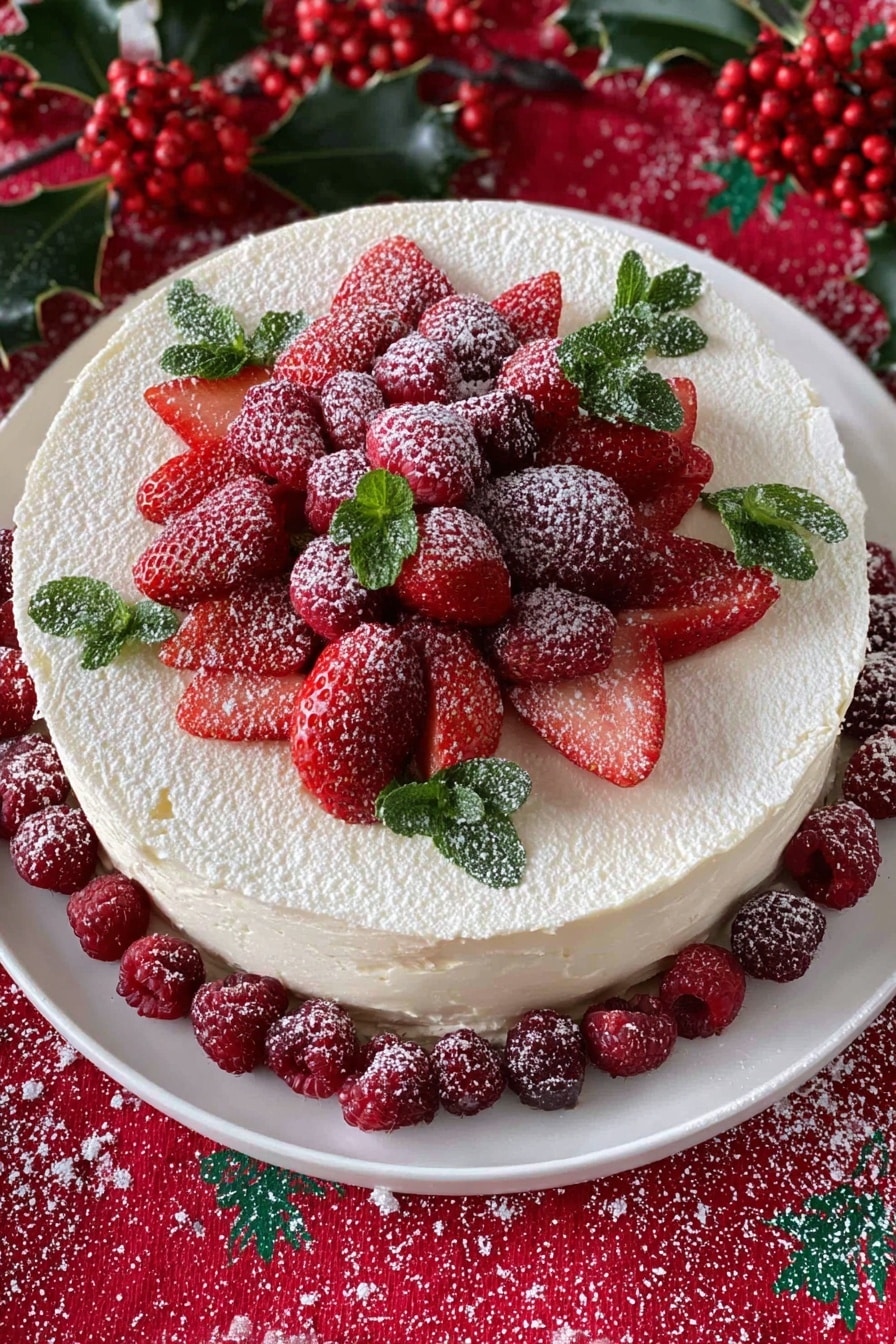
If you’re on the hunt for a show-stopping dessert that’s silky, luscious, and just the right balance of sweet, I’ve got you covered with my White Chocolate Mousse Cake Recipe. This cake is the kind of treat I bring out when I want to impress friends without spending hours in the kitchen. It’s light but indulgent, and every bite is pure joy. Trust me, once you try this, it’s going to be your new go-to when you want to spoil yourself or your loved ones!
Why You’ll Love This Recipe
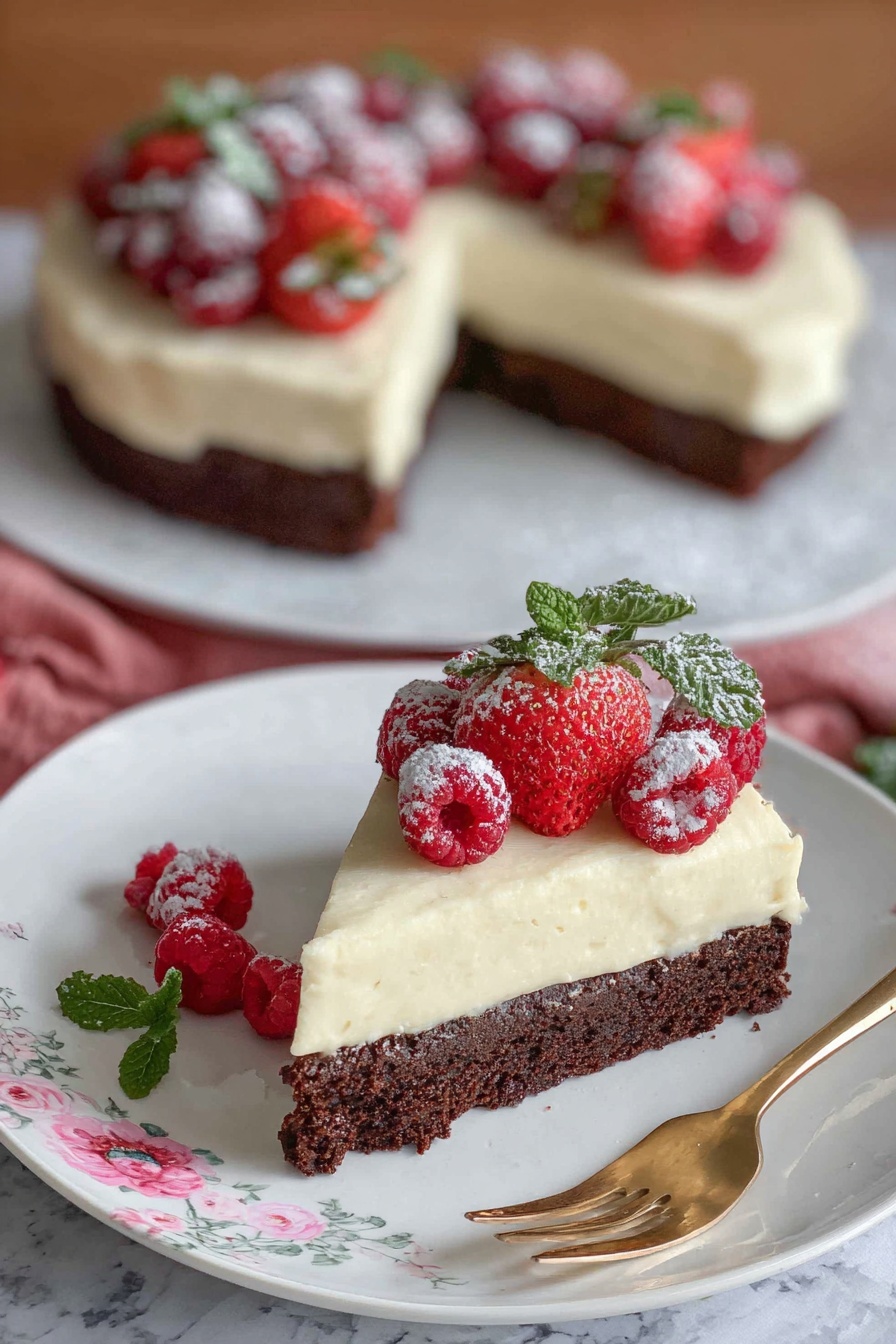
- Unbelievably Creamy Texture: The mousse layer melts in your mouth and complements the chocolate cake base perfectly.
- Simple to Make: No fancy techniques or ingredients needed—just straightforward steps that anyone can follow.
- Perfect for Any Occasion: Whether it’s a birthday, holiday, or just a weekend treat, this cake makes an elegant centerpiece.
- Customizable and Fresh: Easy to add your favorite fruits or garnishes to make it your own.

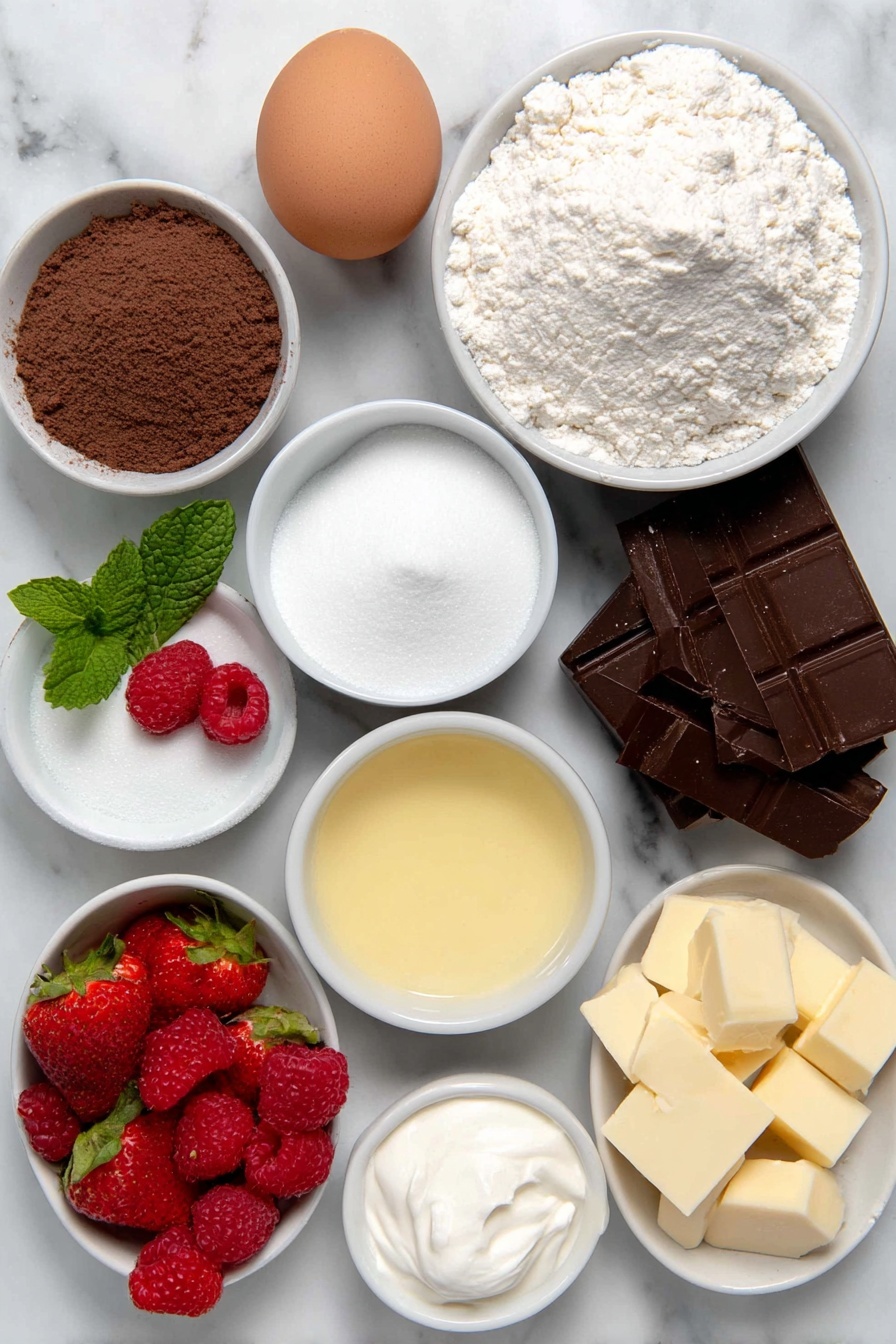
Ingredients You’ll Need
The ingredients for this White Chocolate Mousse Cake Recipe come together to create a perfect harmony of flavors and textures. I always recommend using the freshest cream and good quality white chocolate, as they make all the difference in the mousse’s silkiness.
- Flour: I use plain flour here for structure; measuring by weight gives the best consistency.
- Baking powder: Helps the cake rise just right without overwhelming the delicate mousse.
- Sugar: Sweetens both the cake and mousse; you’ll want to use caster sugar or superfine for quick dissolving.
- Cocoa powder: Adds a subtle, deep chocolate note to the base; I prefer unsweetened cocoa for balance.
- Butter: Melted butter brings richness to the cake; salted or unsalted works—just adjust if using salted.
- Milk: Adds moisture; whole milk is best for that creamy crumb.
- Vanilla essence: A tiny splash lifts the flavor to another level.
- Egg: Provides binding and tenderness.
- Gelatine powder: Essential to set the mousse perfectly; powdered gelatine works best.
- Fresh cream: Heavy or whipping cream for that fluffy mousse texture.
- White chocolate: Choose a good-quality bar for melting; avoid chips for smoother melting.
- Raspberries and strawberries: Fresh berries add a bright, juicy contrast on top.
- Icing sugar: For dusting and a touch of elegance.
- Fresh mint: Adds a lovely pop of color and a hint of freshness.
Variations
I love making this White Chocolate Mousse Cake Recipe my own by switching up the fruit toppings or turning it into a more decadent layered cake. You can easily adapt it to suit your tastes or dietary needs.
- Berry Medley: My family goes crazy when I add blueberries and blackberries alongside the raspberries and strawberries — it’s a fresh burst of flavor.
- Chocolate Lover’s Dream: Adding a drizzle of dark chocolate ganache on top makes this a real crowd-pleaser.
- Party-Friendly: You can turn this into mini mousse cakes using ramekins for individual servings, great for celebrations.
- Dairy-Free Version: I’ve tried swapping fresh cream with coconut cream and using dairy-free white chocolate—you’ll still get that creamy texture but with a subtle coconut twist.
How to Make White Chocolate Mousse Cake Recipe
Step 1: Prepare and Bake the Chocolate Cake Base
Start by preheating your oven to 180°C fan bake. In a mixer bowl, whisk together your dry ingredients on low speed—flour, baking powder, sugar, and cocoa powder. Then, add the melted butter, milk, vanilla essence, and the egg. Whisk everything on medium speed until you get a smooth, glossy batter. Pour it into a 22cm springform cake tin that you’ve lined with baking paper. Bake for about 22 minutes or until a skewer poked in the center comes out clean. Trust me, don’t rush this step — that mix sets the foundation for the whole cake.
Step 2: Cool the Cake to Perfection
Once it’s out of the oven, let the cake cool in the tin on the bench for 20 minutes. Here’s a little trick I learned: pop the whole tin in the freezer for another 20 minutes after that to cool the cake completely. It makes spreading the mousse on top much easier and prevents it from melting into the cake.
Step 3: Prepare the Base for Mousse Layer
Carefully remove the cake from the tin, flip it over, and peel off the baking paper. Then line the base of the springform tin with fresh baking paper and place the cake back on top. Next, line the sides with baking paper and clip the tin back together tightly. This lining trick is a game-changer—it’ll make removing the cake later super easy and keep the mousse neatly contained.
Step 4: Bloom the Gelatine
Mix the gelatine powder with 2 tablespoons of cold water and let it bloom for 5 minutes. This step is crucial because it ensures the gelatine dissolves evenly without lumps. I mess around with this step sometimes and it really makes a difference in the mousse texture.
Step 5: Melt the White Chocolate and Combine
In a saucepan, combine the sugar and a third of the cream (about 2/3 cup cream). Stir gently over low heat until the sugar dissolves. Then stir in the bloomed gelatine mixture. Remove the pan from heat, and immediately break the white chocolate into the warm cream mix. Let it sit for a couple of minutes to melt before stirring until smooth. Let this cool for at least 10 minutes while you get the rest ready.
Step 6: Whip the Cream and Fold in the Mousse
Whip the remaining cream in your mixer bowl until soft peaks form. Then take about a quarter of the whipped cream and gently fold it into your cooled white chocolate mixture to loosen it up. Next, slowly pour this mix back into the whipped cream bowl on low speed, then whisk on medium until just combined. Be careful not to over-whip here—you want it light and fluffy, not dense.
Step 7: Assemble and Chill
Pour the mousse over the chilled cake base and smooth the top with a spatula. Pop the whole thing back in your fridge (still in the tin) for at least 4 hours or overnight so it sets beautifully. Patience really pays off here, as the mousse firms up into that dreamy texture.
Step 8: Unmold and Decorate
When it’s time to serve, unlock the springform tin and gently slide the cake onto your serving plate. Carefully remove the baking paper from the sides; I sometimes use a thin knife to help without scratching the mousse. Then peel off the paper from the base—if it sticks, a large knife tip helps ease it off smoothly. Smooth any edges with a butter knife if needed. Finally, decorate the top with fresh strawberries, raspberries, a light dusting of icing sugar, and some fresh mint for that pop of color and freshness.
Pro Tips for Making White Chocolate Mousse Cake Recipe
- Use Good Quality White Chocolate: I learned the hard way that cheap white chocolate can seize or taste waxy—stick to brands with cocoa butter for smooth melting and great flavor.
- Don’t Overwhip the Cream: Whipping the cream too much can cause it to break. Stop as soon as soft or medium peaks form for the silkiest mousse.
- Chill the Cake Base Before Mousse: Freezing the cake base briefly after baking stops the mousse from melting into the crumb, keeping layers distinct and neat.
- Line Your Tin Properly: Using fresh baking paper on the base and sides makes unmolding so much easier and the final presentation flawless.
How to Serve White Chocolate Mousse Cake Recipe
Garnishes
My favorite way to garnish this cake is with a mix of fresh strawberries and raspberries because their tartness balances out the mousse’s sweetness perfectly. A light dusting of icing sugar adds a pretty snowy look, and I always add a few sprigs of fresh mint—it brightens the flavor and looks so elegant. If you want, some white chocolate shavings on top work beautifully too!
Side Dishes
This cake is rich enough to stand alone, but I love pairing it with a simple berry coulis or a scoop of vanilla bean ice cream. If you want something light, a citrusy fruit salad on the side helps cut through the creaminess and adds a refreshing contrast.
Creative Ways to Present
For special occasions, I’ve layered this mousse between individual clear cups with alternating layers of crushed biscuits or brownie bits for texture. Another fun idea is to pipe the mousse in decorative swirls on top and finish with edible flowers or gold leaf for that wow factor.
Make Ahead and Storage
Storing Leftovers
I wrap leftover slices tightly in plastic wrap and store them in an airtight container in the fridge. The mousse holds up well for 2-3 days, still tasting fresh and creamy. Just make sure it doesn’t get squished under heavier items.
Freezing
I’ve frozen entire cakes and individual slices before, and it works pretty well. When freezing, I recommend covering the cake tightly with cling wrap and then foil to prevent freezer burn. Thaw in the fridge overnight before serving to maintain that dreamy mousse texture.
Reheating
This dessert is best served cold and doesn’t need reheating, but if it’s slightly firm after refrigeration, simply let it sit at room temperature for 15-20 minutes before slicing. That’s enough time to soften the mousse without losing its structure.
FAQs
-
Can I use gelatin sheets instead of powder in this recipe?
Absolutely! If you’re using gelatin sheets, soak them in cold water for about 5-10 minutes until soft. Then gently melt the softened sheets in the warm cream mixture, just like you would with the powdered gelatine. Just make sure you adjust quantity accordingly—usually about 3 sheets equal 1 teaspoon of powdered gelatin.
-
Can I make this cake dairy free or vegan?
Yes, though it will change the texture slightly. For dairy-free, swap heavy cream for coconut cream and use dairy-free white chocolate. For vegan, you’ll need to substitute the egg and find a vegan setting agent (like agar-agar) for the mousse. It takes some experimentation, but it’s doable.
-
How do I know when the cake is fully baked?
Insert a toothpick or skewer into the center of the cake. If it comes out clean or with just a few crumbs, it’s done. If there’s wet batter, it needs more time. Keep an eye after 20 minutes so it doesn’t overbake and dry out.
-
Can I prepare this cake ahead of time?
Definitely. I usually make it the day before serving to give the mousse plenty of time to set and for the flavors to meld beautifully. It keeps well in the fridge for 2 days, making it perfect for planning ahead.
-
Why does the mousse sometimes turn out grainy?
This can happen if the white chocolate overheats or if the gelatine isn’t fully dissolved. Melting the chocolate gently off the heat and stirring in the dissolved gelatine carefully helps keep the mousse silky smooth.
Final Thoughts
I absolutely love how this White Chocolate Mousse Cake Recipe turns out every time—it’s become a favorite in my household and among friends. It’s elegant yet approachable, and the combination of a rich chocolate base with the airy white chocolate mousse is simply irresistible. If you follow these steps and tips, you’ll have a beautiful dessert to be proud of, one that’ll surely sparkle at your next gathering or just as a special indulgence. So go ahead, make this cake your own little slice of heaven—you deserve it!
Print
White Chocolate Mousse Cake Recipe
- Prep Time: 35 minutes
- Cook Time: 25 minutes
- Total Time: 5 hours
- Yield: 10 servings
- Category: Dessert
- Method: Baking
- Cuisine: Western
- Diet: Vegetarian
Description
This White Chocolate Mousse Cake is a luscious dessert featuring a light cocoa-flavored cake base topped with a creamy, silky white chocolate mousse. Finished with fresh strawberries, raspberries, a dusting of icing sugar, and fresh mint leaves, this elegant cake offers a perfect combination of rich flavors and delicate textures, ideal for special occasions or a luxurious treat.
Ingredients
Chocolate Cake
- 1 cup flour (150g)
- 1 tsp baking powder
- ⅔ cup sugar (150g)
- ¼ cup cocoa powder (25g)
- 100g butter, melted
- ⅓ cup milk (80ml)
- 1 tsp vanilla essence
- 1 egg
White Chocolate Mousse
- 1 tsp gelatine powder
- 2 Tbsp cold water
- ½ cup sugar (110g)
- 2 cups fresh cream (500ml), divided
- 190g white chocolate
Decoration
- Raspberries
- Strawberries
- Icing sugar
- Fresh mint leaves
Instructions
- Preheat Oven: Preheat your oven to 180°C with fan bake enabled to ensure even cooking of the chocolate cake base.
- Prepare Cake Batter: In a mixing bowl, combine flour, baking powder, sugar, and cocoa powder on low speed. Add melted butter, milk, vanilla essence, and egg. Whisk on medium speed until the batter becomes smooth and uniform in texture.
- Bake Cake: Pour the batter into a pre-lined 22cm springform cake tin. Bake in the preheated oven for 22 minutes or until a skewer inserted comes out clean, indicating the cake is cooked through.
- Cool Cake: Allow the cake to cool in the tin on the bench for 20 minutes. Then transfer the tin to the freezer for an additional 20 minutes to chill completely, which helps with mousse layering.
- Prepare Cake for Mousse: Remove the cake from the tin, flip it, and peel off the original baking paper. Line the base of the tin with fresh baking paper and place the cake back in. Line the sides with baking paper and secure the springform ring.
- Bloom Gelatine: Mix the gelatine powder with 2 tablespoons of cold water and let it bloom for 5 minutes to activate it.
- Dissolve Sugar and Gelatine: In a saucepan, combine sugar and ½ cup of the fresh cream. Heat gently while stirring until the sugar dissolves completely. Stir in the bloomed gelatine until fully incorporated.
- Melt White Chocolate: Remove the saucepan from heat and add the white chocolate broken into pieces. Let it sit for 2 minutes to melt, then stir until smooth and set aside to cool for at least 10 minutes.
- Whip Remaining Cream: Whip the remaining 1 ½ cups of fresh cream until soft peaks form. Take ¼ of this whipped cream and stir it gently into the cooled white chocolate mixture to lighten it.
- Combine Mousse Mixture: Using the mixer on low speed, slowly add the white chocolate mixture into the whipped cream. Once fully combined, increase the speed to medium and whisk gently until just combined without overbeating.
- Assemble and Chill: Pour the white chocolate mousse over the chilled cake base in the tin, smoothing the surface evenly. Refrigerate for at least 4 hours or preferably overnight to set firmly.
- Remove from Tin: After chilling, unlock the springform tin and carefully slide the cake onto a serving plate. Remove the side baking paper gently, then peel off the base baking paper using a large knife if needed.
- Finish Edges: Use a butter knife to smooth out any imperfections around the cake edges for a clean finish.
- Decorate: Adorn the top of the mousse cake with fresh strawberries and raspberries. Dust lightly with icing sugar and add fresh mint leaves for color contrast.
- Serve: Keep the cake refrigerated until ready to serve to maintain the mousse’s delicate texture and freshness.
Notes
- For best results, use fresh high-quality white chocolate to ensure a smooth mousse.
- Ensure the cake is completely cool before adding the mousse to prevent melting.
- Blooming the gelatine is important for the mousse to set properly.
- You can swap fresh cream with whipping cream but ensure it has sufficient fat content for whipping.
- This cake can be prepared a day in advance for convenience.
- Use a sharp knife warmed under hot water to slice the cake smoothly.
Nutrition
- Serving Size: 1 slice (approx. 1/10 of cake)
- Calories: 420 kcal
- Sugar: 30 g
- Sodium: 90 mg
- Fat: 28 g
- Saturated Fat: 17 g
- Unsaturated Fat: 9 g
- Trans Fat: 0.2 g
- Carbohydrates: 38 g
- Fiber: 2 g
- Protein: 5 g
- Cholesterol: 90 mg


