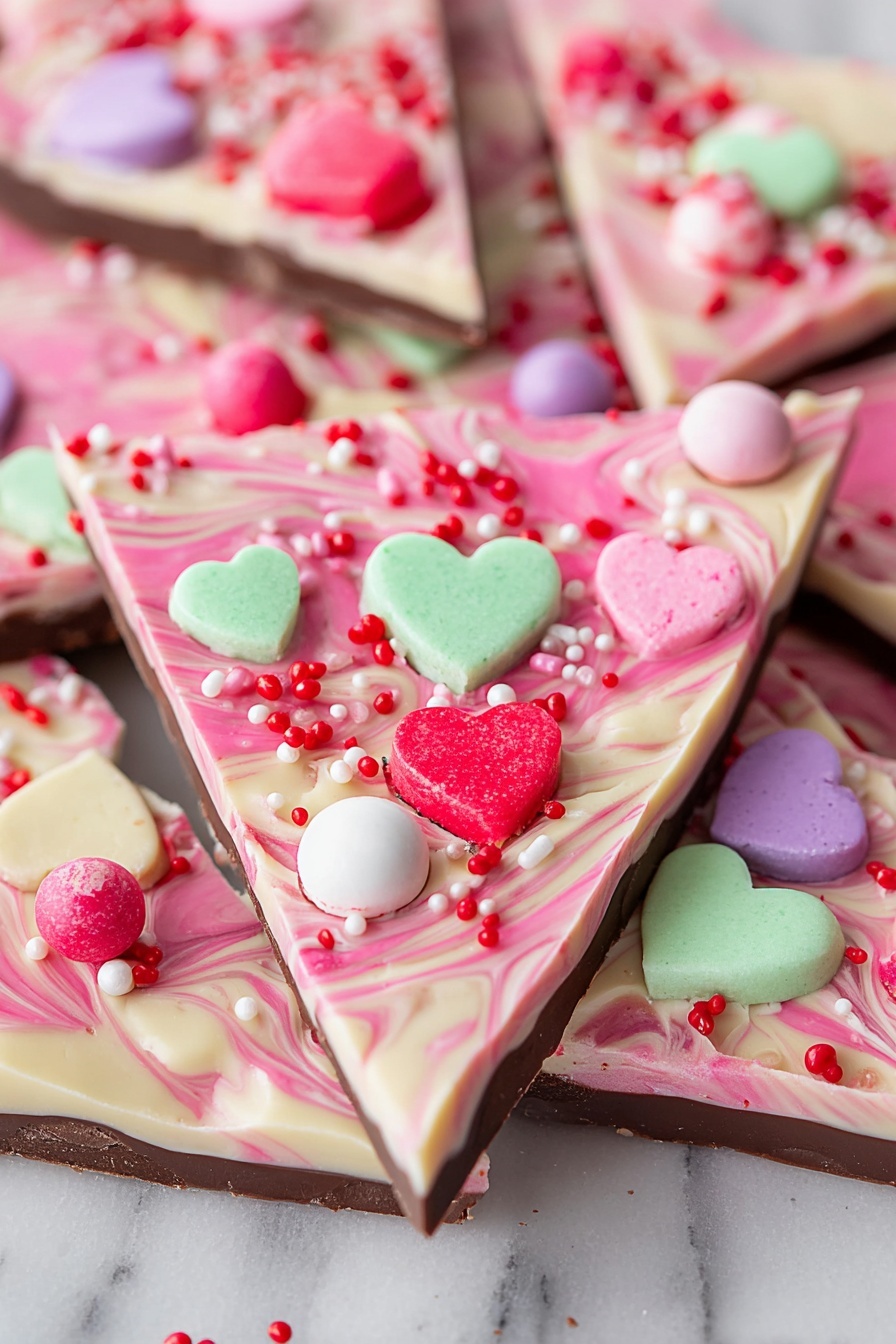
If you’re looking for a fun, festive treat that’s as pretty as it is delicious, you’re going to adore this Valentine’s Day Chocolate Bark Recipe. I absolutely love how this turns out — a perfect blend of rich dark chocolate, smooth white chocolate, and a pop of sweet pink candy melts topped with adorable Valentine’s-themed candies and sprinkles. Whether it’s for gifting, party snacking, or just a special indulgence, this chocolate bark is guaranteed to bring smiles. Stick with me, and I’ll guide you through every delicious detail so you nail it perfectly!
Why You’ll Love This Recipe
- Super Simple Steps: Even if you’re not a pro, you’ll find this Valentine’s Day Chocolate Bark Recipe a breeze to make with my step-by-step tips.
- Stunning Presentation: This bark looks like it came from a fancy chocolatier, but it’s all homemade.
- Customizable Fun: You can swap out candies or sprinkles to make it uniquely yours every time.
- Perfect for Gifting: It stores beautifully and keeps well so you can make it ahead and impress loved ones on Valentine’s Day.

Ingredients You’ll Need
This Valentine’s Day Chocolate Bark Recipe uses a lovely trio of chocolates to create layers of flavor and contrast, plus plenty of festive candy to make it pop. The ingredients are simple but powerful, and you can even find most of them at your local grocery store or specialty candy shop.
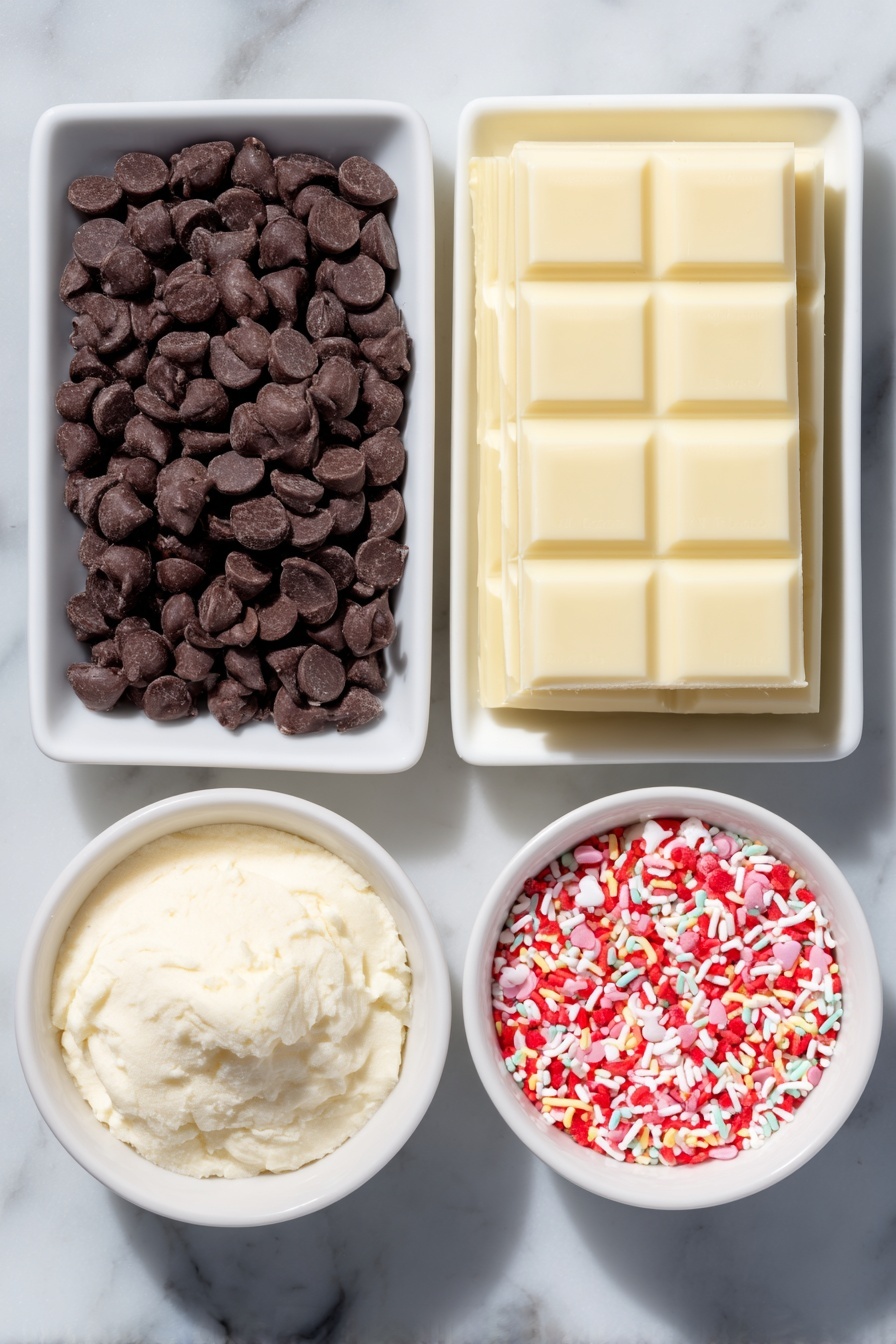
- Dark chocolate chips: I love using chips here because they melt smoothly and give that rich, deep chocolate base.
- White chocolate baking bars: Bars melt down nicely to give you a creamy, luxurious layer—trust me, chopped bars work better than chips for this one.
- Pink candy melts: These give a sweet, melt-in-your-mouth pop of color and flavor that screams Valentine’s Day.
- Valentine’s Day candy: Choose cute, small candies that you love, like conversation hearts or mini chocolate kisses.
- Valentine’s Day sprinkles: Pick fun, colorful sprinkles to add texture and fancy flair to your bark.
Variations
I love making this Valentine’s Day Chocolate Bark Recipe my own by switching up the mix-ins. You can easily customize it based on what you have on hand or the look you’re going for. That’s one thing I appreciate — it’s forgiving and creative all at once.
- Use milk chocolate instead of dark chocolate: One year, I swapped in milk chocolate for a sweeter, creamier base, and my family went crazy for it.
- Add nuts or dried fruit: If you’re feeling fancy, try crushed pistachios or dried cranberries for extra texture and flavor contrast.
- Make it dairy-free: Use vegan chocolate chips and candy melts, and double-check your candies for allergens.
- Change up the theme colors: Pink isn’t your vibe? Try red and white candy melts for a different look or seasonal inspirations.
How to Make Valentine’s Day Chocolate Bark Recipe
Step 1: Prep Your Pan Like a Pro
Get started by lining a half-sheet baking pan with parchment paper. Here’s my secret: leave extra parchment over the edges so you can easily lift the bark out once it’s set—no struggling or breaking your pieces while removing.
Step 2: Melt and Spread Your Dark Chocolate Base
Place the dark chocolate chips in a microwave-safe bowl. Heat them for 30 seconds, then stir vigorously. Repeat heating in 15-20 second bursts, stirring after every turn, until smooth and glossy. Patience is key here! Pour the melted chocolate onto your parchment and spread thinly with an offset spatula. This layer forms the sturdy, delicious base, so even spreading matters — I use gentle, smooth strokes for an even look.
Step 3: Let It Set Just Right
Set the pan aside for about 10 minutes or until the dark chocolate is mostly, but not totally, hardened. This stage is super important because you want a slightly tacky surface so the next layer sticks but doesn’t blend in. I learned this the hard way — if you wait too long and it’s fully set, layers won’t bond; too soon and they get messy.
Step 4: Melt Your White Chocolate and Candy Melts
Chop the white chocolate bars and place them in another microwave-safe bowl. Heat in 30-second increments, stirring well each time until silky smooth. Repeat this same process with the pink candy melts in a separate bowl. Slow, steady heat and lots of stirring help prevent seizing — that’s when chocolate gets grainy and ruined. If you ever find lumps forming, stop heating immediately and keep stirring to cool it down.
Step 5: Add the White Chocolate Layer Quickly
Pour the melted white chocolate over the slightly set dark chocolate and spread it out quickly. This layer sets fast, so work in swift, smooth moves. I like using a smaller offset spatula here to spread the layer evenly before it cools too much.
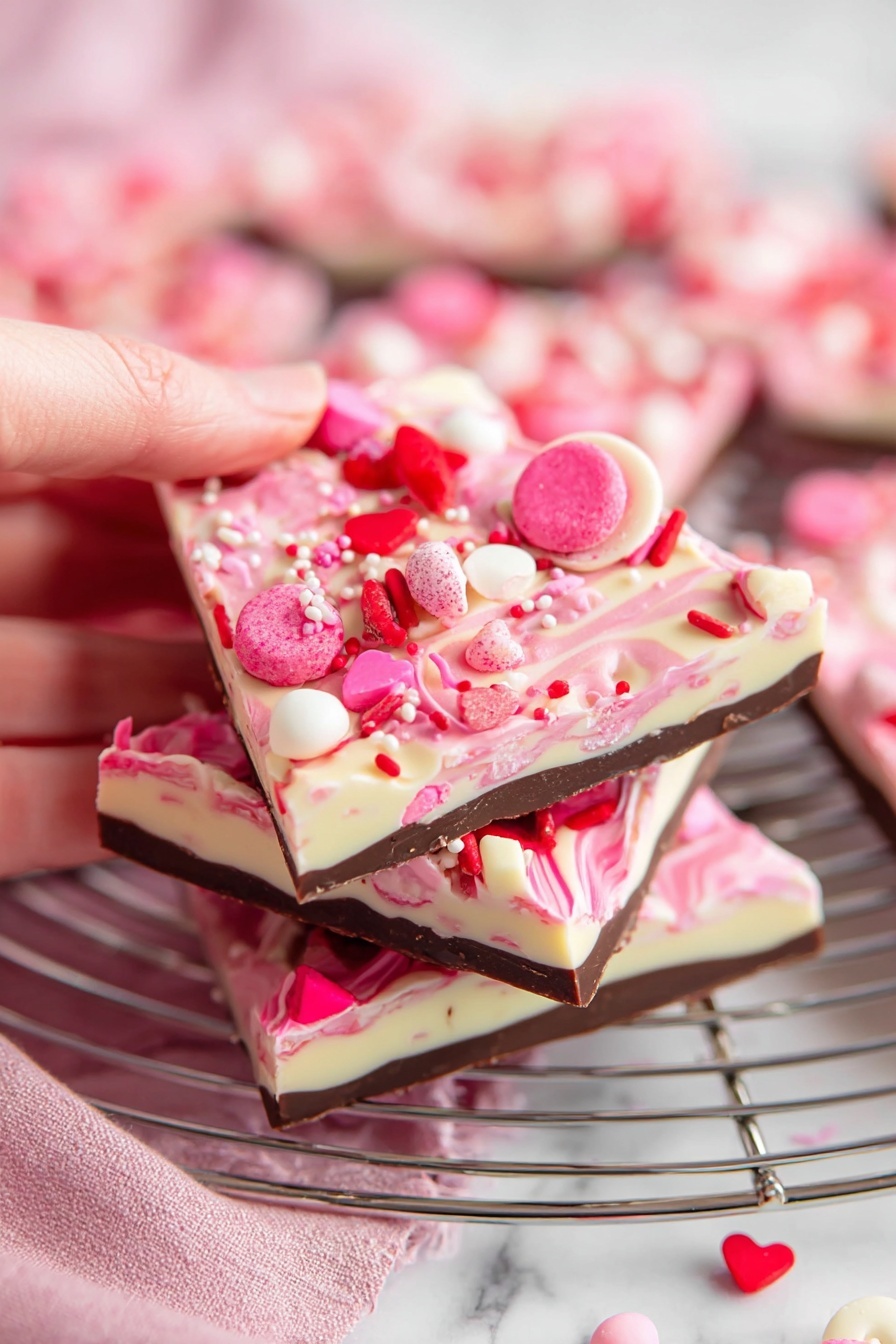
Step 6: Marble in the Pink Candy Melt
Before the white chocolate solidifies, drizzle the pink candy melts on top. Then grab a toothpick and gently swirl through the pink and white to make those gorgeous marbled patterns. Avoid dragging the toothpick into the dark chocolate so you keep that beautiful, layered look. This step always feels artistic and fun — it’s where you turn simple layers into Valentine’s magic.
Step 7: Sprinkle and Set
While the chocolate is still warm, sprinkle your Valentine’s Day candies and sprinkles over the top. The warmth ensures they stick without sinking or sliding off. Then, let everything cool and harden completely for about 30 minutes—this is the hardest waiting part but trust me, it’s worth it!
Step 8: Break and Enjoy!
Once fully set, lift the bark out using the parchment overhang and break or cut it into fun-sized pieces. I usually aim for chunks just big enough to savor without guilt. Serve it up and watch it disappear fast!
Pro Tips for Making Valentine’s Day Chocolate Bark Recipe
- Don’t Rush the Melting: I discovered heating the chocolate slowly in small increments is the best way to get a silky, smooth melt without seizing.
- Layer Timing is Everything: Waiting until each chocolate layer is almost set (but still tacky) helps them stick together beautifully without merging into one blob.
- Use Parchment Overhang: Leaving extra parchment paper edges on your pan is a game-changer for lifting the bark cleanly out and breaking it into pieces.
- Swirl Carefully: When marbling the candy melts and white chocolate, slow, gentle swirls with a toothpick give you pretty patterns without mixing layers too much.
How to Serve Valentine’s Day Chocolate Bark Recipe
Garnishes
I usually top my bark with heart-shaped candies and sprinkle a few extra festive sugar sprinkles to make it look irresistible. Fresh edible rose petals are a fancy addition if you want to impress guests or elevate it for a special date night at home.
Side Dishes
This chocolate bark pairs wonderfully with light, fresh sides like strawberries or raspberries—perfect to balance the sweetness. It also goes great alongside a creamy vanilla or coffee-flavored drink to round out your Valentine’s Day spread.
Creative Ways to Present
For gifting, I like wrapping pieces in clear cellophane bags tied with a red or pink ribbon. For parties, try arranging pieces on a decorative platter with scattered rose petals or themed confetti. You can even layer the pieces in a pretty box as an edible bouquet alternative!
Make Ahead and Storage
Storing Leftovers
I store leftover bark in an airtight container at room temperature and it stays fresh for about 4-5 days. I like to keep it away from heat and humidity to avoid melting or sweating. When I’ve stored it properly, it’s still perfectly crisp and delicious even after several days.
Freezing
Freezing chocolate bark works surprisingly well! I place pieces in a freezer-safe container layered between parchment paper to keep them from sticking. When I’ve frozen leftovers, they keep for up to 4 months. Just thaw at room temperature before serving for best texture and flavor.
Reheating
You don’t really want to reheat chocolate bark because it’s meant to be enjoyed as is, but if you do want to soften it slightly for dipping or melting, a quick zap in the microwave for 5-10 seconds works. Be careful not to overheat or it’ll seize and become grainy.
FAQs
-
Can I use chocolate chips instead of baking bars for the white chocolate layer?
You can, but baking bars tend to melt more smoothly and evenly than chips, which often have stabilizers and can clump when melted. If you only have chips, melt gently and stir continuously to prevent seizing.
-
How do I prevent the chocolate from seizing when melting?
Heat your chocolate slowly in short bursts and stir thoroughly between each. Avoid any moisture from dripping into the chocolate, as even a tiny bit can cause seizing. If this happens, adding a small amount of vegetable oil or cocoa butter can sometimes help smooth it out.
-
Can I prepare Valentine’s Day Chocolate Bark Recipe in advance?
Absolutely! This bark keeps well stored in an airtight container at room temperature for several days or in the fridge for a couple of weeks. It also freezes well, making it perfect for prepping ahead of Valentine’s Day festivities.
-
What’s the best way to break the bark into pieces?
I find using your hands to gently break it into natural chunks works best—no need for perfect pieces! Just hold the parchment edges to lift the bark out of the pan, then use your fingers or a sharp knife to create bite-sized portions.
-
Can I substitute the Valentine’s Day candy and sprinkles with other toppings?
Yes! This recipe is super flexible. Try nuts, dried fruits, crushed cookies, or even edible glitter to customize it for different occasions or personal preferences.
Final Thoughts
This Valentine’s Day Chocolate Bark Recipe has become my go-to for an easy, impressive, and utterly delicious treat. It’s one of those recipes that’s simple enough to make after a long day but yields results that get oohs and ahhs from friends and family. I can’t recommend it enough for adding a personal, homemade touch to your Valentine’s celebrations — once you try it, I’m betting you’ll want to make it every year. Go ahead, whip it up, and enjoy that sweet, festive magic you created!
Print
Valentine’s Day Chocolate Bark Recipe
- Prep Time: 10 minutes
- Cook Time: 15 minutes
- Total Time: 55 minutes
- Yield: 6 servings
- Category: Dessert
- Method: No-Cook
- Cuisine: American
Description
This Valentine’s Day Chocolate Bark is a festive, colorful treat perfect for sharing or gifting. Combining rich dark chocolate, creamy white chocolate, and vibrant pink candy melts, it is decorated with Valentine’s Day-themed candies and sprinkles. The bark features a beautiful marbled effect and a delightful mix of textures that make it both visually stunning and deliciously satisfying.
Ingredients
Dark Chocolate Layer
- 1½ cups dark chocolate chips
White Chocolate Layer
- 12 ounces (3 4-ounce bars) white chocolate baking bars
Pink Candy Melt Layer
- ¾ cup pink candy melts
Decorations
- ¼ cup Valentine’s Day candy
- 2 tablespoons Valentine’s Day sprinkles
Instructions
- Prepare Baking Pan: Line a half sheet baking pan with parchment paper and set it aside for easy removal of the chocolate bark once hardened.
- Melt Dark Chocolate: Place dark chocolate chips in a microwave-safe bowl. Heat for 30 seconds, stir well, then continue heating in 15-20 second increments, stirring thoroughly after each until the chocolate is melted and smooth.
- Spread Dark Chocolate: Pour the melted dark chocolate onto the parchment-lined pan. Use a spreading spatula to evenly spread it into a thin layer.
- Allow to Partially Set: Let the dark chocolate sit for about 10 minutes or until it is mostly but not fully hardened.
- Melt White Chocolate: Break the white chocolate bars into a microwave-safe bowl. Microwave for 30 seconds, stir, then heat in short increments with stirring until smooth and completely melted.
- Melt Pink Candy Melts: Place pink candy melts in a separate microwave-safe bowl. Heat starting with 30 seconds, then in 15-20 second increments with stirring until melted and smooth.
- Add White Chocolate Layer: Quickly pour and spread the melted white chocolate over the dark chocolate layer. Work fast as it will harden rapidly.
- Drizzle Pink Candy Melts: Before the white chocolate sets, drizzle the melted pink candy over the top.
- Create Marble Pattern: Gently drag a toothpick through the pink and white layers to create a marbled effect, taking care to avoid mixing into the dark chocolate layer below.
- Add Decorations: While the chocolate layers are still warm, evenly sprinkle the Valentine’s Day candy and sprinkles on top.
- Cool to Harden: Let the bark cool for about 30 minutes or until completely hardened.
- Serve: Once set, break or cut the bark into pieces and serve.
Notes
- Store the bark in an airtight container at room temperature for 4-5 days or refrigerate for up to 2 weeks.
- Freeze the bark in a freezer-safe container for up to 4 months.
- Adjust serving size by breaking the bark into smaller or larger pieces based on preference.
- When lining the baking sheet, leave an overhang of parchment paper for easy lifting of the bark.
- Heat chocolates slowly and in short increments to prevent seizing and lumpy textures.
- Allow each chocolate layer to be almost fully hardened before adding the next for best bonding and swirl effects.
Nutrition
- Serving Size: 1/6 of recipe (approx. 1 cup)
- Calories: 280
- Sugar: 25g
- Sodium: 15mg
- Fat: 18g
- Saturated Fat: 11g
- Unsaturated Fat: 6g
- Trans Fat: 0g
- Carbohydrates: 28g
- Fiber: 3g
- Protein: 3g
- Cholesterol: 10mg


