
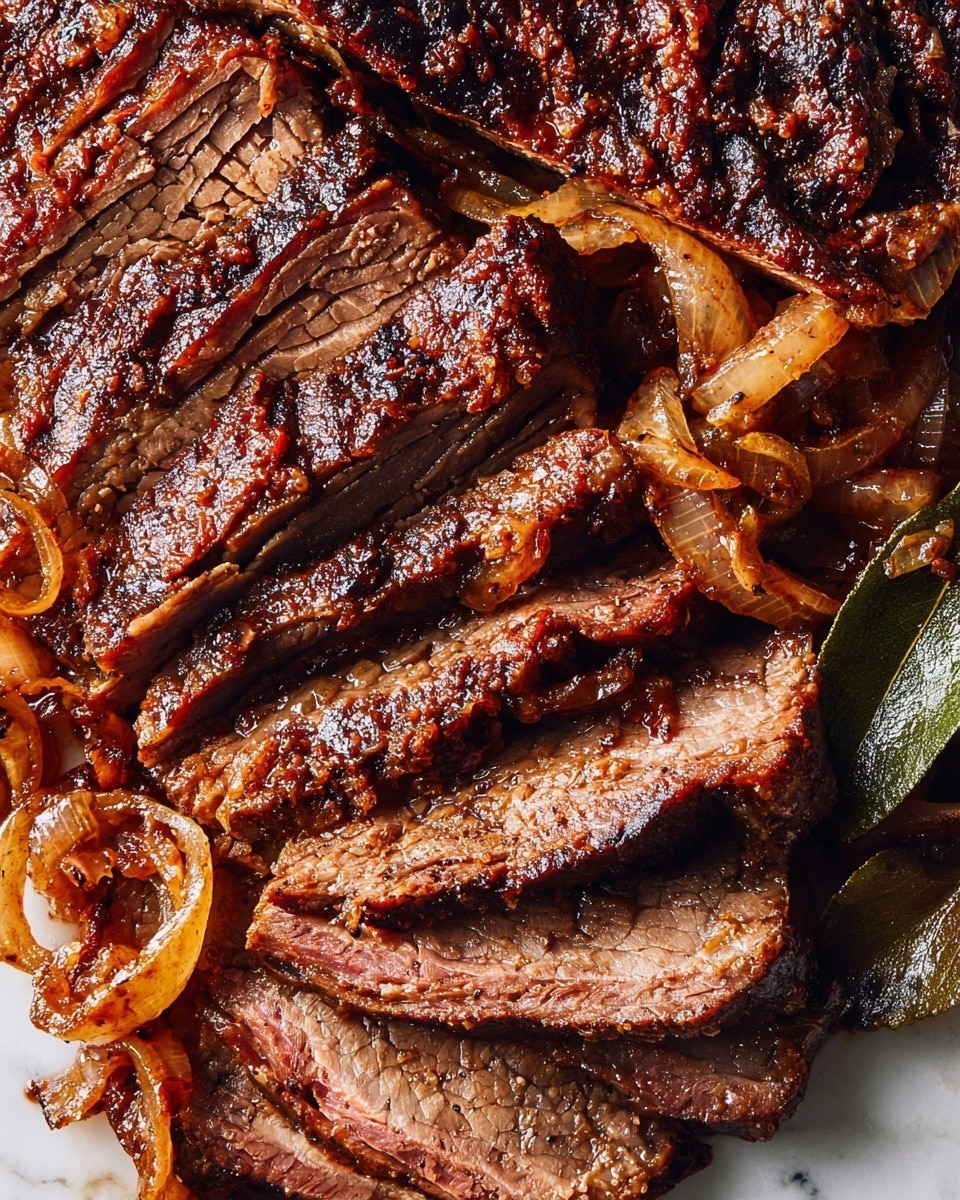
If you’re looking for a comforting, show-stopping dish that fills your kitchen with irresistible aromas, look no further than this Thyme and Garlic Brisket Recipe. I absolutely love how tender and flavorful the beef turns out after slow baking in a rich, garlicky sauce infused with fresh thyme and shallots. Whether you’re cooking for a family dinner or a special weekend gathering, this brisket is one of those recipes that gets raving reviews every single time—I’m thrilled to share all my tips so you can make it just right!
Why You’ll Love This Recipe
- Unbeatable Flavor: The garlic and fresh thyme blend creates an aromatic paste that beautifully infuses the brisket.
- Perfectly Tender: Slow baking for 3 to 4 hours ensures the beef is fall-apart tender every time.
- Simple Ingredients: Using pantry staples and fresh herbs means you don’t need fancy extras.
- Impress Without Stress: Once it’s in the oven, it mostly takes care of itself—perfect for busy cooks or entertaining.

Ingredients You’ll Need
I love how this Thyme and Garlic Brisket Recipe keeps things straightforward but full of layers of flavor. Using fresh thyme and garlic alongside red wine and shallots gives the dish depth without overwhelming the beef’s natural richness. When shopping, pick fresh herbs and good-quality red wine—you’ll notice the difference!
- Garlic: Freshly chopped garlic makes all the difference; it melds perfectly into the paste for a mellow, fragrant base.
- Kosher Salt: Use kosher salt for seasoning and to balance the flavors without overpowering the meat.
- Fresh Thyme: Essential for that herbal, earthy note; strip the leaves from the stems to incorporate easily.
- Olive Oil: Adds richness and helps sear the brisket beautifully without burning.
- Beef Brisket: Go for a 4-pound cut with good marbling; this fat renders slowly and keeps everything juicy.
- Freshly Cracked Black Pepper: Adds subtle heat and pairs especially well with garlic and thyme.
- Shallots: These soften and caramelize slightly during baking, adding a sweet complexity.
- Dry Red Wine: Use something you enjoy drinking; it adds acidity and depth to the sauce.
- Crushed Tomatoes: Provides body and richness to the sauce without being too heavy.
- Fresh Flat-Leaf Parsley: Finishes the dish with a fresh brightness at the end.
- Bay Leaves: A classic aromatic that enhances the brisket’s flavors subtly during the slow bake.
Variations
While I love sticking to this classic Thyme and Garlic Brisket Recipe, I also enjoy making little tweaks depending on the occasion or pantry staples. Feel free to personalize it—it’s a great canvas for your flavor preferences.
- Spicy Kick: Adding a pinch of red pepper flakes to the garlic and thyme paste gave me a lovely subtle heat that my family adored.
- Smoky Twist: I’ve tried adding a splash of smoked paprika which brought a smoky depth, perfect if you want a more robust flavor.
- Red Wine Substitute: When I was out of wine, substituting beef broth worked fine, though the sauce was less tangy and rich.
- Vegetarian-Friendly Sauce: Use the sauce base with roasted mushrooms or jackfruit for a hearty alternative if you want to skip the meat.
How to Make Thyme and Garlic Brisket Recipe
Step 1: Make the Garlic and Thyme Paste
This is where the magic starts! Finely chop the garlic cloves with kosher salt until they begin to form a paste—that salt helps break down the garlic and intensifies the flavor. Then, strip the thyme leaves from the sprigs and add them, continuing to chop until everything is well combined. Stir in 2 tablespoons of olive oil to create a luscious paste that will infuse the brisket beautifully. A little chopping here goes a long way, so take your time.
Step 2: Sear the Brisket to Lock in Juices
Generously season both sides of your brisket with salt and freshly cracked black pepper. Heat a large Dutch oven over medium-high heat and add the remaining olive oil, coating the bottom. Once hot, carefully place the brisket in and sear for about 4 to 5 minutes per side until a golden crust forms. This step is crucial—it locks in the juices and develops flavor through a beautiful browning process. Don’t rush this; patience pays off here.
Step 3: Layer with Shallots and Add Sauce Ingredients
Arrange the halved shallots around the brisket in the Dutch oven—they will soften and take on a sweet richness while baking. Brush the entire top of the brisket with your thyme and garlic paste, making sure it’s evenly coated for maximum flavor. Then pour in the dry red wine, followed by the crushed tomatoes, fresh parsley, and bay leaves. Cover it tightly to keep all those flavors sealed in during baking.
Step 4: Slow Bake Until Tender
Pop the Dutch oven into your preheated 325°F oven and bake for 3 to 4 hours. Every 30 minutes, baste the brisket with the pan juices—this keeps the meat moist and infuses it with flavor. You’ll know it’s done when the brisket is fork-tender, meaning a fork slides in with little resistance and the meat nearly falls apart. It’s a labor of love that rewards you with melt-in-your-mouth deliciousness!
Step 5: Rest and Finish the Sauce
Carefully transfer the brisket to a cutting board and let it rest for at least 15 minutes — resting allows the juices to redistribute and keeps the meat juicy when sliced. Move the shallots from the Dutch oven onto a serving platter. Skim off any excess fat from the pan juices, then place the Dutch oven on the stove over medium-high heat. Boil and stir the sauce for about 5 minutes until it reduces by half and thickens beautifully. This concentrated sauce is the perfect finishing touch.
Step 6: Slice and Serve
Slice the brisket against the grain—that’s a key trick I learned early on to ensure maximum tenderness with every bite. Arrange the slices on the platter with the cooked shallots and drizzle the reduced pan juices over the top. Serve warm, and watch your family or guests go crazy for this hearty, flavorful dish!
Pro Tips for Making Thyme and Garlic Brisket Recipe
- Don’t Skimp on the Sear: That golden crust locks in flavor and juices; a well-heated pan is your best friend here.
- Baste Regularly: Basting the brisket every 30 minutes keeps it moist and helps infuse the sauce’s flavors deeply.
- Slice Against the Grain: This simple trick makes the meat easier to chew and more tender to enjoy.
- Cover Tightly: A snug lid or foil prevents moisture loss and helps the brisket braise perfectly soft.
How to Serve Thyme and Garlic Brisket Recipe
Garnishes
I love to finish this dish with a sprinkle of fresh flat-leaf parsley; it adds just the right pop of color and a hint of freshness that balances the rich sauce. Sometimes, I add a few extra thyme sprigs for a pretty presentation and to hint at the flavors inside.
Side Dishes
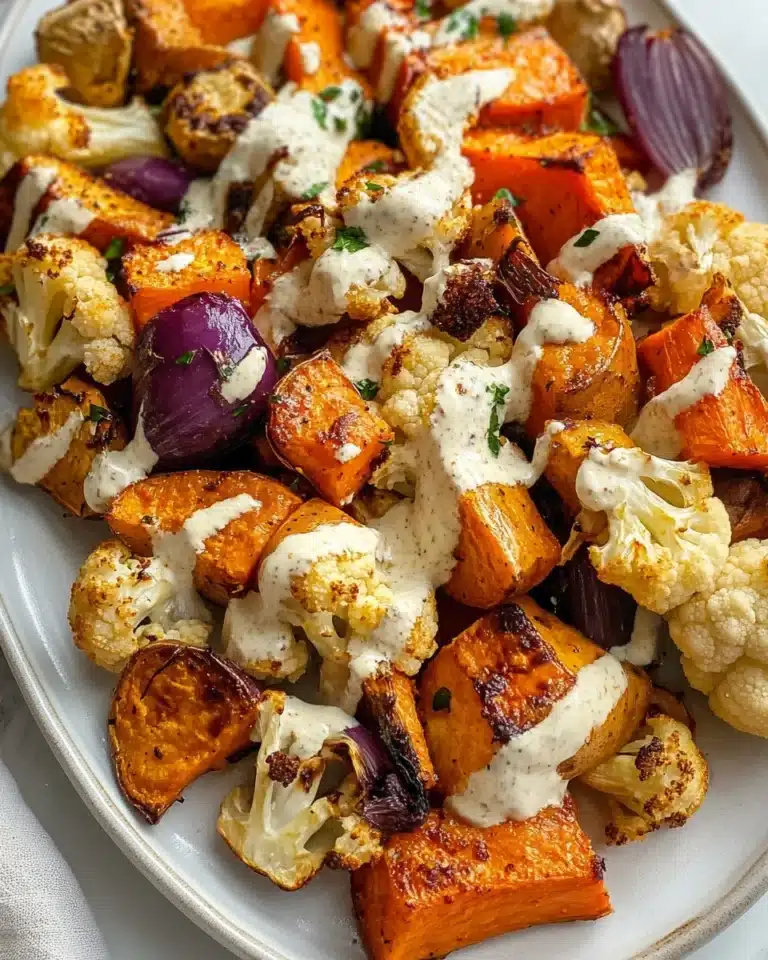
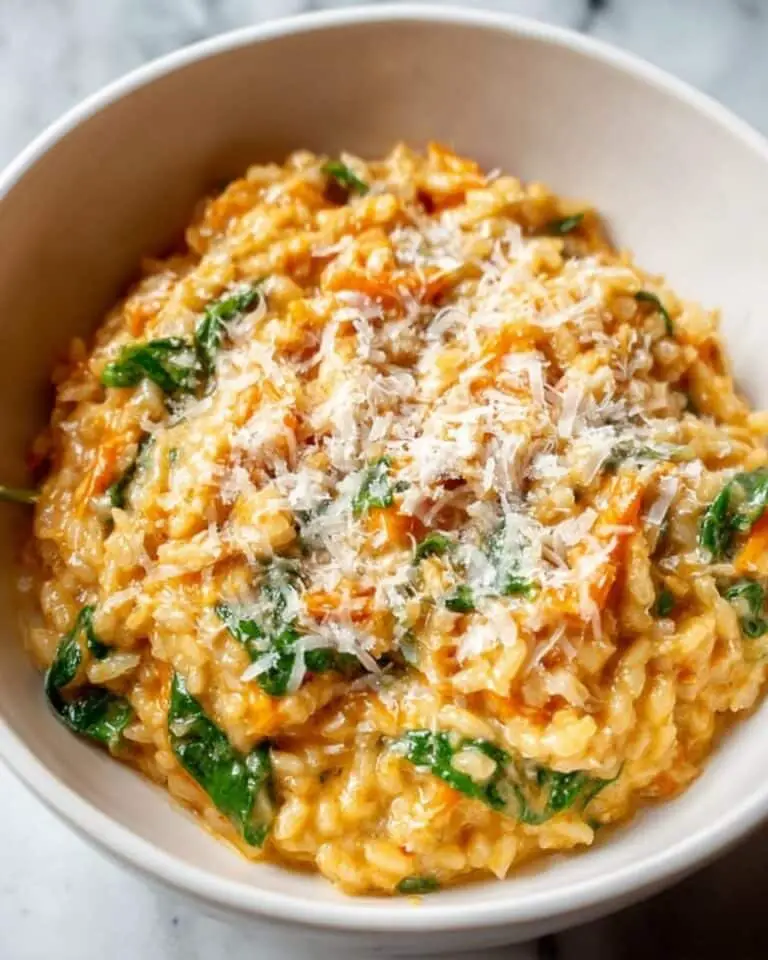
This brisket pairs beautifully with creamy mashed potatoes or buttered egg noodles to soak up all those luscious pan juices. For a lighter choice, roasted root vegetables or steamed green beans make a perfect contrast to the rich meat.
Creative Ways to Present
For holidays or special dinners, I like to serve the brisket on a rustic wooden board surrounded by the roasted shallots and fresh herbs. Adding some crusty artisan bread alongside invites everyone to mop up every last drop of that flavorful sauce. It’s both beautiful and inviting—trust me, it’ll get compliments!
Make Ahead and Storage
Storing Leftovers
Any leftovers go straight into an airtight container once cooled, and I store them in the fridge for up to 3 days. The brisket actually tastes even better the next day as the flavors deepen, making it perfect for easy meal prep.
Freezing
I’ve frozen cooked brisket chunks with some sauce a few times—just portion into freezer-safe containers or bags. When thawed, it reheats beautifully without losing moisture, so you can enjoy this Thyme and Garlic Brisket Recipe anytime.
Reheating
To reheat, I gently warm the brisket and sauce on the stove over low heat, stirring occasionally. Adding a splash of beef broth or water helps keep the meat tender and the sauce from drying out. Microwaving works in a pinch, but low stovetop heat keeps it tasting its best.
FAQs
-
Can I use a different cut of beef for this Thyme and Garlic Brisket Recipe?
Absolutely! While brisket is ideal due to its marbling and texture that benefits from slow cooking, you can substitute other tougher cuts like chuck roast. Just expect some variation in cooking time and tenderness.
-
Is it necessary to baste the brisket every 30 minutes?
Basting helps keep the meat moist and flavorful, but if you’re short on time, you can baste less frequently or once during cooking. Just know that regular basting elevates the final texture and taste.
-
Can I prepare the garlic and thyme paste ahead of time?
You sure can! I often make the paste a few hours or even a day ahead and keep it covered in the fridge, which actually helps the flavors blend nicely before applying to the brisket.
-
What if I don’t have a Dutch oven?
A heavy oven-safe pot with a tight-fitting lid or a roasting pan covered well with foil works fine. Just make sure it retains moisture well during baking to keep the brisket tender.
-
How do I know when the brisket is done?
You’ll want to look for fork-tender meat that pulls apart easily when tested with a fork after 3 to 4 hours. It should feel soft and juicy, not tough or chewy.
Final Thoughts
This Thyme and Garlic Brisket Recipe has become one of my go-to dishes whenever I want something special with minimal fuss. The gorgeous aroma while it bakes and the melt-in-your-mouth tenderness never fail to impress. I hope you enjoy making and serving this as much as I do—it’s a beautiful dish that brings people together. Give it a try; I promise it’ll become one of your favorites too!
Print
Thyme and Garlic Brisket Recipe
- Prep Time: 15 minutes
- Cook Time: 4 hours
- Total Time: 4 hours 30 minutes
- Yield: 6 servings
- Category: Main Course
- Method: Baking
- Cuisine: American
Description
This Thyme and Garlic Brisket recipe features a tender, slow-braised beef brisket infused with aromatic garlic, fresh thyme, and rich red wine. Seared to golden perfection and oven-baked with shallots and crushed tomatoes, the brisket is finished with a flavorful, reduced pan sauce making it a perfect hearty and comforting meal for gatherings.
Ingredients
Brisket and Seasoning
- 4 pound beef brisket
- ½ teaspoon kosher salt, plus more for seasoning
- Freshly cracked black pepper, to taste
Herb Garlic Paste
- 6 cloves garlic, finely chopped
- 8 sprigs fresh thyme (leaves removed)
- ¼ cup olive oil (divided: 2 tablespoons for paste, remaining for searing)
Additional Ingredients
- 8 large shallots, halved
- 2 cups dry red wine
- 16 ounce can crushed tomatoes
- 1 handful fresh flat-leaf parsley leaves
- 3 bay leaves
Instructions
- Preheat Oven: Preheat your oven to 325 degrees F (163 degrees C) to prepare for slow braising.
- Prepare Garlic Thyme Paste: Combine the finely chopped garlic and ½ teaspoon kosher salt and chop further to form a paste. Add thyme leaves and chop until fully incorporated. Transfer this paste to a small bowl and mix with 2 tablespoons of olive oil until well combined.
- Season and Sear Brisket: Generously season both sides of the brisket with kosher salt and freshly cracked black pepper. Heat a large Dutch oven over medium-high heat and add the remaining olive oil. Sear the brisket for 4-5 minutes on each side until a golden crust forms, then remove from heat.
- Arrange and Add Flavorings: Place the halved shallots evenly around the brisket in the Dutch oven. Brush the garlic and thyme paste over the top surface of the brisket.
- Add Liquids and Herbs: Pour in the dry red wine and add the crushed tomatoes, fresh parsley, and bay leaves around the brisket. Cover the Dutch oven tightly with its lid or aluminum foil.
- Braise the Brisket: Transfer the covered Dutch oven to the preheated oven. Bake for 3 to 4 hours, basting every 30 minutes with the pan juices, until the brisket is fork-tender.
- Rest the Brisket: Carefully remove the brisket from the Dutch oven and place it on a cutting board. Let it rest for 15 minutes to allow juices to redistribute.
- Prepare the Sauce: Remove the shallots from the Dutch oven and place them on a serving platter. Skim off excess fat from the pan juices. Place the Dutch oven with the juices on the stovetop over medium-high heat and boil, stirring occasionally, for about 5 minutes until the sauce reduces by half and thickens slightly.
- Serve: Slice the brisket against the grain and arrange it on the platter with the shallots. Pour the reduced pan sauce on top. Serve warm and enjoy.
Notes
- For best results, use a well-marbled brisket that will become tender during slow braising.
- Keep an eye on the braising liquid level; add a splash of water or broth if it reduces too much during cooking.
- Basting every 30 minutes helps keep the meat moist and flavorful.
- You can prepare the garlic thyme paste in advance to save time.
- Allowing the brisket to rest after cooking helps retain juices when slicing.
- Leftovers keep well refrigerated for up to 3 days and taste even better reheated.
Nutrition
- Serving Size: 1/6 of recipe (about 6 ounces cooked brisket with sauce and shallots)
- Calories: 480
- Sugar: 5g
- Sodium: 500mg
- Fat: 28g
- Saturated Fat: 8g
- Unsaturated Fat: 18g
- Trans Fat: 0g
- Carbohydrates: 10g
- Fiber: 2g
- Protein: 40g
- Cholesterol: 120mg


