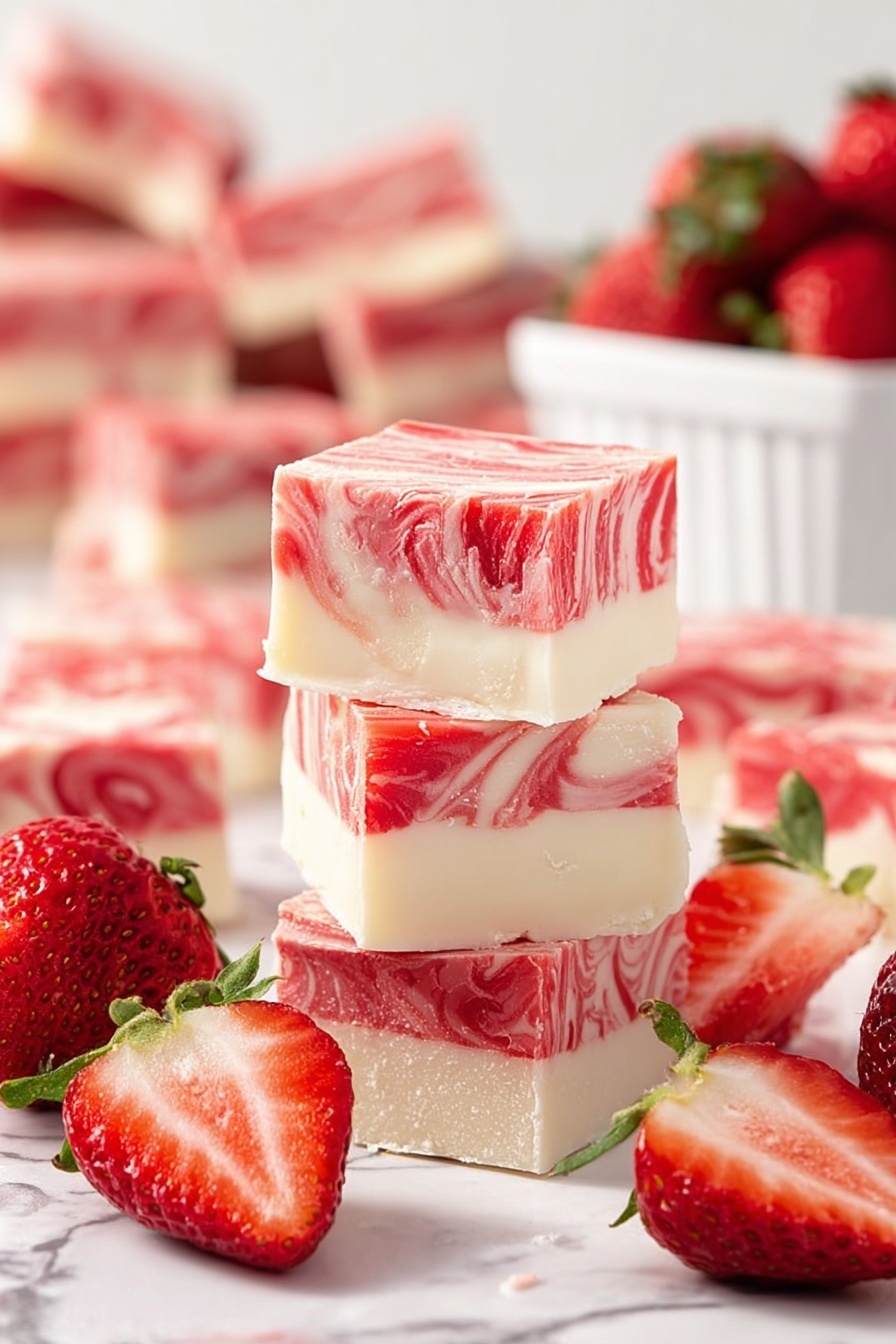
If you’ve been scouring for a dessert that’s as visually stunning as it is downright delicious, you’re going to fall head over heels for this Strawberry Swirl Fudge Recipe. I absolutely love how this fudge looks with its vibrant pink swirls and how each bite bursts with a creamy, sweet strawberry flavor. Trust me, stick with me here—this recipe is fan-freaking-tastic, and whether you’re making it for a holiday treat or just because you deserve something special, it won’t disappoint.
Why You’ll Love This Recipe
- Strawberry Flavor That Pops: The combination of strawberry extract and red food coloring gives it that classic, inviting pink swirl anyone can’t resist.
- Creamy, Melt-in-Your-Mouth Texture: Thanks to marshmallow fluff and white baking chips, every square is unbelievably smooth and rich.
- Simple Ingredients & Steps: You don’t have to be a candy expert to nail this fudge — I’ve found this method foolproof and perfect for home cooks.
- A Showstopper for Any Occasion: Whether it’s a gift or party dessert, this fudge looks and tastes like it took hours but comes together easily.

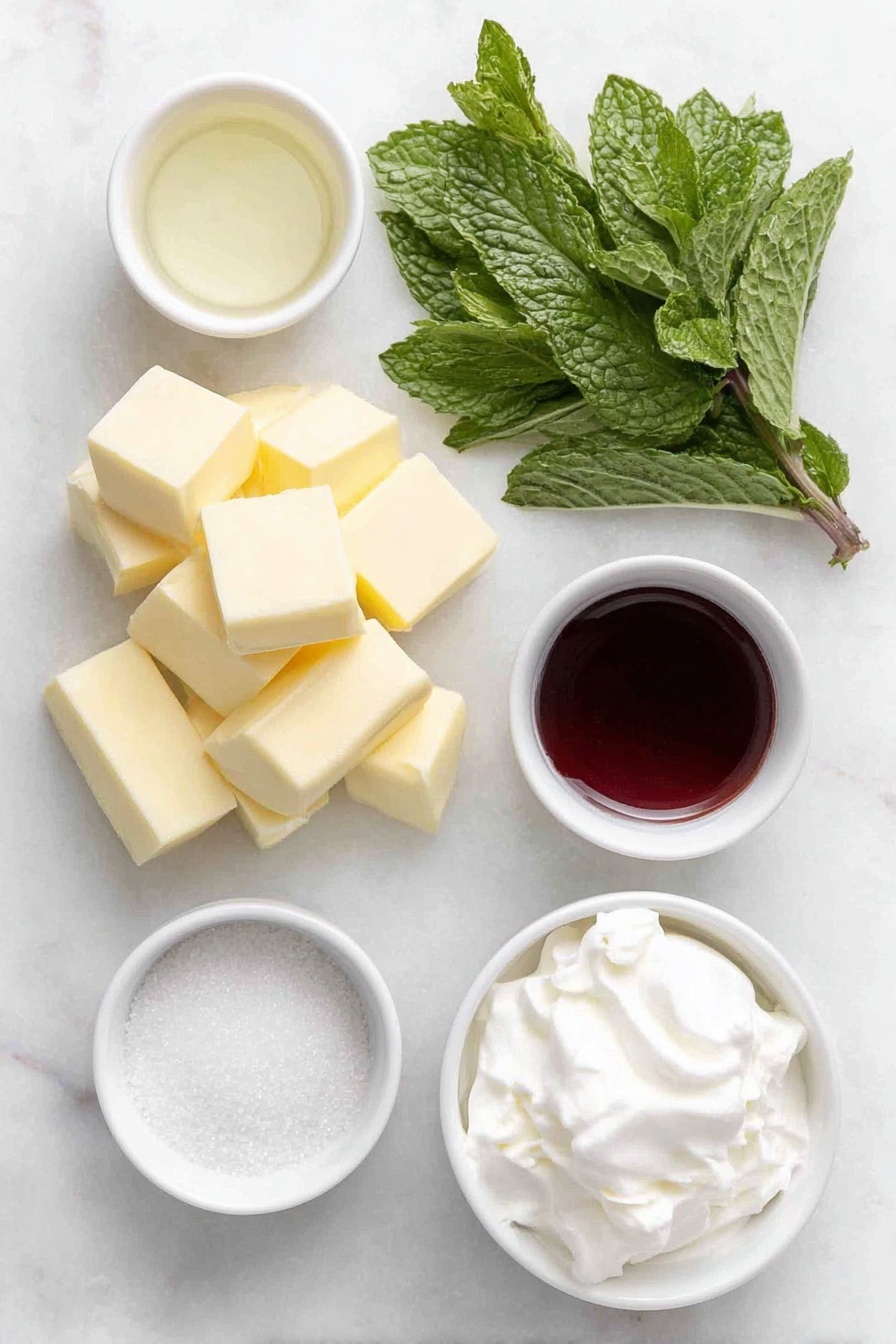
Ingredients You’ll Need
This recipe uses classic fudge ingredients paired with some special touches like strawberry extract and marshmallow fluff that really elevate the flavor and texture. When picking your ingredients, aim for quality—good white baking chips and fresh cream make a big difference in the final taste.
- Strawberry extract: I swear by Watkins for that intense, authentic strawberry punch without any artificial bitter aftertaste.
- Red food color gel: This gives the fudge those vivid swirls without watering down your batch—use gel for the best color saturation.
- Salted sweet cream butter: Real butter adds richness and balances sweetness perfectly—don’t skimp on this one!
- Half and half: Provides creaminess and helps get that smooth fudge texture you’re after.
- Heavy cream: A bit of fat makes every bite extra luscious and silky.
- Clear vanilla flavoring: Adds subtle warmth without darkening your fudge’s bright colors.
- Granulated sugar: Essential for that perfect candy texture—don’t swap it out!
- White baking chips: I use Ghirardelli because their quality really shines through in the final product.
- Marshmallow fluff: This secret ingredient brings incredible smoothness and chewiness to your fudge.
Variations
Over time, I’ve enjoyed mixing this recipe up a bit to suit different occasions and dietary needs. Feel free to make this fudge your own—every twist adds a new layer of fun and flavor.
- Less Intense Strawberry: If you want a subtler pink swirl, just dial down the red food color gel to about ¼ teaspoon—I’ve done this when making fudge for kids, and it’s still lovely!
- Dairy-Free Version: I’ve experimented using coconut cream instead of heavy cream and dairy-free butter; it yields a slightly different texture but still keeps that dreamy creaminess.
- Chocolate Twist: Try swirling in melted dark chocolate instead of red coloring for a chocolate-strawberry combo—my family goes crazy for this one.
- Nutty Add-In: I’ve tossed in some chopped toasted almonds or pistachios for a delightful crunch and a bit of nutty contrast to the smooth fudge.
How to Make Strawberry Swirl Fudge Recipe
Step 1: Prep Your Pan and Color Mix
First things first, line a 9×9-inch baking dish with parchment paper. Make sure the paper extends up all four sides—that’s your secret for easy fudge removal! Then, mix the strawberry extract and red food color gel in a small glass bowl. I always choose glass because it won’t stain, which trust me, as a fudgy-mess veteran, is a huge time saver.
Step 2: Melt Butter and Cream
In a heavy-bottomed saucepan over medium heat, combine the butter, half and half, heavy cream, and clear vanilla flavoring. Stir constantly until the butter has fully melted and everything is smoothly blended. This step sets the creamy foundation for your fudge, so keep a close eye to avoid scorching.
Step 3: Add Sugar and Simmer
Next, stir in the granulated sugar and keep stirring as the mixture comes to a simmer. This usually takes about 6 to 7 minutes. It’s critical to keep stirring here to prevent sticking or burning. Once it reaches a simmer, let it go for an additional 3 minutes before removing from heat. This cooking length ensures the perfect candy consistency later.
Step 4: Incorporate White Baking Chips
Sprinkle the white baking chips into the hot sugar mixture, cover the saucepan, and let it rest for 3 to 4 minutes. Don’t rush this pause! I discovered that giving the chips time to melt without stirring aggressively leads to that luxuriously smooth fudge texture everyone raves about. After resting, stir gently until the chips have completely melted.
Step 5: Add Marshmallow Fluff
Now for the magic—add the marshmallow fluff and stir until it’s fully melted and incorporated into the fudge base. This is what gives the fudge its signature cloudlike softness. I remember the first time I tried this step, I was amazed at how it transformed the texture instantly.
Step 6: Create Your Strawberry Swirls
Pour about three-quarters of your fudge into the prepared pan in an even layer. Then, mix the red food color and strawberry extract mixture into the remaining fudge in the pot until the color is uniform and striking. Dollop spoonfuls of this colored fudge over the base fudge and use a kitchen knife to swirl it around gently. Don’t overmix—you want to see beautiful swirled patterns that give each piece personality!
Step 7: Chill and Slice
Let the fudge sit at room temperature for about 30 minutes, then pop it in the refrigerator for at least 4 hours to fully set. When it’s ready, lift it out using the parchment paper, and cut into 25 pieces with a sharp knife. I like a big sharp knife, and sometimes I run it under hot water between cuts—it makes slicing so much easier and cleaner.
Pro Tips for Making Strawberry Swirl Fudge Recipe
- Parchment Paper Is Your Best Friend: I can’t stress this enough—lining your pan well lets you lift the fudge out easily without any cracks or crumble.
- Don’t Rush the Simmering: Stir frequently and give the sugar mixture enough time at simmer to avoid gritty fudge—patience pays off!
- Rest Before Melting Chips: Covering and letting the baking chips sit in the hot sugar mixture creates that smooth, silky base instead of grainy chunks.
- Use a Hot Knife for Cutting: Run your knife under hot water and dry it before each cut to get clean slices with neat edges.
How to Serve Strawberry Swirl Fudge Recipe

Garnishes
I love sprinkling a few freeze-dried strawberry bits on top just before the fudge sets—the tart crunch contrasts so well with the creamy sweetness. Sometimes, I also dust the top lightly with edible glitter for a festive sparkle, especially during the holidays. Fresh mint leaves on the side add a nice pop of color when serving.
Side Dishes
This fudge pairs wonderfully with a cup of hot tea or coffee for an afternoon pick-me-up. At parties, I like to serve it alongside a cheese and fruit platter—its sweetness balances out savory bites beautifully. It also makes a lovely end note after a light meal or brunch.
Creative Ways to Present
For special occasions, I’ve arranged the fudge pieces in a pretty glass jar layered with parchment or wax paper, tied with a ribbon—my go-to gift idea! Another fun way is cutting fudge into heart shapes using cookie cutters, which is perfect for Valentine’s Day or anniversaries. If you’re feeling fancy, stack bite-sized fudge cubes on appetizer skewers with fresh berries for a fruity-fudge kabob!
Make Ahead and Storage
Storing Leftovers
I keep leftover fudge stored in an airtight container inside the fridge—it stays fresh and creamy for up to two weeks that way. If your kitchen is on the warmer side, refrigeration is a must to prevent melting or stickiness.
Freezing
I’ve frozen both sliced and unsliced fudge wrapped tightly in plastic wrap and placed inside a freezer-safe container. It lasts beautifully for up to two months. When I freeze fudge, I make sure to separate pieces with waxed paper to keep them from sticking together—pro tip that really helps!
Reheating
When ready to enjoy frozen fudge, I let it thaw overnight in the fridge to maintain the best texture. If I’m in a hurry, I allow it to come to room temp for about 30 minutes before serving. Avoid microwaving as it can change the texture and make it grainy.
FAQs
-
Can I use fresh strawberries instead of strawberry extract in this Strawberry Swirl Fudge Recipe?
Unfortunately, fresh strawberries won’t provide the same flavor intensity or color needed for the swirl effect. The extract delivers concentrated flavor and the red food coloring gel gives that vivid pink swirl, which fresh strawberries can’t replicate consistently in texture or appearance.
-
What does marshmallow fluff do in the Strawberry Swirl Fudge Recipe?
Marshmallow fluff adds softness, chewiness, and smoothness to fudge. It helps prevent the fudge from becoming grainy or hard by integrating air and moisture, contributing to a delightful melt-in-your-mouth texture that traditional fudge sometimes lacks.
-
How long does this fudge last once made?
Stored in an airtight container in the refrigerator, this fudge keeps well for up to two weeks. If frozen properly, it can last for up to two months without significant loss of quality.
-
Can I make this recipe without white baking chips?
White baking chips are critical in this recipe for texture and sweetness. While you could try substituting with white chocolate bars, keep in mind that chips are formulated to melt smoothly. Chocolate bars may require tempering or careful chopping to avoid graininess.
Final Thoughts
This Strawberry Swirl Fudge Recipe quickly became one of my favorite sweets to make because it’s straightforward, stunning to look at, and utterly scrumptious. Every time I whip up a batch, I’m reminded how something so simple can bring so much joy to my family and friends. If you want to impress with minimal effort and maximum satisfaction, definitely give this recipe a try—you’ll thank me later!
Print
Strawberry Swirl Fudge Recipe
- Prep Time: 5 minutes
- Cook Time: 15 minutes
- Total Time: 4 hours 50 minutes
- Yield: 25 pieces
- Category: Dessert
- Method: Stovetop
- Cuisine: American
Description
This luscious Strawberry Fudge recipe combines creamy white baking chips with rich butter, cream, and marshmallow fluff, infused with real strawberry extract for a vibrant flavor and beautiful swirl. Finished with a striking red swirl pattern and smooth texture, this homemade fudge is a perfect sweet treat for any occasion.
Ingredients
Flavoring and Color
- 2 teaspoons strawberry extract (Watkins recommended)
- ½ teaspoon red food color gel
Dairy and Cream
- ¾ cup salted sweet cream butter
- ½ cup half and half
- ⅓ cup heavy cream
- 1 teaspoon clear vanilla flavoring
Sweets and Add-ins
- 3 cups + 2 tablespoons granulated sugar
- 1¾ cups good quality white baking chips (Ghirardelli recommended)
- 7 ounce (1 container) marshmallow fluff
Instructions
- Prepare the baking dish: Line a 9×9-inch baking dish with parchment paper, making sure the paper extends up all four sides for easy fudge removal. Set aside.
- Mix flavor and color: In a small glass bowl, combine the strawberry extract and red food color gel. Stir well to blend and set aside. Using glass prevents staining.
- Melt butter and dairy: In a heavy-bottomed 3 to 4-quart saucepan over medium heat, combine butter, half and half, heavy cream, and vanilla flavoring. Stir continuously until the butter fully melts and ingredients are well blended.
- Add sugar and simmer: Gradually add granulated sugar, stirring constantly as the mixture heats. Allow it to come to a simmer in about 6-7 minutes, then continue stirring and simmering for an additional 3 minutes. Remove from heat once done.
- Melt baking chips: Stir in the white baking chips, then cover the saucepan and let sit for 3-4 minutes. Stir again until the chips are completely melted and mixture is smooth.
- Incorporate marshmallow fluff: Add marshmallow fluff and stir thoroughly until fully incorporated, forming the base fudge.
- Pour base layer: Pour approximately ¾ of this fudge mixture into the prepared baking dish, spreading evenly.
- Create colored swirl: Stir the reserved strawberry extract and red food color gel mixture into the remaining fudge in the saucepan until uniform in color.
- Swirl on top: Dollop the red-colored fudge over the base fudge in the baking dish. Use a kitchen knife to gently swirl the red fudge into the base fudge, creating a beautiful marbled pattern.
- Set fudge: Let the fudge sit at room temperature for 30 minutes, then chill it in the refrigerator for at least 4 hours to fully set.
- Slice and serve: Once set, lift the fudge out using the parchment paper edges. Cut into a 5 by 5 grid to yield 25 evenly sized pieces. Keep refrigerated until serving.
Notes
- Storage: Store leftovers in an airtight container in the refrigerator for up to 2 weeks.
- Freezing: Freeze unsliced fudge tightly wrapped for up to 2 months. You may also freeze cut pieces separated by waxed paper and wrapped well.
- Baking dish lining: Ensure parchment paper rises on all four sides for easy removal of fudge.
- Coloring tips: Use a glass bowl to mix color and extract as it won’t stain; alternatively, a small red or disposable bowl can be used.
- Shade variations: For a lighter pink fudge, reduce red food coloring to ¼ teaspoon or 4-6 drops.
- Cooling: If your kitchen is cool, allow fudge to cool overnight at room temperature before refrigerating to extend shelf life.
Nutrition
- Serving Size: 1 piece (approx. 1/25 of total batch)
- Calories: 180
- Sugar: 22g
- Sodium: 85mg
- Fat: 9g
- Saturated Fat: 5g
- Unsaturated Fat: 4g
- Trans Fat: 0g
- Carbohydrates: 25g
- Fiber: 0.2g
- Protein: 1g
- Cholesterol: 25mg


