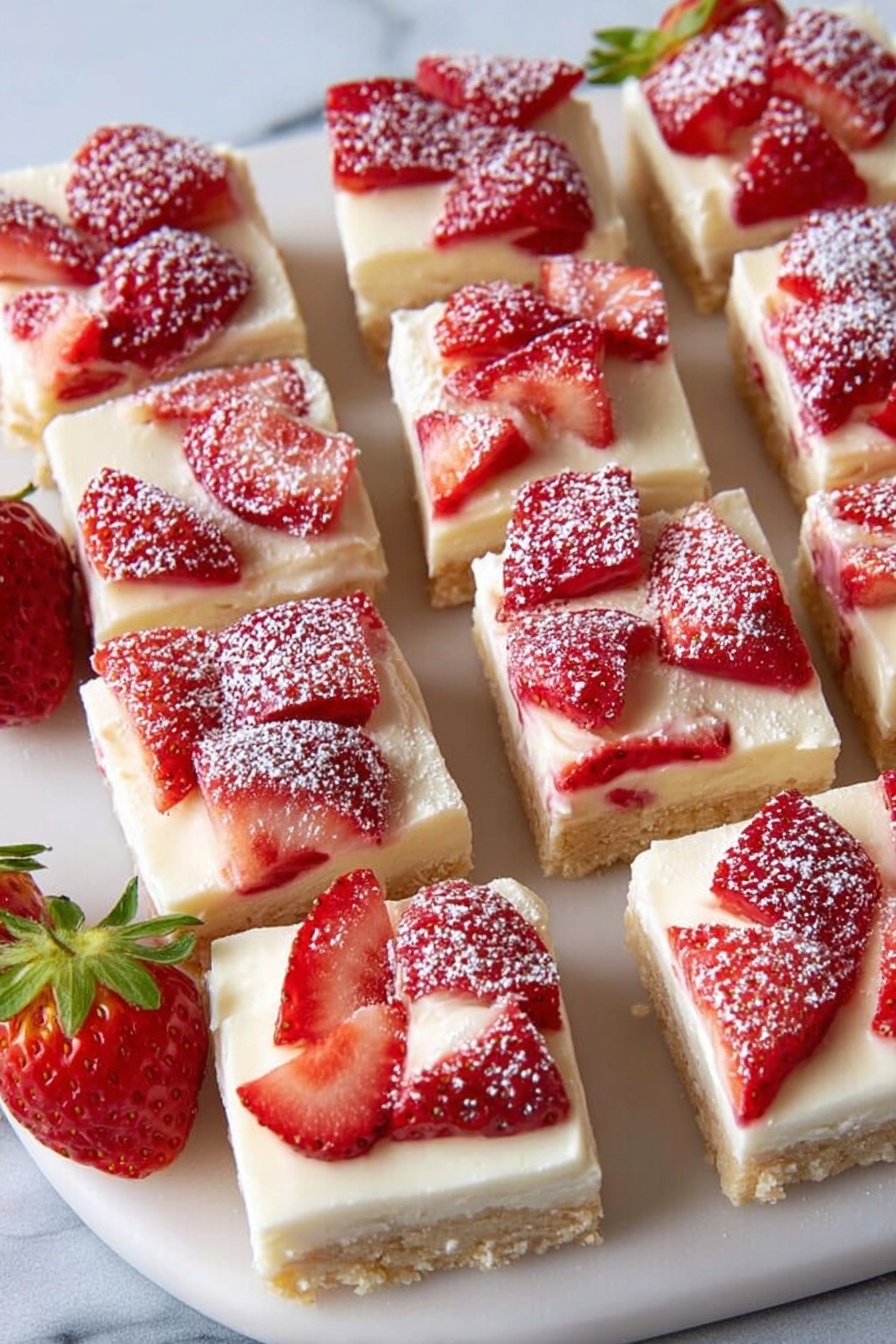
If you’re looking for a dessert that’s as pretty as it is delicious, then you’re going to adore this Strawberry Cheesecake Slice Recipe. I absolutely love how this turns out — silky creamy, with a buttery biscuit base and fresh strawberries that make every bite feel like a summer celebration. Whether you’re making it for a crowd or a little treat for yourself, this slice is simple enough to whip up but tastes like you’ve spent hours in the kitchen. Let me take you through everything you’ll want to know to make these strawberry cheesecake slices your new go-to dessert.
Why You’ll Love This Recipe
- No-bake simplicity: You don’t need an oven — just your fridge, which makes it perfect for warm days or quick prep.
- Fresh strawberry goodness: Juicy strawberries on top give the perfect pop of brightness and natural sweetness.
- Creamy, dreamy texture: The cream cheese and thickened cream blend into a silky topping that’s light but indulgent.
- Family approved: Every time I bring these slices out, my family goes crazy — they’re always the first to disappear!

Ingredients You’ll Need
Each ingredient in this Strawberry Cheesecake Slice Recipe plays a key role in creating balance — the buttery biscuit base, the smooth cream cheese layer, and the fresh strawberries that crown it all. I always choose good-quality cream cheese and ripe strawberries for the best flavor.
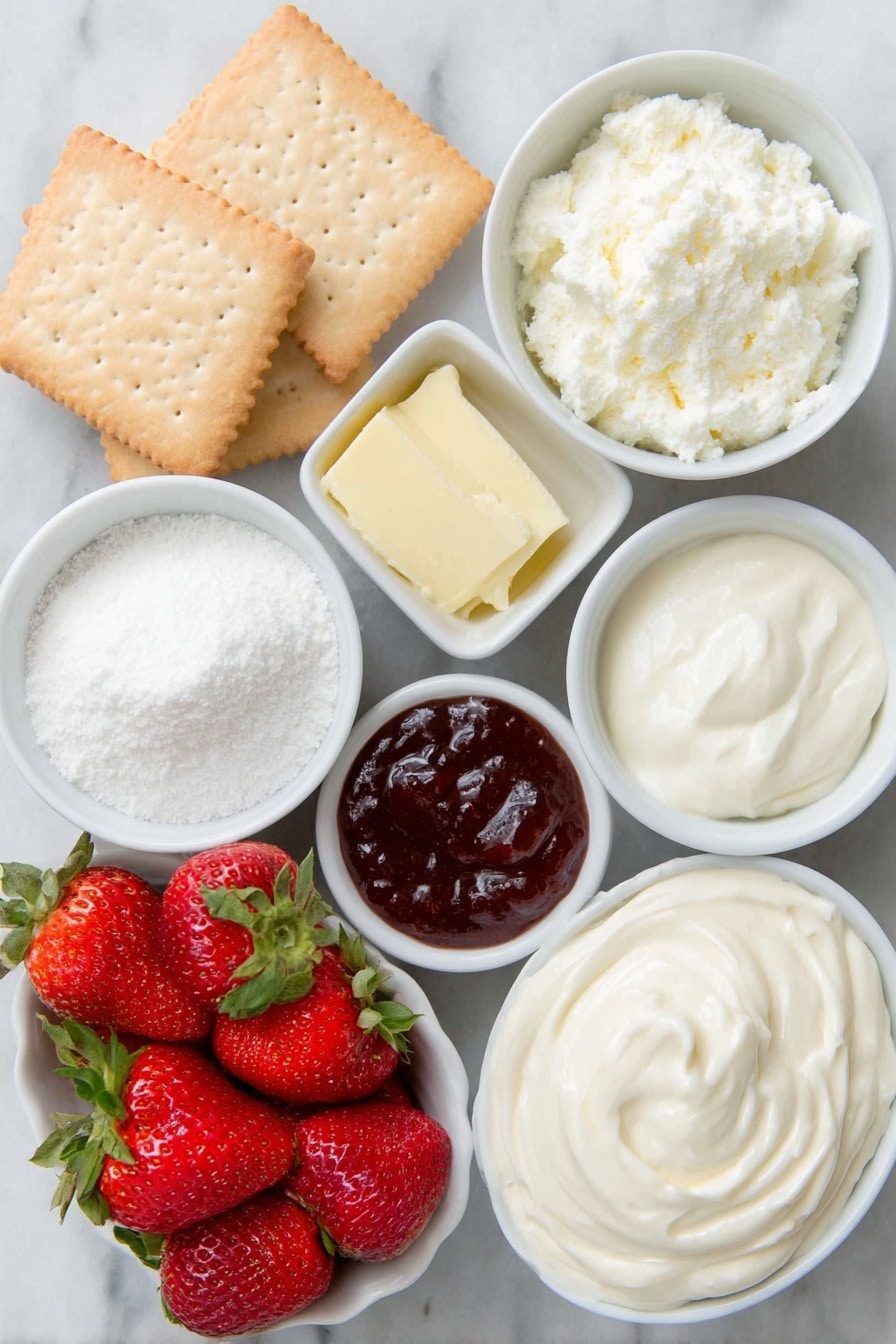
- Plain biscuits: Digestive or tea biscuits work best to give a crisp, buttery base.
- Butter: Melted to bring the biscuit crumbs together; I use unsalted to control saltiness.
- Thickened cream: This adds richness and a velvety texture to the topping — avoid substitutes here for best results.
- Cream cheese: Softened at room temperature for smooth mixing; this is the heart of the cheesecake flavor.
- Caster sugar: Gives just the right amount of sweetness without graininess.
- Lemon zest: Adds subtle zing and freshness, balancing the creamy sweetness.
- Strawberry jam: Folded into the topping to gently infuse extra strawberry flavor.
- Fresh strawberries: Thinly sliced to decorate on top — the fresher, the better!
Variations
I love to play around with this Strawberry Cheesecake Slice Recipe depending on the season or what I have on hand. It’s surprisingly versatile, which means you can take it in a few fun directions!
- Berry swap: I’ve made this using blueberries or raspberries instead of strawberries and it works beautifully — just swap the jam and fresh fruit.
- Nutty crunch: Sometimes I sprinkle crushed pistachios or toasted almonds on top for an extra textural contrast my family adores.
- Low sugar option: If you’re watching sugar intake, reducing the caster sugar and using a no-sugar-added jam still makes a delightful slice.
- Gluten-free base: Just swap plain biscuits for gluten-free ones to adapt easily for gluten sensitivities.
How to Make Strawberry Cheesecake Slice Recipe
Step 1: Prep your base
First things first — line a 20cm square tin with baking paper to stop your cheesecake slices sticking later. Then blitz your plain biscuits in a food processor until they’re finely ground; this gives you a smooth base. Tip in the melted butter and mix again until everything sticks together like wet sand. When you pour this crumbly mix into your lined tin, press down firmly and evenly with a spatula, so you get a solid, compact base. Pop it in the fridge while you make the creamy topping — chilling helps it set nicely.
Step 2: Make that luscious cheesecake topping
In a large bowl, combine the thickened cream, softened cream cheese, and caster sugar. Use a handheld or stand mixer to whisk until it’s smooth and well combined — it should look light and fluffy. Next, gently fold in the lemon zest and strawberry jam to give it a fresh, fruity pop that sets this cheesecake slice apart. Pour this topping evenly over the chilled biscuit base and smooth it out for a beautiful finish.
Step 3: Crown with strawberries and set
Slice fresh strawberries thinly and arrange them neatly on top of your cheesecake layer. I like to place them slightly overlapping for a pretty pattern — it’s a small detail but makes such a big difference when you serve it up. Once decorated, cover your tin and pop it in the fridge overnight to set completely. Patience here really pays off, as it helps firm up the layers perfectly so your slices hold together when you cut them.
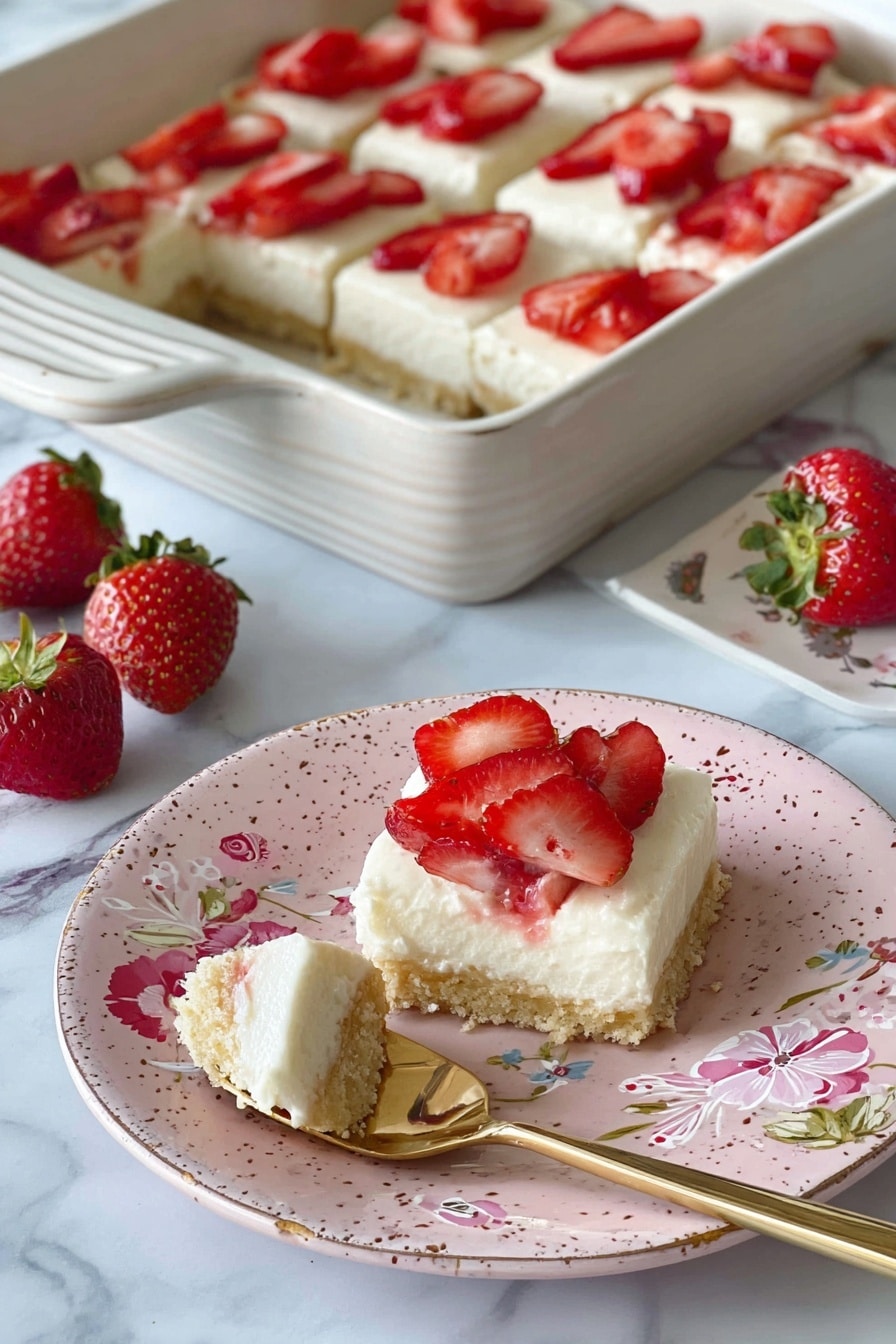
Step 4: Slice and serve like a pro
When your cheesecake is fully set, carefully lift it out of the tin using the baking paper. Place it on a serving plate and slice into 16 even pieces with a sharp knife. I recommend wiping your knife clean between each cut to keep those edges neat and avoid smudging the creamy topping. Keep your slices refrigerated until it’s time to serve — trust me, they’ll disappear fast!
Pro Tips for Making Strawberry Cheesecake Slice Recipe
- Use room temperature cream cheese: It mixes more smoothly with the cream to avoid lumps in your topping.
- Chill the base first: This prevents it from becoming soggy once you add the creamy topping.
- Fresh strawberries matter: Pick ripe but firm berries so they don’t turn mushy overnight on top.
- Clean your knife between cuts: This helps slices stay clean and beautiful for serving or gifting.
How to Serve Strawberry Cheesecake Slice Recipe
Garnishes
I usually keep garnishes simple to highlight the strawberry topping. A light dusting of icing sugar or a sprig of fresh mint adds an extra touch of elegance without overpowering the flavors. Sometimes I drizzle a little extra warmed strawberry jam for gloss, which always impresses guests.
Side Dishes
Pairing this strawberry cheesecake slice with freshly brewed coffee or a cup of floral tea is a personal favorite of mine. If you want to turn it into a full dessert platter for gatherings, some lightly toasted nuts or a scoop of vanilla ice cream works great alongside these slices.
Creative Ways to Present
For special occasions, I like to individually wrap each slice in decorative parchment or place them in mini dessert boxes — perfect for gifting or a chic party presentation. You can also layer these slices on a tiered cake stand with fresh flowers to really make the dessert table pop.
Make Ahead and Storage
Storing Leftovers
After making the strawberry cheesecake slices, I keep leftovers tightly covered in the fridge; they stay fresh and creamy for up to 3 days. If your fridge is prone to odors, a sealed container helps keep those delicate flavors pure.
Freezing
I’ve frozen these cheesecake slices with success by wrapping individual pieces in plastic wrap, then placing them in a freezer-safe container. They keep well for up to 1 month. When you want to enjoy, thaw them slowly in the fridge overnight to maintain that perfect texture.
Reheating
This is a chilled dessert, so reheating isn’t necessary — in fact, you want to keep it cool to enjoy the creamy texture. Just let frozen slices thaw gently in the fridge; reheating will change the texture and isn’t recommended.
FAQs
-
Can I use a different type of biscuit for the base?
Absolutely! Digestive biscuits are classic, but you can use graham crackers, plain Marie biscuits, or even ginger snaps for a spicier twist. Just make sure the biscuits are plain or mildly flavored to keep the balance of the cheesecake.
-
Do I need to use fresh strawberries?
Fresh strawberries give the best texture and flavor on top. However, if fresh aren’t in season, you can use frozen thawed berries, but they might release more juice and make the topping less firm. I recommend fresh when possible.
-
What’s the best way to get clean slices?
Use a very sharp knife and wipe it clean with a warm, damp paper towel after each cut. This method prevents dragging or smudging the creamy layer, making your slices look picture-perfect.
-
Can I make this recipe ahead of time?
Yes! This no-bake strawberry cheesecake slice actually improves with time — letting it chill overnight lets the layers set perfectly. It’s great for making the day before a party or gathering.
Final Thoughts
This Strawberry Cheesecake Slice Recipe has become one of my absolute favorites because it’s fuss-free but feels special every time. Sharing these slices with family and friends has made so many moments memorable. Once you try this recipe, I’m confident it will become a staple in your dessert rotation too — a sweet, simple slice that feels like a hug in dessert form. So go ahead, whip one up, and enjoy that creamy, fruity bliss!
Print
Strawberry Cheesecake Slice Recipe
- Prep Time: 25 minutes
- Cook Time: 0 minutes
- Total Time: 12 hours 25 minutes
- Yield: 16 slices
- Category: Dessert
- Method: No-Cook
- Cuisine: Western
- Diet: Vegetarian
Description
This Strawberry Cheesecake Slice is a no-bake, creamy dessert featuring a crunchy biscuit base topped with a luscious strawberry-flavored cream cheese layer and fresh strawberries. Perfect for a refreshing treat with a balance of sweet and tangy flavors, set overnight for the best texture.
Ingredients
Biscuit Base
- 250g plain biscuits
- 100g butter, melted
Cheesecake Topping
- 250ml thickened cream
- 250g cream cheese, softened
- 2 Tbsp caster sugar
- 1 tsp lemon zest
- 2 Tbsp strawberry jam
Decoration
- 250g strawberries, sliced
Instructions
- Prepare the base: Line the base of a 20cm square tin with baking paper to ensure easy removal later.
- Make biscuit crumbs: Place the plain biscuits into a food processor and blitz until finely crushed. Add the melted butter and pulse again until the mixture is well combined.
- Form the base: Pour the biscuit mixture into the lined tin. Spread it evenly to the edges and smooth the top with a spatula. Place in the fridge to chill while preparing the topping.
- Whip the topping: In a bowl, combine thickened cream, softened cream cheese, and caster sugar. Using a handheld or stand mixer, whisk the mixture until smooth and well combined.
- Add flavor: Gently fold in the lemon zest and strawberry jam to the cream mixture to incorporate the fruity and citrus notes.
- Assemble cheesecake: Pour the cream cheese mixture evenly over the chilled biscuit base and spread smooth.
- Decorate: Slice the strawberries and arrange them on top of the cheesecake layer to create an appealing finish.
- Chill to set: Place the assembled cheesecake slice in the fridge overnight (about 12 hours) to allow it to fully set and develop flavors.
- Serve: Once set, carefully remove the cheesecake from the tin using the baking paper. Place it on a serving plate and slice into 16 even pieces, cleaning the knife between cuts for neat slices. Keep refrigerated until serving.
Notes
- For the thickened cream, use heavy cream or whipping cream to achieve the best creamy texture.
- Ensure the cream cheese is softened to room temperature for easier mixing.
- Chilling overnight is essential for the cheesecake to set properly and for flavors to meld.
- Wiping the knife clean between slices helps maintain clean, neat pieces.
Nutrition
- Serving Size: 1 slice (approximate)
- Calories: 220
- Sugar: 15g
- Sodium: 90mg
- Fat: 15g
- Saturated Fat: 9g
- Unsaturated Fat: 4g
- Trans Fat: 0g
- Carbohydrates: 18g
- Fiber: 1g
- Protein: 3g
- Cholesterol: 50mg


