If you’re looking to add some harmless creepiness to your Halloween treats this year, you’ll absolutely adore this Spooky Spider Cookies Recipe. I stumbled upon it when trying to make a fun, festive dessert that’s both adorable and delicious, and trust me — it’s a total crowd pleaser. These peanut butter cookies covered with chocolate spiders and marshmallow webs aren’t just spooky; they’re mouthwateringly good, plus they’re surprisingly easy to make. Stick around because I’m going to share all my favorite tips and tricks so you’ll nail these creepy-cute treats every time!
Why You’ll Love This Recipe
- Fun and Festive Design: These cookies turn into spooky spiders with just a few clever decorating steps that are super kid-friendly.
- Rich Peanut Butter Flavor: I love how the peanut butter shines through in the cookie base — it’s buttery and soft without being overly sweet.
- Perfect Texture: The slight crisp edges and chewy centers create a delightful mouthfeel every time.
- Decorating Made Simple: The marshmallow cobweb and chocolate piping might sound fancy, but I’ll show you how to do it step-by-step with no stress.

Ingredients You’ll Need
All these ingredients come together to make a cookie that’s buttery, peanut buttery, and just sweet enough — and the decorating components turn them into spooky little critters you’ll want to eat right away. When shopping, fresh peanut butter and good quality melting chocolate really make a difference in taste and texture.
- Unsalted Butter: Using unsalted butter lets you control the saltiness and keeps the flavor buttery and pure.
- Light Brown Sugar: Packs moisture and a hint of caramel flavor into the dough.
- Sugar (granulated and for rolling): Adds sweetness and helps achieve a slight crisp on the cookie edges.
- Creamy Peanut Butter: The star ingredient — creamy is easier to blend smoothly into the dough.
- Eggs + Egg Yolk: Provide structure and richness without drying the cookies out.
- Vanilla Extract: A little vanilla always enhances sweetness and rounds out flavors.
- All-Purpose Flour: The base of the dough, for that soft yet sturdy texture.
- Corn Starch: Helps tenderize the cookie and prevent toughness.
- Baking Soda and Salt: For lift and flavor balance.
- Dark Chocolate Melting Wafers: Best for smooth melting and easy piping on decorations.
- Mini Marshmallows: The most fun part — used for creating those perfect cobwebs.
- Mini Reese’s Peanut Butter Cups: The cute spider bodies — chilling them before use is key so they don’t melt.
- Small Candy Eyes: Adds personality to your spiders — irresistible and a total hit with kids!
Variations
I love playing around with these cookies — feel free to make this recipe yours! Whether you want to swap peanut butter for almond butter or make it nut-free with sunflower seed butter, there’s a way to customize. You can also vary the spooky decoration based on whatever candies you have on hand.
- Nut-Free Variation: Substitute the peanut butter with a sunflower seed butter, and make sure to use allergy-friendly chocolate and candies; my niece’s friends with allergies still gobbled these up!
- Spooky Decoration Swap: Instead of mini Reese’s cups, try using small candy pumpkins or gummy spiders for a colorful change.
- Vegan Option: Use vegan butter and egg replacer, and double-check the marshmallows as they often contain gelatin — vegan marshmallows are available online.
- Chocolate Chip Variation: For a quicker version, just press mini chocolate chips in the centers and pipe spider legs with melted chocolate.
How to Make Spooky Spider Cookies Recipe
Step 1: Cream the Butter and Sugars to Perfection
Start by beating the softened unsalted butter with both the light brown sugar and granulated sugar in your stand mixer or hand mixer for about a minute until everything looks well combined and fluffy. This crucial step traps air and ensures your cookies turn out soft and tender instead of dense. I always scrape the bowl once or twice here to keep the mixture even.
Step 2: Add the Peanut Butter, Eggs, and Vanilla
Mix in the creamy peanut butter until smooth, then add your eggs and the extra egg yolk one at a time. Pause after each addition to scrape down the sides of the bowl — this keeps everything well-incorporated. Lastly, stir in the vanilla extract; this little splash really brightens up the flavor.
Step 3: Whisk Together the Dry Ingredients and Combine Gently
In a separate bowl, whisk the all-purpose flour, corn starch, baking soda, and salt. Gradually add this dry mix to the peanut butter batter, mixing just enough to combine. I learned that overmixing can make cookies tough, so keep it gentle and scrape the bowl again to catch any stray flour pockets.
Step 4: Chill the Dough to Prevent Flat Cookies
Pop the dough into the fridge for at least 30 minutes. This step is a game-changer, especially for peanut butter cookies that tend to spread. If you find your cookies are too flat after baking, give the dough a longer chill time — I sometimes chill mine for a full hour and it makes a big difference.
Step 5: Form and Bake Your Cookies
Preheat to 375°F (190°C) and prep your baking sheets with parchment paper. Roll out the chilled dough into 1 ½ tablespoon-sized balls, then roll each in the granulated sugar — this adds a perfect slight crunch on the outside. Space the dough balls at least two inches apart. Bake for 8-10 minutes; I usually pull mine at 9 minutes for that soft center. Let them cool on the tray for 5 minutes before the next step.
Step 6: Press in the Mini Reese’s Peanut Butter Cups
While the cookies are still warm but cooled a bit (~5 minutes), gently press a chilled mini Reese’s peanut butter cup into the center of each cookie. Keeping the candies cold is key to avoid melting. Then let the cookies cool completely on the sheet so the candy settles nicely without sliding off.
Step 7: Create the Marshmallow Cobwebs
Place about ¼ cup of mini marshmallows in a microwave-safe bowl. Heat for about 10 seconds — they should start puffing but not melt completely. Stir, then pinch and stretch the sticky marshmallow with your fingers to drape web-like strands over the cooled cookies. The marshmallow sets fast, so work quickly and refresh with new marshmallows as needed. This technique adds the perfect spooky “cobweb” effect and is always a hit.
Step 8: Pipe on the Chocolate Spider Legs and Eyes
Melt your dark chocolate wafers according to package directions and let them cool about 5 minutes — if too hot, the piping gets messy. Pour the melted chocolate into a small zip-top bag and snip a tiny corner. Pipe a small dab of chocolate on top of each peanut butter cup to act as glue, then immediately place two candy eyes on it. Next, pipe four thin “legs” on each side of the cup to turn your cookie into a creepy spider. Take your time here — this is where the cookies really come to life!
Pro Tips for Making Spooky Spider Cookies Recipe
- Chill the Dough Thoroughly: This prevents spreading and helps your spider legs hold their shape perfectly.
- Work Quickly With Marshmallows: Marshmallow strands set fast, so have all your cookies ready before melting your marshmallows.
- Use a Small Snip for Chocolate Piping: Smaller openings give you more control to pipe spider legs neatly without blobs.
- Keep Candy Eyes and Reese’s Refrigerated: Keeping these chilled prevents melting, ensuring clean, cute spider faces.
How to Serve Spooky Spider Cookies Recipe
Garnishes
I like adding a few extra candy eyes scattered on the serving platter and a dusting of powdered sugar for a “misty graveyard” look. If you want to up the spooky vibe, scatter some edible glitter or place the cookies on a bed of crumbled chocolate cookie crumbs as “dirt.”
Side Dishes
These cookies are fantastic with a glass of cold milk or a cup of spiced hot chocolate. If you’re hosting a Halloween party, pairing them with pumpkin-flavored muffins or apple cider donuts adds a nice seasonal spread.
Creative Ways to Present
Last year, I placed these spider cookies on mini paper plates decorated with fake spider webs and added some plastic spiders for dramatic effect — kids went nuts for it! You could also serve them on a dark-colored platter with orange and black napkins or put each cookie inside a mini cupcake liner to keep them from sticking together during a Halloween potluck.
Make Ahead and Storage
Storing Leftovers
Once decorated, store these cookies in an airtight container at room temperature for up to 3 days. I like to layer them with parchment paper between cookies to keep the spider legs intact and prevent sticking.
Freezing
If you want to make these ahead, freeze the baked but undecorated cookies in a single layer on a tray first. Once frozen, transfer them to a zip-top bag and store for up to 2 months. Decorate just before serving for best results — marshmallows and chocolate decorations don’t freeze well.
Reheating
I usually don’t reheat because these cookies are best fresh, but if you want that just-baked warmth, pop them in the microwave for 10-15 seconds. Avoid reheating after decorating, as the marshmallows might melt and the chocolate can soften too much.
FAQs
-
Can I make the Spooky Spider Cookies Recipe nut-free?
Absolutely! You can swap the peanut butter for sunflower seed butter or a nut-free butter alternative to keep the flavor and texture without nuts. Just make sure to use allergy-friendly chocolate and candies for the decorating to keep them safe for all guests.
-
What’s the best way to prevent these cookies from spreading too much?
Chilling the dough for at least 30 minutes (or longer if needed) before baking is your best bet. Also, rolling the dough balls in sugar helps form a slight crust that keeps them from spreading excessively.
-
Can I prepare these cookies a day ahead of time?
You can bake and even decorate them a day ahead. Store them in an airtight container at room temp, and they’ll stay fresh. Just be sure to handle the marshmallow webs gently as they can be a bit delicate after some time.
-
What if I don’t like using marshmallows for the webs?
No worries! You can create spider webs using melted white chocolate piped in lines or even edible icing. The marshmallows add a fun texture but aren’t the only option for spooky webs.
-
How do I avoid the chocolate legs from breaking?
Pipe the legs thin but not too fragile, and let the chocolate harden on a cool surface. When storing, avoid stacking cookies directly on top of each other without protective layers to prevent breakage.
Final Thoughts
This Spooky Spider Cookies Recipe has become a Halloween tradition in my home — the perfect mix of fun, flavor, and festive spirit. I love how approachable it feels, even if you’re not a baking pro, and every year I’m amazed at how much joy these little spider treats bring to kids and adults alike. If you want a dessert that’s sure to spark smiles and maybe a little harmless shiver, give this recipe a try. You’ll enjoy every spooky, buttery, chocolatey bite!
Print
Spooky Spider Cookies Recipe
- Prep Time: 1 hour
- Cook Time: 10 minutes
- Total Time: 1 hour 10 minutes
- Yield: 40 cookies
- Category: Baking
- Method: Baking
- Cuisine: American
Description
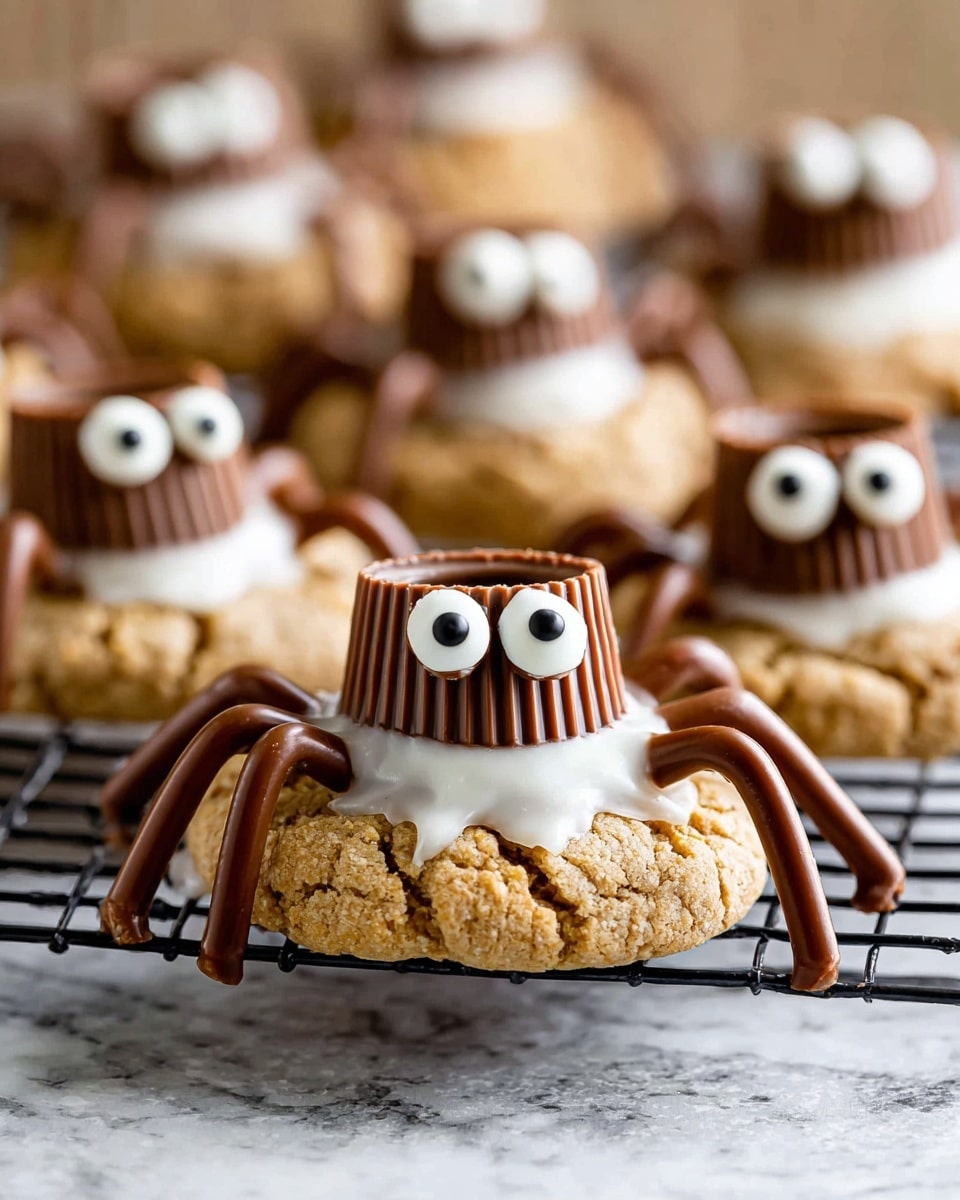
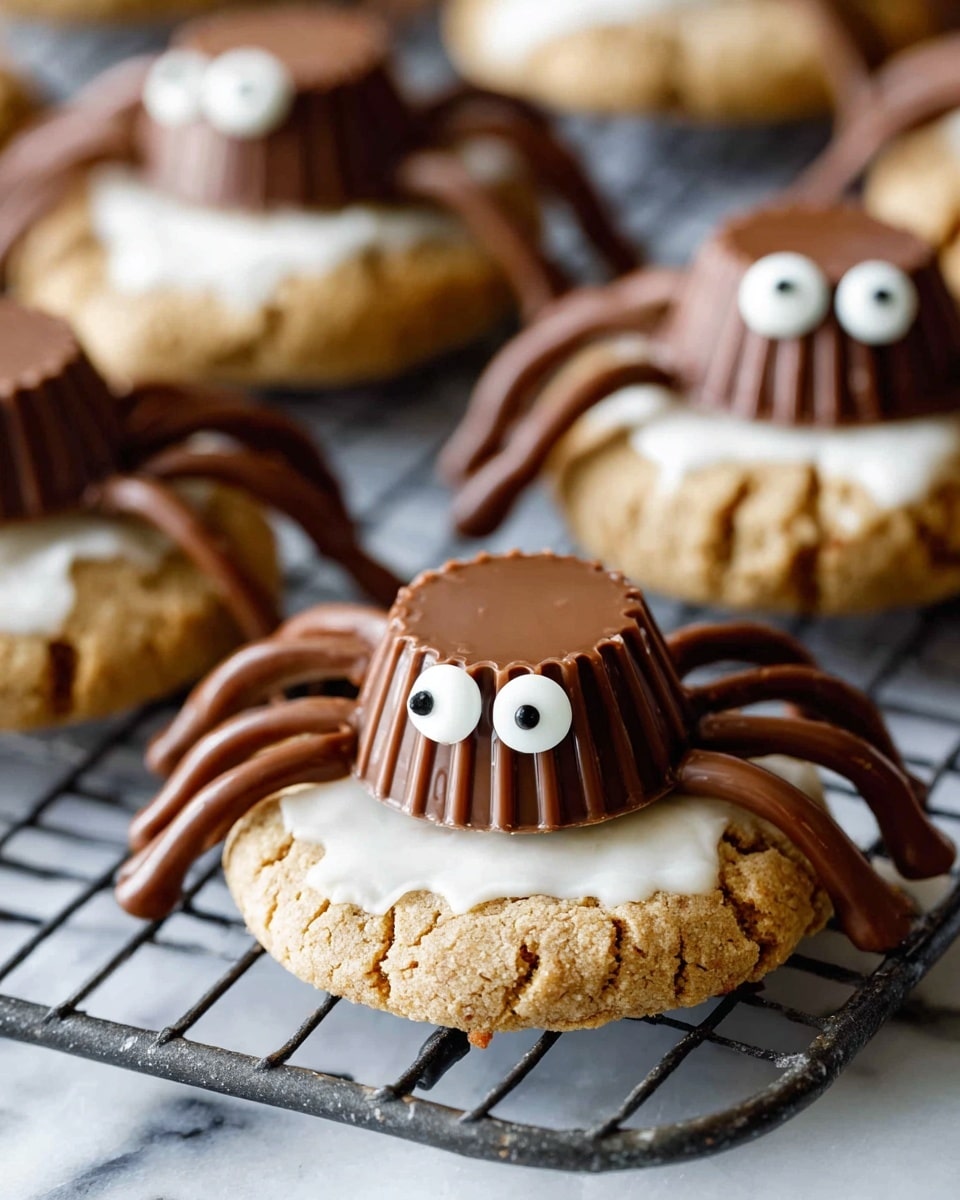
These spooky spider cookies combine creamy peanut butter cookies with a fun Halloween twist. Decorated with melted dark chocolate, mini Reese’s peanut butter cups, mini marshmallows for cobwebs, and candy eyes, they make a delightful and festive treat perfect for Halloween parties or any spooky celebration.
Ingredients
Cookie Dough
- 1 ¼ cup (282 g) unsalted butter, softened to room temperature
- 1 ½ cup (300 g) light brown sugar, tightly packed
- ¼ cup (50 g) sugar
- 1 cup (280 g) creamy peanut butter
- 2 eggs + 1 egg yolk
- 1 teaspoon vanilla extract
- 3 ¼ cups (400 g) all-purpose flour
- 1 Tablespoon corn starch
- 1 ½ teaspoons baking soda
- 1 ½ teaspoon salt
- ½ cup granulated sugar for rolling
Decorations
- 10 ounces (285 g) dark chocolate melting wafers
- 2 cups mini marshmallows, divided
- 40 Reese’s miniature peanut butter cups, chilled
- small candy eyes for decorating
Instructions
- Make the Dough: In the bowl of a stand mixer, combine the softened butter, light brown sugar, and sugar. Beat until well combined, about 1 minute. Add the creamy peanut butter and stir to combine thoroughly.
- Add Eggs and Flavoring: Add eggs and egg yolk one at a time, pausing to scrape the sides and bottom of the bowl after each addition. Stir in the vanilla extract until evenly incorporated.
- Combine Dry Ingredients: In a separate medium bowl, whisk together the all-purpose flour, cornstarch, baking soda, and salt. Gradually add the flour mixture into the peanut butter mixture, mixing well and scraping the bowl to ensure all ingredients are fully combined.
- Chill Dough: Place the dough in the refrigerator and chill for 30 minutes to 1 hour to firm up. If still too sticky or cookies spread too much when baked, chill an additional 30 minutes.
- Prepare for Baking: Preheat the oven to 375°F (190°C). Line cookie sheets with parchment paper. Pour ½ cup granulated sugar into a small bowl for rolling the dough balls.
- Shape and Roll Cookies: Remove dough from refrigerator. Roll dough into 1½ tablespoon-sized balls. Roll each ball in the granulated sugar, then place on the prepared cookie sheets spaced at least 2 inches apart.
- Bake Cookies: Bake cookies at 375°F (190°C) for 8-10 minutes. Remove from oven and let cool on the cookie sheet for 5 minutes. While still warm, gently press a chilled Reese’s miniature peanut butter cup into the center of each cookie to create an indent. Allow cookies to cool completely on the sheet before decorating.
- Create Marshmallow Cobwebs: Place about ¼ cup of mini marshmallows in a small microwave-safe dish and microwave for about 10 seconds until puffed. Stir gently to deflate slightly. Using your fingers, pinch and stretch the marshmallow filling and drape it over the cooled cookies to create cobweb effects. Repeat with additional marshmallows as needed, allowing each batch to set before proceeding.
- Prepare Chocolate for Decorating: Melt the dark chocolate wafers according to package instructions. Allow melted chocolate to cool for 5 minutes so it is easier to pipe.
- Decorate Spiders: Pour the cooled melted chocolate into a small zip-lock bag and snip a tiny corner off to create a piping bag. Pipe a small amount of chocolate onto the indent on each cookie where the Reese’s cup was pressed. Place the Reese’s cup, larger surface side down, onto the melted chocolate. Pipe four chocolate lines on each side of the Reese’s cup as spider legs. Dab a small amount of melted chocolate on the back of the candy eyes and attach two eyes onto each Reese’s cup to complete the spooky spider decoration.
Notes
- Chilling the dough is important to prevent the cookies from spreading too much during baking and helps achieve the right texture.
- Use chilled Reese’s peanut butter cups to prevent melting when pressing into warm cookies.
- If the marshmallow cobwebs become too firm, just microwave a fresh batch of marshmallows to continue decorating.
- Let the cookies cool completely before adding marshmallow and chocolate decorations for better results.
- You can substitute candy eyes with small dots of melted white and dark chocolate if preferred.
Nutrition
- Serving Size: 1 cookie
- Calories: 250
- Sugar: 18 g
- Sodium: 200 mg
- Fat: 16 g
- Saturated Fat: 6 g
- Unsaturated Fat: 8 g
- Trans Fat: 0 g
- Carbohydrates: 22 g
- Fiber: 1 g
- Protein: 5 g
- Cholesterol: 40 mg


