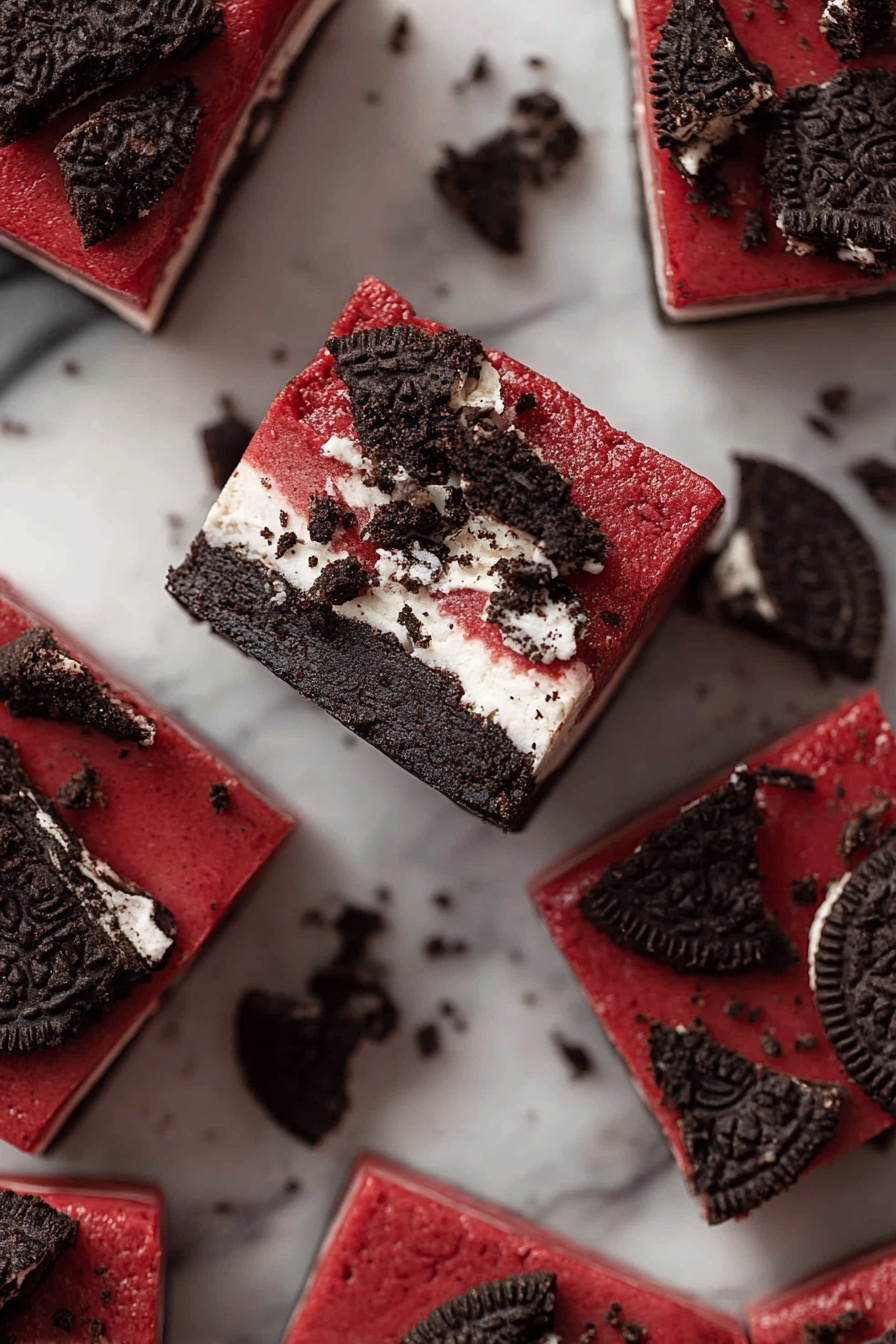
If you love a dessert that’s as rich and indulgent as it is fun and nostalgic, then you’re in for a treat with this Red Velvet Oreo Fudge Recipe. I absolutely love how the creamy red velvet fudge combines with crunchy Oreo bits—trust me, every bite feels like a party in your mouth. Whether you’re making it for a holiday gift, a special occasion, or just because, you’ll find this recipe surprisingly easy and incredibly rewarding. Stick with me here, and I’ll share all my tips to help you nail this fabulous fudge every time.
Why You’ll Love This Recipe
- Simple Yet Impressive: You don’t need fancy tricks or ingredients to wow your guests with this fudge.
- Perfect Balance of Flavors: The sweetness of the white chocolate and the slight bitterness of Oreos create an irresistible combo.
- Make-Ahead Friendly: Prepare it in advance for easy gifting or party-ready desserts.
- Kid-Approved and Crowd-Pleasing: My family goes crazy for this one every time I whip it up.

Ingredients You’ll Need
This Red Velvet Oreo Fudge Recipe relies on just a handful of ingredients, but each one plays a key role in creating that luscious, melt-in-your-mouth texture and flavor. I love using mini marshmallows here—they give the fudge a wonderful bounce and softness that’s hard to beat.
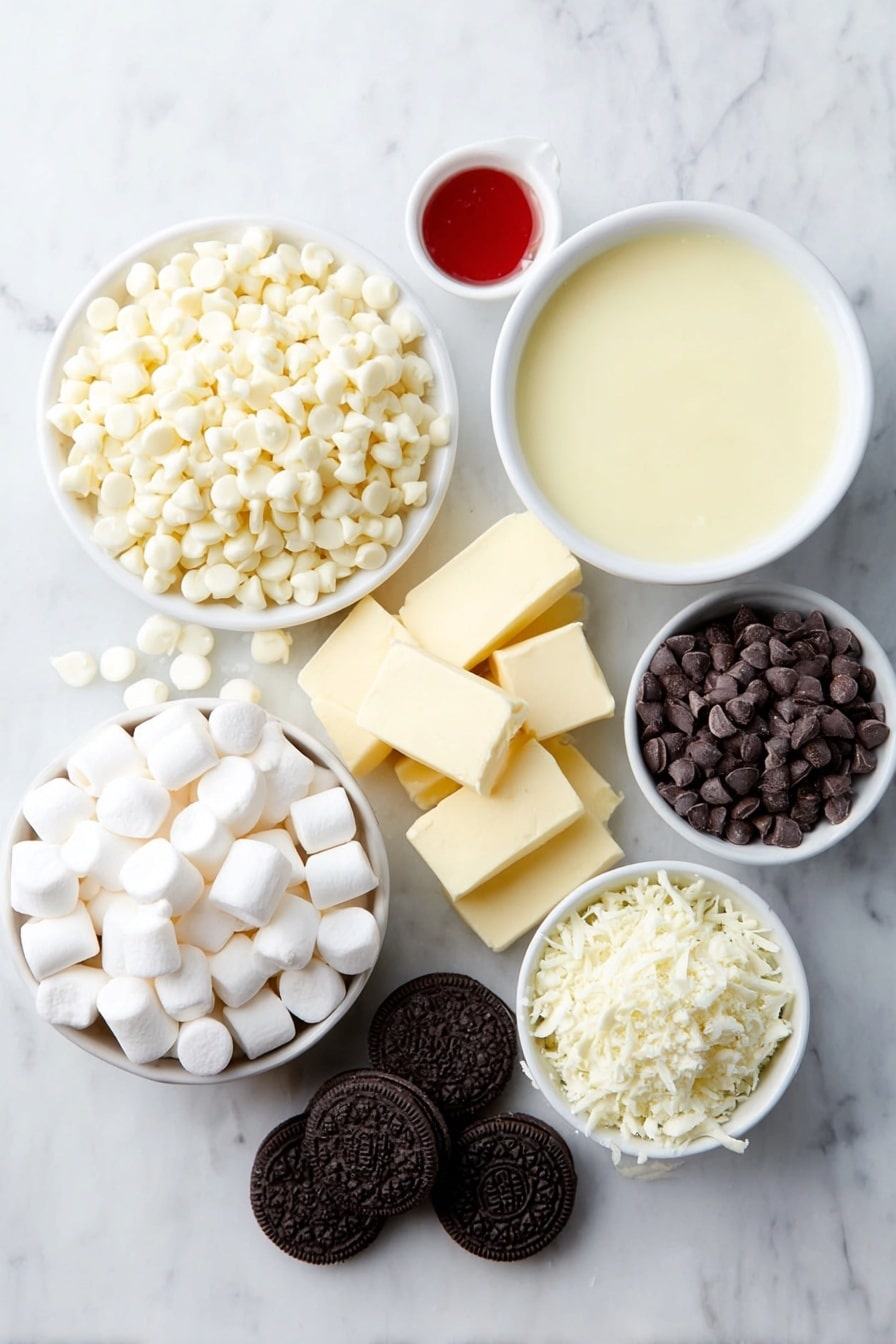
- Sweetened Condensed Milk: Make sure it’s sweetened, not evaporated, for the perfect creamy sweetness.
- White Chocolate Chips: These add rich creaminess and a subtle sweetness that pairs perfectly with red velvet.
- Semi-Sweet Chocolate Chips: Just a bit to balance the sweetness and add depth.
- Mini Marshmallows: Helps create that silky texture and adds a fun chewiness.
- Unsalted Butter: Adds richness without overwhelming the sweet flavors.
- Vanilla Extract: A splash enhances all the flavors beautifully.
- Red Food Coloring: For that iconic red velvet look—you can adjust the amount if you want it more or less vibrant.
- Oreos: I like to use crushed Oreos for plenty of cookie bits in every fudge piece.
Variations
I love how this Red Velvet Oreo Fudge Recipe is so versatile. You can keep it classic or tweak it to fit your cravings and dietary needs. Play around with these variations to make it your own!
- White Chocolate Only: For an extra creamy fudge, use only white chocolate chips—I’ve done this when I want a lighter flavor profile.
- Dark Chocolate Twist: Swap the semi-sweet chips for dark chocolate to add richness and a touch of sophistication.
- Nutty Surprise: Toss in chopped pecans or walnuts for some crunch—I like this especially around the holidays.
- Marshmallow-Free: If you’re not into marshmallows, just skip them; your fudge will be a little denser but still delicious.
- Vegan Version: Use dairy-free chocolate chips and vegan condensed milk alternative to make it plant-based—I’ve heard this works great!
How to Make Red Velvet Oreo Fudge Recipe
Step 1: Set Up and Prep Your Oreos
First things first: line an 8×8 inch baking pan with parchment paper, making sure the parchment hangs over the sides so you can lift your fudge out easily later. Next, toss your Oreos into a sealed plastic bag (I like freezer bags for durability) and crush them with a rolling pin or the back of a big spoon. You’ll want a mix of smaller crumbs and some chunkier pieces for texture. I keep a few extra Oreos on hand—sometimes I sprinkle more on top for that added crunch.
Step 2: Melt and Mix—the Magic Begins
Grab a medium saucepan and combine the sweetened condensed milk, white chocolate chips, semi-sweet chocolate chips, butter, and mini marshmallows. Turn your heat to low or medium-low—you want to melt these gently, stirring constantly. If your heat is too high, your chocolate can seize or burn, which I’ve learned the hard way! This process takes about 8 to 10 minutes; keep your arm moving and be patient, because the smooth, glossy mixture is well worth the wait.
Step 3: Depth of Flavor and Color
Once everything is melted and combined, remove the pan from heat. Stir in the vanilla extract and then add your red food coloring—start with a little less if you want a softer red, or add more for that bold velvet look. Be careful with the coloring; a little goes a long way, and it can stain your hands (speaking from experience, so gloves or a careful finger dip is best!). After that, fold in around 2 cups of the crushed Oreos gently so you don’t lose the cookie chunks.
Step 4: Spread and Chill
Pour the fudge mixture into your prepared pan and spread it evenly with a spatula. I like to tap the pan on the countertop a few times—it helps the fudge settle and removes any air pockets. Now sprinkle the remaining crushed Oreos on top and gently press them into the fudge for that irresistible cookie topping. Pop it into the fridge for about 4 hours until it’s fully set. If you’re in a rush, you can freeze it for 90 minutes, but chilling longer gives a better texture.
Step 5: Slice and Enjoy
Once your Red Velvet Oreo Fudge is firm, use the parchment overhang to lift it out of the pan and slice it into the size you prefer—I usually cut 1-inch squares to get about 64 pieces, perfect for sharing. Pro tip: use a sharp knife and wipe it clean between cuts for the neatest edges. Then, enjoy all the creamy, chocolatey, and Oreo-packed joy you just created!
Pro Tips for Making Red Velvet Oreo Fudge Recipe
- Low and Slow Melting: Melting your ingredients on low heat prevents scorching and ensures a silky smooth fudge every time.
- Using Parchment with Overhang: This simple trick makes removing the fudge from the pan a breeze without breaking your pieces.
- Crush Oreos with Texture: Mix fine crumbs with larger chunks so you get delicious Oreo bits that surprise you in every bite.
- Clean Knife Slices: Wiping your knife after each cut helps keep the fudge squares looking professional and neat.
How to Serve Red Velvet Oreo Fudge Recipe

Garnishes
When I serve this fudge, I often sprinkle a little extra crushed Oreos on top or even drape some white chocolate drizzle for a pretty finishing touch. Sometimes fresh raspberries or a tiny dusting of powdered sugar adds a lovely fresh contrast that brightens the rich fudge.
Side Dishes
This fudge pairs wonderfully with a cup of coffee or hot chocolate, making it ideal for cozy gatherings. If you’re serving a dessert platter, fresh fruit or simple vanilla ice cream beautifully balances the rich chocolate flavors and creamy texture.
Creative Ways to Present
For parties, I like to cut the fudge into bite-size cubes and arrange them on a decorative wooden board or tiered dessert stand alongside other small treats. Wrapping individual fudge pieces in wax paper and tying them with festive twine makes for adorable homemade gifts everyone loves.
Make Ahead and Storage
Storing Leftovers
I store leftover fudge in an airtight container in the fridge—this keeps it fresh for up to two weeks. If you like your fudge a bit firmer, refrigeration is your best bet. Just let the fudge come to room temperature for 10 minutes before serving to soften it up slightly.
Freezing
If you want to stock up or save leftovers, this fudge freezes beautifully. I wrap individual pieces in parchment and place them in a freezer-safe container or zip-top bag. When you’re ready to enjoy, thaw them overnight in the fridge for the best texture.
Reheating
Since fudge is best enjoyed at room temperature, I don’t recommend microwaving. Instead, just let frozen pieces thaw in the fridge and sit out for a few minutes before serving. This keeps the fudge soft and delicious without any melting or loss of texture.
FAQs
-
Can I use regular Oreo cookies instead of mini Oreos?
Absolutely! The recipe calls for crushed Oreos, so you can break down regular-sized Oreos into smaller pieces. Just be sure to crush them into bite-sized pieces and crumbs so they’ll distribute well in the fudge. I usually crush about 24-28 cookies to get the right amount of Oreo flavor and texture.
-
Is there a substitute for sweetened condensed milk?
Sweetened condensed milk is key for the creamy, sweet base of this fudge, so it’s best not to substitute it if possible. However, for a vegan or dairy-free alternative, you can try canned coconut milk mixed with sugar cooked down to a syrupy consistency, but it might change the final texture and flavor.
-
How do I avoid grainy fudge?
Melting the ingredients slowly on low heat while stirring constantly helps prevent graininess. Also, make sure to use good-quality chocolate chips and stir gently once you add the Oreos, so the mixture stays smooth. Avoid overheating or rushing the melting process.
-
Can I make this fudge without food coloring?
Yes, you can skip the red food coloring if you prefer, but the fudge won’t have that signature red velvet color. The fudge will still taste amazing, but it will look more like traditional white chocolate fudge with Oreo pieces.
-
How long does Red Velvet Oreo Fudge keep?
If stored properly in an airtight container in the fridge, your fudge will stay fresh for up to two weeks. It also freezes well for longer storage.
Final Thoughts
This Red Velvet Oreo Fudge Recipe holds a special place in my heart because it’s a perfect blend of creamy, crunchy, and just plain fun. Every time I make it, my family lights up with excitement—and honestly, I can’t blame them! It’s a simple recipe that feels indulgent and special, making it an ideal go-to for gifts, celebrations, or a sweet pick-me-up on any day. Give it a try—you’ll love making it as much as eating it, and once you do, you’ll have a new favorite dessert staple in your recipe box.
Print
Red Velvet Oreo Fudge Recipe
- Prep Time: 15 minutes
- Cook Time: 10 minutes
- Total Time: 4 hours 25 minutes
- Yield: 64 pieces
- Category: Dessert
- Method: Stovetop
- Cuisine: American
- Diet: Vegetarian
Description
This Red Velvet Fudge with Oreos recipe combines the rich, creamy texture of classic fudge with the distinctive flavor of red velvet and the delightful crunch of crushed Oreos. Perfectly sweet and colorful, this no-bake treat is ideal for parties, holidays, or anytime you crave a decadent dessert that’s easy to make and sure to impress.
Ingredients
Fudge Base
- 1 can sweetened condensed milk, 14 oz.
- 2 cups white chocolate chips
- 1 cup semi-sweet chocolate chips
- 2 cups mini marshmallows
- 2 tablespoons unsalted butter, sliced into smaller pieces
- ½ teaspoon vanilla extract
- 1 teaspoon red food coloring, more or less as desired
Add-ins
- 2½ cups crushed Oreos (about 24-28 Oreos), more as desired
Instructions
- Prepare the Pan and Oreos: Line an 8×8 inch baking pan with parchment paper, ensuring there is enough overhang on the sides for easy removal later. Using a plastic bag and a large spoon, crush the Oreos into small pieces and set aside.
- Melt Fudge Ingredients: In a medium saucepan, combine the sweetened condensed milk (ensure it is not evaporated milk), white chocolate chips, semi-sweet chocolate chips, sliced butter pieces, and mini marshmallows. Heat on low to medium-low, stirring constantly to prevent burning, until the mixture is completely melted and smooth. This process should take approximately 8-10 minutes.
- Add Flavor and Color: Remove the saucepan from heat. Stir in the vanilla extract and red food coloring until the color is evenly distributed. Fold in about 2 cups of the crushed Oreos gently to incorporate the cookie texture within the fudge.
- Set the Fudge: Pour the fudge mixture into the prepared parchment-lined baking pan and spread it evenly. Tap the pan several times on the countertop to help settle the fudge and eliminate any air bubbles. Sprinkle the remaining Oreos on top, pressing them gently into the fudge to ensure they stick.
- Chill and Serve: Refrigerate the fudge for about 4 hours, or until fully set and firm to the touch. Once chilled, lift the fudge out using the parchment overhang, slice into your desired sizes (1 inch pieces yield about 64 pieces), and serve. Enjoy this rich and festive treat!
Notes
- Use sweetened condensed milk, not evaporated milk, for the correct fudge texture.
- Stir constantly while melting to avoid burning the chocolate and scorching the pan.
- Adjust the amount of red food coloring based on your preferred intensity of red velvet color.
- Crushing Oreos finely will blend more evenly in the fudge; coarser chunks give more crunch.
- Store leftovers in an airtight container in the refrigerator for up to a week.
Nutrition
- Serving Size: 1 piece (approximately 1 inch square)
- Calories: 150
- Sugar: 22g
- Sodium: 50mg
- Fat: 7g
- Saturated Fat: 4.5g
- Unsaturated Fat: 2g
- Trans Fat: 0g
- Carbohydrates: 23g
- Fiber: 1g
- Protein: 2g
- Cholesterol: 15mg


