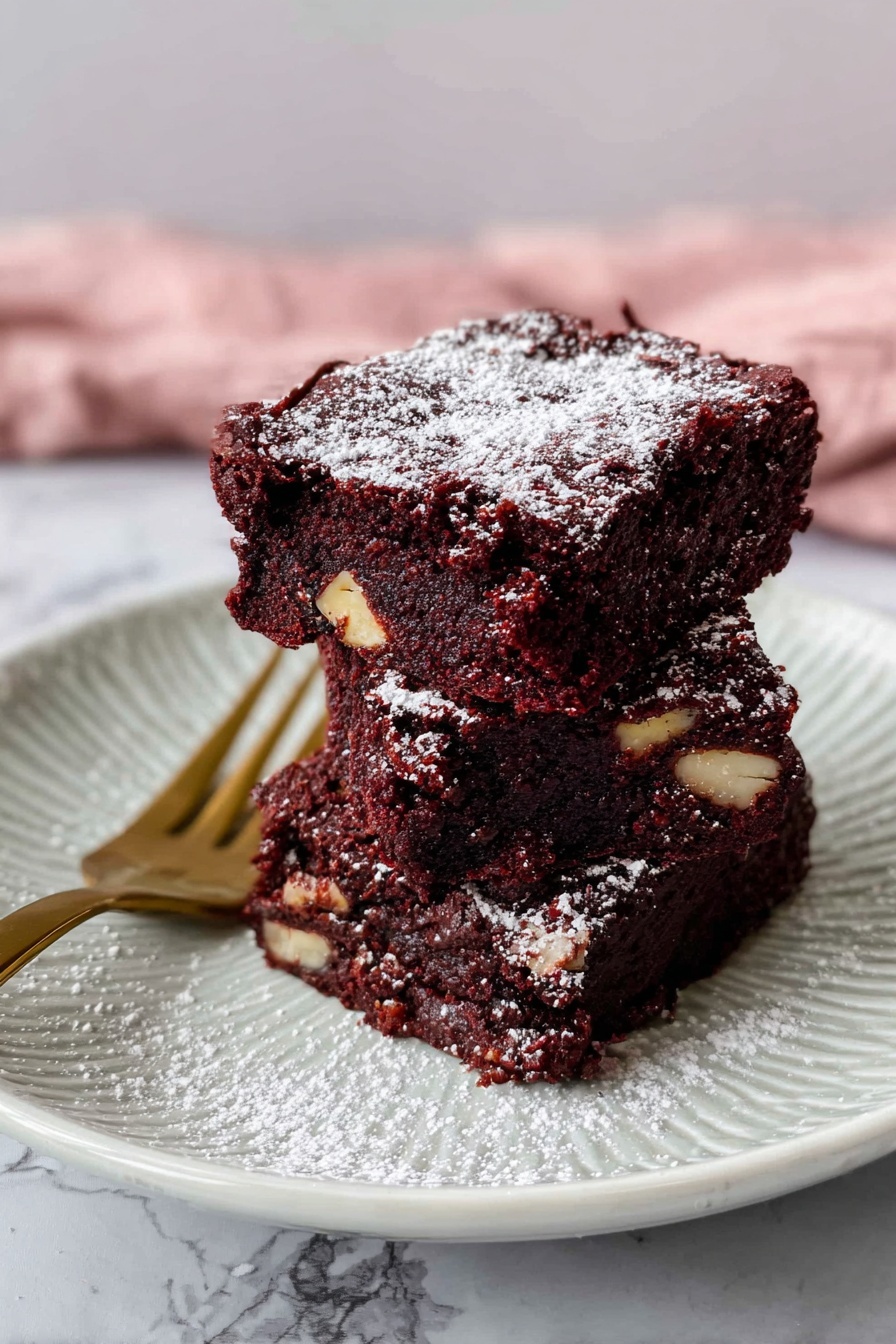
If you’re a fan of rich, chocolatey treats with a twist, I can’t wait to share this Red Velvet Brownies with White Chocolate Chips Recipe that has quickly become a staple in my kitchen. These brownies bring together the deep, velvety texture of red velvet cake and the gooey, sweet pops of white chocolate chips, creating a dessert that’s both visually stunning and incredibly delicious. Stick around, because this recipe is fan-freaking-tastic and super approachable for any level of baker!
Why You’ll Love This Recipe
- Perfect Texture: These brownies come out moist and fudgy with just the right amount of chewiness, thanks to the cocoa and vinegar combo.
- Beautiful Contrast: The red velvet base paired with creamy white chocolate chips makes every bite pop in both flavor and color.
- Easy to Make: Even if you’re not a baking pro, this recipe is straightforward with simple steps and common ingredients.
- Versatile Serving Options: Dress them up with icing sugar or bake in fun shapes for parties and special occasions.

Ingredients You’ll Need
The magic really happens when you combine classic red velvet ingredients with a hint of cocoa and chunks of white chocolate to bring sweetness and melt-in-your-mouth moments. Grab the freshest ingredients you can find to get the best results.
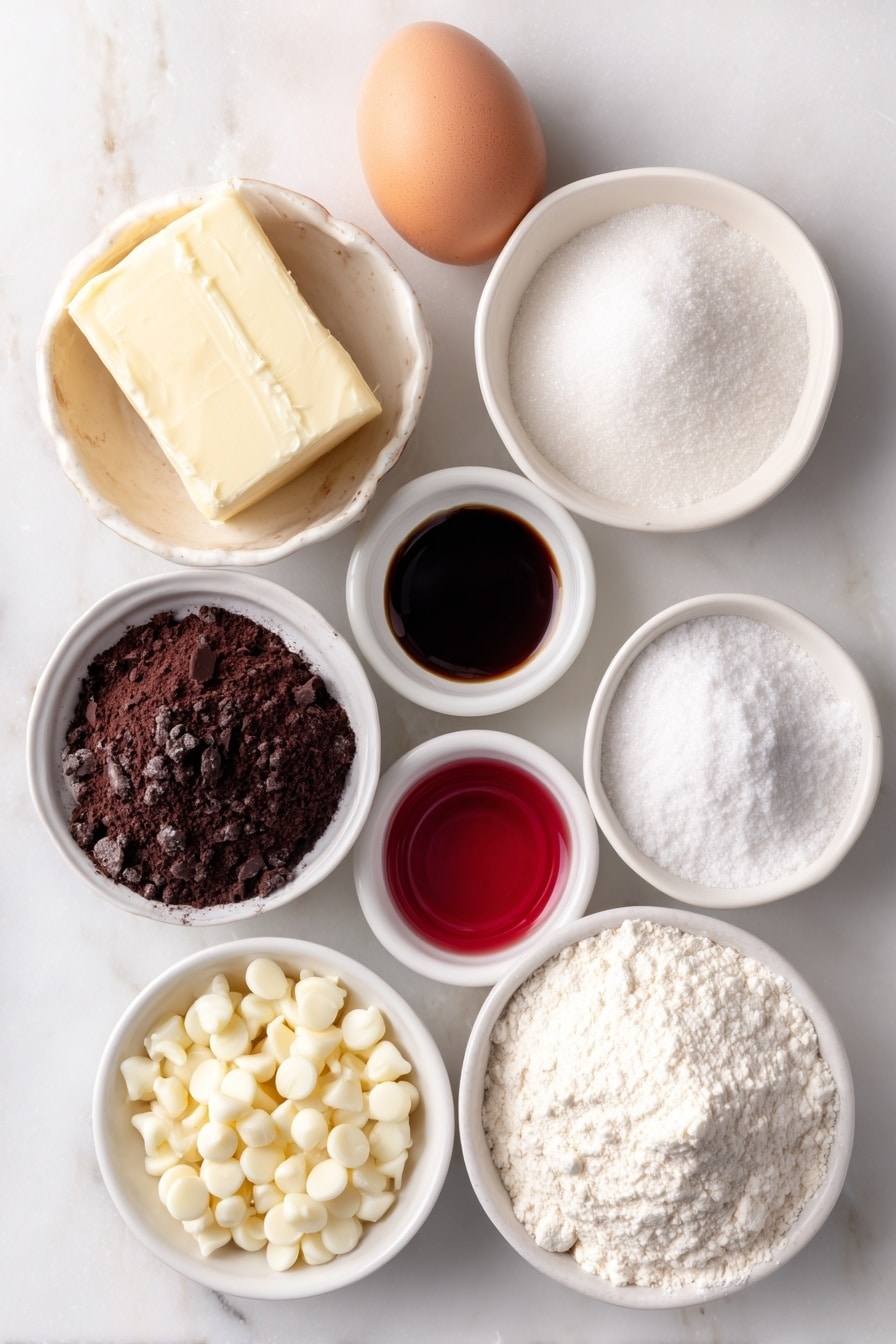
- Butter: Use unsalted, melted butter for rich flavor; it helps create that perfect fudgy texture.
- Sugar: Regular granulated sugar works beautifully to sweeten just right.
- Egg: Acts as a binder — make sure it’s at room temperature to blend seamlessly.
- Cocoa Powder: Adds that subtle chocolate kiss crucial for red velvet flavor; don’t skip it!
- Vanilla Extract: Enhances depth and rounds out the flavors.
- Red Food Coloring: I recommend gel food coloring for vibrant red without thinning the batter.
- Plain Flour: Provides structure; sift it to avoid lumps and get a tender crumb.
- Baking Powder: Gives a gentle lift to keep brownies from being too dense.
- Salt: Balances sweetness and amplifies flavors.
- White Vinegar: Reacts with baking powder and cocoa to enhance the velvet texture and tangy note.
- White Chocolate Chips: The star complementary ingredient – creamy and sweet, adding delightful pockets of melt.
Variations
I love tweaking this Red Velvet Brownies with White Chocolate Chips Recipe depending on what I’m in the mood for or what I have on hand. It’s such a flexible base that personalizing it is part of the fun!
- Nutty Twist: Adding chopped pecans or walnuts gives a satisfying crunch that my family adores.
- White Chocolate Swap: Try white chocolate chunks instead of chips for bigger melty pockets—super indulgent!
- Dairy-Free Version: Substitute the butter with coconut oil and use dairy-free white chocolate chips for a vegan-friendly treat.
- Extra Fudgy: Use half brown sugar and half granulated sugar for a deeper caramel flavor and moist crumb.
How to Make Red Velvet Brownies with White Chocolate Chips Recipe
Step 1: Prep and Preheat
Start by preheating your oven to 180°C (fan bake) and lining a 20cm square brownie tin with baking paper. This step is crucial—lining the pan makes for easy removal and cleaner edges when you slice your brownies.
Step 2: Mix Butter and Sugar, Then Add Flavors
Whisk the melted butter and sugar together until they’re well combined and smooth. Then add in the egg, mixing well before moving on. Next, stir in the cocoa powder, vanilla extract, and your red food coloring—remember, gel colors pack more pigment with less liquid, so start with 1 tsp and add more if you want a deeper red.
Step 3: Combine Dry Ingredients and Vinegar
Gently fold in the plain flour, baking powder, and salt until everything just comes together – don’t overmix! Lastly, pour in the white vinegar and mix briefly. This acidic touch activates the baking powder and intensifies that understated tang that red velvet is famous for.
Step 4: Add White Chocolate Chips
Stir in the white chocolate chips evenly throughout the batter. These little gems melt slightly while baking, creating little pockets of creamy sweetness that your taste buds will thank you for.
Step 5: Bake to Perfection
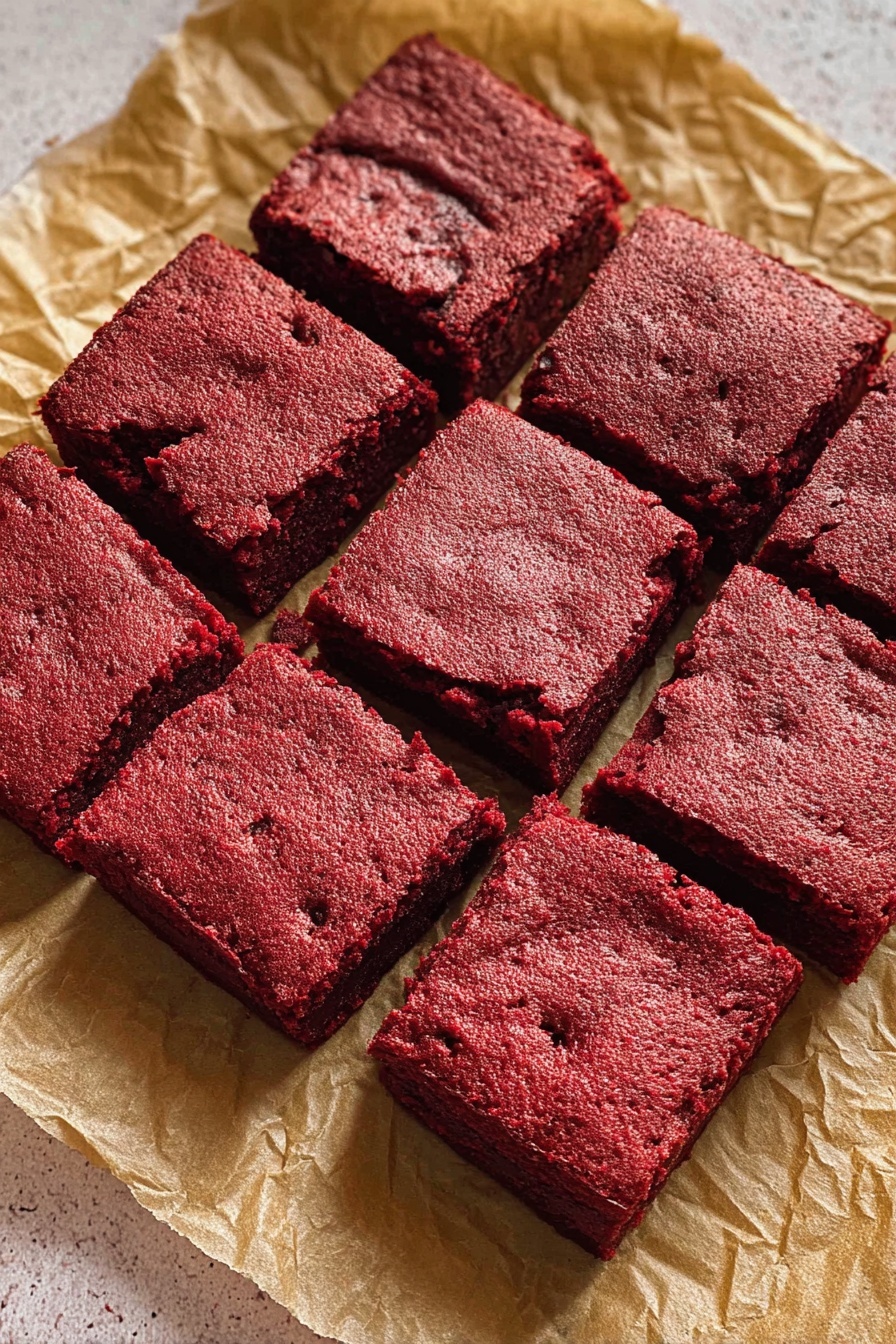
Pour the batter into your prepared pan and smooth it out gently to the edges. Baking time is about 24-28 minutes—look for a crisp top and a slightly soft center (a toothpick inserted will have moist crumbs but no raw batter). Don’t overbake or they’ll dry out!
Step 6: Cool and Enjoy
Once out of the oven, let your brownies cool completely in the tin to set the texture. Then, cut into squares or use cookie cutters for fun shapes if you’re making these for parties. A light dusting of icing sugar amps up the presentation and adds a festive touch.
Pro Tips for Making Red Velvet Brownies with White Chocolate Chips Recipe
- Use Gel Food Coloring: I learned gel works best to keep the batter thick and vibrantly red without watering it down.
- Don’t Overmix the Batter: Overworking flour can toughen the brownies; mix just until combined for tender results.
- Watch Baking Time Closely: Check at 24 minutes and adjust based on your oven—moist centers make fudgy brownies.
- Let Cool Completely: Cutting too soon can cause your brownies to crumble; patience pays off with neat slices.
How to Serve Red Velvet Brownies with White Chocolate Chips Recipe
Garnishes
I often dust my brownies with icing sugar for a simple, classic look. Sometimes, I drizzle melted white chocolate or sprinkle edible glitter for special occasions—the little touches really elevate the dessert and make it feel festive.
Side Dishes
These brownies pair wonderfully with a scoop of vanilla bean ice cream or a dollop of whipped cream to balance their richness. For a cozy vibe, serve with a hot cup of coffee or a creamy latte.
Creative Ways to Present
For birthdays or holiday parties, I like cutting the brownies into heart or star shapes using cookie cutters. Layering them in a clear glass jar with whipped cream and berries creates an eye-catching dessert parfait. Trust me, your guests will be wowed!
Make Ahead and Storage
Storing Leftovers
I keep leftover brownies in an airtight container at room temperature for up to 3 days. This keeps them moist and fresh, though if your kitchen’s warm, popping them in the fridge helps extend their life a bit.
Freezing
Freeze any extras by wrapping individual squares tightly in plastic wrap and placing them in a freezer bag. When I want a treat after a busy week, I thaw them overnight in the fridge—they taste almost as good as fresh!
Reheating
To warm these up, I like to microwave them for 10-15 seconds or pop them in a low oven (about 150°C) for 5 minutes. This revives that gooey texture and brings back the fresh-baked feeling.
FAQs
-
Can I use regular chocolate chips instead of white chocolate chips?
Absolutely! Regular or semi-sweet chocolate chips will give the brownies a different but equally delicious flavor, making them a bit richer and more chocolate-forward. Just keep the amount the same.
-
What’s the purpose of vinegar in the recipe?
The white vinegar reacts with baking powder and cocoa powder to enhance the signature tang and tenderness of red velvet. It’s key to achieving that classic velvet-like texture and a touch of subtle sharpness in flavor.
-
How do I know when my red velvet brownies are done baking?
Look for a crisp top and slightly set edges while the center remains a bit soft. Insert a toothpick—it should come out with moist crumbs but no wet batter. Overbaking will dry them out.
-
Can I make these brownies vegan?
Yes, by swapping butter for coconut oil, using a vegan egg substitute like flax egg, and ensuring you have dairy-free white chocolate chips, you can make a vegan version. The texture might be slightly different but still delicious.
Final Thoughts
I absolutely love how this Red Velvet Brownies with White Chocolate Chips Recipe turns out every single time. It’s one of those crowd-pleasers that makes celebrations extra special but is simple enough for a weekend treat. When I first tried making red velvet brownies, I struggled with dryness and dull colors — but with the right balance of ingredients and a few tips I’m sharing here, you’ll find your brownies both beautiful and irresistibly delicious. Give this recipe a go, and trust me, your friends and family will be asking for seconds (and the recipe, too!). Happy baking!
Print
Red Velvet Brownies with White Chocolate Chips Recipe
- Prep Time: 30 minutes
- Cook Time: 28 minutes
- Total Time: 58 minutes
- Yield: 12 brownies
- Category: Baking
- Method: Baking
- Cuisine: American
Description
This Red Velvet Brownie recipe offers a delicious twist on traditional brownies by incorporating rich cocoa, vibrant red food coloring, and creamy white chocolate chips. Baked to a perfect balance of a crisp top and a moist, fudgy center, these brownies are ideal for sharing at gatherings or enjoying as a decadent treat.
Ingredients
Dry Ingredients
- 1 cup plain flour
- 2 Tbsp cocoa powder
- ½ tsp baking powder
- ¼ tsp salt
Wet Ingredients
- 150g butter, melted
- 1 cup sugar (220g)
- 1 egg
- 1 tsp vanilla extract
- 1 tsp white vinegar
- 1-2 tsp red food colouring
Add-ins and Toppings
- 100g white chocolate chips
- Icing sugar, to serve
Instructions
- Preheat and prepare tin: Preheat the oven to 180°C fan bake and line a 20cm square brownie tin with baking paper to prevent sticking.
- Mix wet ingredients: Whisk together the melted butter and sugar until combined. Add the egg, cocoa powder, vanilla extract, and red food colouring, whisking thoroughly after each addition to ensure a smooth, evenly colored batter.
- Incorporate dry ingredients: Sift or add the plain flour, baking powder, and salt to the mixture and mix until just combined to avoid overmixing and tough brownies. Then pour in the white vinegar and mix gently to activate the leavening.
- Add white chocolate chips: Fold in the white chocolate chips evenly throughout the batter for pockets of sweetness.
- Pour and smooth batter: Transfer the batter to the lined brownie tin, using a spatula to gently smooth it out evenly to the edges for uniform baking.
- Bake: Bake in the preheated oven for 24-28 minutes until the top is crisp and the center is just set, taking care not to overbake to maintain a fudgy texture.
- Cool and serve: Allow the brownies to cool completely in the tin before cutting into squares or fun shapes using a cookie cutter. Dust with icing sugar just before serving for a festive finish.
Notes
- Ensure not to overmix the batter after adding the flour to keep the brownies tender.
- Adjust the amount of red food colouring to achieve your preferred shade of red.
- Use white vinegar as it reacts with baking powder to help create a lighter texture.
- Allow the brownies to cool fully for cleaner cuts and better flavor development.
- Store leftovers in an airtight container at room temperature for up to 3 days or refrigerate for up to a week.
Nutrition
- Serving Size: 1 brownie (approx. 60g)
- Calories: 220
- Sugar: 18g
- Sodium: 110mg
- Fat: 12g
- Saturated Fat: 7g
- Unsaturated Fat: 4g
- Trans Fat: 0g
- Carbohydrates: 27g
- Fiber: 1g
- Protein: 2g
- Cholesterol: 40mg


