If you love cozy holiday flavors but want something quick and fuss-free, you’re going to adore this No-Bake Gingerbread Icebox Cake Recipe. It’s got that perfect combo of spicy gingersnap cookies stacked with a dreamy, caramel-spiced cream that sets in the fridge—no oven required! I first tried this on a chilly afternoon when I was craving all the gingerbread vibes but without the hours of baking. Trust me, this dessert will make your whole house smell festive and has become a favorite for unexpected guests or last-minute celebrations.
Why You’ll Love This Recipe
- No baking required: Perfect for when you want holiday flavors without heating up the kitchen.
- Flavor-packed layers: The combination of gingersnap crunch and creamy caramel spiced filling is irresistible.
- Make-ahead friendly: Prep it hours or even a day in advance, making your day-of stress-free.
- Impressive yet simple: Looks like a fancy dessert but comes together quickly—your guests will be amazed!

Ingredients You’ll Need
Each ingredient here plays a role in building that perfect balance of spice, sweetness, and creaminess. When shopping, I recommend using a good-quality gingersnap cookie—thin and crispy works best. Also, pick a luscious caramel or dulce de leche that you enjoy tasting on its own since it really shines in the filling.

- Cream cheese: Softened cream cheese adds tang and richness to the filling; make sure it’s at room temp for smooth mixing.
- Confectioners’ sugar: Adds a gentle sweetness and helps the cream cheese blend flawlessly into the cream.
- Caramel or dulce de leche: This is your secret sweetness and depth-booster; jarred caramel works beautifully for convenience.
- Pumpkin pie or gingerbread spice blend: This packs the warm, spicy notes that make this dessert feel like a holiday hug.
- Heavy whipping cream: Cold cream whips up nicely, giving lightness to the filling that balances those crunchy cookies.
- Thin gingersnap cookies: The essential crunch and spice—thin cookies absorb moisture better and soften just right.
- Piping bag with star tip: For neat layers and pretty rosettes on top; it’s easier than trying to spread the cream with a knife.
Variations
I love to tweak this No-Bake Gingerbread Icebox Cake Recipe depending on the season or occasion—after all, recipes are happiest when they’re personalized! Feel free to swap spices or try different toppings.
- Use different spices: Sometimes I mix in a pinch of cloves or nutmeg to amp up the warmth or swap the pumpkin pie spice for just ginger for a sharper zing.
- Switch up the caramel: I once used a salted caramel spread which gave a delightful sweet-salty finish that my family went crazy for.
- Try chocolate drizzle: If you love chocolate, melt some dark chocolate to drizzle over the top instead of caramel—still heavenly!
- Make it mini portions: You can also assemble them into one big cake or mini individual stacks for parties, which make adorable presentations.
How to Make No-Bake Gingerbread Icebox Cake Recipe
Step 1: Whip Up the Creamy Spiced Filling
Start by beating the softened cream cheese with confectioners’ sugar, caramel or dulce de leche, and your pumpkin pie or gingerbread spice blend until silky smooth—this usually takes about 2 minutes on medium speed. This base is where the magic begins! Then, add cold heavy whipping cream and whisk until you see medium peaks form, roughly 3 minutes. The mixture should be fluffy enough to pipe smoothly but still hold shape. Transfer this delicious filling into your piping bag fitted with a star tip—it really helps make those layers look gorgeous!
Step 2: Assemble Your Cookie Layers Like a Pro
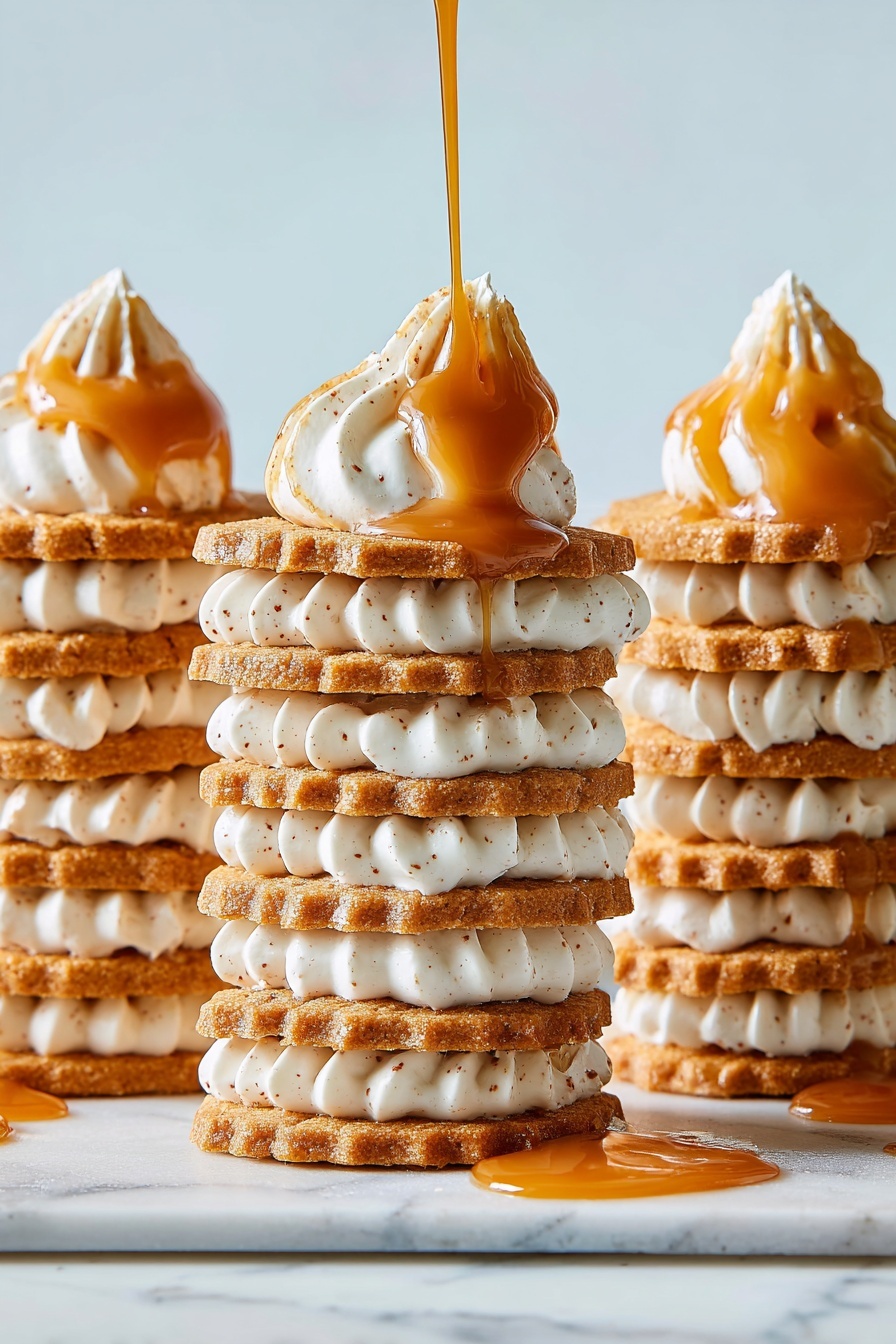
Lay out 12 thin gingersnap cookies on a baking sheet. Pipe a zigzag layer of your cream on each cookie—don’t be shy, that extra cream makes it luscious! Top each with a second cookie, press gently so they stick, and pipe more cream on top. Repeat layering until you have five cookies stacked, finishing with cream rosettes on the top cookie. This stacking method ensures even softening and that beautiful, creamy look. Then pop them in the fridge to set for about an hour.
Step 3: Give It Time to Soften Perfectly
After the initial setting, cover your cakes loosely with plastic wrap and refrigerate for at least 3 hours, ideally overnight. This patience pays off big time—the cookies soak up the spiced cream and become melt-in-your-mouth soft without losing their structure. I discovered that the longer it sits, the better the flavors meld and texture improves, so don’t rush!
Step 4: Drizzle and Serve with Love
Right before serving, drizzle extra caramel sauce over the tops for that irresistible shine and sweet note. This finishing touch always gets compliments. Plus, that sticky caramel pairs so well with the gingerbread spices. Serve chilled and enjoy the smiles!
Pro Tips for Making No-Bake Gingerbread Icebox Cake Recipe
- Room temperature cream cheese: I always let my cream cheese sit out for about 30 minutes before mixing—it makes blending so much smoother and avoids lumps.
- Use cold cream: Cold heavy cream whips up faster and achieves better peaks for the fluffy filling.
- Don’t skip the piping bag: It makes layering quick, tidy, and beautifully decorative, especially for those rosettes on top.
- Patience is key: Letting the cakes chill overnight transforms the cookies from crunchy to tender so they melt in your mouth.
How to Serve No-Bake Gingerbread Icebox Cake Recipe
Garnishes
I love topping these little cakes with a fresh sprinkle of crushed gingersnap crumbs or a dusting of cinnamon for extra spice flare. Sometimes, I pop a small sprig of fresh rosemary or a star anise on top for that festive touch—it looks gorgeous and smells amazing too!
Side Dishes
This dessert pairs wonderfully with a simple cup of hot cider or chai tea. If you want to round out a holiday spread, consider serving alongside fresh fruit salad or spiced nuts to keep the flavor theme consistent and balanced.
Creative Ways to Present
For parties, I like to build a mini cake tower on a pretty platter and drizzle caramel over the whole stack last minute—guests love the drama! Another fun idea is layering the cake pieces in clear individual glass jars for gifting or easy grab-and-go desserts. It’s a crowd-pleaser every time!
Make Ahead and Storage
Storing Leftovers
These icebox cakes keep beautifully in the fridge for up to 3 days. I store mine in an airtight container to prevent any absorption of other fridge odors and to keep the cream fresh. The cookies stay tender and the flavors improve, so sometimes leftovers taste even better!
Freezing
I’ve frozen these cakes wrapped tightly in plastic wrap and placed in a freezer-safe container. When thawed overnight in the fridge, they maintain their texture remarkably well. Just know that the whipped cream might be a little softer after freezing, but still delicious.
Reheating
No reheating needed here! This dessert is best served chilled. If you prefer it a bit less cold, just set it out at room temperature for 15 minutes before serving to soften it up slightly.
FAQs
-
Can I make No-Bake Gingerbread Icebox Cake Recipe ahead of time?
Absolutely! In fact, making it several hours or even a day ahead improves the texture as the cookies soften perfectly. Just keep it covered and refrigerated.
-
What can I substitute for gingersnap cookies?
You can try thin gingerbread cookies or crisp graham crackers with a pinch of added ginger or cinnamon to keep the spicy flavor. Just make sure they’re firm enough to hold the layers.
-
Can I use whipped topping instead of heavy cream?
I recommend using real heavy whipping cream for the best texture and flavor, as it whips up nicely with the cream cheese and holds the layers together better.
-
How long does this dessert last in the fridge?
It stays good for about 3 days refrigerated. Beyond that, the cream might start to break down and the cookies could become overly soft.
-
Can I double this recipe for a larger crowd?
Definitely! Just double your ingredients and assemble in batches. If you make a large cake, a big glass dish works great for layering like a traditional icebox cake.
Final Thoughts
This No-Bake Gingerbread Icebox Cake Recipe has become my go-to when I want a show-stopping dessert without the fuss of baking and cooling times. I love how the gingerbread spices mingle with smooth caramel and soft cream, creating that nostalgic holiday feeling in every bite. Give it a try—you’ll enjoy the ease, the flavor, and the happy smiles it brings at your table. Trust me, once you make this recipe, it’ll be your new seasonal favorite too!
Print
No-Bake Gingerbread Icebox Cake Recipe
- Prep Time: 20 minutes
- Cook Time: 0 minutes
- Total Time: 4 hours 25 minutes
- Yield: 12 servings
- Category: Dessert
- Method: No-Cook
- Cuisine: American
- Diet: Vegetarian
Description
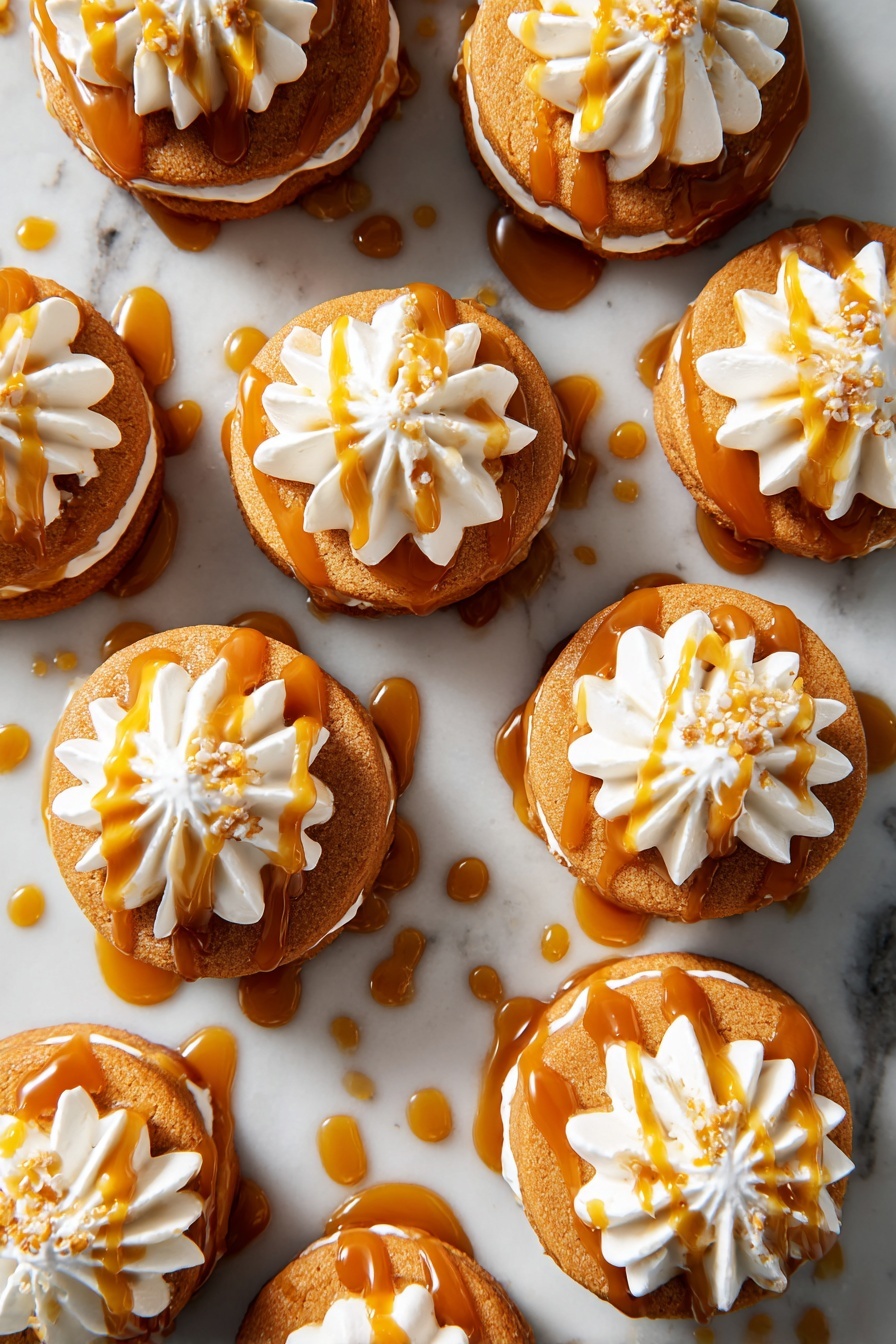
These Mini No-Bake Gingerbread Icebox Cakes are a delightful and easy dessert perfect for the holiday season. Layers of ginger snap cookies and a creamy caramel-spiced filling come together without baking, creating a soft, flavorful treat that is sure to impress. The cakes are beautifully finished with rosettes of whipped cream and drizzled caramel for an extra touch of indulgence.
Ingredients
Filling
- 4 oz. cream cheese, softened
- 2 tbsp. confectioners’ sugar
- 2 tbsp. jarred caramel or dulce de leche, plus more for drizzling
- 1/4 tsp. pumpkin pie or gingerbread spice blend
- 1 1/2 cups cold heavy whipping cream
Cake
- 2 (5.25-oz.) boxes thin gingersnap cookies (about 60 cookies)
Tools
- A large piping bag with an open star or French star tip (between 1/2″ and 3/4″ diameter)
Instructions
- Prepare the Cream Filling: In the large bowl of a stand mixer fitted with the whisk attachment, beat together the softened cream cheese, confectioners’ sugar, caramel sauce, and pumpkin pie spice on medium speed until the mixture is smooth and well combined, about 2 minutes. Then add the cold heavy whipping cream and continue beating on medium speed until medium peaks form, about 3 minutes. Transfer this whipped cream mixture to a piping bag fitted with a star tip.
- Assemble the Cakes: On a baking sheet, arrange 12 gingersnap cookies to form the base layer. Pipe a generous zigzag layer of the cream filling on each cookie. Top each with a second cookie, pressing gently to sandwich the cream. Repeat the layering two more times, finishing with a fifth cookie on top. Pipe a large rosette or multiple smaller rosettes of cream on the top cookie for decoration.
- Set the Cream: Refrigerate the assembled icebox cakes for about 1 hour to allow the cream to set and stabilize the layers.
- Soften the Cookies: Loosely cover the cakes with plastic wrap and continue refrigerating for at least 3 hours or up to overnight. This step softens the gingersnap cookies, giving the cake a tender, moist texture.
- Serve: Before serving, drizzle additional caramel over the top of each mini cake to add extra flavor and a beautiful finishing touch.
Notes
- For best results, ensure the cream cheese is fully softened before mixing to avoid lumps.
- Use thin gingersnap cookies for even layering and proper softening.
- The cakes can be prepared a day ahead and refrigerated overnight for maximum cookie softness and flavor melding.
- Substitute dulce de leche or caramel sauce depending on flavor preference or availability.
- If you don’t have a piping bag, you can spread the cream with a small spoon or spatula, though piping adds a decorative finish.
Nutrition
- Serving Size: 1 mini cake
- Calories: 220
- Sugar: 15g
- Sodium: 110mg
- Fat: 15g
- Saturated Fat: 9g
- Unsaturated Fat: 5g
- Trans Fat: 0g
- Carbohydrates: 20g
- Fiber: 1g
- Protein: 3g
- Cholesterol: 55mg


