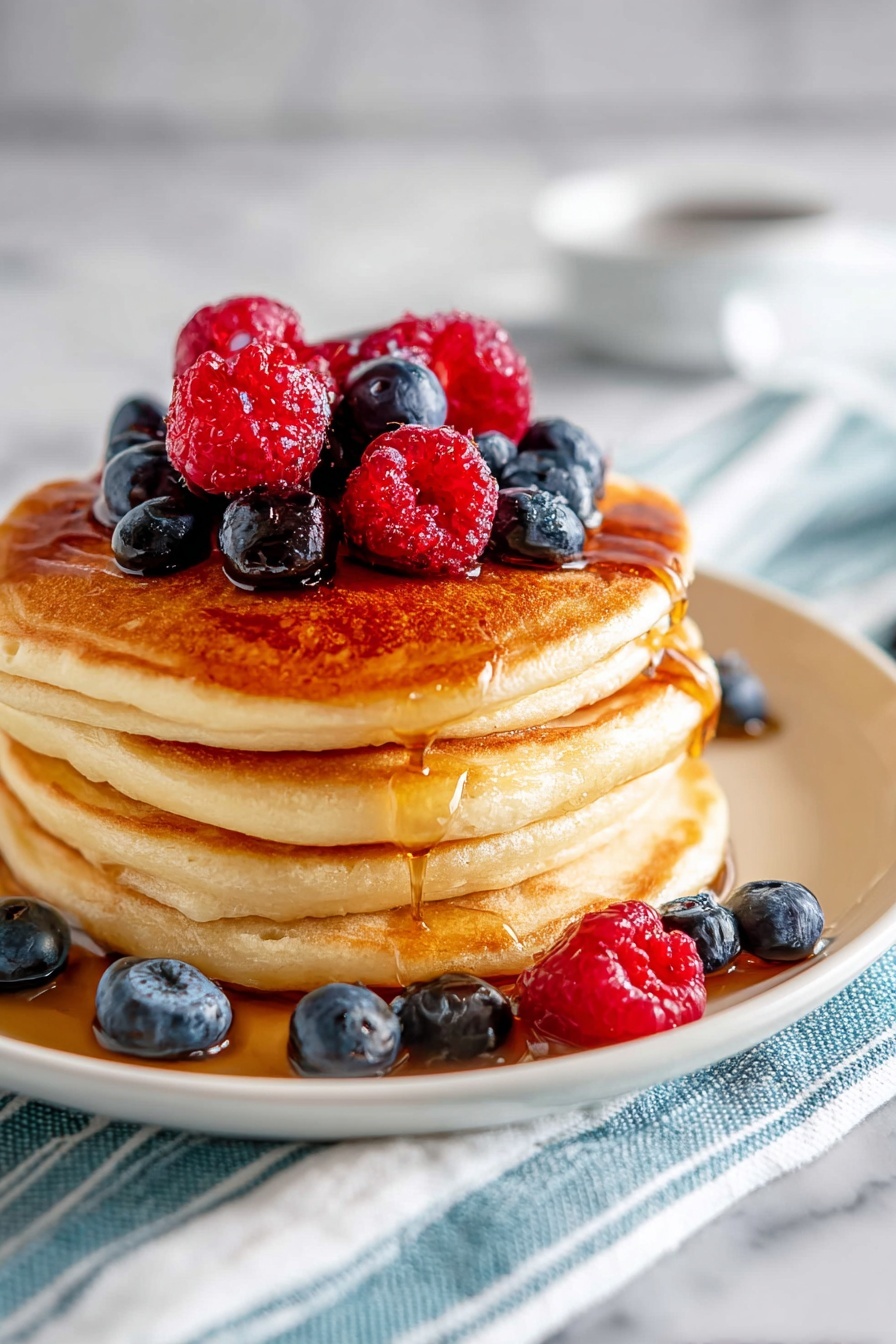
If you’re craving that warm, comforting breakfast that tastes like a hug from your childhood, you’re going to absolutely love this Mom’s Classic Buttermilk Pancakes Recipe. I’ve made these pancakes so many times, and honestly, they never fail to bring a smile to my face (and my family’s!). Fluffy, tender, and with just the right amount of tang from the buttermilk, this recipe quickly became my go-to for weekend brunches or whenever I want to impress without the fuss. Let me walk you through it—it’s easier than you think, and the results are just fan-freaking-tastic!
Why You’ll Love This Recipe
- Super Fluffy Pancakes: The buttermilk and baking soda create the perfect lift and tenderness every time.
- Simple Ingredients: No fancy add-ins needed; just pantry staples you probably already have.
- Failsafe Technique: Resting the batter and careful flipping means pancakes that aren’t flat or tough.
- Family Favorite: This recipe has stood the test of time in my house—everyone asks for seconds!

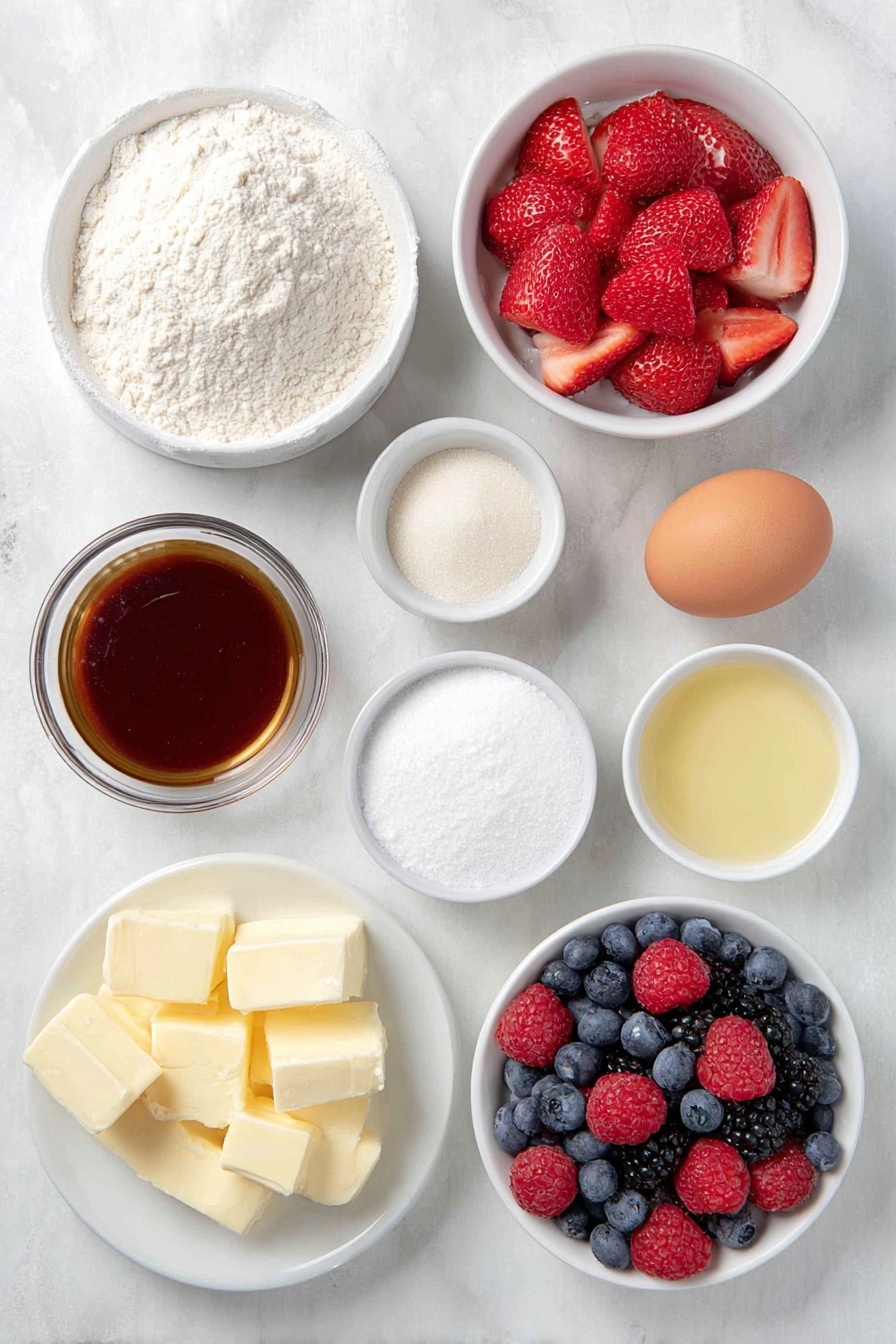
Ingredients You’ll Need
The magic of Mom’s Classic Buttermilk Pancakes Recipe really shines through because of the simple yet perfect combination of ingredients. Choosing fresh buttermilk and quality flour makes a surprising difference, and getting the butter just right sets the tone for your batter’s flavor and texture.
- All-purpose flour: Using plain flour keeps the texture tender but not cakey, perfect for fluffy pancakes.
- Baking soda: This is the secret lift agent reacting with the buttermilk to give lightness and rise.
- Salt: Just a little pinch to balance the sweetness and bring out flavors.
- Granulated sugar: Adds a subtle touch of sweetness without overpowering the batter.
- Buttermilk: The star ingredient! Its acidity works magic with baking soda and gives pancakes their classic tang.
- Large egg: Provides structure and richness, binding all ingredients beautifully.
- Butter: Melted and slightly cooled, it adds moisture and a buttery depth—but don’t use it hot or the egg might cook prematurely!
- Pure vanilla extract (optional): I like adding this for a hint of warmth and sweetness, but it’s totally okay to skip it.
- Nonstick cooking spray or vegetable oil: For a perfect, mess-free pancake flip with no sticking.
Variations
I love how this Mom’s Classic Buttermilk Pancakes Recipe gives you a solid base that’s flexible for any flavor twist you’re craving. Sometimes I add berries or chocolate chips right to the batter, and other times I keep it classic to let the buttermilk shine through.
- Blueberry Pancakes: Fold fresh or frozen blueberries into the batter for a juicy, sweet surprise in every bite—I promise, your family will go crazy for this!
- Vegan Twist: Swap the egg for a flax egg and use plant-based milk mixed with a splash of apple cider vinegar instead of buttermilk for a dairy-free version.
- Gluten-Free Option: Use a gluten-free all-purpose flour blend in equal amounts; the pancakes remain just as fluffy.
- Cinnamon-Maple Flavor: Stir 1 teaspoon cinnamon into the dry ingredients before mixing for that cozy, comforting fall vibe.
How to Make Mom’s Classic Buttermilk Pancakes Recipe
Step 1: Mix Dry Ingredients Gently
Start by whisking together the flour, baking soda, salt, and sugar in a large bowl. This blends your leavening agent evenly, so your pancakes rise perfectly. I always take a moment here to sift or whisk thoroughly—no one wants a clump of baking soda surprising them!
Step 2: Add Buttermilk and Wet Ingredients
Pour in your buttermilk and whisk gently until the dry ingredients just get moistened. Then crack in your egg, add the melted butter (make sure it’s cooled a bit or you’ll scramble your egg), and vanilla if you’re using it. Whisk just until combined; a slightly lumpy batter is exactly what you want here. Over-mixing can toughen the pancakes, so resist the urge to overdo it!
Step 3: Let the Batter Rest
Here’s a trick I discovered over time—letting the batter sit for 5 to 10 minutes before cooking lets the flour absorb the liquid and produces lighter pancakes. I rarely skip this, and you’ll thank me when your pancakes come out fluffy and tender.
Step 4: Heat Your Griddle or Pan
Set your electric griddle to 350°F or heat a large skillet over medium heat. Spray with nonstick cooking spray or brush lightly with vegetable oil. You want it hot enough to brown the pancakes but not so hot they burn before cooking inside. I adjust the heat as I cook to get the timing just right.
Step 5: Cook and Flip with Confidence
Use a ¼ or ⅓ cup measuring scoop to pour batter onto your hot griddle, spacing them out comfortably. Cook about 2 minutes until bubbles form on top and edges look set, then gently flip with a spatula. Cook another 1-2 minutes on the other side until golden brown. If you’re making a big batch, keep cooked pancakes warm in a 200°F oven on a baking sheet—it keeps them fluffy and perfectly warm.
Pro Tips for Making Mom’s Classic Buttermilk Pancakes Recipe
- Don’t Overmix: Lumps in the batter are okay—they help keep pancakes light and fluffy.
- Rest Your Batter: Waiting 5-10 minutes before cooking locks in moisture and improves texture.
- Test Heat First: Drop a small spoonful of batter on the griddle to check the temperature before making the full batch.
- Flip Only Once: Resist flipping too early or multiple times; patience will give you golden, evenly cooked pancakes.
How to Serve Mom’s Classic Buttermilk Pancakes Recipe
Garnishes
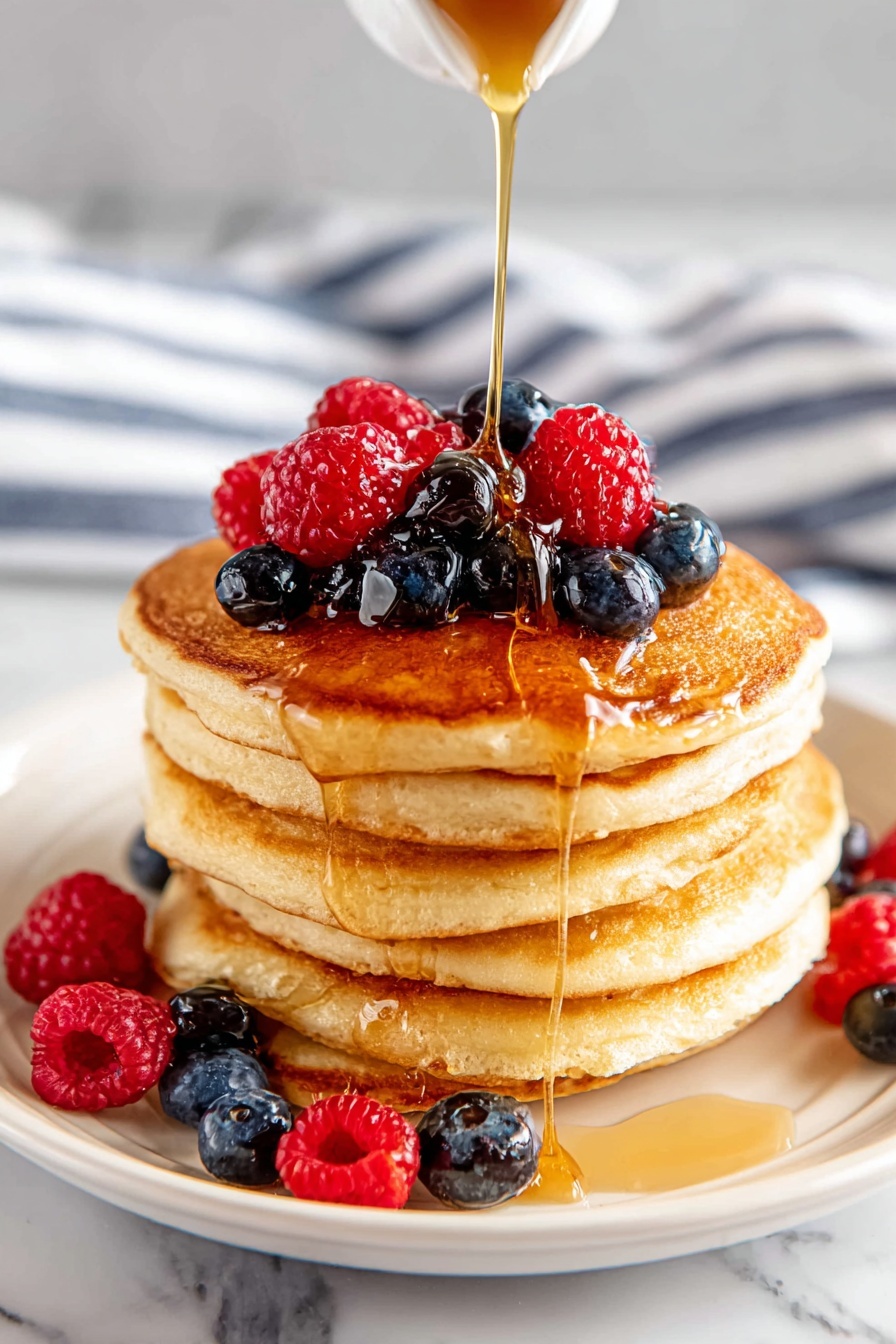
I love topping these pancakes with just a pat of butter melting on top and a drizzle of pure maple syrup—that classic combo never fails. Fresh berries, like blueberries or sliced strawberries, add a pop of color and natural sweetness. Sometimes, I sprinkle a little powdered sugar on top for a pretty finishing touch when serving guests.
Side Dishes
To round out the meal, I usually serve crispy bacon or breakfast sausage on the side—something savory to balance the sweet pancakes. A fresh fruit salad or simple yogurt parfait also pairs beautifully for a lighter twist. And if you’re feeling indulgent, whipped cream or a spoonful of yogurt on top adds fantastic creaminess.
Creative Ways to Present
For special mornings, I like to stack pancakes tall and layer in fresh fruit between the layers, creating a pretty pancake tower. A drizzle of chocolate sauce or caramel over the top adds that wow factor for birthdays or holidays. Using mini pancake molds or cutting pancakes into fun shapes with cookie cutters is always a hit with kids!
Make Ahead and Storage
Storing Leftovers
I usually stack leftover pancakes with a piece of parchment paper between each to prevent sticking, then store them in an airtight container in the fridge. They keep well for 2-3 days, which is perfect for quick breakfasts or snacks.
Freezing
Freezing pancakes is a game-changer. Once cooled, I freeze the stacked pancakes with parchment sheets between layers inside a zip-top bag. When you want some, just pop a few pancakes straight into the toaster or oven from frozen, no need to thaw. They thaw even better than most frozen bread!
Reheating
Reheating pancakes is best done in a toaster oven or regular oven at around 350°F for 5-10 minutes. This keeps them crispy on the outside and soft inside. Microwave works if you’re in a rush but may make them a bit soggy, so I save that as a last resort.
FAQs
-
Can I make Mom’s Classic Buttermilk Pancakes Recipe without buttermilk?
Absolutely! If you don’t have buttermilk on hand, you can make a quick substitute by adding 1 tablespoon of white vinegar or lemon juice to 1 cup of milk, then let it sit for 5 minutes before using. This mimics the acidity and works well with the baking soda for that fluffy texture.
-
Why is my pancake batter lumpy? Is that okay?
Lumpy batter is totally normal and actually desirable for this recipe. It means you haven’t overmixed, which keeps your pancakes tender and fluffy instead of dense and chewy. Just whisk until combined.
-
How do I know when to flip the pancakes?
Look for bubbles forming on the surface of the pancake and edges starting to look set and dry. When the bottom is golden brown (you can peek by gently lifting with a spatula), it’s time to flip. Be patient for the best results!
-
Can I prepare the batter the night before?
While you can mix the dry ingredients ahead of time, I recommend adding wet ingredients just before cooking to keep the batter fresh and ensure rise and texture. If you mix everything the night before, the pancakes might come out denser the next day.
Final Thoughts
There’s something so nostalgic and comforting about Mom’s Classic Buttermilk Pancakes Recipe—it’s more than just breakfast; it’s a little piece of happiness with every bite. I hope you enjoy making it as much as I do, especially when you see those fluffy golden stacks piling up on your plate and hear the happy “mmm”s around the table. Give this recipe a try, and I promise it’ll become a staple in your kitchen too!
Print
Mom’s Classic Buttermilk Pancakes Recipe
- Prep Time: 10 minutes
- Cook Time: 5 minutes
- Total Time: 20 minutes
- Yield: 8 pancakes
- Category: Breakfast
- Method: Stovetop
- Cuisine: American
Description
This Mom’s Old Fashioned Pancakes recipe delivers fluffy, tender pancakes with a classic homemade flavor. Made from simple pantry staples including buttermilk, baking soda, and a touch of vanilla, these pancakes are perfect for a comforting breakfast or brunch. They cook quickly on a griddle or skillet and can be kept warm in the oven while making multiple batches.
Ingredients
Pancakes
- 1 cup all-purpose flour
- 1 teaspoon baking soda
- ¼ teaspoon salt
- 1 tablespoon granulated sugar
- 1 cup buttermilk
- 1 large egg
- 2 tablespoons butter, melted and slightly cooled
- 1 teaspoon pure vanilla extract (optional)
- Nonstick cooking spray or vegetable oil for cooking
For Serving
- Butter pats
- Fresh berries
- Pure maple syrup
Instructions
- Mix Dry Ingredients: In a large bowl, whisk together the flour, baking soda, salt, and sugar to combine evenly.
- Add Wet Ingredients: Pour in the buttermilk and whisk just until the dry ingredients are moistened. Then add the egg, melted butter, and optional vanilla extract, and whisk gently until combined, keeping the batter slightly lumpy for fluffiness.
- Rest the Batter: Let the batter rest for 5 to 10 minutes to allow ingredients to hydrate and improve pancake texture.
- Preheat Griddle or Skillet: Heat an electric griddle to 350°F or place a large skillet over medium heat. Lightly coat the surface with nonstick cooking spray or vegetable oil.
- Cook Pancakes: Using a ¼ or ⅓ cup measure, pour batter onto the hot surface leaving space between pancakes. Cook about 2 minutes until bottoms are golden brown. Carefully flip with a spatula and cook an additional 1-2 minutes until cooked through.
- Keep Warm: Transfer cooked pancakes to a baking sheet and keep warm in a 200°F oven while cooking remaining batches.
- Serve: Serve the pancakes hot with butter pats, fresh berries, and pure maple syrup or toppings of your choice.
Notes
- Using buttermilk makes the pancakes tender and adds a slight tangy flavor.
- Do not overmix the batter; keeping it slightly lumpy ensures tender pancakes.
- Preheating the cooking surface properly is key to even browning without burning.
- To keep pancakes warm without drying, use a low-temperature oven set at 200°F.
- Batter quantity makes about 8 medium-sized pancakes depending on the scoop size.
Nutrition
- Serving Size: 1 pancake
- Calories: 140
- Sugar: 3g
- Sodium: 240mg
- Fat: 6g
- Saturated Fat: 3.5g
- Unsaturated Fat: 2g
- Trans Fat: 0g
- Carbohydrates: 18g
- Fiber: 0.5g
- Protein: 4g
- Cholesterol: 55mg


