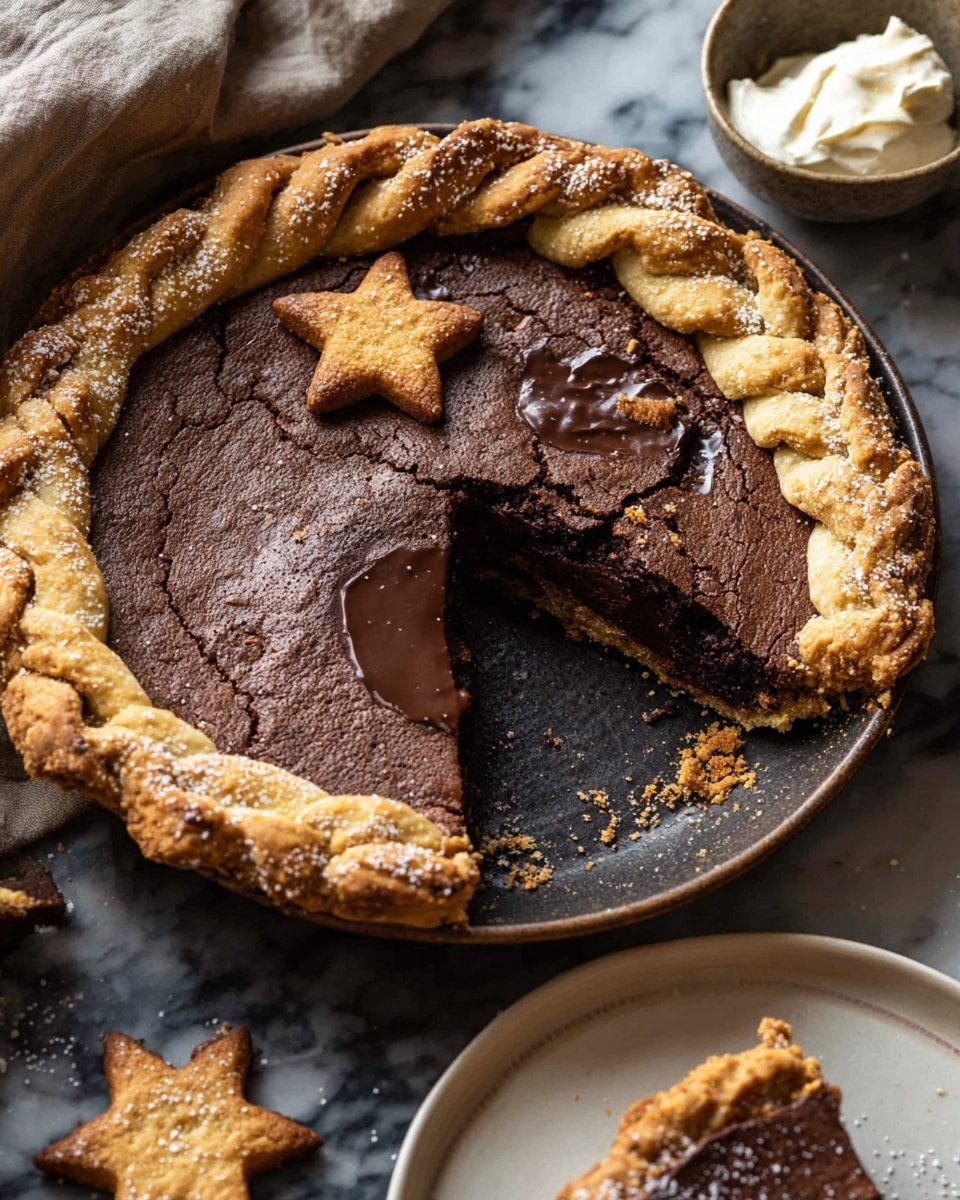
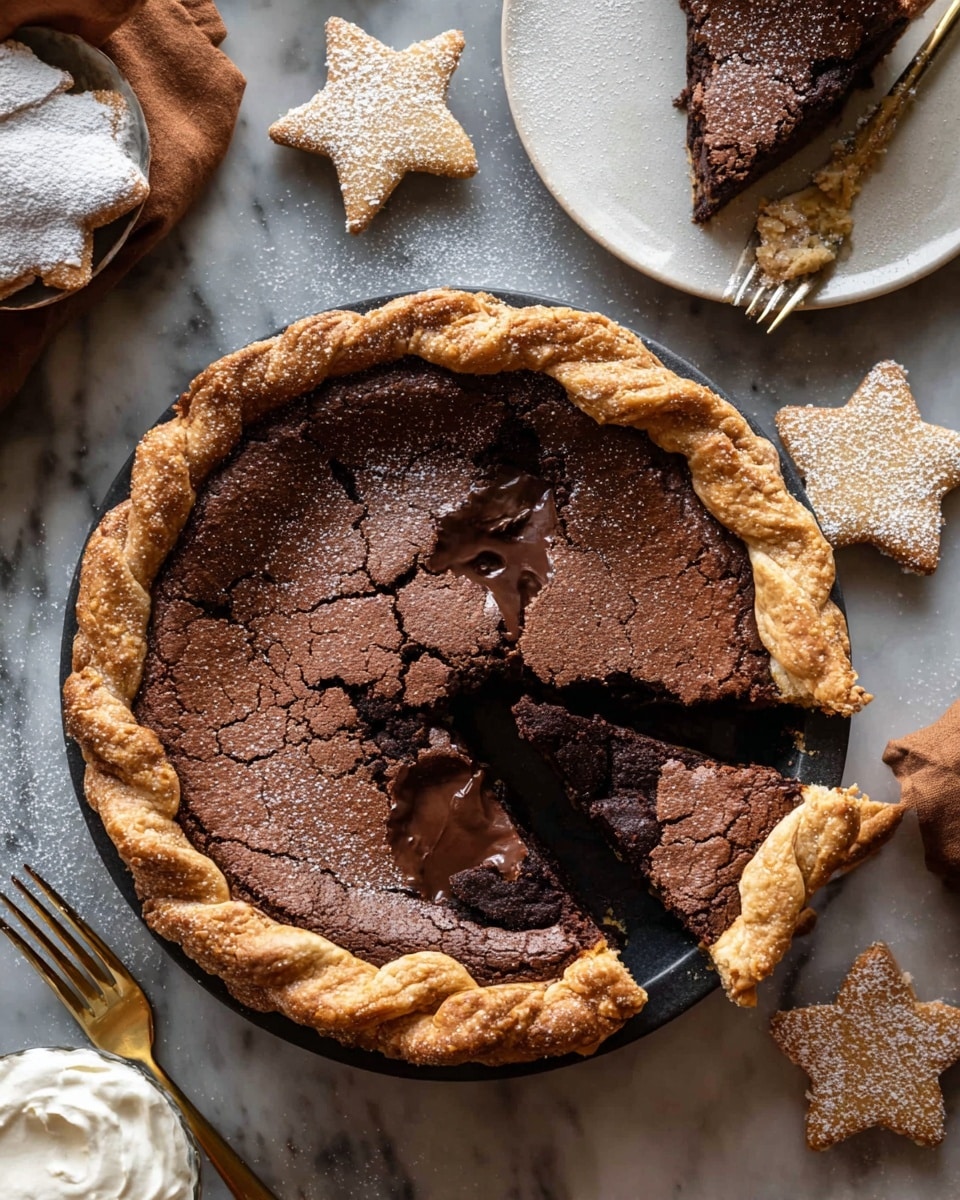
I absolutely love sharing this Molten Chocolate Crackle Pie with Hazelnut Whipped Cream Recipe because it’s one of those desserts that feels fancy but is surprisingly easy to pull off. You get this beautifully crackled, almost brownie-like crust with a molten, gooey chocolate center that oozes out the moment you slice into it. It’s perfect for cozy nights in or impressing guests without spending all day in the kitchen.
When I first tried making this pie, I was blown away by how the hazelnut whipped cream adds this lovely nutty twist that takes the whole experience to another level. Whether you serve it warm right after baking or chilled the next day, you’ll find that this recipe consistently delivers that rich chocolate satisfaction everyone craves. Trust me — it’s worth having this Molten Chocolate Crackle Pie with Hazelnut Whipped Cream Recipe in your dessert arsenal.
Why You’ll Love This Recipe
- Decadently Gooey Center: The molten chocolate filling is rich and irresistibly soft, creating that perfect oozy center every time.
- Easy Yet Impressive: You don’t need to be a pro baker to nail this pie, yet it looks and tastes like a showstopper.
- Nutty Hazelnut Whipped Cream: The whipped cream adds a subtle, sophisticated flair with just a hint of hazelnut liqueur.
- Versatile Serving Options: Whether you enjoy it warm or chilled, this pie adapts beautifully to your preference or occasion.
Ingredients You’ll Need
All these ingredients come together to create that perfect balance of crisp crust, molten chocolate richness, and the creamy nutty whipped topping. If you shop for quality cocoa and butter, your pie will taste even more indulgent.
- Pie crust round: You can use a homemade pie crust or a good quality store-bought one; just make sure it’s deep enough to hold the filling.
- Eggs: Both whole eggs for the filling and an egg for brushing the crust; they provide structure and that beautiful golden finish.
- Granulated sugar: Balances the rich cocoa with sweetness and helps develop the crackled top.
- Unsweetened cocoa powder: For that intense chocolate flavor, I recommend Dutch-processed for a less bitter taste.
- Instant coffee granules: This is a classic trick to deepen the chocolate flavor without making it taste like coffee.
- Kosher salt: Enhances all the chocolate notes and balances sweetness.
- Salted butter: Melted and rich, it adds creaminess and moisture.
- Hazelnut liquor: Adds a warm nutty depth; totally optional but highly recommended!
- Vanilla extract: For that sweet, aromatic finish.
- Semi-sweet chocolate chips or chunks: Folded in for surprise pockets of gooey melted chocolate.
- Heavy cream: The base for the luscious hazelnut whipped cream.
- Real maple syrup: A natural sweetener that complements the hazelnut flavor beautifully in the whipped cream.
Variations
I love to customize this pie to suit different occasions or whatever I have on hand. You can switch things up by changing the type of chocolate or omitting the alcohol to keep it family-friendly. Don’t be afraid to experiment — that’s part of the fun!
- Adding nuts: I sometimes toss in chopped toasted hazelnuts or pecans inside the filling for a crunchy surprise my family adores.
- Dairy-free version: Swap the butter for coconut oil and use non-dairy cream to whip for a vegan-friendly take.
- More chocolate burst: Using a mix of dark and milk chocolate chips gives a sweeter and more complex flavor palette.
- Alcohol-free: Simply leave out the hazelnut liquor — the pie still shines without it.
How to Make Molten Chocolate Crackle Pie with Hazelnut Whipped Cream Recipe
Step 1: Prepare the crust and blind bake
Start by fitting your pie crust into a deep 9-inch pie plate — this helps contain all that luscious filling. Brush the edges with beaten egg and sprinkle with vanilla or coarse sugar for a beautifully caramelized finish. Lightly prick the bottom of the dough so it doesn’t puff up, then line it with parchment and fill with pie weights or beans. Freezing it for 10-15 minutes before baking really helps keep the crust crisp. Bake at 375°F for about 20 minutes until set, then remove the weights and bake an additional 5 minutes until golden. Lower the oven temperature to 350°F before adding the filling.
Step 2: Make the molten chocolate filling
Whisk together the eggs and sugar until well combined — you want a glossy, smooth mixture that will help develop the crackled surface. Add your cocoa powder, instant coffee granules, and salt, then whisk in melted butter, hazelnut liquor (if using), and vanilla extract. Folding in semi-sweet chocolate chunks adds those pockets of melted chocolate that make this pie extra special. Pour the mixture into the prepared crust, spreading evenly but gently.
Step 3: Bake to perfection
Bake the filled pie at 350°F for 45 to 55 minutes. You’re aiming for that puffed top with a gentle jiggle in the center — that’s the magic molten texture. The longer you bake, the more set it becomes, so keep an eye on it starting at 45 minutes. Once done, let the pie cool on the counter for 20-30 minutes before serving; this helps the filling settle just right.
Step 4: Whip up the hazelnut whipped cream
While the pie is cooling, whip the heavy cream with an electric mixer until soft peaks form. Add real maple syrup, vanilla extract, and a splash of hazelnut liqueur if you’re using it — then whip just until fluffy and combined. This cream is the pièce de résistance; it pairs perfectly with the warm, fudgy pie.
Pro Tips for Making Molten Chocolate Crackle Pie with Hazelnut Whipped Cream Recipe
- Freeze the crust before blind baking: This helps keep your crust from shrinking and ensures a beautifully crisp base.
- Use instant coffee granules: It boosts the chocolate flavor subtly without any actual coffee taste, which I learned makes a huge difference.
- Don’t overbake: The filling should still jiggle slightly in the center—overbaking will dry it out and lose that molten magic.
- Whip cream just right: Stop whipping as soon as the peaks form to avoid turning it into butter; light and fluffy is key.
How to Serve Molten Chocolate Crackle Pie with Hazelnut Whipped Cream Recipe
Garnishes
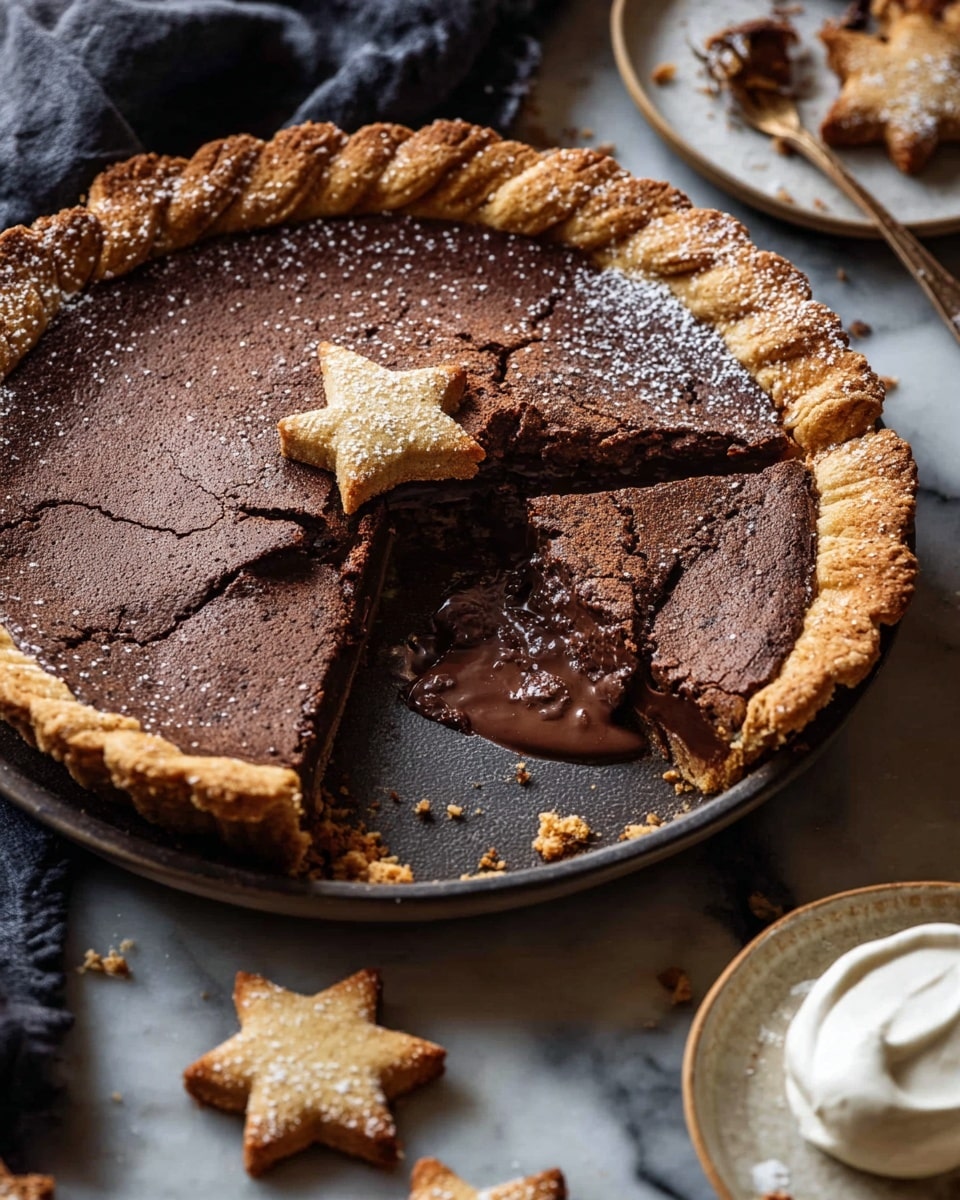
I love topping the pie with a generous dollop of hazelnut whipped cream, then sprinkling a few toasted hazelnuts or a dusting of cocoa powder for a little extra wow factor. If I want to be fancy, a few delicate chocolate shavings on top never fail. You’ll enjoy how these simple touches elevate the presentation and add texture.
Side Dishes
This pie shines as a standalone treat, but I like serving it alongside fresh berries or a small scoop of vanilla bean ice cream to cut through the richness with some brightness. A strong cup of espresso or bold black coffee also pairs perfectly to complement the chocolate.
Creative Ways to Present
For special occasions, I sometimes serve this pie in individual mini tart pans with a piped swirl of hazelnut whipped cream. It makes guests feel extra special and cuts down on slicing fuss. Another fun idea is drizzling a bit of warm caramel or chocolate sauce right before serving to amp up the decadence.
Make Ahead and Storage
Storing Leftovers
I usually store leftover pie tightly wrapped in plastic wrap or in an airtight container in the fridge. It keeps wonderfully for about 3-4 days, and if anything, the flavors deepen even more as it sits. Just be sure to bring it back to room temp or warm slightly before serving to recapture that molten feel.
Freezing
I have frozen this pie successfully on a few occasions—just wrap it well with plastic wrap and foil to avoid freezer burn. When ready to enjoy, thaw overnight in the fridge and warm up gently in the oven. The texture holds up pretty well, though the whipped cream is best fresh-made when serving.
Reheating
To reheat, I pop slices in a 300°F oven for about 10-15 minutes until warm but not overcooked. The center should still have that soft wobble, so keep an eye on it. If you’ve chilled it, letting it sit at room temperature for a bit before warming helps avoid drying it out.
FAQs
-
Can I make the Molten Chocolate Crackle Pie without hazelnut liquor?
Absolutely! The hazelnut liquor adds a lovely nutty depth and a bit of warmth, but it’s totally optional. Leaving it out won’t compromise the overall flavor — the pie will still be rich and delicious.
-
How do I know when the pie is done baking for the perfect molten center?
You want the pie to be puffed on top but still slightly wiggly in the center when you gently shake the pan. The edges should be set and pulling away from the crust. This indicates the filling is cooked but still gooey inside.
-
Can I use store-bought pie crust for this recipe?
Yes! A good quality store-bought pie crust works just fine, and it saves time. Just be sure it’s deep-dish style to hold the filling and follow the blind-baking steps carefully to keep it crisp.
-
What’s the best way to store leftover hazelnut whipped cream?
Store the whipped cream in an airtight container in the fridge and try to use it within a day or two for best texture. If it separates, a quick re-whip with a mixer usually brings it back.
Final Thoughts
This Molten Chocolate Crackle Pie with Hazelnut Whipped Cream Recipe has become one of my go-to homemade desserts whenever I want something indulgent but simple. It’s that kind of treat that surprises everyone, and I love seeing the delight when someone digs into that molten center for the first time. Give it a try—you’ll find it’s not just a recipe but a chocolate hug in pie form.
Print
Molten Chocolate Crackle Pie with Hazelnut Whipped Cream Recipe
- Prep Time: 20 minutes
- Cook Time: 1 hour 15 minutes
- Total Time: 1 hour 50 minutes
- Yield: 8 servings
- Category: Dessert
- Method: Baking
- Cuisine: American
- Diet: Vegetarian
Description
This Molten Chocolate Crackle Pie is a decadent dessert featuring a crisp pie crust filled with a rich, fudgy chocolate custard that is partially set for a luscious molten center. Enhanced with hints of coffee and hazelnut, this pie is perfectly paired with a smooth hazelnut whipped cream topping, making it an indulgent treat for any chocolate lover.
Ingredients
Pie Crust
- 1 pie crust round (homemade recipe below)
- 1 egg, beaten, for brushing
- vanilla sugar or coarse sugar, for sprinkling (optional)
Filling
- 4 large eggs
- 1 1/2 cups granulated sugar
- 1/2 cup unsweetened cocoa powder
- 2 teaspoons instant coffee granules
- 1/2 teaspoon kosher salt
- 10 tablespoons salted butter, melted
- 1 tablespoon hazelnut liquor (optional)
- 2 teaspoons vanilla extract
- 1/2 cup semi-sweet chocolate chips or chunks
Hazelnut Whipped Cream
- 1 cup heavy cream
- 1 tablespoon real maple syrup
- 2 teaspoons vanilla extract
- 1 tablespoon hazelnut liquor (optional)
Instructions
- Preheat Oven: Position a rack in the lower third of your oven and preheat it to 375°F (190°C) to prepare for baking the pie crust.
- Prepare Pie Crust: Fit your pie crust into a deep 9-inch pie plate. Brush the crust edge with the beaten egg and sprinkle with vanilla or coarse sugar for a sweet, glossy finish. Lightly prick the bottom of the crust with a fork to prevent bubbles. Line the crust with parchment paper and fill with pie weights, dried beans, or rice. Freeze for 10 to 15 minutes to help maintain shape when baking.
- Bake Pie Crust: Bake the crust with the weights on for 20 minutes until it is just set. Then, remove the weights and parchment paper and continue baking for another 5 minutes or until the crust turns golden and crisp. Remove the crust from the oven and reduce the temperature to 350°F (175°C) for the filling.
- Prepare Filling: In a large bowl, whisk together the eggs and granulated sugar until well combined and slightly thickened. Add the cocoa powder, instant coffee granules, and kosher salt, whisking to blend smoothly. Slowly whisk in the melted butter, hazelnut liquor (if using), and vanilla extract until the mixture is smooth and glossy. Gently fold in the semi-sweet chocolate chips or chunks for added texture.
- Fill and Bake the Pie: Pour the prepared chocolate filling into the baked pie crust. Place it in the oven and bake at 350°F (175°C) for 45 to 55 minutes. The pie should puff up on top but still be slightly wobbly in the center when gently shaken. For a firmer set, bake toward the longer end of the time range.
- Cool the Pie: Remove the pie from the oven and let it cool slightly on a wire rack for about 20 to 30 minutes. The pie can be served warm or chilled, both delicious with the whipped cream.
- Make Hazelnut Whipped Cream: Using an electric mixer, whip the heavy cream until soft peaks begin to form. Add the maple syrup, vanilla extract, and hazelnut liquor (if using), then continue whipping until the cream is fluffy and well combined. Serve immediately alongside the pie.
Notes
- Freezing the pie crust before blind baking ensures it stays crisp and prevents shrinking.
- The coffee granules enhance the depth of chocolate flavor but can be omitted if desired.
- Adjust the baking time based on how molten or firm you prefer the pie center.
- The hazelnut liquor is optional but adds a delightful nutty note.
- For a dairy-free version, substitute the butter and cream with plant-based alternatives.
Nutrition
- Serving Size: 1 slice (1/8 of pie)
- Calories: 420
- Sugar: 40g
- Sodium: 230mg
- Fat: 26g
- Saturated Fat: 15g
- Unsaturated Fat: 9g
- Trans Fat: 0g
- Carbohydrates: 45g
- Fiber: 3g
- Protein: 5g
- Cholesterol: 130mg

