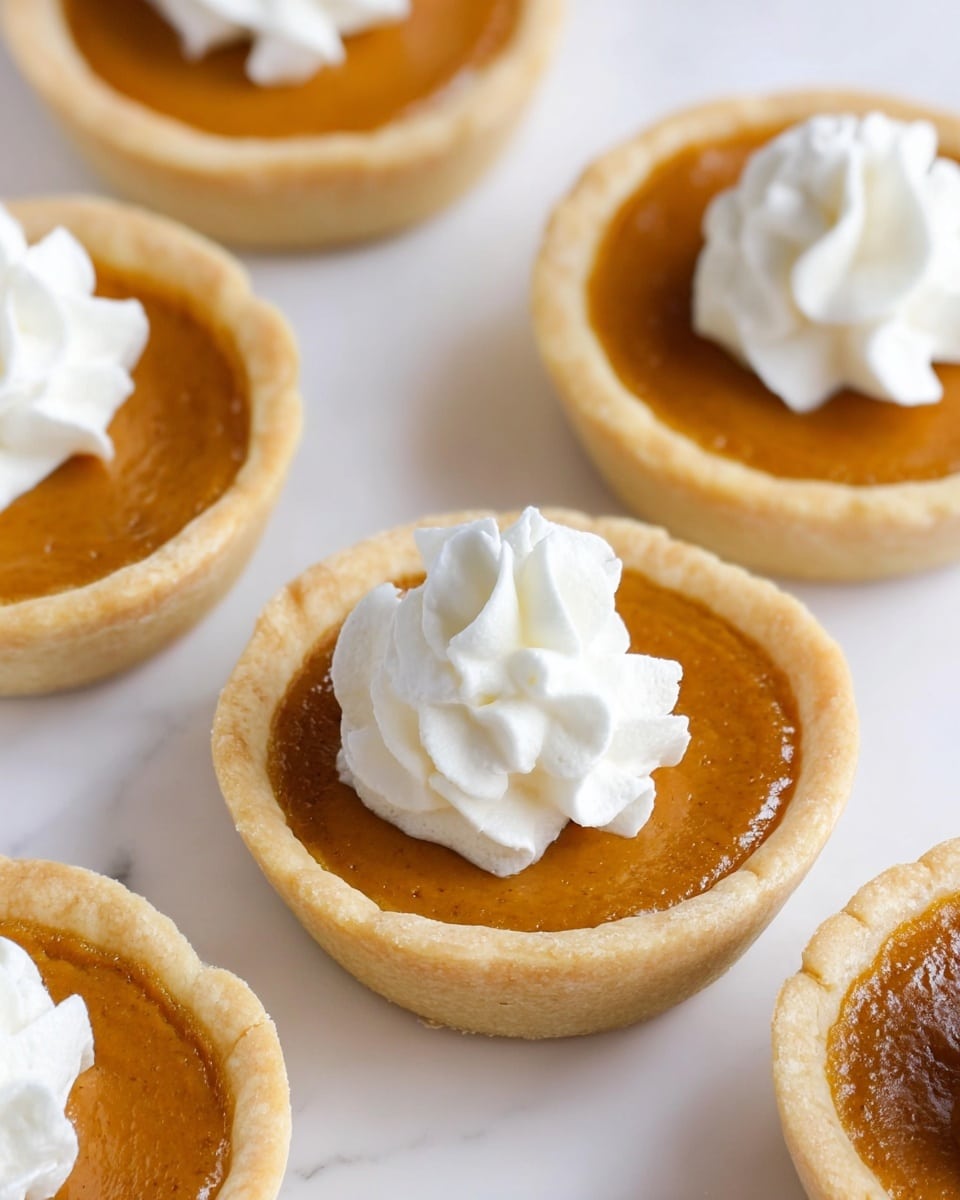
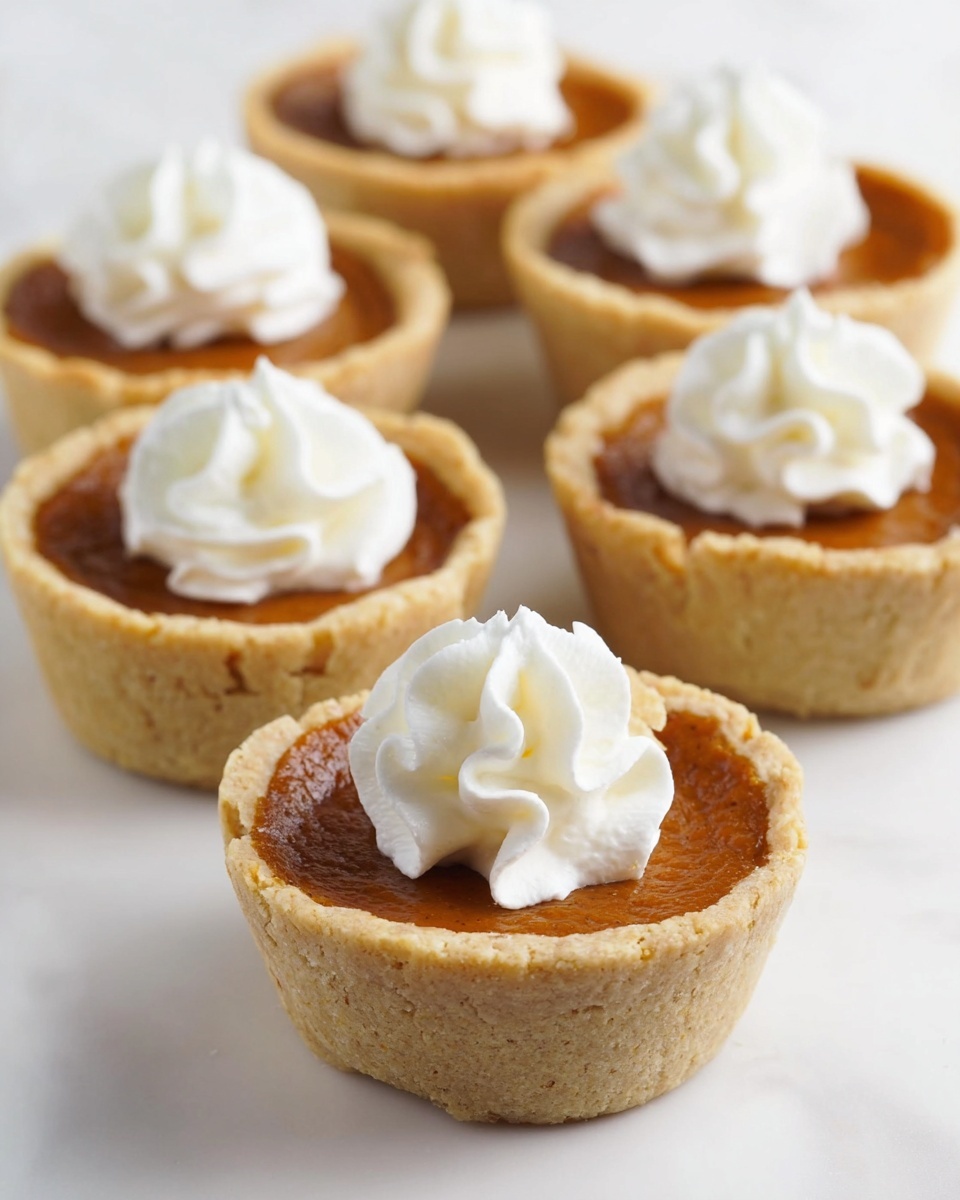
Oh, you’re going to love this Mini Maple Pumpkin Pies Recipe—it’s honestly one of my favorite fall treats to whip up. These little pies are perfect for when you want that classic pumpkin pie flavor but in a handy, bite-sized form that’s just so cute and inviting. I love how the maple extract adds this subtle, cozy sweetness that sets it apart from your usual pumpkin pie.
When I first made these, I was so pleasantly surprised by how easy they were, especially because they use simple store-bought pie crusts to save time without sacrificing anything in flavor or presentation. Whether you’re hosting a holiday gathering or just craving a comforting fall dessert, this Mini Maple Pumpkin Pies Recipe really hits the spot and gets everyone asking for seconds!
Why You’ll Love This Recipe
- Easy and Fun to Make: Cutting little rounds and filling them up makes baking feel playful and rewarding.
- Perfect Portion Size: These minis are ideal for parties, lunchboxes, or just treating yourself without leftovers.
- Warm Maple Flavor Twist: The addition of maple extract makes the pumpkin filling subtly sweet and uniquely delicious.
- Great Make-Ahead Option: You can bake them in advance and garnish with whipped cream right before serving.
Ingredients You’ll Need
These ingredients come together perfectly to create a rich and creamy filling while the pie crust keeps things light and flaky. I usually pick up a good-quality store-bought crust to save time, but if you like, homemade crust works beautifully too.
- Pie crusts: I prefer two refrigerated store-bought pie crusts for convenience—they roll out smoothly and hold up well in the cupcake pan.
- Pumpkin puree: Go for canned pumpkin puree, not pumpkin pie filling, to control your spices and sweetness.
- Light brown sugar: Adds moisture and a caramel undertone that’ll enhance the maple flavor.
- Granulated sugar: Balances the sweetness while keeping the filling light.
- Pumpkin pie spice: The classic blend of cinnamon, nutmeg, and cloves that makes pumpkin pie smell like fall in your kitchen.
- Maple extract: A small but powerful addition that gives this recipe its signature twist—don’t skip it!
- Egg: Helps thicken the filling so it sets perfectly after baking.
- Evaporated milk: Adds creaminess without watering down flavors like regular milk might.
- Whipped cream: Essential topping to make your mini pies look and taste extra special.
Variations
One of the best things about this Mini Maple Pumpkin Pies Recipe is how easily you can customize it to fit your taste or dietary needs. I like to mix things up sometimes and add a little extra touch of something special.
- Spice it up: I’ve experimented by adding a pinch of cayenne or ground ginger for a subtle heat that pairs beautifully with the sweetness.
- Vegan swap: Using coconut milk instead of evaporated milk and a flax egg works well if you want dairy-free pies.
- Crust alternatives: Try a graham cracker crust for an extra layer of texture and flavor that reminds me of pumpkin cheesecake.
- Sweetener swap: If you prefer less refined sugar, I’ve had success using maple syrup in place of some sugar—you’ll get an even richer maple vibe.
How to Make Mini Maple Pumpkin Pies Recipe
Step 1: Prep Your Pie Crusts
Start by preheating your oven to 350°F—this is key to getting the crust golden and the filling just right. Lightly flour your counter so the dough doesn’t stick, then roll out your pie crusts to smooth out any folds or creases. Use a 4-inch round cutter or a glass to cut out 12 mini pie dough rounds—this size fits perfectly in a standard cupcake pan.
Spray the cupcake pan with non-stick spray before gently pressing each dough round into the cavities. Make sure to smooth out any ripples and trim excess dough hanging over the edges so the pies bake evenly. This part feels a little fiddly, but pressing and trimming carefully makes a big difference in how tidy your mini pies look.
Step 2: Mix the Pumpkin Filling
Grab a large mixing bowl and add your pumpkin puree, light brown sugar, granulated sugar, and pumpkin pie spice. Give it a good stir until everything is nicely combined. Then, add the egg and maple extract, whisking until smooth and just incorporated.
Finally, pour in the evaporated milk and stir it all together until silky and well blended. The maple extract here is your secret weapon—it gives the filling that warm, slightly sweet edge that makes these mini pies stand out.
Step 3: Fill and Bake Your Mini Pies
Carefully fill each pie crust with your pumpkin filling—go right up to the edges but leave a bit of crust visible all around. This helps the pies bake evenly and gives you that iconic crust-to-filling ratio we all love. If you overfill, the filling might spill over and make a mess, so take your time here.
Pop the cupcake pan into your preheated oven and bake for 25 to 30 minutes. You’ll know the pies are done when the filling no longer jiggles and the crust edges turn a lovely golden brown. I like to turn off the oven and crack the door open, letting the pies cool slowly right inside; it helps prevent cracking and keeps the pies tender.
Step 4: Add Whipped Cream and Serve
Once your mini pies have cooled completely—which I recommend for the best texture—top each one with a generous swirl of whipped cream using a piping bag fitted with a 1M tip for that pretty, bakery-style look. Not only does this add creamy richness, but it also makes your minis look as good as they taste.
Pro Tips for Making Mini Maple Pumpkin Pies Recipe
- Use a Sharp Cutter: I found that a sharp round cutter makes those crust edges crisper and helps the dough cut cleanly without tearing.
- Don’t Overfill: Leaving a visible crust edge around the filling stopped any spillovers during baking when I tried it—trust me, it makes cleanup easier!
- Let Pies Cool Fully: Cooling completely before topping keeps your whipped cream from melting and gives cleaner slices if you want to cut them.
- Slow Cool in Oven: Turning off the oven and leaving the door cracked prevented cracks in the filling and gave a creamy texture every time.
How to Serve Mini Maple Pumpkin Pies Recipe
Garnishes
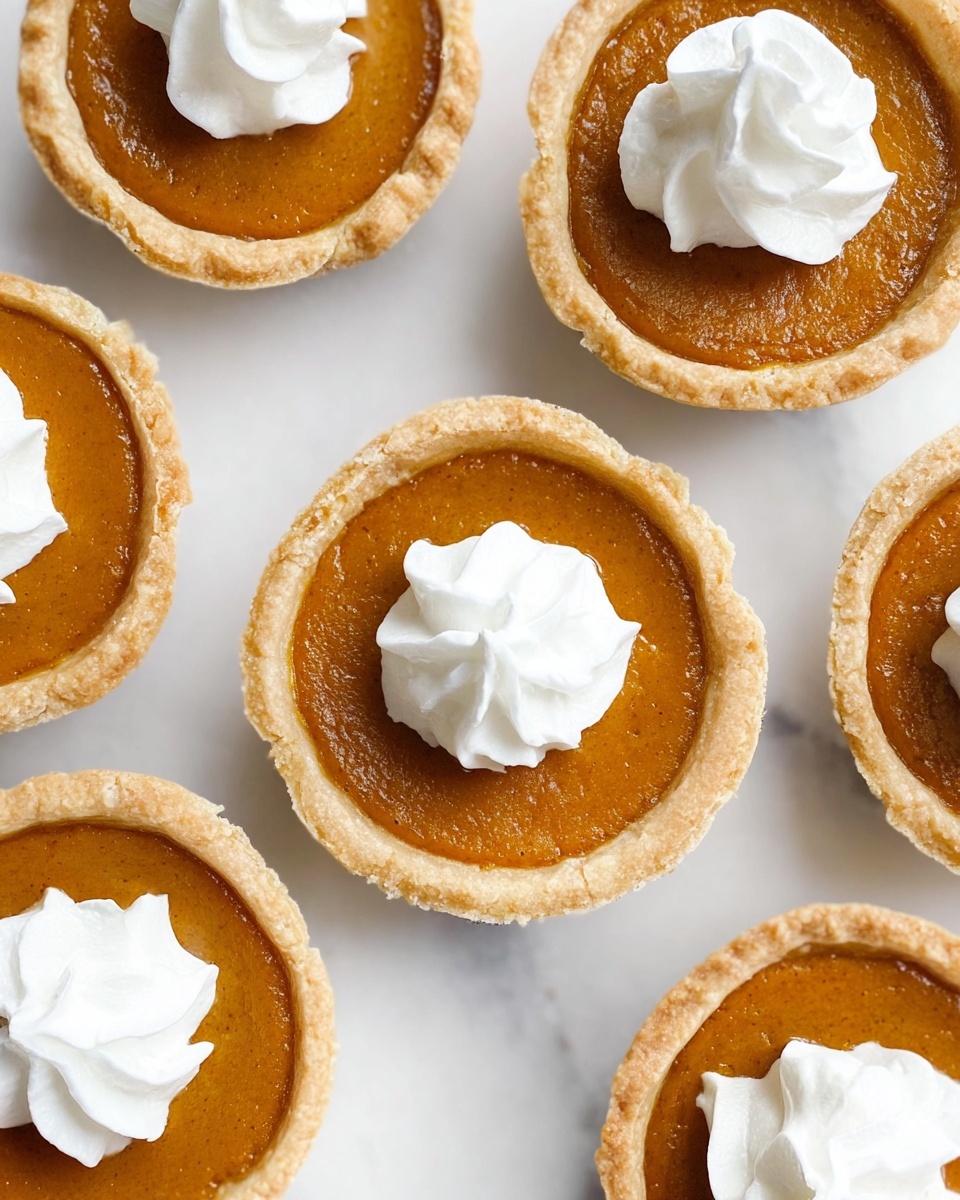
I always garnish mine with freshly whipped cream piped on top, sometimes dusting a little cinnamon or extra pumpkin pie spice right onto the whipped cream for color and aroma. Chopped toasted pecans add a fantastic crunch if you want to jazz things up for guests.
Side Dishes
These mini pies pair wonderfully with a scoop of vanilla ice cream or a simple cup of hot coffee or tea. I also love serving them alongside a crisp green salad with apple slices and toasted nuts for an elevated fall dessert course.
Creative Ways to Present
For holiday tables, I like to serve these mini pies on a rustic wooden board decorated with fresh autumn leaves or small pumpkins. Another fun idea I tried was placing each mini pie in a decorative cupcake liner for easy grab-and-go servings at parties.
Make Ahead and Storage
Storing Leftovers
I keep leftover mini pies in an airtight container in the fridge—trust me, they hold their texture and flavor well up to 3 days. Just make sure to add the whipped cream topping fresh before serving again for that bakery-fresh experience.
Freezing
Freezing works great if you want to make a big batch ahead of time. I recommend baking the pies completely, cooling them fully, and then freezing without the whipped cream. When you’re ready, thaw overnight in the fridge and add the cream just before serving.
Reheating
To reheat, I gently warm the pies at 300°F for about 8–10 minutes—it’s enough to take the chill off without drying out the crust. Then, top with whipped cream after warming for the best flavor and texture.
FAQs
-
Can I use homemade pie crust for this Mini Maple Pumpkin Pies Recipe?
Absolutely! Homemade crust works beautifully here and adds a lovely personal touch to the pies. Just make sure it’s rolled out evenly and chilled well before cutting to get clean edges and prevent shrinking while baking.
-
What if I don’t have maple extract? Can I skip it?
If you don’t have maple extract on hand, you can leave it out, but I recommend not skipping it because it gives these mini pies their unique flavor. Alternatively, a teaspoon of pure maple syrup added to the mixture can work as a substitute, just reduce another liquid slightly.
-
How do I know when the mini pies are done baking?
Look for the filling to be set without any jiggle in the center and the crust edges turning a nice golden brown. Using a toothpick around the edge can help check if the crust is fully baked—it should come out clean or with only moist filling, not raw dough.
-
Can I make these without evaporated milk?
You can substitute evaporated milk with an equal amount of half-and-half or whole milk, but evaporated milk adds richness without extra water content, so the texture may be slightly lighter without it. Some also use coconut milk for a dairy-free version with a subtle tropical twist.
Final Thoughts
This Mini Maple Pumpkin Pies Recipe holds a special place in my kitchen because it’s the perfect little treat that feels homemade without hours of fuss. Whether you’re making them for a crowd or a cozy night in, their tender crust, creamy spiced filling, and that touch of maple magic always make the experience feel extra warm and festive. I really encourage you to give this recipe a try—you might find it becomes your new go-to pumpkin dessert every autumn!
Print
Mini Maple Pumpkin Pies Recipe
- Prep Time: 15 minutes
- Cook Time: 25 minutes
- Total Time: 40 minutes
- Yield: 12 mini pies
- Category: Dessert
- Method: Baking
- Cuisine: American
Description
These Mini Maple Pumpkin Pies are the perfect bite-sized treat for autumn or any festive occasion. Made with a flaky pie crust filled with a creamy pumpkin and maple-flavored custard, these individual pies bake up golden and are topped with a swirl of whipped cream for an irresistible finish. Easy to prepare and perfect for sharing, they combine classic pumpkin pie flavors with a hint of warm maple extract for a delightful twist.
Ingredients
Pie Crust
- 2 store-bought pie crusts or homemade equivalent
Filling
- 15 oz. can pumpkin puree
- 1/4 cup light brown sugar, packed
- 1/2 cup granulated sugar
- 2 teaspoons pumpkin pie spice
- 1/2 teaspoon maple extract
- 1 large egg
- 1 cup evaporated milk
Topping
- 1/4 cup whipped cream
Instructions
- Preheat Oven: Preheat your oven to 350 degrees Fahrenheit to ensure it reaches the perfect baking temperature for the mini pies.
- Prepare Pie Crust: Lightly flour your countertop and roll out the pie dough. Using a 4-inch round cutter, cut out 12 circles from the dough.
- Line Cupcake Pan: Spray a standard cupcake pan with non-stick cooking spray. Press each pie dough round into the cupcake cavities, smoothing out any ripples and trimming excess dough that hangs over the edges. Set the lined pan aside.
- Make Filling: In a large mixing bowl, combine the pumpkin puree, light brown sugar, granulated sugar, and pumpkin pie spice. Stir well until all ingredients are evenly mixed.
- Add Flavor and Egg: Incorporate the egg and maple extract into the pumpkin mixture, stirring until fully combined for a smooth custard base.
- Incorporate Evaporated Milk: Pour in the evaporated milk and continue mixing until the filling has a uniform consistency.
- Fill Pie Crusts: Spoon the pumpkin filling into each pie crust-lined cavity until nearly full, but ensure some crust is visible around the edges for a perfect bake.
- Bake Pies: Place the cupcake pan in the preheated oven and bake for 25 to 30 minutes. The pies are done when the filling no longer jiggles and the crust turns lightly golden.
- Cool Pies: Once baked, turn off the oven and crack the oven door open. Allow the mini pies to cool completely inside the oven to prevent cracking.
- Add Whipped Cream: After cooling, pipe whipped cream on top of each mini pie using a piping bag fitted with a 1M tip for a decorative and creamy finish.
- Store: Store the mini pies in the refrigerator to keep them fresh until ready to serve.
Notes
- You can use homemade or store-bought pie crust depending on your preference and time.
- For a dairy-free version, substitute evaporated milk with a non-dairy evaporated milk alternative and use coconut-based whipped cream.
- Make sure not to overfill the crusts to avoid spillage during baking.
- Allow pies to cool thoroughly before adding the whipped cream topping to prevent it from melting.
- Store pies refrigerated and consume within 3-4 days for optimal freshness.
Nutrition
- Serving Size: 1 mini pie (approx. 1/12 of recipe)
- Calories: 180
- Sugar: 14g
- Sodium: 130mg
- Fat: 7g
- Saturated Fat: 3g
- Unsaturated Fat: 3g
- Trans Fat: 0g
- Carbohydrates: 27g
- Fiber: 2g
- Protein: 3g
- Cholesterol: 45mg

