
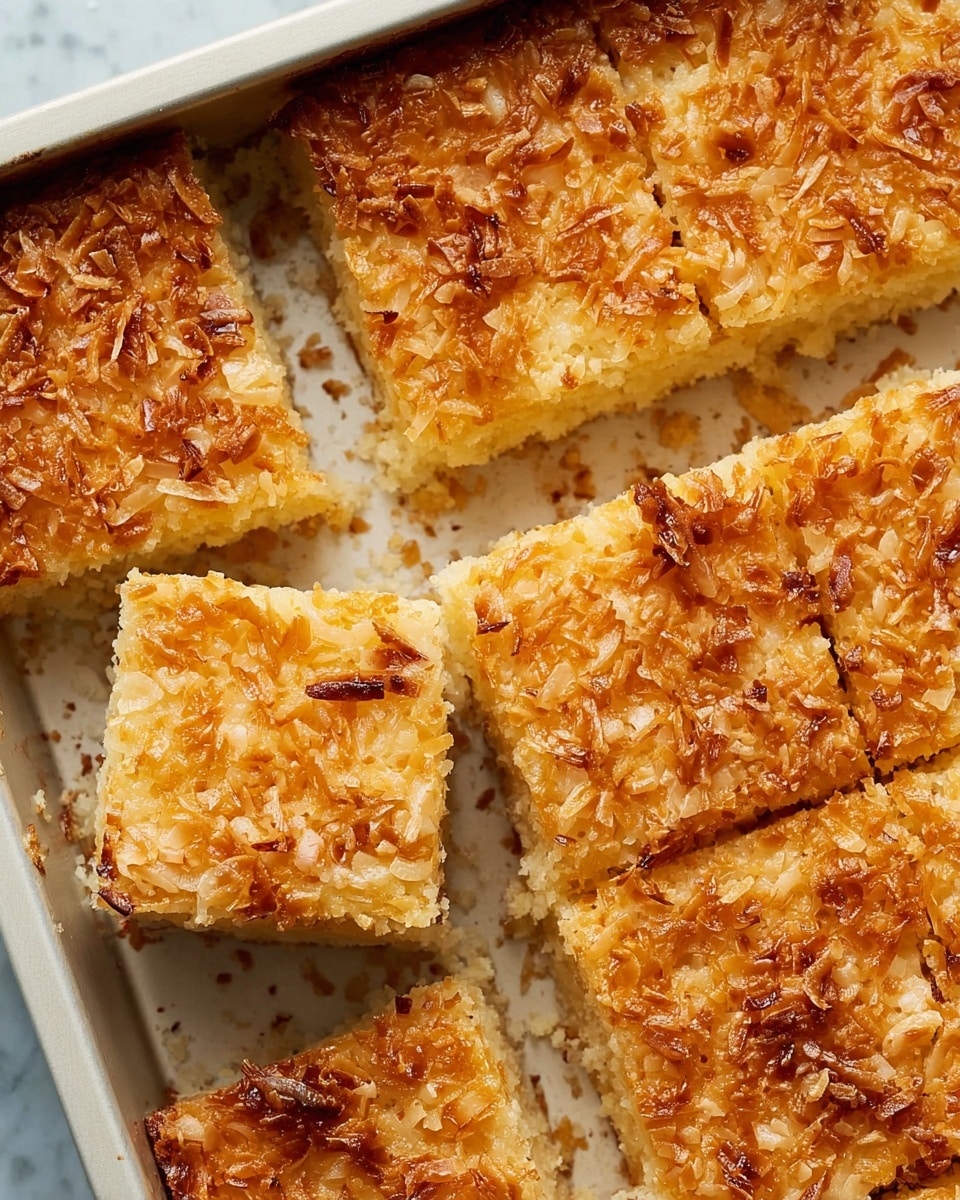
If you’re looking for a simple, nostalgic dessert that’s so good it feels like a warm hug, you’re going to adore this Lazy Daisy Cake Recipe. I absolutely love how this cake combines a soft, buttery base with a gooey, toasted coconut topping—it’s such a fun bake that anyone can master. Plus, it has this cozy, slightly caramelized flavor that feels like a little slice of homemade happiness. Keep reading because I want to share everything I’ve learned to make sure your Lazy Daisy Cake turns out perfectly every single time!
Why You’ll Love This Recipe
- Easy to Make: This cake uses simple ingredients and a straightforward method, perfect for even beginner bakers.
- No Fancy Equipment Needed: Just a basic saucepan, bowl, and an 8×8 pan—means less cleanup!
- Perfect Balance of Flavors: The buttery cake paired with sweet coconut topping hits all the cozy, crave-worthy notes.
- Impress Your Family and Friends: It’s a nostalgic dessert that feels special but requires minimal effort.

Ingredients You’ll Need
The magic behind the Lazy Daisy Cake Recipe lies in the mix of simple pantry staples. Each ingredient plays a role—from the warmth of melted butter in the batter to the rich brown sugar in the topping that creates that irresistible caramelization. When you shop, fresh eggs and a good quality unsalted butter really make a difference in flavor.
- Milk: Use whole or 2%, it helps give the batter a nice tender crumb.
- Butter: Unsalted butter is best so you control the saltiness; melted in the batter and topping.
- Eggs: Large eggs work perfectly here—make sure they’re at room temperature for better mixing.
- Sugar: Granulated sugar sweetens the cake base; brown sugar adds moisture and depth to the topping.
- Vanilla Extract: You’ll appreciate how this adds a subtle warmth and aroma.
- Salt: Just a small pinch to enhance all the flavors.
- All-purpose Flour: Provides structure; sift it or stir to avoid lumps before folding in.
- Baking Powder: Helps the cake rise and get that fluffy texture.
- Sweetened Coconut Flakes: This topping ingredient is the star that adds texture and tropical sweetness.
- Heavy Cream: Adds richness and helps the topping become wonderfully gooey under the broiler.
Variations
One of the things I love about the Lazy Daisy Cake Recipe is how flexible it is. I’ve tried tweaking it here and there, and honestly, these little changes can make it feel brand new every time. Feel free to make it your own!
- Use Almond Extract: I swapped vanilla for almond extract once, and it gave the cake a lovely, nutty undertone that my family went crazy for.
- Toasted Coconut: If you want even more depth, toast the coconut flakes lightly before mixing into the topping—adds a wonderful crunch and flavor.
- Chocolate Drizzle: Drizzle melted chocolate over the cooled cake for an indulgent twist.
- Dairy-Free Version: I experimented using coconut milk and vegan butter for the topping—it worked surprisingly well while keeping that tropical vibe.
How to Make Lazy Daisy Cake Recipe
Step 1: Warm the Milk and Butter with Care
This step feels like setting the mood for the whole cake—it’s all about gently melting butter into the milk over medium-low heat until it’s steaming but not boiling. I like to watch carefully here because too hot can curdle the milk or burn the butter, and you don’t want that. Once done, set it aside so it can stay warm while you whip up the batter.
Step 2: Whisk Your Batter with Zeal
In a large bowl, you’re going to beat together eggs, sugar, vanilla, and salt—this is when you get to get a little aggressive! I’ve learned that whisking for a full minute really lightens the mixture, giving the cake a fluffier texture. If you feel like it, imagine you’re releasing all the stress from the day; it totally helps. Once your arm gets tired, switch to folding in your dry ingredients gently to avoid deflating that air you just incorporated.
Step 3: Combine and Bake Your Cake
After folding in the flour and baking powder carefully, add your warm milk-butter mixture—the batter will loosen up into a pourable but still thick consistency. Pour it into your greased 8×8 pan and pop it into the preheated 350°F oven. The magic happens over about 30 minutes: look for a golden edge and a slight spring back in the center when you press it with your fingertip. Resist the urge to open the oven frequently or the cake may deflate!
Step 4: Make the Topping and Broil it Perfectly
While the cake bakes, use the same saucepan (love minimizing dishes!) to melt the butter for your luscious topping. Then, stir together the coconut flakes, brown sugar, cream, salt, and melted butter in the same bowl you made your batter in. I don’t wash it between—that little bit of batter left behind just makes the topping more cohesive. As soon as the cake’s out, spread this topping evenly over the hot cake, slide the pan under the broiler, and watch closely as the topping bubbles and browns in about 3 minutes. Keep an eye and rotate if needed so it doesn’t burn—it goes fast!
Step 5: Cool and Enjoy
Once broiled, transfer your cake to a wire rack to cool completely before slicing. The topping firming up but still soft is the best part—every bite is a lovely balance of textures. I like to cover it tightly with plastic wrap or foil and eat within a few days to enjoy it at its peak, though even leftovers hold their charm as the topping melts into the cake’s crumb.
Pro Tips for Making Lazy Daisy Cake Recipe
- Room Temperature Ingredients: I learned early that using room temp eggs and milk helps you mix the batter more smoothly and gives the cake better rise.
- Don’t Skip the Whisking: Whisking eggs and sugar until pale is a simple trick that makes this cake extra fluffy—don’t rush it!
- Watch the Broiler Closely: Since broilers vary, check your topping every minute to avoid burnt coconut—it should bubble and toast just perfectly.
- Use the Same Bowl and Pan: Saves time and dishes, and I found it actually helps the topping stick better on a warm cake.
How to Serve Lazy Daisy Cake Recipe
Garnishes
I usually keep the garnishes simple—just a light dusting of powdered sugar adds a pretty finish and balances the richness. Sometimes, I’ll sprinkle a few toasted coconut flakes on top after cooling to amp up texture, or add a few fresh berries for a pop of color and brightness.
Side Dishes
This cake pairs beautifully with a scoop of vanilla ice cream or a dollop of whipped cream if I want to turn it into a more indulgent treat. I also love serving it alongside strong black coffee or a cup of tea—the richness of the cake complements a warm cup perfectly on chilly afternoons.
Creative Ways to Present
For special occasions, I’ve arranged the cake on a platter with fresh edible flowers and coconut flakes scattered around the edges—it always makes guests pause and ask what the secret is. Another time, I cut it into small squares and served with little spoons at a brunch party; they disappeared quick!
Make Ahead and Storage
Storing Leftovers
After the cake cools, I cover it tightly with plastic wrap or foil and store it at room temperature for up to 3 days. The topping softens and sinks into the cake a bit, which is exactly what I want—it makes it taste even more like an old-fashioned treat. Just keep it away from direct sunlight or humidity.
Freezing
Though I rarely freeze this cake because it’s usually gone too fast, I have wrapped slices tightly in plastic wrap and popped them in a freezer bag. When thawed overnight in the fridge, the texture is a little softer but still delicious. Just remember to broil the topping fresh if you want that bubbly crust again.
Reheating
I gently reheat slices in a low oven (around 300°F) for 5-7 minutes to warm through without drying out the cake. If you want to revive the toasted topping, a quick 1-2 minute broil works wonders—just watch it closely so it doesn’t burn!
FAQs
-
Can I use unsweetened coconut flakes for the topping?
Yes, absolutely! Using unsweetened coconut flakes will give you a less sweet topping, so you might consider adjusting the brown sugar slightly to keep the right balance of sweetness and moisture. I like the sweetened flakes because they add that classic sweet, chewy texture, but unsweetened works well if you want a less sugary finish.
-
What type of pan is best for this cake?
An 8×8-inch square baking pan is perfect because it gives the cake the right thickness for baking evenly. I recommend using a light-colored metal pan or glass if possible; dark pans can bake faster and risk over-browning the edges before the center is cooked through.
-
Can I make this cake gluten-free?
Definitely! Substitute the all-purpose flour with a good-quality gluten-free blend that includes xanthan gum or another binder. I found that the cake still rises nicely and the texture remains tender if you measure carefully and don’t overmix.
-
Why does the cake need warm milk and butter?
Heating the milk and butter helps melt the butter fully and slightly warms the batter, which results in a moist cake with a delicate crumb. Cold butter or milk can create lumps or cause the batter to firm up too quickly, so warming helps everything blend smoothly.
-
Is it necessary to broil the topping?
Broiling the topping is what transforms it from just sweet and coconutty to irresistibly bubbly and caramelized. It creates a beautiful toasted flavor and texture contrast that makes the Lazy Daisy Cake so special. You could skip broiling, but I don’t recommend it unless you’re in a real hurry.
Final Thoughts
This Lazy Daisy Cake Recipe has a special place in my heart because it reminds me of those simple, joyful moments when you bake with love and get rewarded with a treat that feels homemade and satisfying without fuss. I hope you give this one a try—it’s a sweet little project that brings so much warmth and smiles whether you’re sharing with family, friends, or savoring a quiet moment just for yourself. Trust me, once you’ve had your first bite, this charming cake will become your go-to for those times you want a cozy, impressive dessert minus the hassle!
Print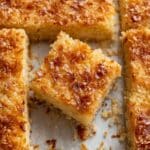
Lazy Daisy Cake Recipe
- Prep Time: 10 mins
- Cook Time: 35 mins
- Total Time: 45 mins
- Yield: 8 servings
- Category: Dessert
- Method: Baking
- Cuisine: American
Description
Lazy Daisy Cake is a moist and tender vanilla cake topped with a rich, caramelized coconut and brown sugar topping. This easy-to-make dessert blends the comforting flavors of butter, coconut, and brown sugar, broiled to a bubbly golden finish. Its simple preparation and delightful texture make it perfect for casual gatherings or an everyday treat.
Ingredients
For the Cake
- 1/2 cup milk
- 1 tablespoon butter
- 2 large eggs
- 1 cup (202g) sugar
- 1 teaspoon vanilla extract
- 1/4 teaspoon salt
- 1 cup (135g) all-purpose flour
- 1 teaspoon baking powder
For the Topping
- 4 tablespoons (1/2 stick) unsalted butter
- 1 cup (87g) sweetened coconut flakes
- 2/3 cup (154g) packed brown sugar
- 3 tablespoons heavy cream
- 1/4 teaspoon salt
Instructions
- Preheat and prepare pan: Preheat your oven to 350°F (175°C). Grease an 8×8-inch square baking pan thoroughly to prevent sticking.
- Heat the milk and butter: In a small saucepan over medium-low heat, warm the milk and butter together until the butter melts completely and the milk is steaming. Remove from heat and set aside.
- Mix wet ingredients: In a large bowl, whisk together the eggs, sugar, vanilla, and salt vigorously for about 60 seconds until the mixture lightens in color and thickens slightly.
- Add dry ingredients: Sprinkle baking powder evenly over the flour, crush any lumps, then fold the flour and baking powder mixture gently into the wet ingredients using a spatula until just combined.
- Combine batter: Pour the warm milk and butter mixture into the batter and fold it in gently until you have a slightly liquidy, smooth batter.
- Bake the cake: Pour the batter into the prepared pan and smooth the top. Bake for about 30 minutes, until the cake is puffed, golden at the edges, and springs back gently when pressed in the center.
- Make the topping: While the cake bakes, melt the butter over medium-low heat in the same saucepan. In the same bowl used for the batter, combine the melted butter, sweetened coconut flakes, brown sugar, heavy cream, and salt, mixing thoroughly to form a thick topping.
- Broil the topping: After removing the cake from the oven, move the oven rack to about 5 inches from the broiler element. Spread the topping evenly over the hot cake. Broil for about 3 minutes, watching closely and rotating the pan every minute to ensure the topping bubbles and caramelizes evenly without burning.
- Cool and serve: Transfer the cake to a wire rack and allow it to cool completely. Slice into pieces and serve. Store leftovers covered for up to 3 days; the topping will soften but remain delicious.
Notes
- Use an 8×8-inch square pan for the correct thickness and baking time.
- Be sure to watch the cake closely during broiling to prevent burning the topping.
- Allow the cake to cool completely for clean slices and best texture.
- Leftover cake is best consumed within 3 days for optimal freshness.
- You can substitute heavy cream with whole milk for a lighter topping, though the texture will differ slightly.
Nutrition
- Serving Size: 1 slice (1/8 of cake)
- Calories: 350 kcal
- Sugar: 30 g
- Sodium: 150 mg
- Fat: 18 g
- Saturated Fat: 10 g
- Unsaturated Fat: 6 g
- Trans Fat: 0.2 g
- Carbohydrates: 45 g
- Fiber: 1 g
- Protein: 4 g
- Cholesterol: 75 mg


