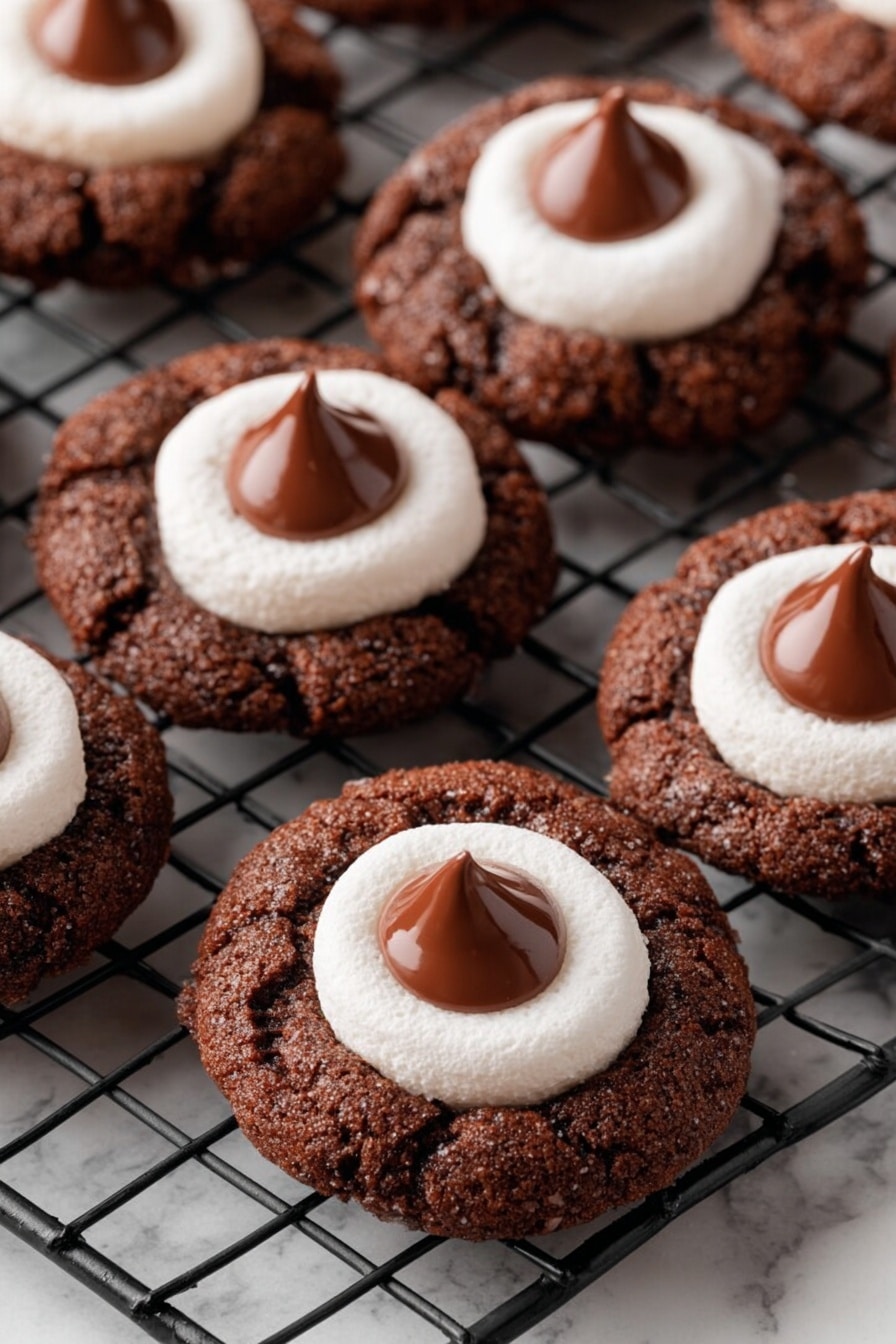
If you’re a fan of cozy treats that warm you up from the inside out, I’ve got something extra special to share with you today. The Hot Cocoa Cookie Blossoms Recipe is hands down one of my favorite desserts to whip up, especially when the weather turns chilly. Imagine rich chocolate-y cookies rolled in sugar, topped with melty marshmallows, and finished off with those classic Hershey’s Kisses Hot Cocoa chocolates that instantly scream comfort. Whether you’re baking for a crowd or a cozy night in, this recipe will become your go-to for a sweet, nostalgic treat.
Why You’ll Love This Recipe
- Irresistibly Chocolatey: The cocoa in these cookies is perfectly balanced for a deep chocolate flavor without being bitter.
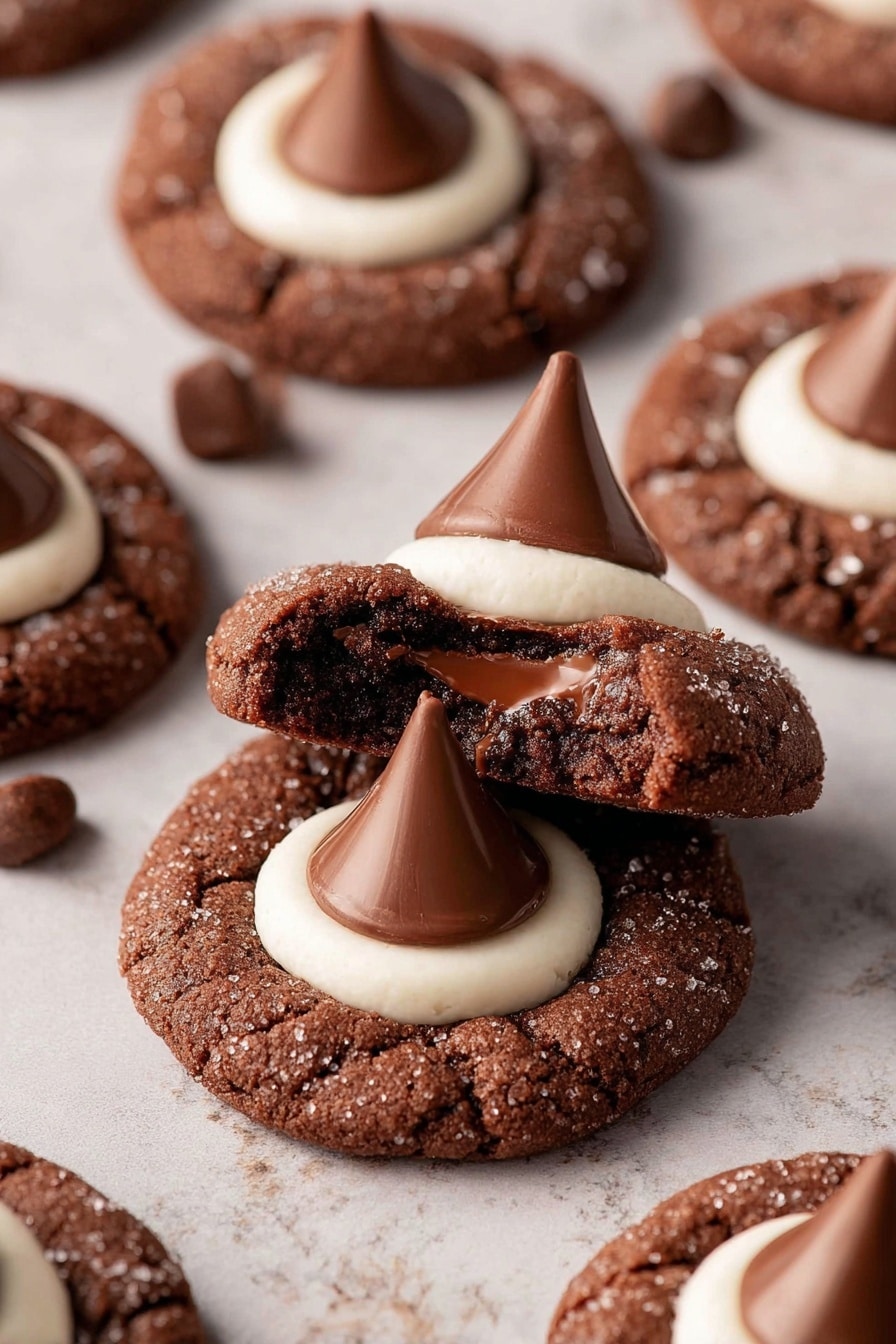
- Melty Gooey Topping: Those marshmallows and Hershey’s Kisses create a warm, melty center every time you bite in.
- Simple Ingredients: You probably already have everything in your pantry, making this recipe easy to pull off anytime.
- Quick Baking Time: Ready in under 30 minutes, perfect for last-minute cravings or holiday baking blitzes.

Ingredients You’ll Need
Each ingredient in this Hot Cocoa Cookie Blossoms Recipe plays such an important role in delivering that perfect cookie texture and flavor. I always recommend using fresh cocoa powder and real butter for the best results — it really makes all the difference in the final taste and crumb.

- All-purpose flour: Essential for structure; measuring it correctly keeps the cookies from turning tough.
- Baking soda and baking powder: Both work together to give the cookies just the right rise and lightness.
- Unsweetened cocoa powder: The heart of that hot cocoa flavor; choose a good-quality brand for rich depth.
- Salt: Balances sweetness and enhances the chocolate notes.
- Unsalted butter: Melted and cooled for a tender, chewy bite; make sure it’s not warm or the eggs could cook.
- Brown sugar (light or dark): Adds subtle molasses notes and keeps cookies moist and chewy.
- White granulated sugar: Adds crispness and sweetness; also used for rolling for that pretty sugar-coated finish.
- Pure vanilla extract: Boosts flavor complexity, so don’t skip this.
- Egg and egg yolk: The duo creates just enough moisture and richness without making the dough too wet.
- Marshmallows (regular-sized): Cut in half for that gooey cookie top that everyone loves.
- Hershey’s Kisses Hot Cocoa Chocolates: The signature finishing touch that melts into the marshmallow topping beautifully.
Variations
I love how flexible this Hot Cocoa Cookie Blossoms Recipe is — once you’ve nailed the basic technique, you can have fun making it your own. I like to tweak things depending on the season or who I’m baking for, and honestly, that’s part of the fun!
- Double Chocolate: I once swapped regular Hershey’s Kisses with dark chocolate ones for a more intense buzz, and my family went crazy for the richer flavor.
- Peanut Butter Twist: Adding a teaspoon of peanut butter to the dough creates a fun surprise, pairing beautifully with chocolate.
- Vegan Version: I substitute butter with coconut oil, use flax eggs, and find vegan cocoa kisses to keep it plant-based but still delicious.
- Seasonal Flavors: During the holidays, I sprinkle in some cinnamon or cayenne for a cozy, spicy kick that brightens up the cocoa flavor.
How to Make Hot Cocoa Cookie Blossoms Recipe
Step 1: Prep Your Dry Ingredients
Start by sifting together your flour and cocoa powder in a medium bowl. This step might feel a little extra, but it really helps the cocoa evenly incorporate and keeps the dough light and airy. Then add the baking soda, baking powder, and salt. Give it all a good whisk so everything is well blended. Setting this aside lets you focus on your wet ingredients.
Step 2: Mix Wet Ingredients to Creamy Perfection
In a large bowl, combine melted and cooled butter with brown sugar, white sugar, vanilla, the egg, and egg yolk. I like using a hand mixer here to get everything smooth and creamy, but whisking by hand works too! Just make sure your butter is not hot; otherwise, you risk scrambling the eggs. This combination creates the creamy base that gives these cookies such a rich, moist texture.
Step 3: Combine Dry and Wet Ingredients
Add your dry ingredients to the wet side and gently fold together with a rubber spatula. Don’t overmix here or your cookies might turn out dense – just until you don’t see flour streaks anymore. This is a key step I’ve learned over time — less is more when combining.
Step 4: Chill and Prep Your Cookies for Baking
Preheat your oven to 350°F (175°C) and line two cookie sheets with parchment paper. While the oven heats, let your dough rest for about 10 minutes. This little rest lets the gluten relax and helps the cookies spread just right. Meanwhile, unwrap your Hershey’s Kisses and stick them in the freezer – this prevents them from melting too quickly in the oven, so they keep their shape beautifully on top of the cookies.
Step 5: Shape, Roll, and Prepare Marshmallows
Use a small cookie scoop or tablespoon to portion out balls of dough. Roll each ball into the extra granulated sugar for a sweet, sparkling coating – it adds a lovely texture and looks so pretty! Place about 12 dough balls on each cookie sheet, spaced to give room for spreading. Grab your regular-sized marshmallows and cut them in half horizontally with kitchen scissors. Trust me, scissors make this SO much easier and safer than using a knife. Set them aside for the next step.
Step 6: Bake in Two Stages for Perfect Gooeyness
Bake one cookie sheet at a time for 6 minutes. Then quickly press a marshmallow half into the center of each cookie and bake for an additional 2 to 3 minutes — just until the marshmallow starts to get melty and browned on the edges. This two-step baking is the secret I discovered that keeps the marshmallows from overcooking or flattening out too much.
Step 7: Add Hershey’s Kisses and Cool
Once out of the oven, leave the cookies on the hot baking sheet for 2 minutes – this resting time lets them finish setting up without breaking apart. Transfer them carefully to a wire rack, and immediately top each one with a frozen Hershey’s Kiss. The residual heat gently melts the chocolate, melding it perfectly with the marshmallow for that signature “blossom” effect we all love. Then just wait for them to cool before diving in—though patience is hard, trust me, it’s worth it!
Pro Tips for Making Hot Cocoa Cookie Blossoms Recipe
- Measure Your Flour Carefully: I learned the hard way that spooning and leveling flour or using a kitchen scale avoids dry, crumbly cookies because packed flour changes the texture.
- Cool Butter Is Key: Melt your butter but let it return to room temperature before mixing to prevent scrambling the eggs and tough dough.
- Two-Stage Baking Technique: Baking the cookies first before adding marshmallows prevents sogginess and ensures a perfect gooey top.
- Use Frozen Kisses: Putting the Hershey’s Kisses in the freezer keeps them from melting into a puddle when placed on the warm cookies.
How to Serve Hot Cocoa Cookie Blossoms Recipe
Garnishes
I like to add a light dusting of powdered sugar over the cookies just before serving — it makes them look extra special like little winter snowflakes. If you’re feeling fancy, a drizzle of melted white chocolate or a sprinkle of crushed peppermint can add a festive touch that’s perfect for holiday parties.
Side Dishes
These blossoms pair beautifully with a hot cup of your favorite coffee, tea, or even a big mug of hot cocoa (to keep the chocolate theme going!). For a little extra indulgence, I sometimes serve them alongside homemade whipped cream or a scoop of vanilla ice cream to contrast the warm cookie’s texture.
Creative Ways to Present
For parties or gift-giving, I like arranging these cookies on a festive platter lined with evergreen sprigs or wrapping small stacks in clear treat bags tied with a ribbon. Sometimes, I’ll even serve them in cute mini cups resembling hot cocoa mugs for a playful presentation that guests love.
Make Ahead and Storage
Storing Leftovers
Once completely cool, I store leftover Hot Cocoa Cookie Blossoms in an airtight container at room temperature. They’ll stay fresh and chewy for about 3 to 4 days, though I can never keep them around that long! If you want to keep a batch for longer, the freezer is your friend.
Freezing
I’ve had excellent results freezing these cookies—even with the marshmallows and kisses. Just place them in a single layer on a baking sheet to freeze first, then transfer to a freezer-safe bag or container. They’ll keep for about 2 months without losing texture or flavor.
Reheating
To reheat, I warm them for about 10 seconds in the microwave or pop them in a 300°F oven for 5 minutes. This revives that melty marshmallow goo and softens the cookie again. Just be careful not to overheat, or the marshmallow can get rubbery.
FAQs
-
Can I use mini marshmallows instead of regular-sized marshmallows?
You can, but I recommend using regular-sized marshmallows cut in half because they create the perfect gooey topping that complements the Hershey’s Kisses. Mini marshmallows tend to melt away too quickly and won’t give that signature “blossom” look and texture.
-
Why do we bake the cookies before adding marshmallows?
Baking the cookies first allows them to set and start spreading before the marshmallows go on. If you add marshmallows at the beginning, they can over-melt, become soggy, or burn. The two-step baking helps keep that perfect gooey texture just right.
-
Can I make this recipe gluten-free?
Yes! I recommend using a 1:1 gluten-free baking flour blend. Because gluten-free flours absorb moisture differently, you might need to adjust the flour amount slightly. I’d suggest starting with the same measurement and then adding a tablespoon more if the dough feels too sticky.
-
How do I prevent my cookies from flattening too much?
One trick I’ve learned is to chill the dough briefly before baking, but for this particular recipe, letting it rest for 10 minutes works well. Also, using the correct amount of flour and not overmixing the dough helps keep the perfect thickness.
-
Why should Hershey’s Kisses be frozen before topping the cookies?
Freezing the Kisses keeps them from melting too quickly in the hot cookies, allowing them to retain their shape while still becoming soft and melty on top. It gives you that beautiful, iconic blossom look every time.
Final Thoughts
This Hot Cocoa Cookie Blossoms Recipe holds such a cozy spot in my heart (and my kitchen). It’s the perfect mix of chocolate, marshmallow, and sweet nostalgia wrapped in a chewy cookie. Every time I make these, they bring smiles around the table and great memories — just like sharing hot cocoa on a winter afternoon with friends. I can’t recommend you trying this enough; it’s truly one of those recipes you’ll find yourself reaching for time and again, whether for a simple treat or a special occasion. Happy baking!
Print
Hot Cocoa Cookie Blossoms Recipe
- Prep Time: 15 minutes
- Cook Time: 8 minutes
- Total Time: 23 minutes
- Yield: 20 cookies
- Category: Dessert
- Method: Baking
- Cuisine: American
Description
These Hot Cocoa Cookie Blossoms combine rich cocoa-flavored cookie dough rolled in sugar, topped with melted marshmallows and Hershey’s Kisses Hot Cocoa Chocolates for a delightful twist on classic cookie blossoms. Perfect for cozy gatherings or holiday treats, these cookies are soft, chocolaty, and bursting with melty marshmallow goodness.
Ingredients
Dry Ingredients
- 1 1/3 cup All-purpose flour
- 1/4 tsp Baking soda
- 1/4 tsp Baking powder
- 1/4 cup Unsweetened cocoa powder
- 1/2 tsp Salt
Wet Ingredients
- 1/2 cup Unsalted butter, melted and cooled
- 3/4 cup Brown sugar, packed (light or dark)
- 1/4 cup White granulated sugar
- 2 tsp Pure vanilla extract
- 1 Large egg, room temperature
- 1 Egg yolk, room temperature
Toppings and Finishing
- 1/3 cup White granulated sugar (for rolling cookie dough)
- 10 Regular-sized marshmallows, cut horizontally
- 20 Hershey’s Kisses Hot Cocoa Chocolates, unwrapped
Instructions
- Mix Dry Ingredients: In a medium bowl, sift together the all-purpose flour and unsweetened cocoa powder. Add baking soda, baking powder, and salt to this mixture and whisk to combine. Set aside.
- Combine Wet Ingredients: In a large mixing bowl, add melted and cooled unsalted butter. Mix in brown sugar, white granulated sugar, pure vanilla extract, large egg, and egg yolk. Whisk these ingredients together until well combined and creamy.
- Incorporate Dry Ingredients: Add the dry ingredient mixture to the wet ingredients. Use a rubber spatula to gently fold the two mixtures together until just combined, being careful not to overmix to maintain cookie tenderness.
- Preheat and Prepare: Preheat your oven to 350°F (175°C). Line two cookie sheets with parchment paper for easy cleanup. Let the dough rest for 10 minutes while the oven heats to allow the gluten to relax and the dough to hydrate. Meanwhile, unwrap the Hershey’s Kisses and place them in the freezer to keep them firm until needed.
- Shape and Roll Cookies: Using a small cookie scoop, portion the dough into balls. Pour the 1/3 cup white granulated sugar into a shallow bowl and roll each cookie dough ball in the sugar to coat evenly. Arrange 12 cookie dough balls on each prepared cookie sheet, spaced to allow for spreading. Prepare the marshmallows by cutting them horizontally with kitchen scissors and set aside.
- Bake and Add Marshmallows: Bake one cookie sheet at a time for 6 minutes in the preheated oven. Remove from the oven and quickly top each cookie with a piece of the sliced marshmallow in the center. Return the cookie sheet to the oven and bake for an additional 2 to 3 minutes until the marshmallow melts and gently browns.
- Cool and Finish: Let the cookies cool on the hot cookie sheet for about 2 minutes to firm up, then transfer them to a wire cooling rack. While still warm, top each cookie with a Hershey’s Kisses Hot Cocoa Chocolate, pressing lightly so it adheres as it softens. Allow the cookies to cool completely before serving.
Notes
- Flour measurement is critical: spoon and level the flour or use a kitchen scale to avoid dry, crumbly cookies caused by too much flour.
- If baking at high altitudes, increase the flour by 1 tablespoon for better texture and structure.
- Remove dairy ingredients such as butter and eggs from the refrigerator about 2 hours before baking to bring them to room temperature, ensuring better mixing and texture.
Nutrition
- Serving Size: 1 cookie
- Calories: 150 kcal
- Sugar: 12 g
- Sodium: 90 mg
- Fat: 7 g
- Saturated Fat: 4 g
- Unsaturated Fat: 2.5 g
- Trans Fat: 0 g
- Carbohydrates: 20 g
- Fiber: 1 g
- Protein: 2 g
- Cholesterol: 30 mg


