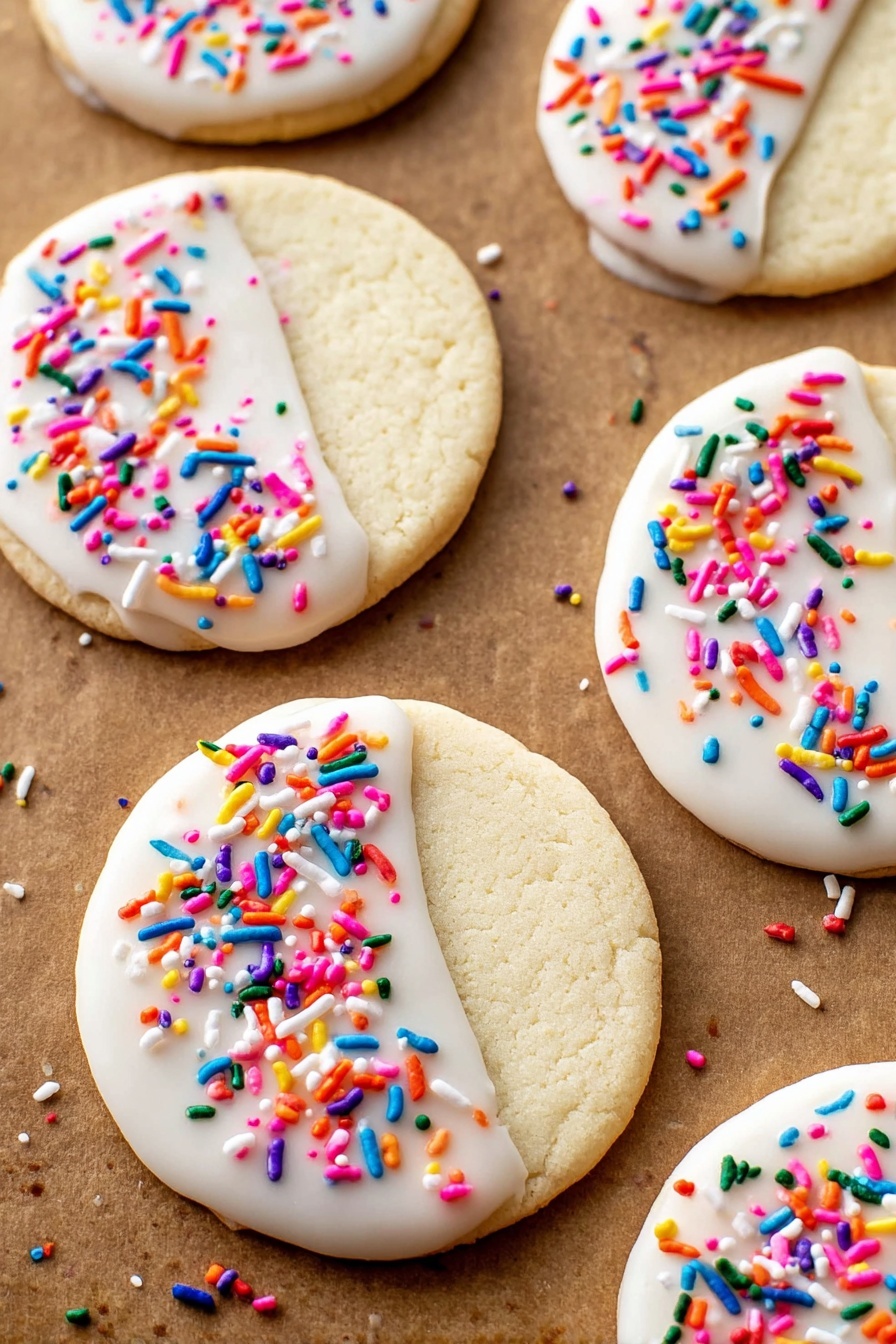
If you’re on the hunt for the perfect classic treat, I absolutely have to share this Homemade Cut-Out Sugar Cookies Recipe with you. It’s the kind of recipe that feels like an instant family favorite — soft, buttery, and just sweet enough to satisfy any cookie craving without being overpowering. Plus, they’re the ideal canvas for frosting, decorating, or just enjoying plain with a cup of tea. Keep reading because I’m spilling all my best tips and tricks so you can nail them every time!
Why You’ll Love This Recipe
- Classic Taste & Texture: Soft, buttery cookies with just the right amount of sweetness every single time.
- Perfect for Decorating: The dough holds shape beautifully, making your cut-outs crisp around the edges but tender inside.
- Easy to Make Ahead: The dough can chill in the fridge for up to 2 days, so you can prep early and bake when you’re ready.
- Family Favorite: Every holiday or special occasion, my family goes crazy for these cookies and yours will too.

Ingredients You’ll Need
All the ingredients in this Homemade Cut-Out Sugar Cookies Recipe come together simply, letting clean, rich flavors shine. Using good quality butter and fresh extracts makes a world of difference, and I always recommend sifting your dry ingredients to avoid lumps and get that smooth dough.
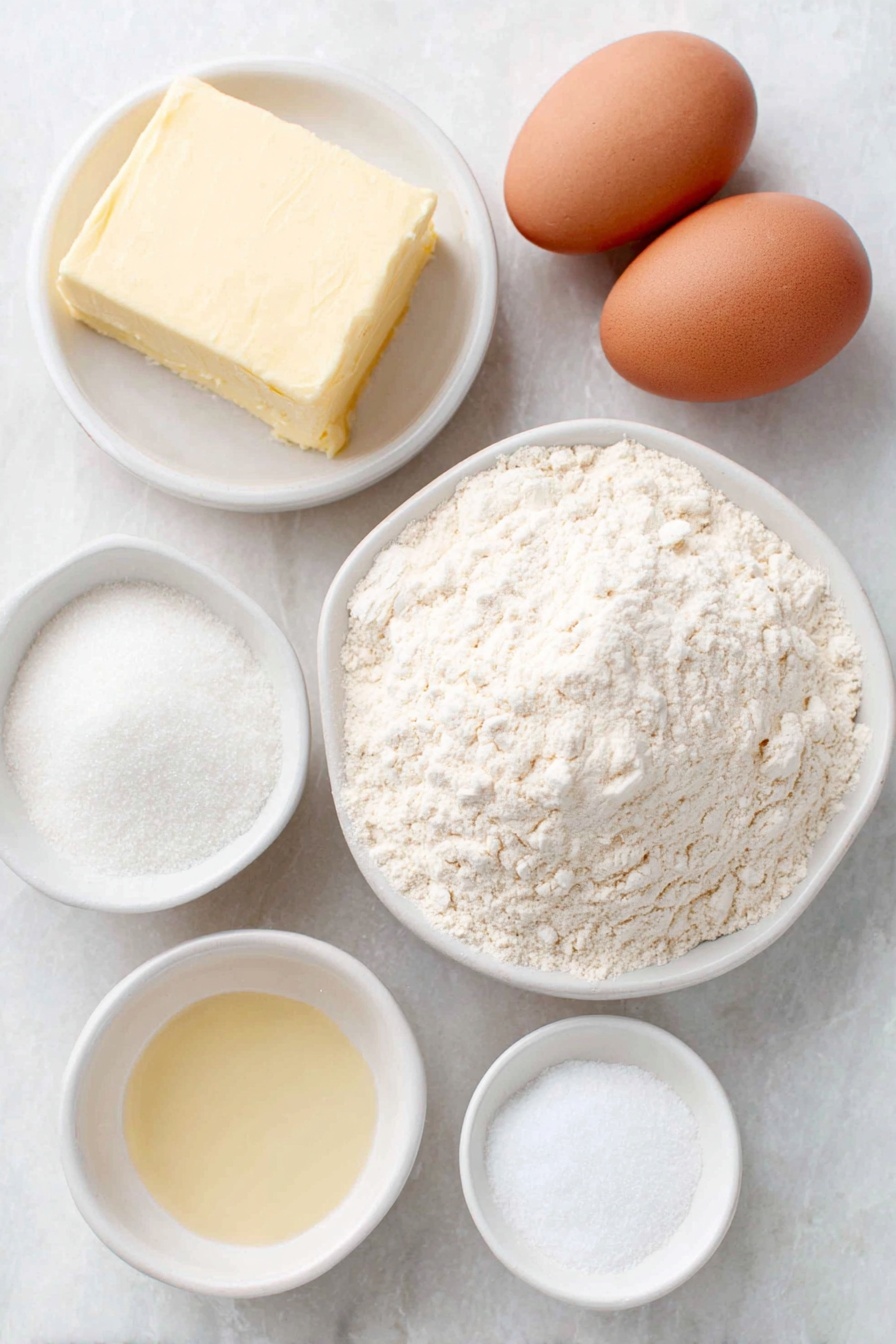
- All-purpose flour: The base of your cookies; choose a good quality brand for consistent results.
- Salt: Enhances the sweetness and balances flavors perfectly.
- Baking powder: Helps the cookies rise just a touch, making them tender but sturdy.
- Butter (softened): Room temperature butter is key for creamy mixing and smooth dough.
- Granulated sugar: For classic sweetness and that tender crumb we all love.
- Eggs: Bind everything together and add richness.
- Vanilla extract: Adds warmth and depth—use pure for best flavor.
- Almond extract: The secret touch! It adds a subtle nutty aroma that makes these cookies extra special.
Variations
I love how flexible this Homemade Cut-Out Sugar Cookies Recipe is — it invites you to play around with flavors, shapes, and decorations. Whether it’s a holiday twist or a diet-friendly adjustment, there’s room to make it your own.
- Adding Citrus Zest: I sometimes grate lemon or orange zest into the dough for a bright, fresh flavor that pairs beautifully with vanilla.
- Gluten-Free Version: Swap the all-purpose flour with a 1:1 gluten-free baking blend; just be mindful to chill the dough a bit longer to firm up.
- Spiced Sugar Cookies: Adding a pinch of cinnamon or nutmeg gives a cozy warmth — my family loves these around fall and winter holidays.
- Sugar Swap: Replace granulated sugar with coconut sugar for a deeper caramel note; the texture remains soft but the flavor feels richer.
How to Make Homemade Cut-Out Sugar Cookies Recipe
Step 1: Prep Your Dry Ingredients
Start by mixing together the flour, salt, and baking powder in a medium bowl. I like to sift them or at least whisk well to get everything evenly combined. Having the dry ingredients ready keeps the process smooth when you start mixing everything together — less waiting, more baking!
Step 2: Cream Butter and Sugar Until Fluffy
This step makes a huge difference in the texture of your cookies. Using a hand mixer or a stand mixer, beat the softened butter with the sugar until it looks light and fluffy — we’re talking about 3 to 5 minutes. This air incorporation is what creates those soft edges and tender crumb I love so much.
Step 3: Add Eggs and Extracts
Next, add the eggs one at a time. I learned the hard way that adding them too quickly can scramble the dough, so take your time. Once the eggs are incorporated, mix in the vanilla and almond extracts. That almond extract is a game-changer—it adds a lovely depth you won’t want to skip.
Step 4: Combine Wet and Dry Ingredients
Slowly add the flour mixture to your wet ingredients, mixing just until combined. Over-mixing can make cookies tough, so pause once the dough comes together. The dough might feel a bit firm, which is perfect for cutting shapes.
Step 5: Chill the Dough for Best Results
This is where patience pays off. Divide your dough into two parts, wrap each tightly, and refrigerate for at least 2 hours. I’ve chilled mine overnight many times, and it only improves the flavor and texture. Chilling lets the butter firm up, making the dough easier to roll and cut clean shapes.
Step 6: Roll Out and Cut Your Shapes
Bring the dough out of the fridge and let it soften just enough to roll — about 10 minutes on your counter. Roll it out on a lightly floured surface until it’s about 1/4 inch thick. Use your favorite cookie cutters (holiday shapes or classic circles) and transfer them carefully onto a parchment-lined baking sheet. Keeping them about 2 inches apart helps them bake evenly without sticking.
Step 7: Bake and Cool
Bake the cookies at 375°F for 10 to 12 minutes until the edges are just turning golden — watch closely so they don’t get too brown. Let the cookies cool completely on a wire rack before you start decorating or storing. Cooling helps them firm up nicely and prevents your frosting from melting.
Pro Tips for Making Homemade Cut-Out Sugar Cookies Recipe
- Use Room Temperature Butter: I can’t stress this enough — it helps your dough come together smoothly without patches of butter or dry clumps.
- Don’t Skip the Chill: Chilling tightens up the dough, making it less sticky and easier to cut perfect shapes.
- Roll Evenly: Rolling the dough to an even 1/4 inch thickness ensures your cookies bake uniformly, so no tiny crisp edges or underdone centers.
- Watch Your Bake Time: Cookies can go from perfect to overdone quickly; set your timer and keep an eye on those edges.
How to Serve Homemade Cut-Out Sugar Cookies Recipe
Garnishes
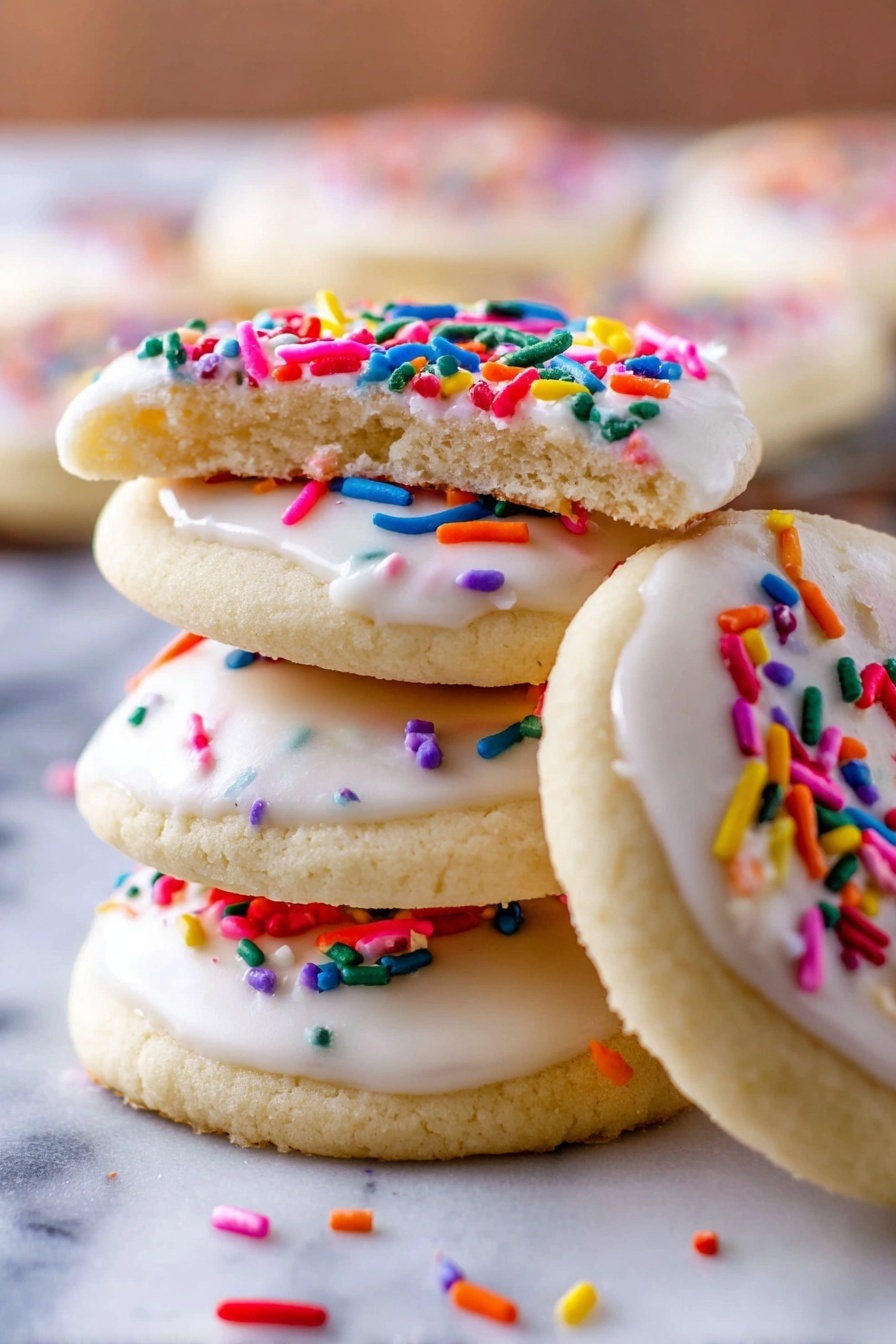
I love decorating these cookies with classic royal icing or buttercream frosting, topped with colorful sprinkles or edible glitter. Sometimes, I add delicate piping with a tiny tip for special occasions. If you prefer to keep it simple, a dusting of powdered sugar or a drizzle of melted chocolate is just as delightful.
Side Dishes
These sugar cookies are perfect alongside a hot cup of coffee, robust black tea, or even a cold glass of milk. For holiday gatherings, I like to present them with fresh fruit slices or a whipped cream dip, which adds a nice balance to the sweetness.
Creative Ways to Present
For birthdays or holidays, arrange your cookies on a festive platter with matching colored napkins or cellophane wrap tied with ribbons. Another fun idea I’ve tried is threading small cookies onto a decorative string to create an edible garland — such a conversation starter at parties!
Make Ahead and Storage
Storing Leftovers
Once cooled, store your cookies in an airtight container at room temperature, layered with parchment paper to avoid sticking. My family usually finishes them quickly, but they stay fresh for about 4 to 5 days.
Freezing
I’ve had great success freezing both the dough and the baked cookies. For dough, wrap it tightly in plastic wrap and foil before freezing up to 3 months. When ready, thaw overnight in the fridge before rolling out. Baked cookies freeze well in airtight containers; just thaw at room temperature before serving.
Reheating
If your cookies lose a bit of their fresh-baked softness, a quick 5-10 second zap in the microwave revives that tender texture. Just be careful not to overheat — you want them slightly warm and chewy!
FAQs
-
Can I use cold butter instead of softened butter for this recipe?
It’s best to use softened butter at room temperature because it creams better with the sugar, trapping air which creates a lighter cookie texture. Using cold butter can lead to uneven mixing and denser cookies.
-
How do I prevent my sugar cookies from spreading too much?
Chilling the dough before baking is key. It firms up the butter so cookies hold their shape better. Also, avoid over-mixing the dough and make sure your oven is fully preheated.
-
What is the best way to decorate these cookies?
Royal icing or buttercream frosting works beautifully because they pipe well and hold their shape. Sprinkles, edible glitter, or colored sugars add a fun finishing touch. Just be sure the cookies are fully cooled before decorating.
-
Can I make this dough ahead of time?
Absolutely! This dough can be made and stored tightly wrapped in the fridge for up to 2 days or frozen for up to 3 months. Just thaw in the refrigerator before rolling out.
Final Thoughts
I used to struggle with finding a sugar cookie recipe that was perfectly balanced — not too sweet, not too flat. This Homemade Cut-Out Sugar Cookies Recipe quickly became my go-to because it delivers that classic cookie I’ve always craved. Whether you’re baking for a party, the holidays, or just because, these cookies will bring smiles all around. Give this recipe a try and I guarantee once you try it, you’ll keep coming back to bake these sweet little treasures again and again!
Print
Homemade Cut-Out Sugar Cookies Recipe
- Prep Time: 10 minutes
- Cook Time: 12 minutes
- Total Time: 2 hours 22 minutes
- Yield: 36 cookies
- Category: Dessert
- Method: Baking
- Cuisine: American
Description
Classic cut-out sugar cookies that are soft, buttery, and perfect for decorating. These easy-to-make cookies hold their shape well, making them ideal for festive occasions or everyday treats. With a subtle hint of vanilla and almond extract, they offer a delightful balance of sweetness and flavor.
Ingredients
Dry Ingredients
- 4 cups all purpose flour
- 3/4 teaspoon salt
- 3/4 teaspoon baking powder
Wet Ingredients
- 1 cup butter, softened to room temperature
- 1 cup granulated sugar
- 2 large eggs
- 1 teaspoon vanilla extract
- 1 teaspoon almond extract
Instructions
- Preheat Oven: Preheat your oven to 375°F (190°C) to ensure it’s at the right temperature by the time your cookies are ready to bake.
- Mix Dry Ingredients: In a medium mixing bowl, combine the all-purpose flour, salt, and baking powder. Stir them well to distribute the leavening and seasoning evenly, then set aside.
- Cream Butter and Sugar: In a large mixing bowl, use a hand mixer to beat the softened butter and granulated sugar until the mixture becomes light, fluffy, and pale in color. This step incorporates air, helping the cookies to be tender.
- Add Eggs and Extracts: Beat in the eggs one at a time, making sure each egg is fully incorporated before adding the next. Then add the vanilla and almond extracts to enhance the flavor, mixing until combined.
- Combine Dry and Wet Mixtures: Gradually add the flour mixture into the butter mixture while mixing until just incorporated. Avoid overmixing to keep the cookies tender.
- Chill the Dough: Divide the dough into two equal parts, wrap each tightly in plastic wrap, and refrigerate for at least 2 hours or up to 2 days. This firms the dough and prevents spreading during baking.
- Roll and Cut Shapes: Remove the dough from the refrigerator and let it soften slightly at room temperature until workable. On a lightly floured surface, roll the dough out to about 1/4 inch thickness. Use cookie cutters to cut out your desired shapes.
- Arrange and Bake: Place the cut-out cookies about 2 inches apart on a parchment paper-lined cookie sheet. Bake in the preheated oven at 375°F for 10-12 minutes, or until the edges are just starting to turn golden.
- Cool and Decorate: Transfer cookies to a wire rack to cool completely before frosting or decorating as desired. This prevents the frosting from melting.
Notes
- For best results, do not skip the chilling step as it helps maintain the cookie shapes during baking.
- Use parchment paper or silicone baking mats to prevent sticking and ease cleanup.
- Decorate cookies after they are completely cooled to avoid smudging or melting of icing.
- You can customize these cookies with different flavors by substituting almond extract with other extracts such as lemon or peppermint.
- Store cookies in an airtight container to keep them fresh for up to a week.
Nutrition
- Serving Size: 1 cookie
- Calories: 120
- Sugar: 7g
- Sodium: 85mg
- Fat: 6g
- Saturated Fat: 3.5g
- Unsaturated Fat: 2g
- Trans Fat: 0g
- Carbohydrates: 16g
- Fiber: 0.5g
- Protein: 1g
- Cholesterol: 25mg


