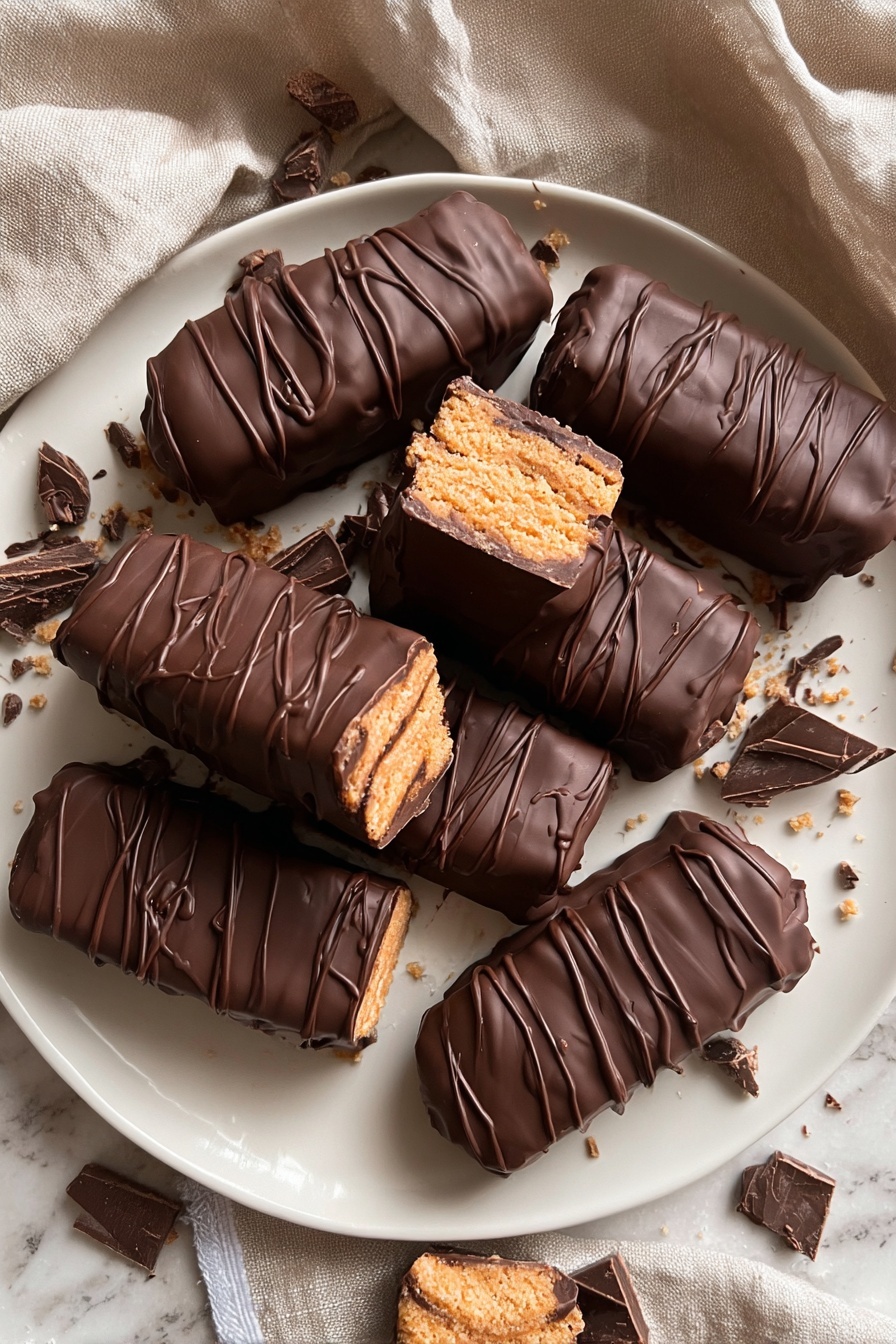
If you’ve ever craved that satisfyingly crunchy, peanut buttery treat but wanted a healthier option that’s easy to whip up at home, you’re in for a real treat with this Healthy Homemade Butterfingers Recipe. Trust me, it’s fan-freaking-tastic—I’ve made it countless times, and every single batch vanishes in no time. You’ll love how it balances wholesome ingredients without skimping on that classic Butterfinger crunch and chocolatey goodness.
Why You’ll Love This Recipe
- Clean, Simple Ingredients: No artificial junk—just natural peanut butter, honey, and cornflakes.
- Crunchy & Chocolatey: Perfectly replicates the original Butterfinger texture with a homemade twist.
- Kid-Friendly & Allergy-Conscious: Easily swap chocolate and peanut butter for dairy-free or nut-free options.
- Super Quick to Make: You’ll be enjoying your Butterfingers in just over an hour, no baking required.

Ingredients You’ll Need
These ingredients come together like a dream because they’re simple, easy to find, and do exactly what they’re supposed to—create a sweet, crunchy, and wholesome candy bar that tastes incredible without the guilt.
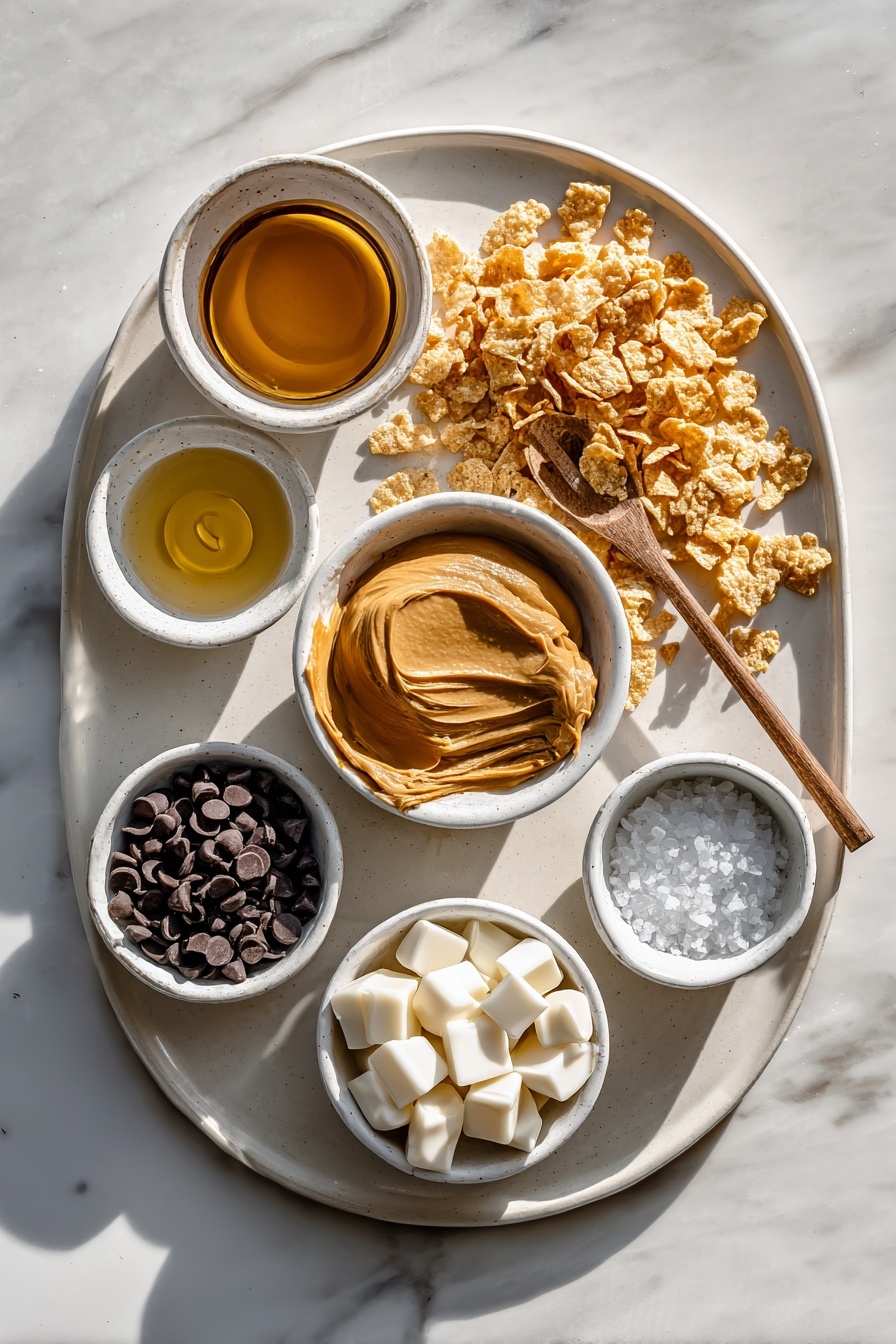
- Peanut Butter: Use natural or unsweetened for the healthiest option; it gives that rich, creamy base.
- Honey: Acts as a natural sweetener and binder, making your Butterfingers chewy yet firm.
- Vanilla Extract: Just a touch adds a warm, sweet aroma that elevates flavors.
- Sea Salt: Balances the sweetness and enhances the peanut flavor beautifully.
- Cornflake Cereal: Crush slightly to get that signature Butterfinger crunch and texture.
- Chocolate Chips (dairy-free if needed): For coating; choose your favorite kind—dark, milk, or vegan chocolate.
- Coconut Oil: Helps the chocolate set nicely with a smooth finish and glossy texture.
Variations
I love making this Healthy Homemade Butterfingers Recipe my own sometimes, depending on who’s coming over or what pantry staples I have on hand. Don’t hesitate to play around with it—you might find your new favorite twist!
- Nut-Free Version: Swap peanut butter for sunflower seed butter and use nut-free chocolate chips; my nephew is allergic and this still tastes amazing!
- Added Crunch: Toss in some crushed almonds or pecans along with the cornflakes for an extra layer of texture.
- Simpler Sweetener: Use maple syrup instead of honey if that’s your preference—it changes the flavor slightly but keeps it just as delicious.
- Spiced Kick: Add a pinch of cinnamon or cayenne to the peanut butter mixture for something unexpected and delightful.
How to Make Healthy Homemade Butterfingers Recipe
Step 1: Warm Up Your Peanut Butter Mix
Start by gently heating the peanut butter, honey, vanilla extract, and sea salt in a saucepan over medium-low heat. Stir constantly for 2-4 minutes until the mixture is warm and silky smooth. Be careful not to overheat it—too hot and it can separate or scorch. This step makes mixing in the cereal so much easier and helps the flavors meld beautifully.
Step 2: Combine and Crunch
Pour your warmed peanut butter mixture into a large bowl with the cornflake cereal. Here’s the fun part: mix gently but firmly, crushing the cereal a bit while stirring until all pieces are well coated. You’ll notice the mixture getting sticky and coming together—this is when you know you’re on the right track.
Step 3: Shape Your Butterfingers
Form the mixture into 12 to 14 small logs or bars—try to keep them uniform in size so they freeze evenly. Lay them on a parchment-lined tray or plate, then pop them into the freezer for about an hour. This freezes them solid enough to dip in chocolate without falling apart.
Step 4: Dip in Chocolate
While your logs chill, melt the chocolate chips and coconut oil together in short bursts in the microwave or over a double boiler, stirring frequently so the chocolate doesn’t scorch. Once smooth, dip each frozen log into the chocolate, letting excess drip back into the bowl. Return to the parchment-lined tray and freeze for another 10 minutes until the chocolate hardens.
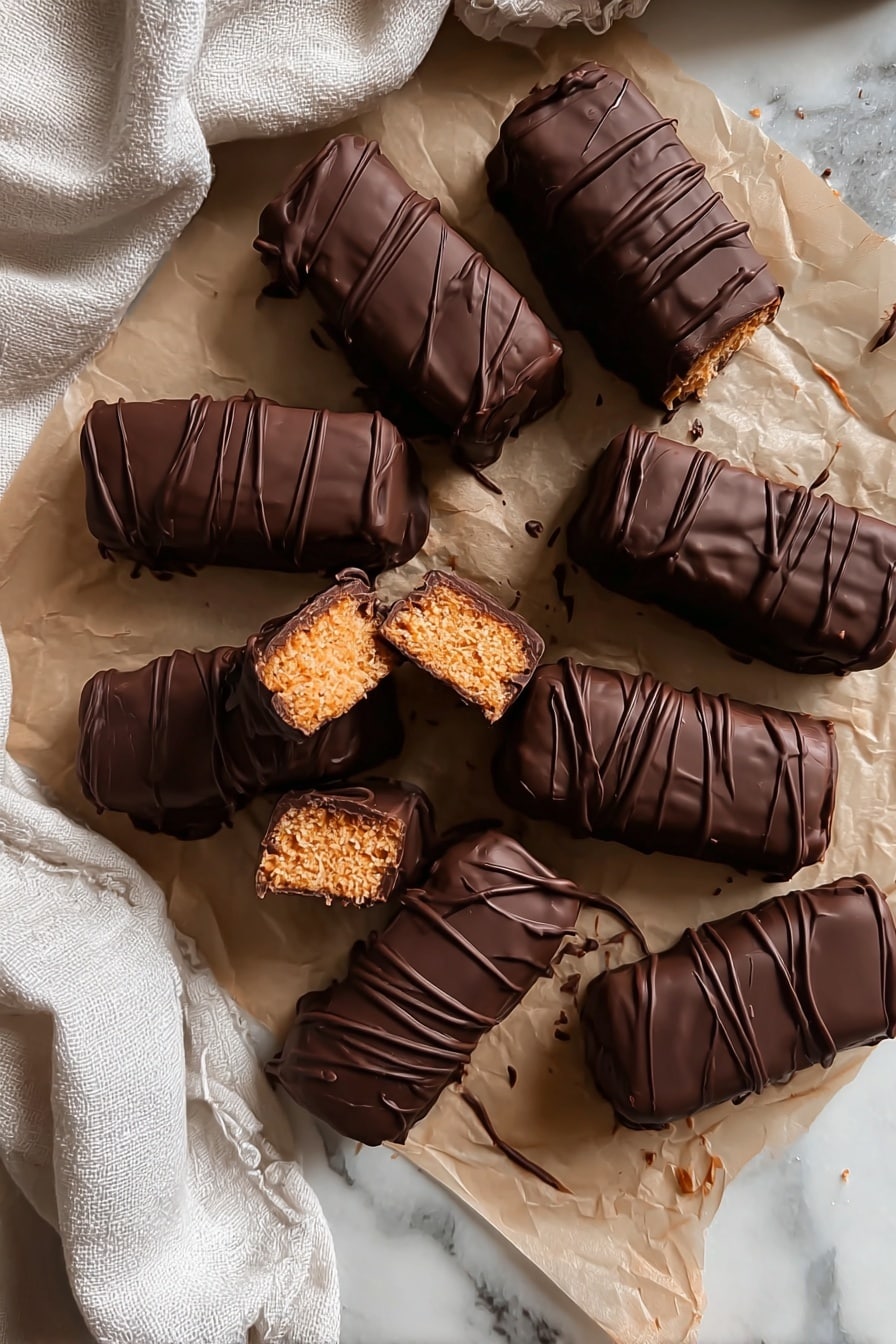
Step 5: Store and Enjoy
These homemade Butterfingers keep best stored in the fridge for up to a week or in the freezer for longer. I usually stash some in the freezer so I always have a healthier snack ready to go.
Pro Tips for Making Healthy Homemade Butterfingers Recipe
- Use Natural Peanut Butter: I’ve found the flavor is richer and less oily, which helps the bars hold their shape better.
- Don’t Skip Freezing Twice: Freezing before chocolate dipping prevents crumbly logs and dipping after keeps that perfect chocolate shell.
- Mix Gently But Thoroughly: Crushing the cornflakes just a little gives that authentic Butterfinger crunch without big chunks.
- Patience Is Key: Avoid the temptation to speed up chilling by cooling at room temp—it can make the bars fall apart when dipping.
How to Serve Healthy Homemade Butterfingers Recipe
Garnishes
For a little extra flair, I sometimes sprinkle a pinch of flaky sea salt on the chocolate before it sets—adds a nice salty crunch that highlights the peanut butter. You can also drizzle a bit of extra melted peanut butter or dark chocolate over the top for a beautiful finish.
Side Dishes
These Butterfingers are perfect as a sweet snack on their own, but I love pairing them with a cold glass of almond milk or a cup of herbal tea to balance the richness.
Creative Ways to Present
If you’re making these for a party or gift, try wrapping individual bars in parchment paper tied with kitchen twine. I once arranged them all in a rustic wooden box lined with wax paper for a sweet edible gift—it was a huge hit with friends!
Make Ahead and Storage
Storing Leftovers
I keep leftover Butterfingers in an airtight container in the fridge. They last about a week and still maintain that delightful crunch and chewy center. Just be sure to separate layers with parchment paper so they don’t stick together.
Freezing
For longer storage, these freeze beautifully. I pop them into a freezer-safe bag or container and they keep great for about two months. When you want one, just thaw in the fridge for a couple hours or enjoy them frozen for an extra refreshing bite.
Reheating
Since these aren’t baked, reheating isn’t necessary—but if the chocolate gets too hard in the fridge or freezer, leave them out at room temperature for 10 minutes before eating for the perfect chewy texture.
FAQs
-
Can I use other nut butters instead of peanut butter?
Absolutely! Almond butter, cashew butter, or sunflower seed butter all work well and give you a slightly different but equally delicious flavor profile. Just make sure your nut butter is smooth and natural for the best texture.
-
Is this recipe suitable for kids?
Yes! These Healthy Homemade Butterfingers are a great option for kids because they’re made with simple, wholesome ingredients and don’t contain processed sugars or additives. Just be mindful of any nut allergies.
-
Can I make these without honey?
Definitely. You can substitute honey with maple syrup, agave nectar, or even brown rice syrup. The texture might vary slightly, but the bars will still be delicious and hold together well.
-
How long do homemade Butterfingers last?
Stored in the fridge, they’ll stay fresh and tasty for up to a week. Freeze them to extend their shelf life up to 2 months—perfect if you want to batch make and enjoy anytime!
-
Can I use regular chocolate instead of dairy-free chocolate chips?
Yes! Use whatever chocolate you prefer or have on hand. Dairy-free chips keep it allergy-friendly, but regular milk or dark chocolate work just as well for a classic Butterfinger flavor.
Final Thoughts
I absolutely love how this Healthy Homemade Butterfingers Recipe turns out every single time. It’s one of those treats I feel good sharing with my family because it’s made from ingredients I trust—without sacrificing the sweet crunch and rich chocolate we all crave. If you try making these, I promise you’ll enjoy the process and the delicious results just as much as I do. Give it a go, and your homemade candy game will never be the same!
Print
Healthy Homemade Butterfingers Recipe
- Prep Time: 10 minutes
- Cook Time: 4 minutes
- Total Time: 1 hour 14 minutes
- Yield: 12-14 butterfingers
- Category: Snack
- Method: No-Cook
- Cuisine: American
- Diet: Gluten Free
Description
This Healthy Homemade Butterfingers recipe offers a delicious and nutritious alternative to traditional candy bars. Made with peanut butter, honey, and crunchy cornflake cereal, these no-bake treats are coated in rich chocolate, combining smooth, sweet, and crunchy textures perfect for a guilt-free snack.
Ingredients
Butterfinger Base
- 1 cup peanut butter
- 1/3 cup honey
- 1/2 tsp vanilla extract
- 1/2 tsp sea salt
- 1 3/4 cup cornflake cereal
Chocolate Coating
- 1 cup chocolate chips (dairy free, if needed)
- 1 tsp coconut oil
Instructions
- Heat Peanut Butter Mixture: In a saucepan over medium-low heat, combine the peanut butter, honey, vanilla extract, and sea salt. Heat for 2 to 4 minutes, stirring frequently, until the mixture is smooth and warmed through.
- Mix with Cereal: Transfer the warm peanut butter mixture to a large mixing bowl containing the cornflake cereal. Stir gently but thoroughly to coat the cereal evenly, lightly crushing some of the cereal during mixing for better integration.
- Shape the Butterfingers: Form the mixture into 12 to 14 log-shaped bars. Place each log onto a parchment-lined plate or baking sheet, ensuring they are evenly spaced. Freeze for 1 hour to firm up.
- Melt Chocolate Coating: Melt the chocolate chips together with the coconut oil using a microwave-safe bowl or a double boiler on the stove. Heat gently and stir to ensure the chocolate does not burn and becomes smooth.
- Coat Butterfingers: Dip each frozen butterfinger log into the melted chocolate, allowing any excess chocolate to drip off before placing it back onto the parchment-lined plate.
- Set Chocolate: Return the chocolate-coated butterfingers to the freezer for about 10 minutes or until the chocolate hardens.
- Store: Keep the butterfingers refrigerated or frozen until ready to serve to maintain freshness and texture.
Notes
- Use dairy-free chocolate chips to make this recipe vegan or suitable for lactose intolerant individuals.
- To get perfectly shaped logs, use wet hands or a piece of parchment paper to shape the mixture.
- Store butterfingers in an airtight container in the refrigerator for up to a week or frozen for longer shelf life.
- Crushing the cornflakes slightly helps bind the ingredients while retaining a crunchy texture.
Nutrition
- Serving Size: 1 butterfinger (approx. 30g)
- Calories: 170
- Sugar: 10g
- Sodium: 85mg
- Fat: 11g
- Saturated Fat: 3g
- Unsaturated Fat: 7g
- Trans Fat: 0g
- Carbohydrates: 15g
- Fiber: 2g
- Protein: 5g
- Cholesterol: 0mg

