If you’re looking for a fun and festive treat for your spooky celebrations, you’ll absolutely adore this Halloween Dirt Cake Cups Recipe. It’s playful, delicious, and surprisingly easy to put together, making it perfect for parties or a family dessert that both kids and adults rave about. I remember the first time I made these—they were such a hit that everyone kept asking for seconds, and honestly, I can’t blame them! Let me walk you through this fan-freaking-tastic recipe so you can wow your guests with minimal stress.
Why You’ll Love This Recipe
- Easy to Make: With simple pudding mixes and fun toppings, you can whip this up in no time.
- Festive & Fun: The orange-colored pudding and gummy worms give it that spooky Halloween vibe everyone loves.
- Kid-Friendly: My family goes crazy for this, especially the kids who love digging through the layers.
- Make-Ahead Friendly: You can prepare it a day or two in advance, so no last-minute dessert panic.

Ingredients You’ll Need
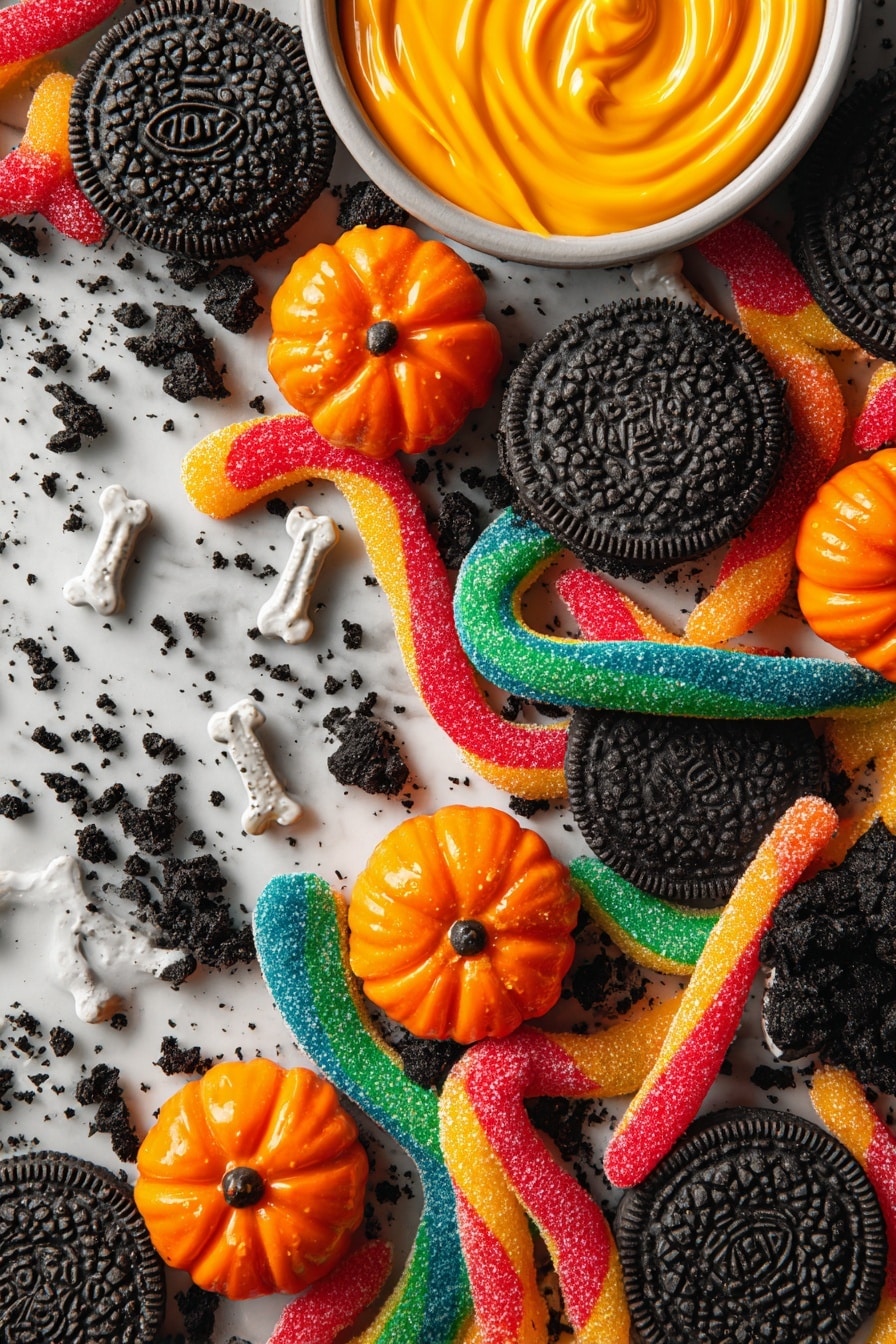
The magic in these Halloween Dirt Cake Cups comes from layering creamy pudding with crunchy cookies and a splash of Halloween-themed fun. Each ingredient plays its part in creating a dessert that’s both texturally exciting and delightfully tasty.
- Milk: Used to prepare the instant pudding—you want whole or 2% for the creamiest texture.
- Instant Chocolate Pudding Mix: Gives that rich chocolate base that reminds me of dirt.
- Instant Vanilla Pudding Mix: We’ll tint this orange to add some spooky Halloween color.
- Orange Food Coloring: Allows you to color the vanilla pudding without changing the flavor.
- Gummy Worms: These are the playful “creepy crawlies” hidden inside the dirt—kids love this surprise! Choose high-quality gummy worms to avoid overly sticky messes.
- Oreo Cookies: Crushed for that authentic “dirt” texture—a classic combo with pudding.
- Pumpkin Candies: Perfect festive toppings for that Halloween pop of color.
- Bone Sprinkles (optional): For extra spooky decoration if you want to go all out.
Variations
I love how customizable this Halloween Dirt Cake Cups Recipe is—once you nail the basics, don’t be afraid to switch up the toppings or even the flavors. It’s all about making the dessert your own and having fun with it!
- Variation: Try swapping out Oreo cookies for chocolate graham crackers if you want a slightly different texture and a bit less sweetness—I discovered this when making a gluten-free version and loved the crunch.
- Variation: Use sugar-free pudding mixes to make it more diet-friendly without losing that creamy delight.
- Variation: Add a layer of crushed pretzels for a salty twist that contrasts amazingly with the sweet pudding.
- Variation: Decorate with edible eyes or candy spiders for an even creepier presentation if you’re serving kids who love Halloween theatrics.
How to Make Halloween Dirt Cake Cups Recipe
Step 1: Whip Up the Puddings Separately
Start by preparing the chocolate and vanilla pudding mixes exactly as the package directs—usually just whisking them with milk. I find it easiest to use 2 separate bowls so they don’t mix together early. Then pop them in the fridge to chill for at least 5 minutes. While that’s working its magic, you can start prepping the other goodies.
Step 2: Color Your Vanilla Pudding Orange
Once chilled, add a few drops of orange food coloring to the vanilla pudding. I like to start with 3-4 drops and stir gently to see how the color develops—gradually adding more until it hits that classic Halloween orange. This step makes your dessert look festive without affecting the creamy texture or taste.
Step 3: Layer Your Cups Like a Pro
Divide half of the chocolate pudding into your serving cups first. Use a spoon or small offset spatula to spread it evenly—it acts like the “soil” layer. Then arrange the gummy worms over the chocolate pudding to look like they’re wriggling through the dirt. Next, sprinkle about a third of your crushed Oreos on top of the worms for that gritty dirt effect.
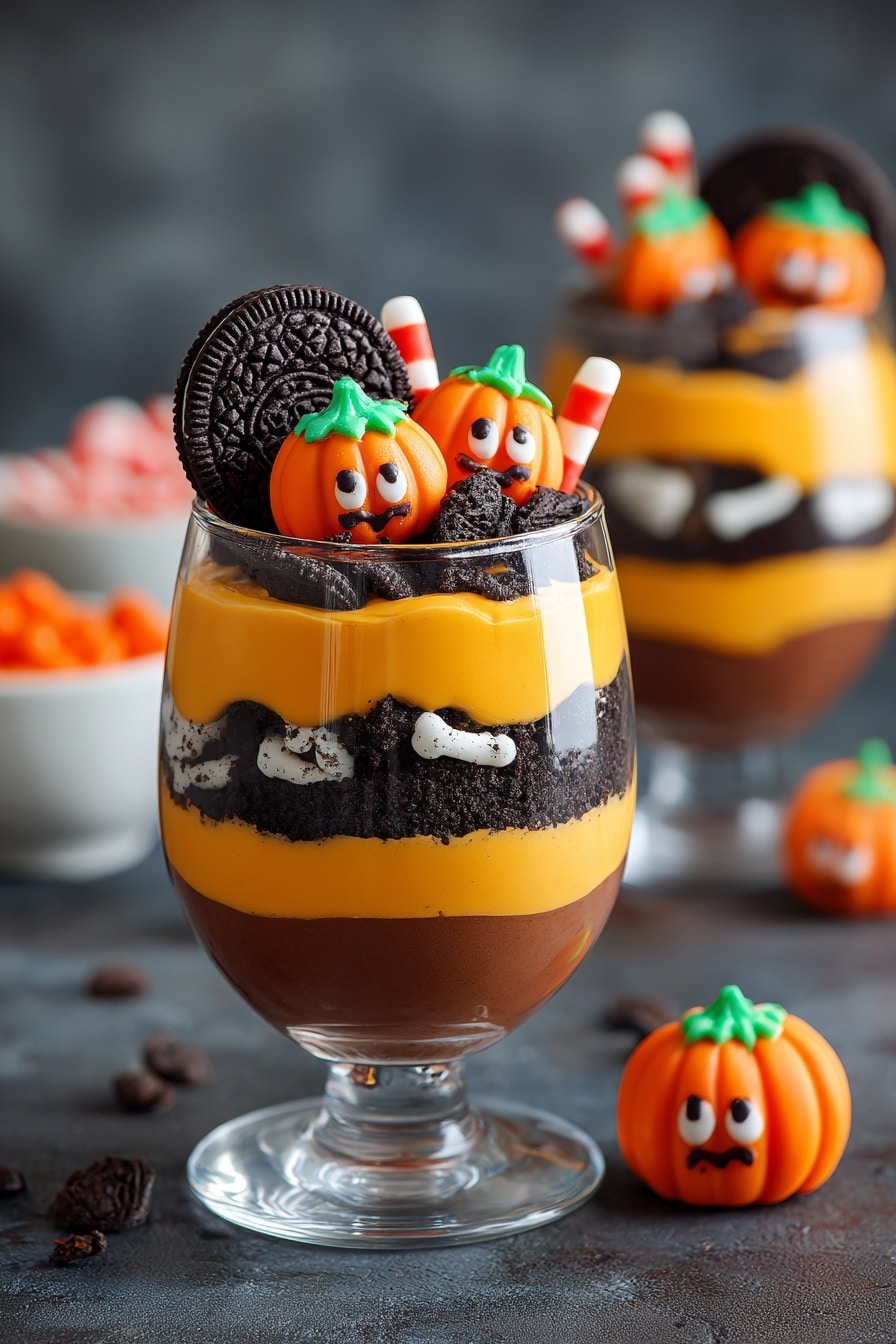
On top of this, gently add half of the orange pudding, spreading it carefully to avoid mixing the layers. Reserve the other half for a second use or future dessert; I sometimes save it as a fun dip for fruit. Sprinkle another third of crushed Oreos over the orange pudding.
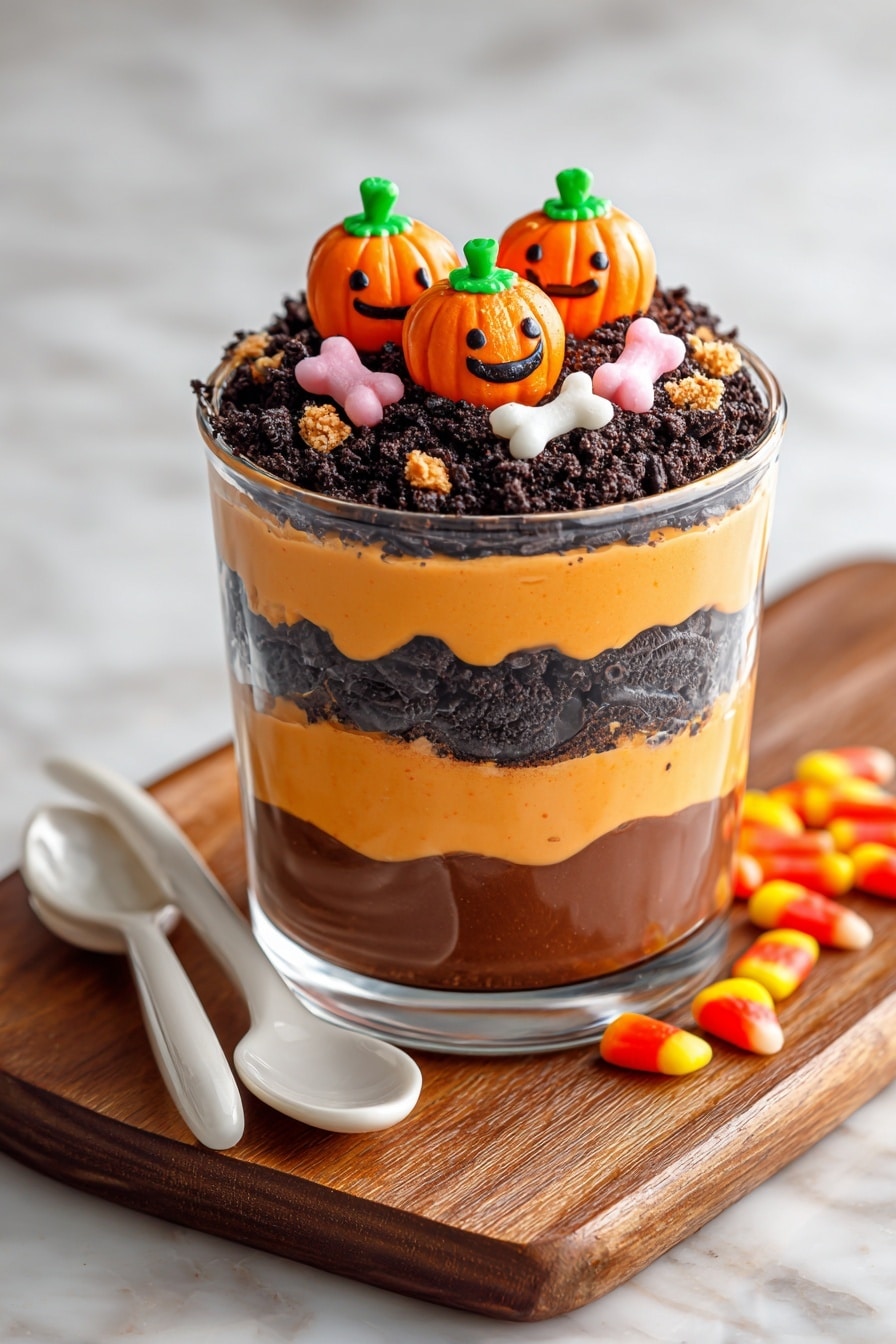
Then add your remaining chocolate pudding over the Oreos, smoothing out the top. Finish by sprinkling the last third of crushed Oreos, creating a dark, crumbly “dirt” crust. Top each cup with three candy pumpkins for that festive touch, and if you’re feeling fancy, add those bone sprinkles for an extra spooky touch.
Step 4: Chill and Serve
Wrap the cups tightly with plastic wrap (I like to use reusable covers) and chill them in the fridge for at least 2 hours, but you can leave them for up to 2 days if you’re prepping ahead. This resting time lets the puddings set nicely and the flavors meld deliciously.
Pro Tips for Making Halloween Dirt Cake Cups Recipe
- Layer with Care: Take your time spreading each pudding layer to keep them distinct and pretty—it makes a huge visual difference!
- Use Fresh Oreos: Crushed Oreos give you the best texture—don’t substitute with pre-packaged dirt toppings, which often get soggy.
- Chill Adequately: Letting the cups chill for a full 2 hours makes the pudding set perfectly firm but still scoopable.
- Gummy Worm Choice: Go for classic gummy worms—not sour or overly sticky—so they hold up well in the pudding layers.
How to Serve Halloween Dirt Cake Cups Recipe
Garnishes
I like keeping garnishes simple but thematic. Those vibrant candy pumpkins add a playful pop of color on top, making each cup feel festive and inviting. Bone sprinkles are optional but really amp up the “creepy” factor without overpowering the look. If you want to get wild, you can even add edible glitter or small Halloween-themed picks.
Side Dishes
This dessert shines best on its own since it’s quite rich, but if you want to offer a little savory contrast, a simple cheese board or light fruit platter works well. Apple slices or pear wedges also complement the chocolatey dirt flavors perfectly and keep the Halloween theme fresh and fun.
Creative Ways to Present
One of my favorite presentation tweaks has been serving these Halloween Dirt Cake Cups inside mini terracotta pots (after lining with cupcake liners, of course!). It’s super cute and makes a memorable display. Another idea: layer the dessert in clear mini mason jars and tie orange and black ribbon around the lids for a party-ready look.
Make Ahead and Storage
Storing Leftovers
Because these cups are pudding-based, they keep best in the fridge covered tightly with plastic wrap or airtight lids. I usually store leftovers for up to 2 days, and they still taste fresh with great texture. After that, the cookie crumbs start to lose their crunch, so it’s best to enjoy them sooner rather than later.
Freezing
Freezing pudding-based desserts like this isn’t usually my go-to because the texture changes upon thawing. I tried freezing once and found it turned the pudding a bit grainy. For best results, I recommend making these cups fresh, but if you must freeze, do so without the cookie toppings and decorate after thawing.
Reheating
No reheating needed here—these are meant to be enjoyed cold straight from the fridge. Just give them a minute or so at room temperature if they seem too firm, which helps bring out that creamy texture perfectly.
FAQs
-
Can I make Halloween Dirt Cake Cups Recipe in advance?
Absolutely! In fact, making these a day or two ahead helps the layers set and the flavors meld. Just keep them refrigerated and covered tightly so the pudding stays fresh and the cookie crumbs don’t get soggy too quickly.
-
What can I substitute if I don’t have gummy worms?
If gummy worms aren’t your thing or you can’t find them, you can use small fruit candies, chocolate chips, or even use mini marshmallows to add texture and fun surprises within the layers.
-
Is it possible to make this recipe dairy-free?
Yes! You can use dairy-free pudding mixes and plant-based milk alternatives like almond or oat milk. Just make sure the toppings you choose are also dairy-free to keep it consistent.
-
How do I keep the pudding layers from blending together?
Patience is key! Spread each pudding layer gently and evenly. Also, chill the prepared puddings before assembling to help them set up a bit so they don’t mix easily when layering.
Final Thoughts
I absolutely love how this Halloween Dirt Cake Cups Recipe turns out—it’s playful, super easy, and hits all those nostalgic Halloween vibes I enjoy sharing with my family. Whether you’re serving it at a big party or sneaking a sweet treat after the kids go to bed, these cups never disappoint. Give it a try; I promise it’ll become your go-to Halloween dessert favorite that everyone keeps asking for. Now, go ahead—dig into some dirt, and enjoy every creamy, crunchy bite!
Print
Halloween Dirt Cake Cups Recipe
- Prep Time: 30 minutes
- Cook Time: 0 minutes
- Total Time: 2 hours 30 minutes
- Yield: 8 servings
- Category: Dessert
- Method: No-Cook
- Cuisine: American
- Diet: Vegetarian
Description
These Halloween Dirt Cake Cups are a fun and festive no-bake dessert perfect for Halloween parties. Layers of creamy chocolate and orange-colored vanilla pudding are combined with crushed Oreos, gummy worms, and festive pumpkin candies for a spooky treat that’s as delicious as it is visually appealing.
Ingredients
Pudding
- 4 cups milk, divided (for preparing puddings)
- 1 box instant chocolate pudding mix (3.4 ounces)
- 1 box instant vanilla pudding mix (3.4 ounces)
- Orange food coloring (to desired color)
Toppings and Decorations
- 1 cup gummy worms
- 22 Oreo cookies, crushed
- 24 pumpkin candies
- 2 tablespoons bone sprinkles (optional)
Instructions
- Prepare Puddings: Use milk to prepare and chill each box of pudding in separate bowls according to package instructions. This ensures each pudding sets properly before assembling.
- Color Vanilla Pudding: Add a few drops of orange food coloring to the vanilla pudding and stir well. Gradually add more drops until you achieve a vibrant orange color suitable for Halloween.
- Layer Chocolate Pudding: Divide half of the chocolate pudding evenly into the bottom of each glass, carefully spreading to form a smooth base layer.
- Add Gummy Worms and Oreos: Scatter gummy worms evenly over the chocolate pudding, then sprinkle one-third of the crushed Oreos on top of the gummy worms.
- Add Orange Vanilla Pudding: Spoon half of the orange-colored vanilla pudding over the Oreos and spread evenly. Reserve the remaining orange pudding for another use or future dessert.
- Sprinkle Oreos Again: Sprinkle another one-third of crushed Oreos over the orange pudding layer.
- Top with Remaining Chocolate Pudding and Oreos: Add the remaining chocolate pudding on top and spread it evenly. Finish by sprinkling the last of the crushed Oreos over this top layer.
- Decorate: Place three candy pumpkins on top of each cup and optionally sprinkle with bone sprinkles for a spooky effect.
- Chill: Wrap each cup tightly and refrigerate for at least 2 hours or up to 2 days to let the flavors meld and pudding fully set before serving.
Notes
- Orange food coloring is used to make the vanilla pudding festive for Halloween; add gradually to achieve the desired color without affecting taste.
- Bone sprinkles are optional and can be omitted or replaced with any Halloween-themed decoration.
- Be gentle when layering puddings to maintain distinct layers for visual appeal.
- Can be prepared up to 2 days in advance; keep refrigerated.
Nutrition
- Serving Size: 1 cup
- Calories: 280
- Sugar: 28g
- Sodium: 200mg
- Fat: 12g
- Saturated Fat: 7g
- Unsaturated Fat: 4g
- Trans Fat: 0g
- Carbohydrates: 38g
- Fiber: 1g
- Protein: 4g
- Cholesterol: 15mg


