If you’re searching for a show-stopping treat that’s as fun to make as it is to eat, then you absolutely need to try this Glowing Black Widow Oreo Pops Recipe. These spooky, glowing pops not only capture that perfect blend of sweet and playful, but they’re surprisingly easy to whip up even if you’re not a kitchen pro. When I first made them for a Halloween party, my family went crazy for how cool they looked – especially that mysterious glow thanks to the tonic water in the white chocolate! Trust me, once you get the hang of this recipe, you’ll be making them for every occasion that calls for a little extra wow.
Why You’ll Love This Recipe
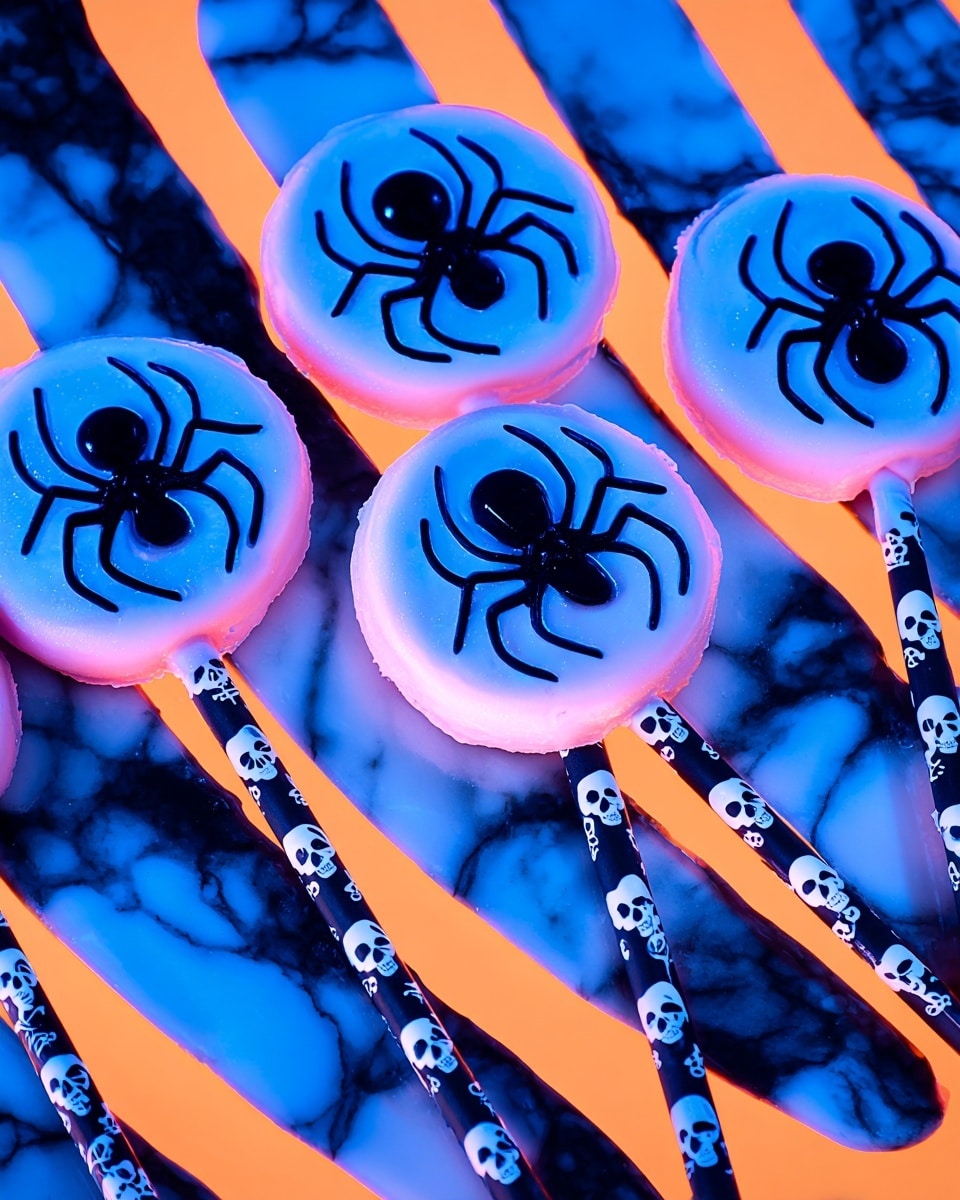
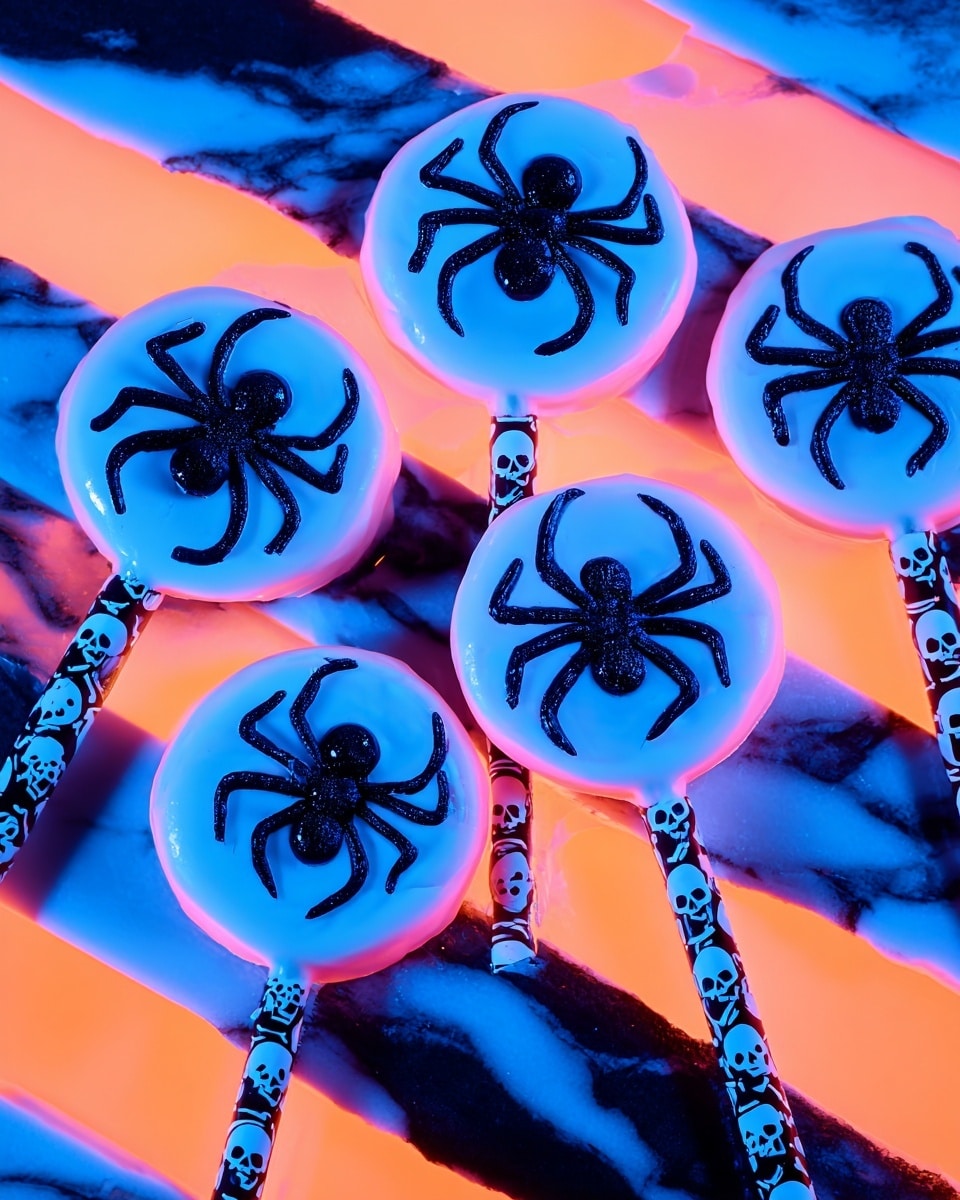
- Eye-Catching Glow: The addition of tonic water in white chocolate makes these pops literally glow under black light—a total crowd pleaser.
- Simple Yet Impressive: You’ll find that despite the stunning results, this recipe is straightforward and kid-friendly.
- Perfect for Parties: Whether it’s Halloween or any fun occasion, these Oreo pops add a whimsical touch that’s hard to beat.
- Customizable and Fun: You can easily swap straws for sticks or add creative toppings to match your theme.

Ingredients You’ll Need
This recipe uses a handful of simple ingredients that pack a big punch in flavor and presentation. Shopping for the right white chocolate and tonic water makes all the difference in achieving that perfect glow and smooth coating.
- White chocolate chips: I recommend using good-quality chips or chopped bars for a smooth melt without clumps.
- Tonic water: This adds the magical glow effect; be sure it contains quinine, which is the glowing ingredient.
- Paper straws or popsicle sticks: Paper straws are great for a quirky, light grip, but sturdy popsicle sticks work perfectly too.
- Oreos: Classic sandwich cookies are perfect here; you can separate them easily and their cream filling pairs well with white chocolate.
Variations
I love mixing things up with this Glowing Black Widow Oreo Pops Recipe — it’s such a fun canvas for your creativity! You can tailor it to your taste or occasion and make every batch uniquely yours.
- Use dark chocolate instead of white: For a wicked twist, dip the Oreo pops in melted dark chocolate and add edible glitter for some spooky sparkle—I tried this for a haunted party and it was a hit!
- Make vegan pops: Swap white chocolate for a vegan variety and use dairy-free Oreos; the glowing effect still works beautifully.
- Customize toppings: Sprinkles, tiny edible spiders, or colored sugar crystals can amp up the spooky factor.
- Change the glow color: Experiment with different tonic water brands or ratios to adjust the glow intensity and style.
How to Make Glowing Black Widow Oreo Pops Recipe
Step 1: Melt the White Chocolate with Tonic Water
Start by melting your white chocolate chips in the microwave in 20-second bursts. Be patient and stir between each round to avoid burning. Once smooth, gently stir in 2 tablespoons of tonic water. This is the secret step for that cool glowing effect under black light. It should have a syrupy consistency—if it’s too thick, add a tad more tonic water and mix well.
Step 2: Assemble Your Oreo Pops
Carefully separate each Oreo cookie. Flatten one end of your paper straw (or stick), dip that flattened end into the white chocolate mixture, and press it firmly into one half of the Oreo. Then top it off with the other half, reassembling the cookie around the straw. This holds everything together neatly while adding that adorable pop look.
Step 3: Dip and Decorate the Pops
One by one, dip each Oreo pop into your melted white chocolate. Let the excess drip off gently—this keeps your coating smooth and even. Place them carefully on a parchment-lined baking sheet. If you’re feeling fancy, add plastic spiders or themed decorations while the coating is still wet.
Step 4: Chill and Serve
Pop the sheet into the fridge for about 20 minutes or until the chocolate coating hardens completely. Once set, your Glowing Black Widow Oreo Pops are ready to wow your guests or satisfy that sweet tooth.
Pro Tips for Making Glowing Black Widow Oreo Pops Recipe
- Don’t Overheat Chocolate: Melting white chocolate requires patience—overheating makes it grainy, so stick to short microwave bursts and frequent stirring.
- Check Your Tonic Water: I learned the hard way that tonic water needs quinine to glow properly; some tonic waters without quinine won’t produce the effect.
- Secure the Straw Well: Press the chocolate-dipped straw firmly but gently between the Oreo halves for a sturdy pop that won’t slip off while dipping.
- Use Parchment Paper: It keeps the pops from sticking and makes cleanup so much easier—I always have parchment ready before I start dipping.
How to Serve Glowing Black Widow Oreo Pops Recipe
Garnishes
I usually like topping the cooled pops with tiny edible spiders or a sprinkle of black and red edible glitter to enhance that creepy vibe. It makes the whole presentation extra special and festive without complicating the recipe.
Side Dishes
These pops pair beautifully with a fizzy, tangy punch or black lemonade to carry on the spooky theme. I’ve also served them alongside simple fruit platters with dark grapes and berries for a nice color contrast and a healthy balance to all that sweetness.
Creative Ways to Present
For Halloween parties, I like to arrange the pops standing up in a mini pumpkin or a foam block wrapped in spider webbing. It creates a fun display centerpiece that guests can grab easily. Another times, laying them out on a mirror plate under a black light really amplifies that glowing effect—I swear it looks like magic!
Make Ahead and Storage
Storing Leftovers
If you end up with extras (which maybe won’t last long!), store them in an airtight container in the fridge. I find they stay fresh and maintain their crunch for up to 4 days.
Freezing
I’ve frozen these pops wrapped individually in plastic wrap and kept them in a freezer bag. They hold up well for up to 2 months. Just thaw them in the fridge before serving — the glow may be slightly dimmer but still fun.
Reheating
Since these are dipped in white chocolate, reheating isn’t really necessary or advised. If you want the chocolate ‘soft’ while dipping, reheat gently over a double boiler, but once set, enjoy cold or at room temperature.
FAQs
-
What makes the Oreo pops glow in this recipe?
The glowing effect comes from adding tonic water to the melted white chocolate. Tonic water contains quinine, which fluoresces under black light, giving your Oreo pops that spooky glow.
-
Can I use regular chocolate instead of white chocolate?
While you technically can, the glow effect is unique to the quinine in tonic water combined with white chocolate. Using regular chocolate won’t create that glowing effect, but you can still make delicious Oreo pops without it.
-
How do I prevent the chocolate from clumping when melting?
Microwave the white chocolate in short 20-second intervals, stirring thoroughly after each. This keeps the heat even and prevents overheating, which is what causes clumps and graininess.
-
Can kids help make this recipe?
Absolutely! Kids love assembling and dipping the Oreo pops. Just be sure an adult handles melting the chocolate to keep things safe.
Final Thoughts
This Glowing Black Widow Oreo Pops Recipe has become one of my absolute favorites to make when I want something quick but totally unique and fun. The fact that it glows always gets people talking, and it’s such a straightforward recipe that even beginners feel confident tackling it. I hope you enjoy making (and eating) these as much as I do — they’re perfect for sharing, celebrating, or just indulging in a little kitchen magic with your loved ones. Give them a try, trust me, you won’t be disappointed!
Print
Glowing Black Widow Oreo Pops Recipe
- Prep Time: 15 mins
- Cook Time: 5 mins
- Total Time: 35 mins
- Yield: 12 Oreo Pops
- Category: Dessert
- Method: No-Cook
- Cuisine: American
Description
These Glowing Black Widow Oreo Pops are a fun and spooky treat perfect for Halloween or any themed party. Featuring classic Oreo cookies dipped in a glowing white chocolate mixture enhanced with tonic water, these pops are easy to make and visually striking with a bright, luminescent finish. Topped optionally with decorative spiders, they offer a delicious twist on a beloved cookie and candy combo.
Ingredients
Ingredients
- 2 cups white chocolate chips
- 2 Tbsp tonic water
- 1 package paper straws or popsicle sticks
- 1 package Oreos (about 12 cookies)
Instructions
- Melt the White Chocolate: Microwave the white chocolate chips in 20-second intervals, stirring thoroughly between each session, until completely melted and smooth. Stir in the tonic water gradually until the mixture reaches a consistency similar to chocolate syrup. Add more tonic water if it is too thick.
- Assemble the Oreo Pops: Carefully twist apart each Oreo cookie into two halves. Flatten one end of a paper straw or popsicle stick, then dip that flattened end into the melted white chocolate to act as glue. Press it firmly into the cream side of one Oreo half, then sandwich the other half on top, reassembling the cookie securely around the straw.
- Dip the Oreo Pops: Dip each assembled Oreo pop into the white chocolate mixture, ensuring it is fully coated. Let any excess chocolate drip back into the bowl. Place the dipped pops upright on a parchment-lined baking sheet. Optionally, decorate the tops with plastic or edible spider decorations for a spooky effect.
- Chill and Set: Refrigerate the Oreo pops for at least 20 minutes or until the white chocolate hardens completely, giving the pops a firm, glossy coating. Once set, they are ready to serve and enjoy.
Notes
- Using tonic water is key to achieving the glowing effect under blacklight due to its quinine content.
- If white chocolate becomes too thick, add tonic water in small amounts to maintain a smooth dipping consistency.
- Handle the Oreo cookies gently during assembly to prevent breaking.
- Store leftovers in an airtight container in the refrigerator to maintain freshness and coating integrity.
- Use paper straws or popsicle sticks for easy handling and a neat presentation.
Nutrition
- Serving Size: 1 Oreo Pop
- Calories: 230
- Sugar: 18g
- Sodium: 90mg
- Fat: 14g
- Saturated Fat: 9g
- Unsaturated Fat: 4g
- Trans Fat: 0g
- Carbohydrates: 25g
- Fiber: 1g
- Protein: 2g
- Cholesterol: 10mg


