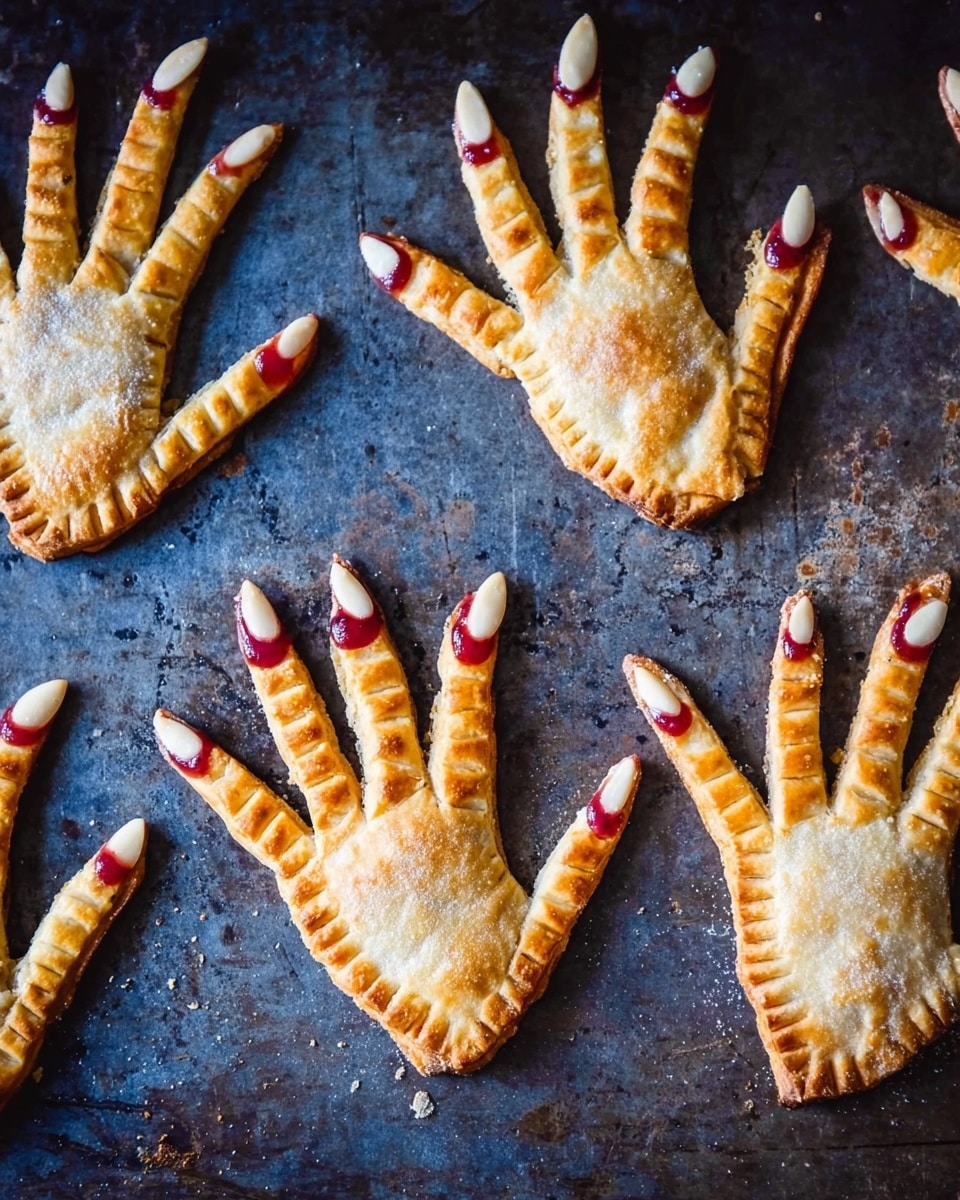
I’m so excited to share this Easy Halloween Hand Pies Recipe with you! These adorable, spooky little treats are not just fun to make but absolutely delicious, perfect for your Halloween party or even just a festive snack for the kids. I first stumbled on this idea when I wanted a quick, crowd-pleasing bake that’s both cute and simple, and every time I make them, my family goes crazy for this playful twist on fruit-filled pastries. Stick with me, and I’ll walk you through every step so you can whip these up like a pro—no stress!
Why You’ll Love This Recipe
- Super Simple & Quick: You’ll love how easy it is to make these hand pies with just a few store-bought ingredients.
- Perfectly Festive: They add that spooky fun vibe to any Halloween gathering without spending hours in the kitchen.
- Kid-Friendly & Delicious: My kids absolutely adore the little hand shapes and sweet jam filling—it’s a win-win!
- Customizable Flavors: You can easily swap out the jam for your favorite fruity filling or try nut toppings for a unique finish.

Ingredients You’ll Need
For this Easy Halloween Hand Pies Recipe, the ingredients are straightforward, and each one complements the others perfectly. Using store-bought pie crust means you get flaky, buttery dough without fuss, and the jam adds just the right amount of sweet, fruity goodness that shines through.
- All-purpose flour: Just a little for dusting your work surface so the dough doesn’t stick—always handy with pie crusts.
- Store-bought pie crust: Saves you so much time without compromising on that classic flaky texture.
- Raspberry or strawberry jam: I love using these because they’re vibrant, sweet, and tart which balances the buttery dough well.
- Large egg: Whisked with water to make an egg wash for that gorgeous golden finish.
- Sliced almonds: For the nails—such a fun touch that makes the hand pies look just right.
Variations
Since I love to keep things creative in the kitchen, I often tweak this Easy Halloween Hand Pies Recipe based on what I have on hand or who I’m baking for. Feel free to make it your own—personalization is where the magic happens!
- Fruit Fillings: Sometimes, I switch the jam to apricot or blackberry, depending on the season and what flavors I’m craving.
- Nut-Free Option: If you’re making these for kids with nut allergies, you can simply skip the almonds or substitute with small candy eyes for spooky fun.
- Spicy Twist: Once, I added a pinch of cinnamon and nutmeg to the jam before baking, which gave the hand pies a cozy fall vibe that impressed friends.
- Vegan Version: Use a plant-based pie crust and a plant-based milk wash instead of egg wash; I’ve tried this and it works beautifully!
How to Make Easy Halloween Hand Pies Recipe
Step 1: Prep and Shape Your Hands
Start by preheating your oven to 425°F and lining two baking sheets with parchment paper—this keeps everything neat and easy to clean up later. Lightly flour your surface so the pie crust doesn’t stick, then unroll the dough. To get that cute hand shape, I either use a hand cookie cutter or carefully trace around my own hand with a sharp knife. Cut out about half the hands and arrange them on the baking sheets, spaced out so they bake evenly. Don’t toss the scraps – just re-roll them to about a quarter-inch thickness and cut more hands from there. This part is fun and a little therapeutic!
Step 2: Add the Jam Filling
Place a small spoonful of your favorite raspberry or strawberry jam right in the middle of each hand-shaped dough on the baking sheet. I love doing this step carefully to avoid overfilling, because jam that escapes during baking can get pretty sticky and a little messy. Less is more here for the perfect bake and easy eating.
Step 3: Seal and Decorate the Hand Pies
Next, place a second hand-shaped dough over each jam-filled one. Press lightly to seal the edges all around but don’t worry too much—using a fork to crimp around the palm area works great for a firm seal. The fingers don’t hold any filling, so just gently press them together without crimping. Then, take a paring knife and make small slits on the finger parts where the knuckles would be—this lets steam escape and adds to the spine-tingly look.
Step 4: Brush with Egg Wash and Bake
Brush the entire surface of the hand pies with your egg wash (egg whisked with a tablespoon of water) for that rich golden color. Bake them in the preheated oven for 10 to 15 minutes. Keep an eye on them after the 10-minute mark since oven temps vary, but you want the edges golden and the dough cooked through. When they’re done, they’ll smell incredible!
Step 5: Final Touches for Spooky Nails
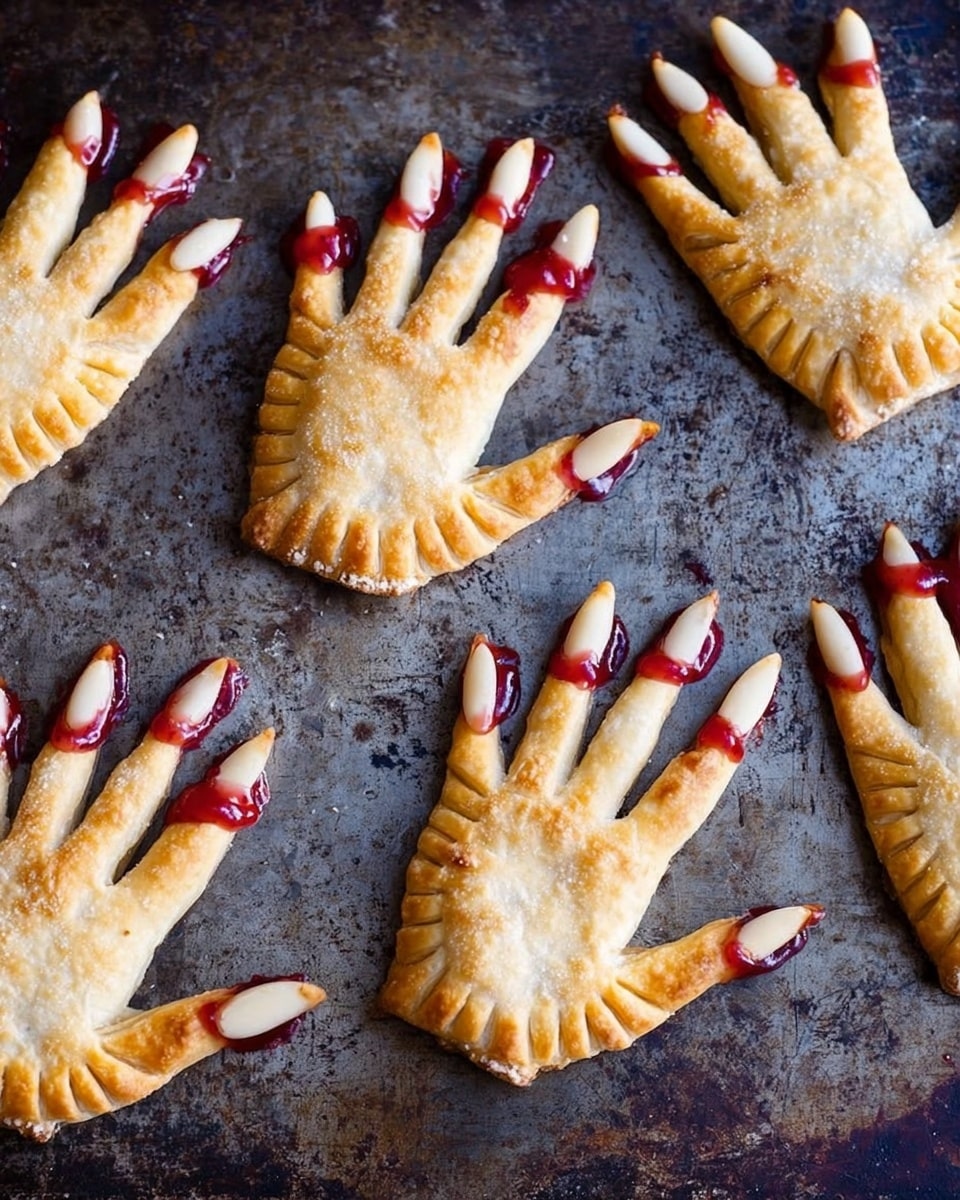
Once the hand pies are out of the oven and still warm, add a tiny dollop of jam at the tip of each finger, then press on sliced almonds to mimic creepy fingernails. This detail always earns a delighted smile from guests—it’s like magic! Let them cool a bit before serving or storing.
Pro Tips for Making Easy Halloween Hand Pies Recipe
- Don’t Overfill the Jam: I learned the hard way that putting too much jam causes leaking and sticky fingers—not the fun you want at a party!
- Chill the Dough if Needed: If your dough gets too soft while working, pop it in the fridge for 10 minutes to keep those shapes crisp and clean.
- Use a Sharp Knife for Slits: It helps make clean cuts on the fingers that look like knuckles without tearing the dough.
- Serve Warm for Best Taste: Reheating gently in the oven brings back that fresh-baked flakiness you want for these pies.
How to Serve Easy Halloween Hand Pies Recipe
Garnishes
I usually keep the garnish simple with the jam ‘nails’ and almond slices—they say less is more, and in this case, it really is! Sometimes, I add a tiny dusting of powdered sugar for a ghostly effect or a drizzle of white chocolate if I want to get fancy. It’s all about adding little details that make your serving presentation pop.
Side Dishes
These hand pies pair beautifully with a warm cup of cider or a hot chocolate bar with marshmallows and sprinkles for a perfect Halloween spread. I’ve also served them alongside pumpkin soup as a fun appetizer that keeps the theme going. Their sweet fruitiness offers a nice contrast to savory dishes.
Creative Ways to Present
Once, for a Halloween party, I placed the hand pies on a platter lined with faux spider webs and scattered plastic spiders for full spooky effect—everyone loved it! You can also arrange them on tiered stands or serve with little bowls of extra jam for dipping. Presentation is half the fun!
Make Ahead and Storage
Storing Leftovers
Leftover hand pies are best stored in an airtight container at room temperature for up to two days. I usually cover mine with a clean kitchen towel to keep the crust from getting soggy. That said, they’re so irresistible, there rarely are many leftovers!
Freezing
If I’m making a big batch ahead of time, I freeze the hand pies unbaked. I place them on a baking sheet, freeze until firm, then transfer to a freezer bag. When I want to bake them, I pop the frozen pies directly into the oven, adding a couple of extra minutes to the baking time. This method keeps them fresh and flaky.
Reheating
To reheat, I use a 350°F oven for about 5-7 minutes until they’re warm and crisp again. Avoid microwaving because it tends to make the crust soggy. A quick bake restores that fresh-from-the-oven magic perfectly.
FAQs
-
Can I make these hand pies gluten-free?
Absolutely! Just swap out the regular pie crust with your favorite gluten-free pie crust found in stores or homemade versions. The rest of the recipe stays the same and the pies still bake beautifully.
-
What if I don’t have a hand-shaped cutter?
No worries at all—you can trace your hand on parchment paper and cut with a sharp knife, or even freehand a simple hand shape. The charm is in the imperfect, homemade look!
-
How do I prevent the jam from leaking out?
Use just a small spoonful of jam in the center and press the edges firmly together with a fork to seal tightly. Also, the slits on the fingers help steam escape and reduce pressure inside.
-
Can I use other fillings besides jam?
Definitely! You can try apple pie filling, chocolate spread, or even sweetened cream cheese. Just keep fillings on the thicker side to prevent too much seepage during baking.
Final Thoughts
I absolutely love how these Easy Halloween Hand Pies Recipe turn out every time—they’re a fun, interactive way to bring a little spooky spirit to your kitchen without the usual fuss. Whether you’re baking with kids, prepping for a party, or just wanting a seasonal treat, these hand pies deliver on flavor and festivity. I hope you make them soon and share the joy; trust me, this recipe is one you’ll want to keep in your Halloween baking rotation!
Print
Easy Halloween Hand Pies Recipe
- Prep Time: 10 minutes
- Cook Time: 15 minutes
- Total Time: 25 minutes
- Yield: 8 (4-inch) hand pies
- Category: Dessert
- Method: Baking
- Cuisine: American
Description
Celebrate Halloween with these spooky and delicious Easy Halloween Hand Pies made from flaky store-bought pie crust filled with sweet raspberry or strawberry jam. Perfectly golden and decorated with almond ‘nails’, these festive treats are simple to prepare and sure to delight kids and adults alike.
Ingredients
Dough
- All-purpose flour, for rolling out dough
- 1 (14.1-oz.) package store-bought pie crust (2 crusts total)
Filling
- 1/3 cup raspberry or strawberry jam, plus more for decorating
Egg Wash & Decoration
- 1 large egg, whisked with 1 Tablespoon water
- Sliced almonds
Instructions
- Preheat and Prepare Baking Sheets: Preheat the oven to 425°F. Line two baking sheets with parchment paper to prevent sticking and ensure easy cleanup.
- Roll and Cut Dough: Lightly flour your work surface to prevent sticking, then unroll the two pie crusts. Using a sharp knife or a hand-shaped cookie cutter, trace and cut out hand shapes. Place half of the cutouts on the lined baking sheets, ensuring they are spaced at least 2 inches apart. Collect the dough scraps, roll them out again to about 1/4-inch thickness, and cut additional hands.
- Add Jam Filling: Spoon a portion of the raspberry or strawberry jam into the center of each hand shape on the baking sheets, taking care not to overflow the edges.
- Seal the Hand Pies: Place a second hand-shaped pie crust on top of each jam-filled one. Press lightly around the edges to seal, then use a fork to crimp around the palm area to lock in the filling. For the fingers, gently press edges together as there is no filling in those areas.
- Make Vent Slits: Using a paring knife, make small slits on the fingers where knuckles would be to allow steam to escape during baking.
- Apply Egg Wash: Brush the assembled hand pies all over with the whisked egg and water mixture. This will help achieve a golden brown finish.
- Bake: Bake in the preheated oven for 10 to 15 minutes, or until the hand pies are golden brown and cooked through. Baking time may vary slightly depending on the size of your pies.
- Add Jam and Almond ‘Nails’: Remove the pies from the oven. While still warm, add a small dollop of jam to the tip of each finger, then press a sliced almond onto the jam to create the appearance of fingernails.
- Serve or Store: Serve the hand pies immediately for best taste and texture, or let them cool and store in an airtight container at room temperature for up to two days.
Notes
- Use cold pie crust dough for easier handling and better texture.
- Be careful not to overfill the pies to prevent leaking during baking.
- Adjust baking time according to the size of your hand pies for even cooking.
- These pies are best enjoyed fresh but can be reheated gently in a warm oven.
- You can substitute jam flavors according to your preference, such as blueberry or apricot.
Nutrition
- Serving Size: 1 hand pie (approx. 80g)
- Calories: 220
- Sugar: 15g
- Sodium: 150mg
- Fat: 11g
- Saturated Fat: 4g
- Unsaturated Fat: 6g
- Trans Fat: 0g
- Carbohydrates: 27g
- Fiber: 1g
- Protein: 3g
- Cholesterol: 35mg


