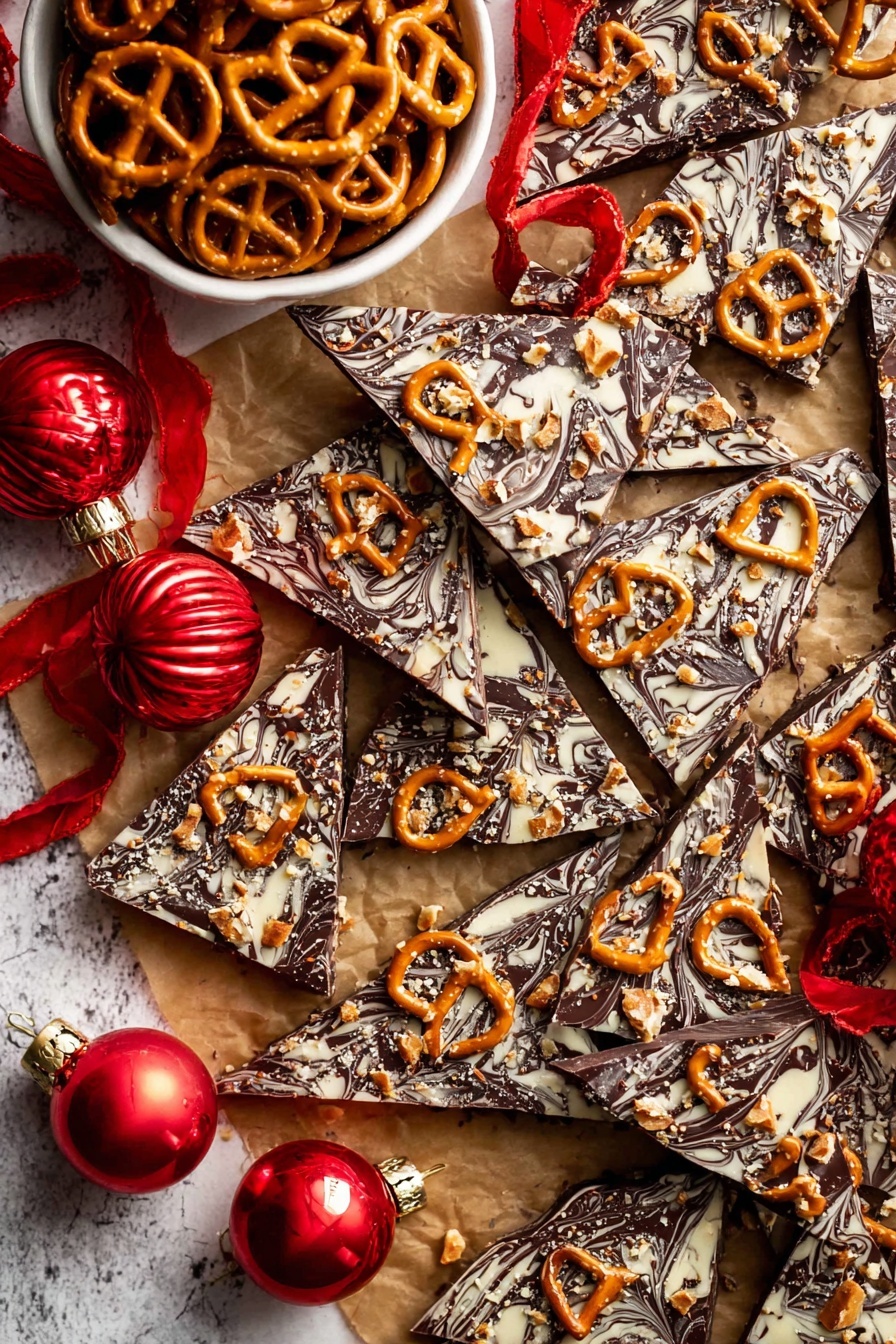
If you’re looking for a sweet, crunchy, and totally addictive holiday treat, you’re going to adore this Christmas Saltine Candy Bars Recipe. I swear, once you try this, it becomes an instant classic for every festive season. Picture salty crackers layered with buttery caramel, melted chocolate, crunchy pretzels, and a delicate drizzle of white chocolate swirls — it’s like the perfect symphony of flavors and textures. Trust me, family and friends won’t stop coming back for more!
Why You’ll Love This Recipe
- Quick & Easy to Make: You’ll be amazed how simple it is to throw this together, even on a busy holiday afternoon.
- Perfect Sweet & Salty Balance: The saltine crackers give just the right salty crunch that perfectly complements the buttery caramel and chocolate.
- Customizable Toppings: You can easily swap pretzels or toffee bits with your favorites to make it your own.
- Makes Great Gifts: This candy bars recipe is a crowd-pleaser and makes a thoughtful homemade gift for friends and neighbors.

Ingredients You’ll Need
Every ingredient here plays a key part in building layers of flavor and texture that work beautifully together. I always recommend using good-quality butter and fresh crackers to get the perfect crunch and richness.
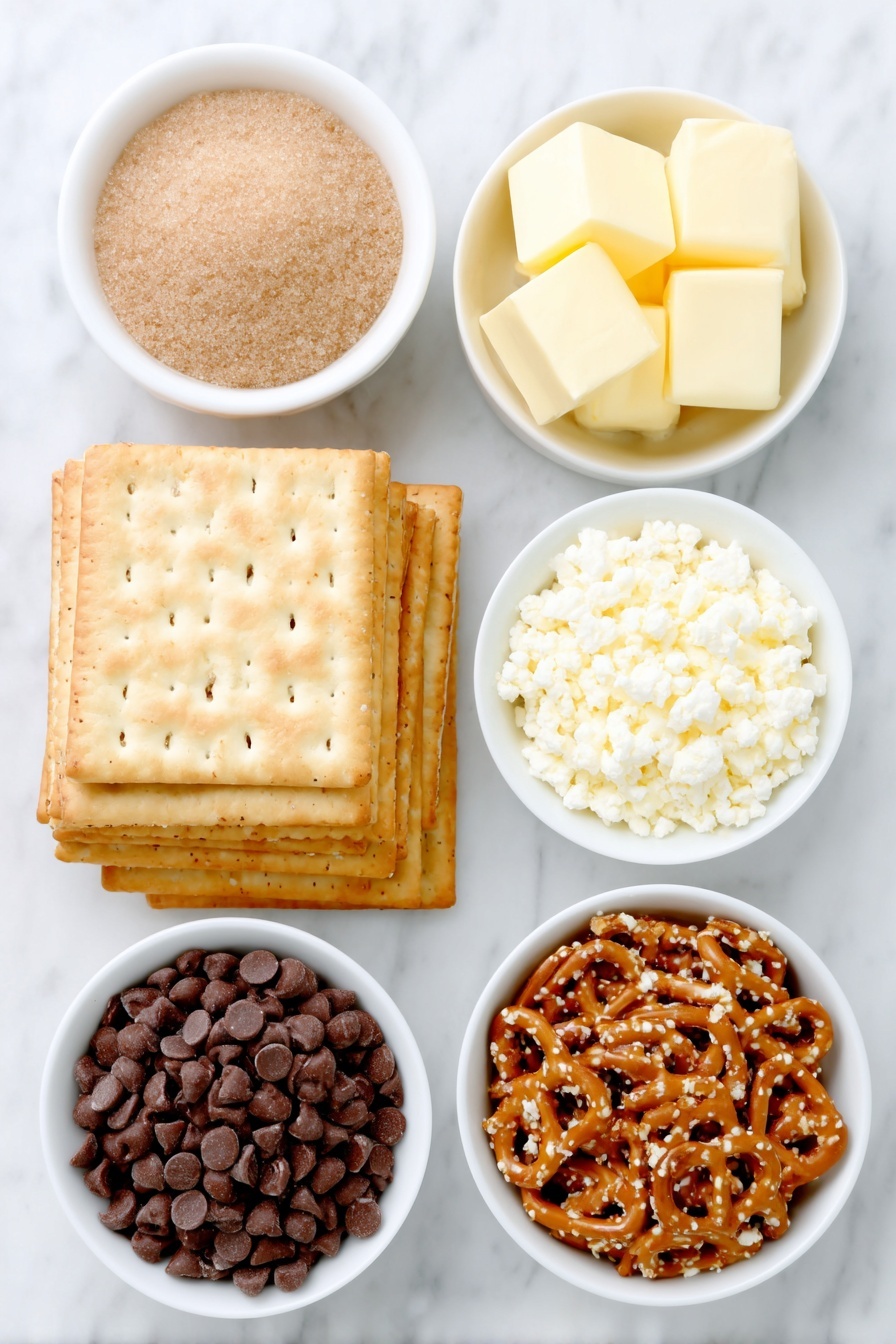
- Saltine Crackers: The base of your candy bars – their saltiness balances the sweet caramel perfectly.
- Unsalted Butter: Use real butter for richness and smooth caramel formation.
- Brown Sugar: Adds deep sweetness and a lovely molasses flavor to the caramel layer.
- Light Corn Syrup: Helps stabilize the caramel to keep it smooth and chewy.
- Semi-sweet Chocolate Chips: Melts perfectly for that classic chocolate top layer.
- White Chocolate: For drizzling and that festive swirl effect on top.
- Pretzels: Adds extra crunch and a salty pop — I love sprinkling these liberally.
- Toffee Bits: Little bursts of buttery toffee that add complexity and crunch.
Variations
I love how versatile this Christmas Saltine Candy Bars Recipe is. I’ve tried swapping out some toppings or chocolate types, and really you can make it uniquely yours depending on what you have or prefer!
- Nutty Twist: Adding chopped pecans or almonds on top gave my bars an extra crunch and nutty flavor that my family adored.
- Dark Chocolate Swap: For a richer, slightly bitter chocolate finish, I sometimes replace semi-sweet chips with dark chocolate chips — it’s a grown-up’s favorite.
- Diet-Friendly: I experimented using a sugar-free caramel sauce and sugar-free chocolate chips once, and although a bit different, it still satisfied my sweet tooth without guilt.
- Holiday Themed: Colored sprinkles or crushed peppermint can be added on top for a festive look and seasonal flavor boost.
How to Make Christmas Saltine Candy Bars Recipe
Step 1: Prep Your Saltine Cracker Base
Start by lining a large baking sheet with parchment paper – this makes cleanup a breeze and helps with easy removal later. Then, carefully arrange all 42 saltine crackers side by side to cover the entire sheet. I like to take my time here to make sure the crackers fit tightly, but if there are little gaps, that’s totally fine—just means a little more caramel pooling!
Step 2: Make the Caramel Layer
In a medium saucepan, melt the butter, brown sugar, and light corn syrup together over medium heat. Stir with a rubber spatula until the butter fully melts and the mixture starts bubbling. Keep stirring for about 5 minutes until all the sugar dissolves and the caramel thickens — if you’re using a candy thermometer, it should reach 280°F. This step is crucial for that perfect smooth caramel without graininess.
Step 3: Pour & Bake the Caramel Over Crackers
Quickly pour the hot caramel evenly over your saltines, then spread it gently with a spatula to cover every cracker. Pop the baking sheet into the oven at 350°F for 3 to 4 minutes until you see the caramel bubbles forming. This baking step gives the candy bar its signature chewy crunch.
Step 4: Add Chocolate Layers
Remove the pan from the oven and immediately sprinkle the semi-sweet chocolate chips evenly across the top. Return to the oven for about 1 minute so the chocolate melts perfectly. Then use a spatula to spread that melted chocolate all over, right on top of the caramel layer.
Step 5: Drizzle and Swirl the White Chocolate
Place your finely chopped white chocolate in a microwave-safe bowl and melt it in 30-second intervals, stirring to avoid overheating. Drizzle the melted white chocolate over the dark chocolate layer. I like to swirl it gently with a wooden skewer in alternating left-to-right, right-to-left motions for a pretty marbled effect. This step always makes the candy bar look extra special and festive.
Step 6: Top with Pretzels and Toffee Bits
Finally, sprinkle generously with pretzels and toffee bits for that irresistible crunch and flavor kicks. These little toppings add contrast and elevate the whole experience.
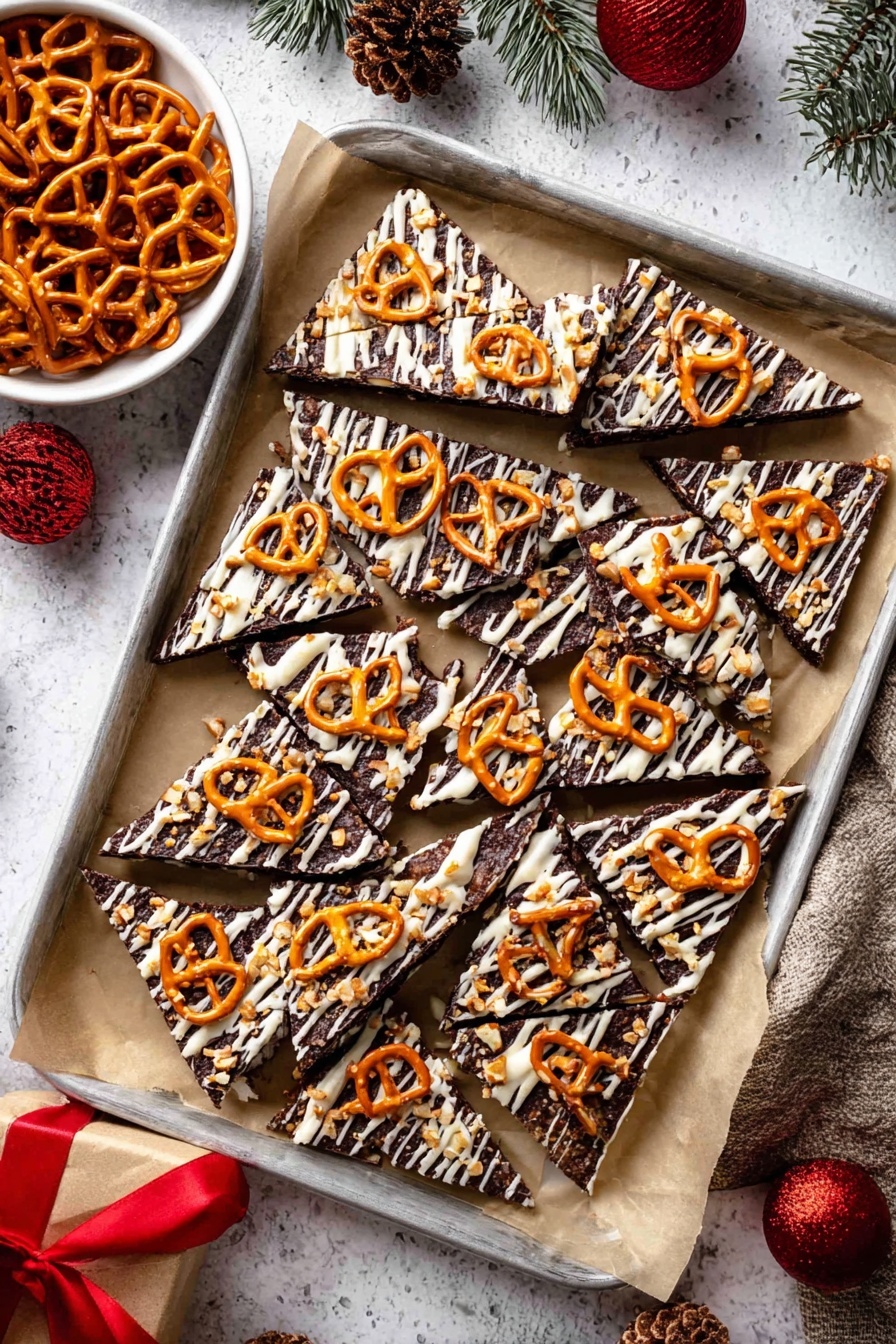
Step 7: Chill & Cut
Pop the sheet pan into the fridge for 1 to 2 hours or into the freezer for a quicker 20 minutes until completely hardened. Once firm, peel off the parchment paper and either slice into squares or triangles, or simply break the bars by hand — I love the rustic chunks the best!
Pro Tips for Making Christmas Saltine Candy Bars Recipe
- Use Fresh Crackers: Stale saltines won’t give you that satisfying crunch and can even affect caramel sticking.
- Don’t Skip the Candy Thermometer: It’s the key to making sure your caramel reaches the ideal texture without burning or undercooking.
- Spread Toppings While Warm: Getting the toppings on while the chocolate is still melty means they stick better and look professional.
- Patience is Key: Let the candy cool fully before cutting to get clean edges and avoid sticky fingers!
How to Serve Christmas Saltine Candy Bars Recipe
Garnishes
I often like to add a little extra flair by lightly dusting the candy bars with powdered sugar or a sprinkle of colored holiday sugar crystals when presenting them. If I’m feeling fancy, a few festive edible gold flakes fit right in with the season’s sparkle!
Side Dishes
Since these bars are quite rich and sweet, they pair wonderfully with something simple like a fresh cup of coffee or hot cocoa. Sometimes I add freshly whipped cream or a scoop of vanilla ice cream on the side for a cozy dessert setup.
Creative Ways to Present
For holiday parties, I like to present these bars in a festive tin lined with parchment paper, or stacked inside clear cellophane bags tied with a colorful ribbon. They’re also a hit when layered in a pretty glass jar with other homemade cookies and treats — like a sweet edible gift tower.
Make Ahead and Storage
Storing Leftovers
I usually store leftover candy bars in an airtight container on the counter if it’s not too warm in my kitchen. They stay fresh for about 5 days that way. If your place tends to be warmer, popping them in the fridge helps keep that caramel from getting too soft and sticky, extending the freshness to about two weeks.
Freezing
I’ve frozen these candy bars several times, and they freeze beautifully for up to three months. Just layer parchment or wax paper between the candy pieces in a freezer-safe bag or container so they don’t stick together. When you want a treat, just thaw them slowly at room temperature.
Reheating
I generally don’t reheat the candy bars because their texture is best when cool and firm. But if you like softer chocolate, a quick 5-10 seconds in the microwave can soften the chocolate layer just a bit — just be careful not to melt the whole thing!
FAQs
-
Can I use a different type of cracker for the Christmas Saltine Candy Bars Recipe?
While saltine crackers provide the classic salty crunch that balances the sweet caramel and chocolate, you can experiment with other thin, sturdy crackers like Ritz or water crackers. Just keep in mind different crackers may alter the final texture and flavor slightly.
-
Why do I need corn syrup in the caramel?
Corn syrup helps prevent crystallization in the caramel, making it smooth and chewy instead of grainy. If you don’t have corn syrup, you can swap in an equal amount of honey or golden syrup, but the texture might vary a bit.
-
How can I make sure the caramel sets properly?
Make sure you cook the caramel to the correct temperature (about 280°F) and don’t rush the chilling step. Allow the candy bars to fully cool and harden in the fridge or freezer before cutting to get that perfect set without stickiness.
-
Can I prepare these candy bars ahead of time for holiday gifting?
Absolutely! These candy bars keep well for up to two weeks in the fridge and up to three months in the freezer when stored properly. They make wonderful, homemade gifts that can be prepared well in advance.
Final Thoughts
I genuinely love this Christmas Saltine Candy Bars Recipe because it feels like a little holiday magic wrapped in every crunchy, caramel-coated bite. I used to struggle with complicated holiday treats that took forever, but this one is straightforward and endlessly rewarding. If you want to impress without stress and enjoy a festive favorite, give it a try—you’ll see why my family goes crazy for this every year. Plus, it’s a fun recipe to make with friends or kids who’ll love being part of the kitchen action. Happy baking and happy holidays!
Print
Christmas Saltine Candy Bars Recipe
- Prep Time: 10 minutes
- Cook Time: 15 minutes
- Total Time: 1 hour 30 minutes
- Yield: 28 pieces
- Category: Dessert
- Method: Baking
- Cuisine: American
Description
This Christmas Crack Candy recipe is a delightful holiday treat combining crunchy salted crackers with buttery caramel, rich semi-sweet chocolate, and a swirl of white chocolate, topped with pretzels and toffee bits for added texture and flavor. Perfect for festive gatherings or gifting, this easy-to-make candy is irresistibly sweet and crunchy.
Ingredients
Base
- 42 saltine crackers
Caramel Layer
- 1 cup (227 grams) unsalted butter
- 1 cup (220 grams) brown sugar
- 1 tablespoon (20 grams) light corn syrup
Chocolate Layer
- 2 cups (340 grams) semi-sweet chocolate chips
- 3 ounces (85 grams) white chocolate, finely chopped
Toppings
- 25-30 pretzels
- ½ cup (148 grams) toffee bits
Instructions
- Preheat and Prepare Crackers: Preheat your oven to 350°F (175°C). Line a large baking sheet with parchment paper, then arrange the saltine crackers in a single layer to cover the entire pan. Set aside.
- Make Caramel Sauce: In a medium saucepan, combine the unsalted butter, brown sugar, and light corn syrup. Heat over medium while stirring continuously with a rubber spatula. Allow the butter to melt and the mixture to bubble, then continue cooking and stirring until the sugar fully dissolves and the caramel is smooth and bubbling, about 5 minutes. For precision, use a candy thermometer ensuring it reaches 280°F (soft crack stage).
- Spread Caramel Over Crackers: Carefully pour the hot caramel evenly over the saltine crackers, spreading it out with a spatula to cover all crackers uniformly. Immediately place the baking sheet into the oven and bake for 3–4 minutes until the caramel starts bubbling again. Remove from oven promptly.
- Add and Melt Chocolate Chips: Sprinkle the semi-sweet chocolate chips evenly over the bubbling caramel layer. Return the pan to the oven for about 1 minute just until the chocolate chips are soft and beginning to melt.
- Spread Melted Chocolate: Remove the pan from the oven and use a spatula to spread the melted chocolate chips evenly over the caramel coating.
- Melt White Chocolate: Place finely chopped white chocolate into a microwave-safe bowl. Heat in 30-second intervals, stirring between each, until fully melted and smooth.
- Drizzle and Swirl White Chocolate: Drizzle the melted white chocolate over the chocolate layer. Using a wooden skewer, create swirls by moving horizontally from left to right on one row, then from right to left on the next, alternating directions as you move down the pan for a decorative marbled effect.
- Add Toppings: Immediately sprinkle the pretzels and toffee bits evenly over the top of the chocolate layers to ensure they stick as the chocolate hardens.
- Chill to Set: Transfer the tray to the refrigerator and chill for 1–2 hours until fully hardened. Alternatively, place in the freezer for about 20 minutes for quicker setting.
- Cut and Serve: Once set, remove the candy from the fridge or freezer. Carefully peel off the parchment paper from the bottom. Place on a cutting board and cut into squares or triangles, or simply break into pieces by hand.
- Storage: Enjoy immediately or store in an airtight container in the refrigerator to maintain freshness.
Notes
- How to Store: Keep candy pieces in an airtight container at room temperature for up to 5 days if the environment is cool. Otherwise, refrigerate to extend freshness for about 2 weeks.
- How to Freeze: Store candy in a freezer-safe bag or container for up to 3 months. Place parchment paper between layers to prevent sticking and ease separation.
Nutrition
- Serving Size: 1 piece (approx. 30g)
- Calories: 160
- Sugar: 15g
- Sodium: 180mg
- Fat: 10g
- Saturated Fat: 6g
- Unsaturated Fat: 3g
- Trans Fat: 0g
- Carbohydrates: 18g
- Fiber: 1g
- Protein: 1g
- Cholesterol: 20mg


