If you’re craving something sweet and fruity but still easy to whip up, you have GOT to try this Cheesy Baked Chicken Tenders Recipe. Wait, what? Cheesy and chicken tenders – yes, it might sound simple, but trust me, this combo is a fan-freaking-tastic hit in my kitchen. Whether you’re feeding hungry kids after school or just want a cozy dinner that hits the spot, these baked tenders deliver crispy, cheesy goodness without the mess of frying. Stick around, because I’m about to share all the tips and tricks to get these done perfectly every time.
Why You’ll Love This Recipe
- Cheesy Crunch Every Time: That melty, golden cheese crust is a total game-changer that turns ordinary chicken tenders into an irresistible treat.
- Baked, Not Fried: You get crispy tenders without the oil splatters or guilt from frying—perfect for weeknight comfort food.
- Family Favorite: Personally, my family goes crazy for this, and I bet yours will too once you try it!

Ingredients You’ll Need
These ingredients are simple but they work together beautifully to create that perfect cheesy baked chicken tender. When I shop, I always look for fresh chicken tenders and sharp cheese to get the best flavor.
- Chicken tenders: I like using fresh, not frozen if possible—makes a difference in the texture.
- Shredded mozzarella cheese: This melts perfectly and gives that gooey, cheesy texture everyone loves.
- Parmesan cheese: Adds a sharp, salty punch that balances nicely with the mozzarella.
- Bread crumbs: Panko is my go-to for extra crispiness, but plain works fine too.
- Garlic powder: A little bit of flavor magic to jazz up the coating.
- Onion powder: Adds subtle depth without overpowering.
- Salt & pepper: Essential for seasoning the chicken perfectly before baking.
- Eggs: Acts as the glue to hold the cheesy breadcrumb coating on the tenders.
- Olive oil spray or cooking spray: Helps get that golden crispy crust without deep frying.
Variations
One of the things I love about this Cheesy Baked Chicken Tenders Recipe is how easy it is to make it your own. I often swap out cheeses or add different herbs depending on what’s in my fridge.
- Spicy Kick: When I want a little heat, I toss in some smoked paprika or cayenne pepper to the breadcrumb mix—delicious and addictive.
- Herby Goodness: Fresh parsley or Italian seasoning mixed into the crumb coating brightens up the flavor, especially in spring and summer.
- Gluten-Free Option: Use gluten-free breadcrumbs and double-check your cheese to make this recipe friendly for gluten-sensitive folks.
- Vegan Cheese Swap: I’ve tried this with vegan shredded cheese, and while it’s not exactly the same, it’s a great plant-based alternative.
How to Make Cheesy Baked Chicken Tenders Recipe
Step 1: Prep Your Tenders and Set Up Your Dredging Station
First things first, pat your chicken tenders dry with paper towels to help the coating stick better. In one bowl, whisk together the eggs with a splash of water. In a separate wide bowl, combine your shredded mozzarella, parmesan, breadcrumbs, garlic powder, onion powder, salt, and pepper. This setup will make it super easy to dip and coat each tender evenly.
Step 2: Coat the Tenders Generously
Dip each chicken tender first into the egg mixture, then fully coat it in the cheesy breadcrumb mix. Press gently so the coating sticks well without falling off in the oven. Don’t rush this step—it’s the secret to that satisfying crunch and cheesy flavor.
Step 3: Bake to Golden Perfection
Place the tenders on a greased or parchment-lined baking sheet. I like to spray the tops lightly with olive oil spray to encourage browning. Bake in a preheated 400°F oven for about 15-18 minutes, flipping halfway, until the coating is golden and the chicken is cooked through (internal temp of 165°F is what I check for). Your kitchen will fill with that warm, cheesy aroma—so good!
Step 4: Serve and Enjoy
Once out of the oven, let the tenders cool just a bit so the cheesy crust can firm up. Serve with your favorite dipping sauces like ranch, honey mustard, or even a spicy sriracha mayo for a fun twist.
Pro Tips for Making Cheesy Baked Chicken Tenders Recipe
- Dry Your Chicken: Always pat the tenders dry before coating to help the egg and cheese mixture stick better.
- Press the Coating: Use your fingers to firmly press the cheese breadcrumb mix onto the chicken to avoid any falling off during baking.
- Use a Wire Rack: If you have one, bake on a wire rack set over a cookie sheet—it helps air circulate for extra crispiness all around.
- Check Internal Temperature: Don’t guess—invest in a meat thermometer to ensure your chicken is safe and perfectly juicy every time.
How to Serve Cheesy Baked Chicken Tenders Recipe
Garnishes
I love sprinkling a little chopped fresh parsley or basil on top for a bright pop of color and freshness. Sometimes I even add a light drizzle of garlic butter — trust me, it takes things to the next level.
Side Dishes
My go-to sides with these tenders are crispy oven fries, a simple green salad with lemon vinaigrette, or even creamy mashed potatoes. When I’m feeling fancy, roasted veggies like asparagus or Brussels sprouts work wonderfully too.
Creative Ways to Present
For a fun party option, I arrange tenders on a large platter with different dipping sauces in small bowls around—everyone loves picking their favorite flavors. Another time, I tried stacking them in mini slider buns with a bit of slaw and it was a big hit at game day.
Make Ahead and Storage
Storing Leftovers
If you have any leftovers (rare in my house!), store them in an airtight container in the fridge for up to 3 days. I always make sure they’ve cooled completely before storing to keep the coating from getting soggy.
Freezing
I’ve frozen these tenders successfully by laying them out on a baking sheet, freezing until solid, then transferring to a freezer bag. This keeps them from sticking together, and they’ll last for up to 2 months in the freezer.
Reheating
To reheat, pop them in a preheated oven at 375°F for about 10 minutes or until hot and crispy again. Avoid microwaving if you want to keep that beautiful cheesy crust intact.
FAQs
-
Can I use chicken breasts instead of tenders for this Cheesy Baked Chicken Tenders Recipe?
Absolutely! Just slice chicken breasts into tender-sized strips so they cook evenly. You might need to adjust the baking time slightly, as thicker pieces take longer to cook through.
-
What cheese works best for the coating?
Mozzarella and Parmesan are my favorites because mozzarella melts wonderfully while Parmesan adds a tasty sharpness and helps crisp up the coating. You can experiment with cheddar or a blend if you like a stronger flavor.
-
Can I make this recipe gluten-free?
Yes! Just swap regular breadcrumbs for gluten-free breadcrumbs, and double-check the cheese and seasonings to be sure they meet your dietary needs.
-
What dipping sauces go best with these cheesy tenders?
Ranch dressing, honey mustard, BBQ sauce, or even a spicy sriracha mayo are some of my top picks. Feel free to get creative with what you have on hand.
Final Thoughts
I absolutely love how this Cheesy Baked Chicken Tenders Recipe turns out every single time — it’s the kind of dish that gets eaten before it even hits the table! When I first tried baking tenders with cheese in the coating, I was surprised how crispy and flavorful they became without frying. It’s such a comforting, easy meal you can throw together any busy weeknight. I’m excited for you to try it and taste that perfect cheesy crunch for yourself. Trust me, your family and friends will be asking for this one again and again.
Print
Cheesy Baked Chicken Tenders Recipe
- Prep Time: 10 minutes
- Cook Time: 20 minutes
- Total Time: 30 minutes
- Yield: 18 donuts
- Category: Dessert
- Method: Baking
- Cuisine: American
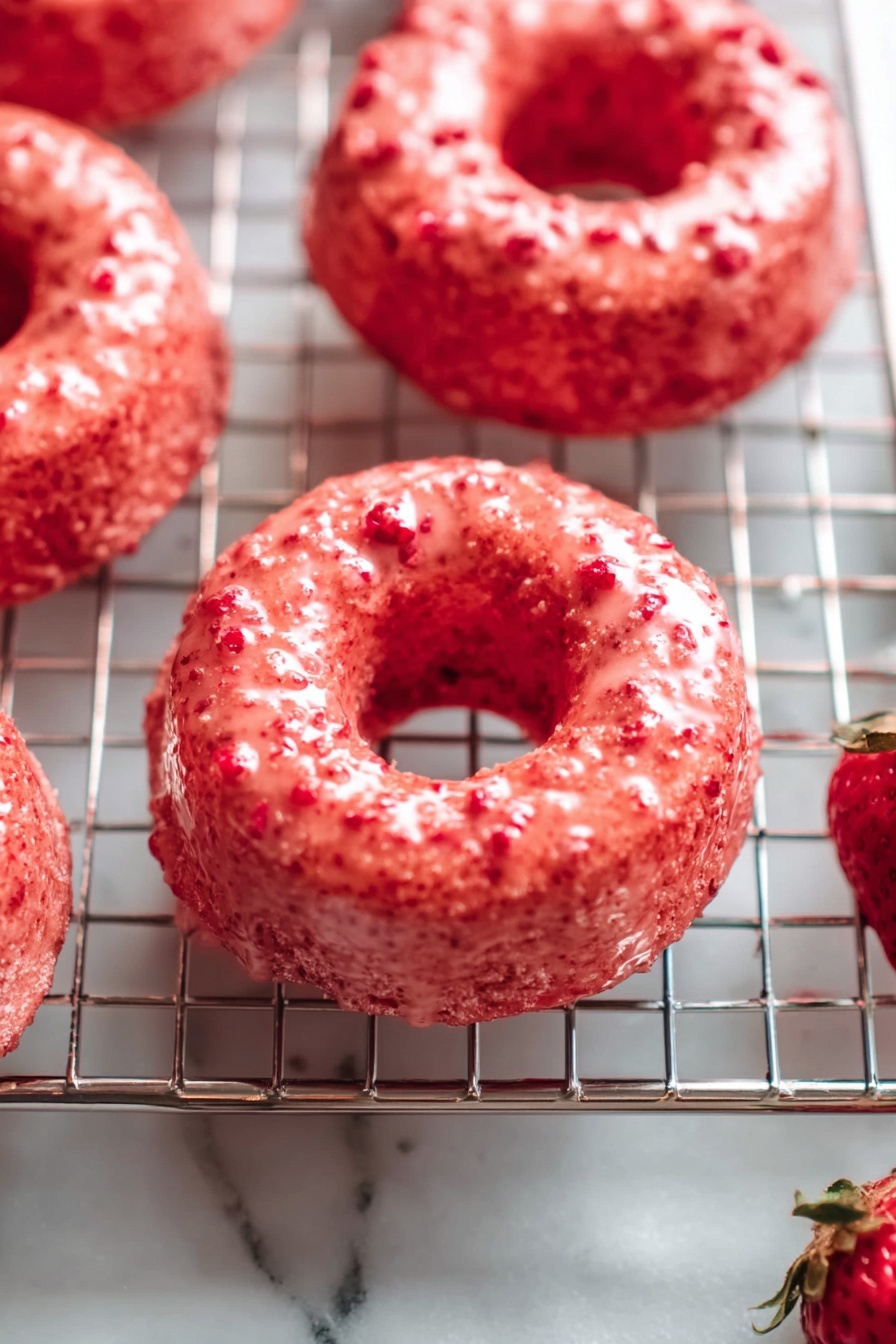
Description
Delight in these homemade Strawberry Donuts, made easy with a strawberry cake mix and topped with a fresh strawberry glaze. Perfectly moist donuts baked to golden perfection and finished with a sweet, fruity glaze featuring finely chopped strawberries. A delicious treat ideal for breakfasts, brunches, or dessert.
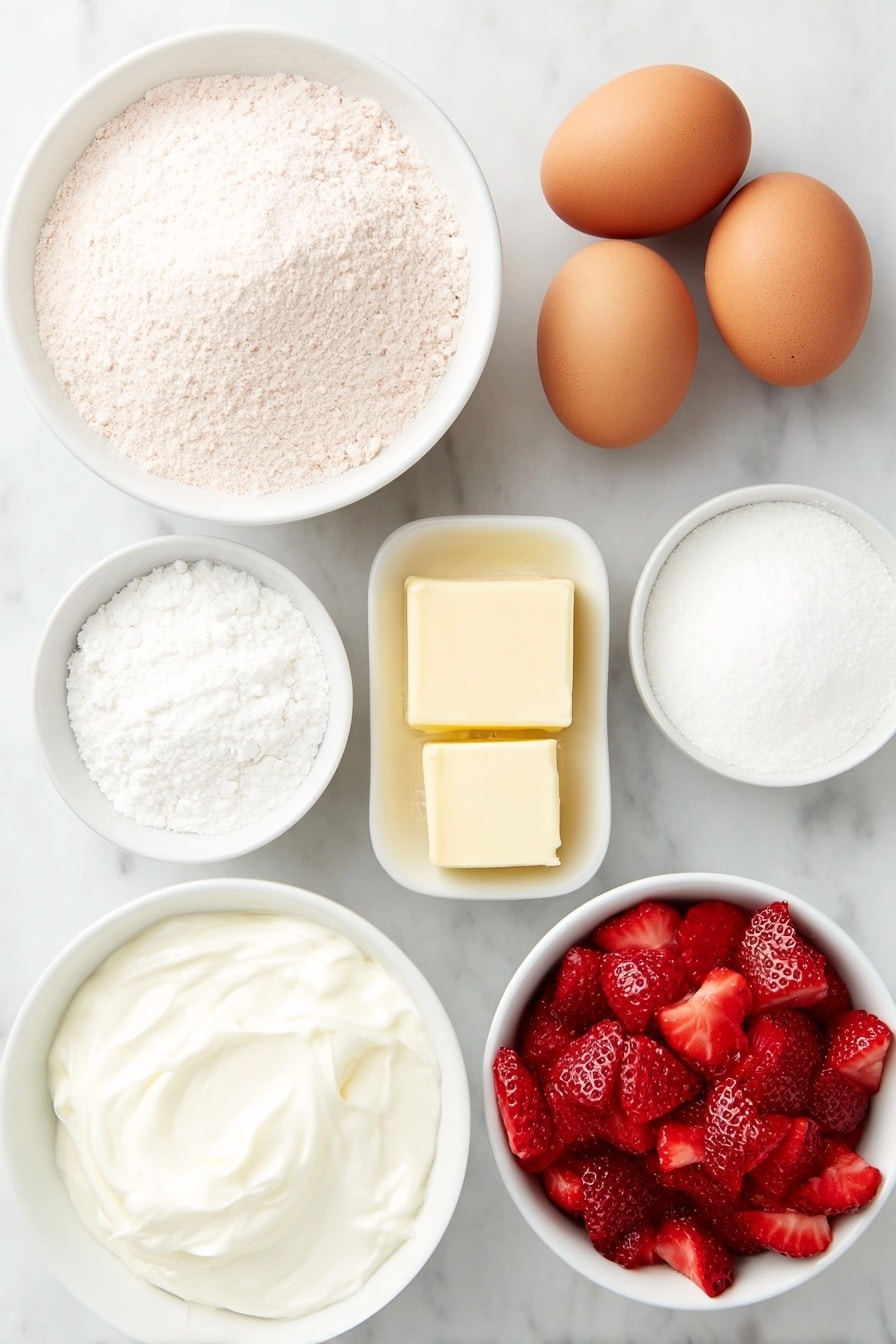
Ingredients
For the Donuts:
- 15.25 ounces (432 grams) Strawberry Cake Mix (1 box)
- 2 large eggs (100 grams)
- 2 tablespoons melted butter (28 grams, ¼ stick)
- ¾ cup heavy cream (170 grams)
For the Glaze:
- 2 cups powdered sugar (226 grams)
- 1 tablespoon heavy cream (14 grams), plus more if needed
- 1 cup finely chopped fresh strawberries (167 grams)
Instructions
- Preheat Oven: Preheat your oven to 350°F (175°C) ensuring it reaches the desired temperature before baking.
- Prepare Donut Batter: In a large bowl, combine the strawberry cake mix, eggs, melted butter, and heavy cream. Stir by hand until the mixture is well combined and smooth.
- Fill Donut Pan: Grease your donut pan thoroughly to prevent sticking. Pour the batter into each mold, taking care not to overfill as the donuts will rise considerably during baking.
- Bake Donuts: Place the pan in the oven and bake for approximately 8 to 10 minutes. Test doneness by inserting a toothpick into the donuts; it should come out clean when they are ready.
- Cool Donuts: Remove the donuts from the oven and carefully transfer them to a cooling rack. Allow them to cool completely before glazing. Repeat the filling and baking process with the remaining batter.
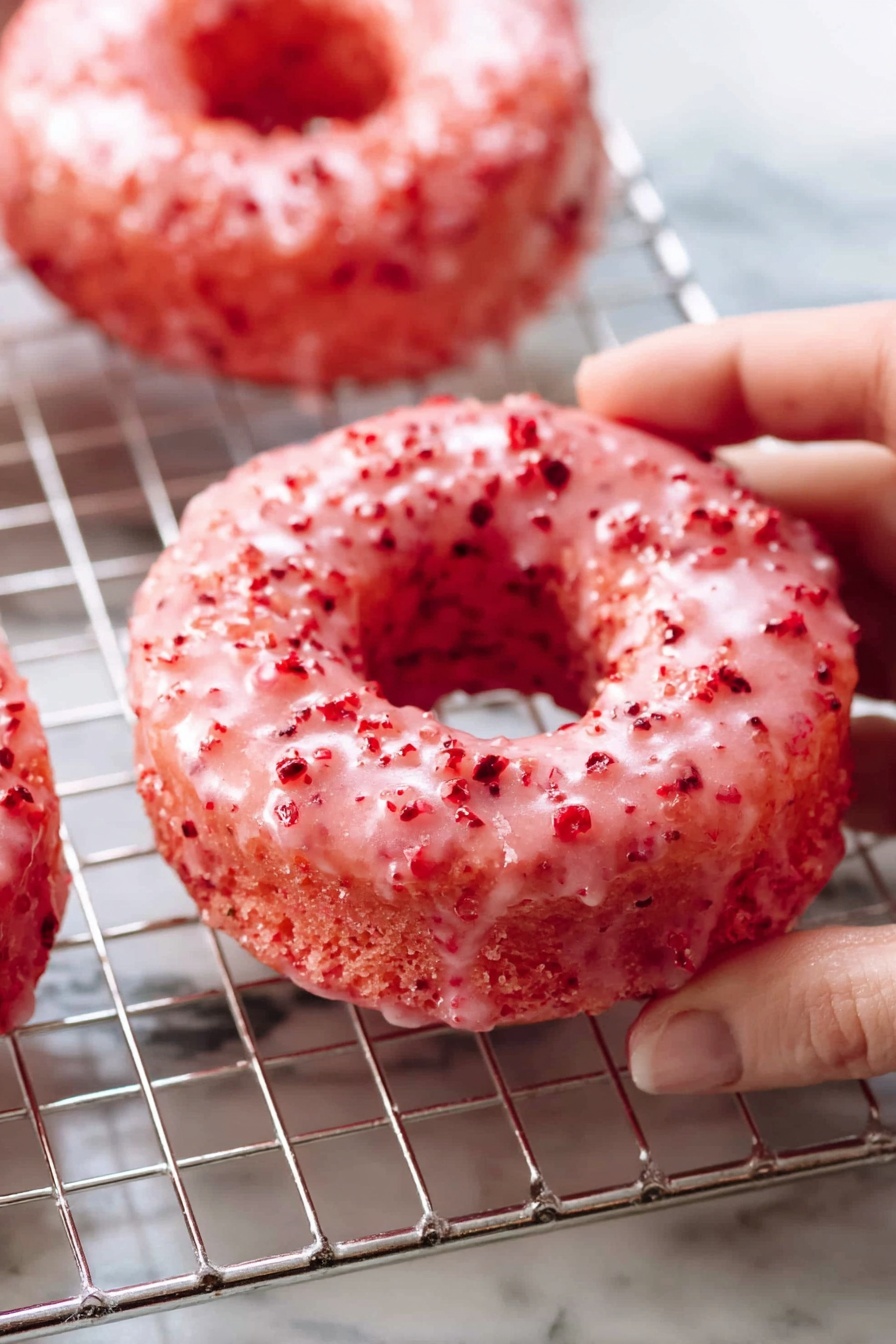
- Make the Glaze: While the donuts are cooling, combine powdered sugar, heavy cream, and finely chopped fresh strawberries in a bowl. Using a hand mixer, beat until well blended. Adjust the consistency by adding more cream to thin or powdered sugar to thicken as needed.
- Glaze Donuts: Dip each cooled donut face-down into the glaze, allowing excess to drip off. Place the donuts back on the rack and let the glaze set and firm up slightly. Due to the fresh strawberries, the glaze may not harden completely but will become firm enough.
Notes
- Use a donut tin for the best shape and even baking; these are available at most kitchenware stores.
- Grease the donut pan well before pouring batter to ensure easy removal after baking.
- Don’t overfill the donut molds, as the batter will rise significantly during baking.
- Prepare the glaze while donuts are cooling to save time.
- For glazing, dip donuts face down to fully coat the top with strawberry glaze.
- Warm donuts briefly in the microwave for 10-20 seconds to refresh before serving.
- Storage: Store donuts in an airtight container at room temperature for up to 2 days, refrigerate for up to 1 week, or freeze for up to 2 months for longer storage.
Nutrition
- Serving Size: 1 donut
- Calories: 180
- Sugar: 16g
- Sodium: 150mg
- Fat: 9g
- Saturated Fat: 5g
- Unsaturated Fat: 3g
- Trans Fat: 0g
- Carbohydrates: 22g
- Fiber: 1g
- Protein: 3g
- Cholesterol: 45mg


