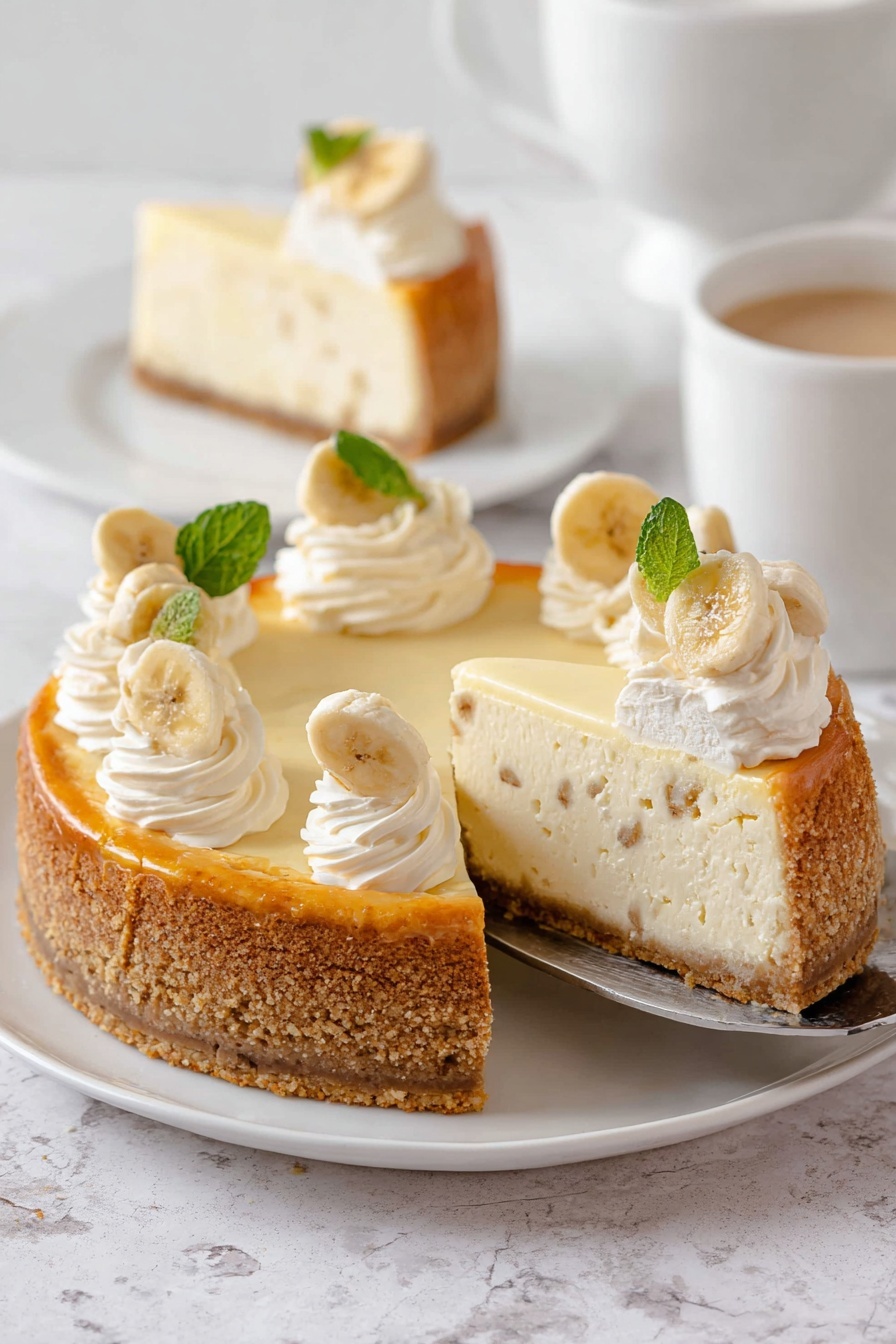
If you love rich, creamy desserts with a nostalgic twist, you’re in for a treat. This Banana Cheesecake with Nilla Wafers Recipe combines the silky smoothness of classic cheesecake with the sweet, comforting flavors of banana pudding — all atop a buttery, crumbly Nilla Wafer crust. I absolutely love how this turns out every time, and I promise you’ll find it irresistible, whether you’re serving it for a family gathering or a special weekend indulgence.
Why You’ll Love This Recipe
- Golden Crust: The Nilla Wafer base adds a lovely sweetness and slight crunch that perfectly contrasts the creamy filling.
- Moist and Luscious: The banana-infused cheesecake has just the right amount of tang and richness — never dry or dense.
- Water Bath Baking: Baking with a water bath ensures a silky texture and prevents cracks, giving you that professional cheesecake look.
- Easy Yet Elegant: Simple ingredients come together effortlessly, making it a dessert that looks like you spent hours but tastes like a dream.

Ingredients You’ll Need
Each ingredient in this Banana Cheesecake with Nilla Wafers Recipe plays an important role. The cream cheese creates that classic cheesecake creaminess, while ripe bananas bring natural sweetness and flavor. The Nilla Wafers make a buttery crust that’s tender without being crumbly — a winning combo, really!
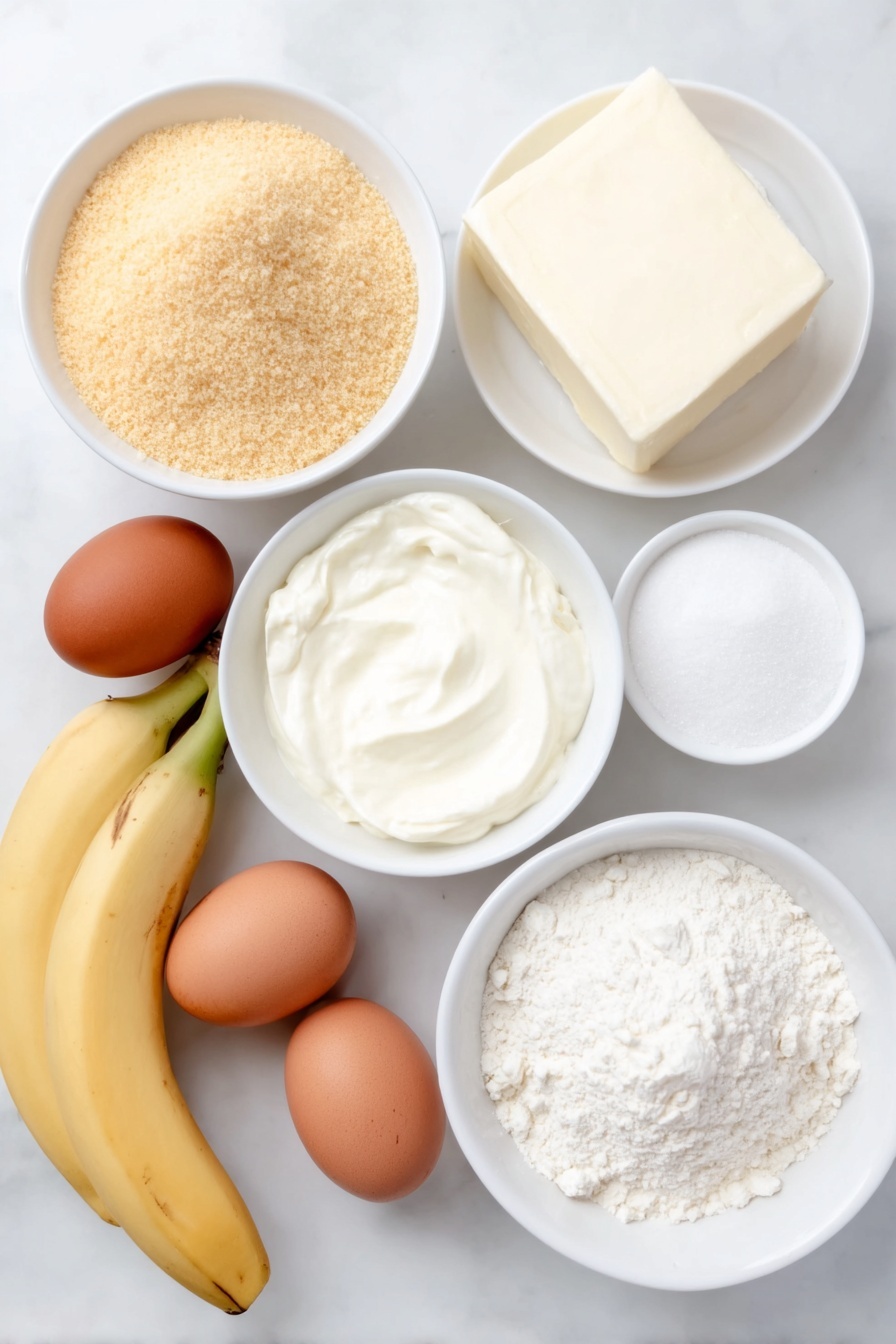
- Nilla Wafers: Using crushed Nilla Wafers gives you a sweet, soft crust that’s a bit unique compared to graham crackers.
- Unsalted Butter: Melting the butter helps bind the crust crumbs together firmly.
- Cream Cheese: Room temperature is key here for a smooth and lump-free batter.
- Granulated Sugar: Adds sweetness, but keeps the texture just right—not too grainy.
- All-Purpose Flour: Helps stabilize the cheesecake for a nice, dense structure without toughness.
- Eggs: Large eggs at room temp blend best to maintain a silky texture.
- Vanilla Extract or Vanilla Bean Paste: This enhances the banana flavor and adds depth.
- Ripe Bananas: The riper, the better — lots of natural sweetness and moistness here.
- Sour Cream: Adds a subtle tang and richness that balances out the sweetness.
- Salt: A pinch brightens and rounds out all the flavors beautifully.
Variations
One of the things I love most about this Banana Cheesecake with Nilla Wafers Recipe is how easy it is to customize. Whether you want to swap ingredients for dietary reasons or play with flavors based on what you love, the recipe is super flexible.
- Crust Swap: If you prefer a firmer crust, try graham crackers instead of Nilla Wafers — it’s just as delicious and gives a bit more crunch.
- Banana Texture: Not a fan of banana chunks in your cheesecake? Puree the bananas smoothly in a food processor for a silkier texture.
- Dairy-Free Option: You can experiment with vegan cream cheese and coconut sour cream for a dairy-free twist — though baking times may vary slightly.
- Extra Flavor Boost: A sprinkle of cinnamon or nutmeg in the filling adds warm, cozy notes perfect for fall and winter.
How to Make Banana Cheesecake with Nilla Wafers Recipe
Step 1: Prep and Bake the Crust
Start by preheating your oven to 350°F. Crush your Nilla Wafers into fine crumbs—about 2 cups worth—and stir them with 6 tablespoons of melted unsalted butter until everything is thoroughly combined. I like pressing the crumbs firmly into the bottom and about an inch up the sides of a 9-inch springform pan. This creates a nice sturdy wall for your cheesecake. Bake this crust for 8 minutes, then set it aside to cool while you prepare the filling. Trust me, pressing the crust tightly is key to avoid sogginess later.
Step 2: Mix the Creamy Cheesecake Filling
In your stand mixer fitted with a paddle attachment, beat 32 ounces of room temperature cream cheese on medium speed for about a minute — until smooth and fluffy. Then add 1 ¼ cups granulated sugar and 3 tablespoons of all-purpose flour; mix for another minute. Next, add your 4 large eggs one at a time, making sure each is fully incorporated before adding the next. Scrape down the bowl between eggs to get everything evenly mixed. Finally, blend in 2 teaspoons vanilla extract, 1 cup mashed ripe bananas (about 2½ medium bananas), ⅔ cup sour cream, and ¼ teaspoon salt. The mixture should be smooth and luscious.
Step 3: Bake Cheesecake Using a Water Bath
Pour your batter into the cooled crust. Now here’s a trick I discovered that really helps: instead of wrapping the springform pan in foil, place it inside a 10-inch cake pan. Then set both pans in a large roasting pan. Pour boiling water into the roasting pan until it reaches halfway up the sides of the cake pan — just enough for the water bath effect without risk of leaks. Bake for 65-70 minutes until the edges look set but the center still jiggles slightly. Then turn off your oven and crack the door open, leaving the cheesecake inside to cool slowly for one hour. This gentle finish helps prevent cracks and keeps the texture silky.
Step 4: Chill and Serve
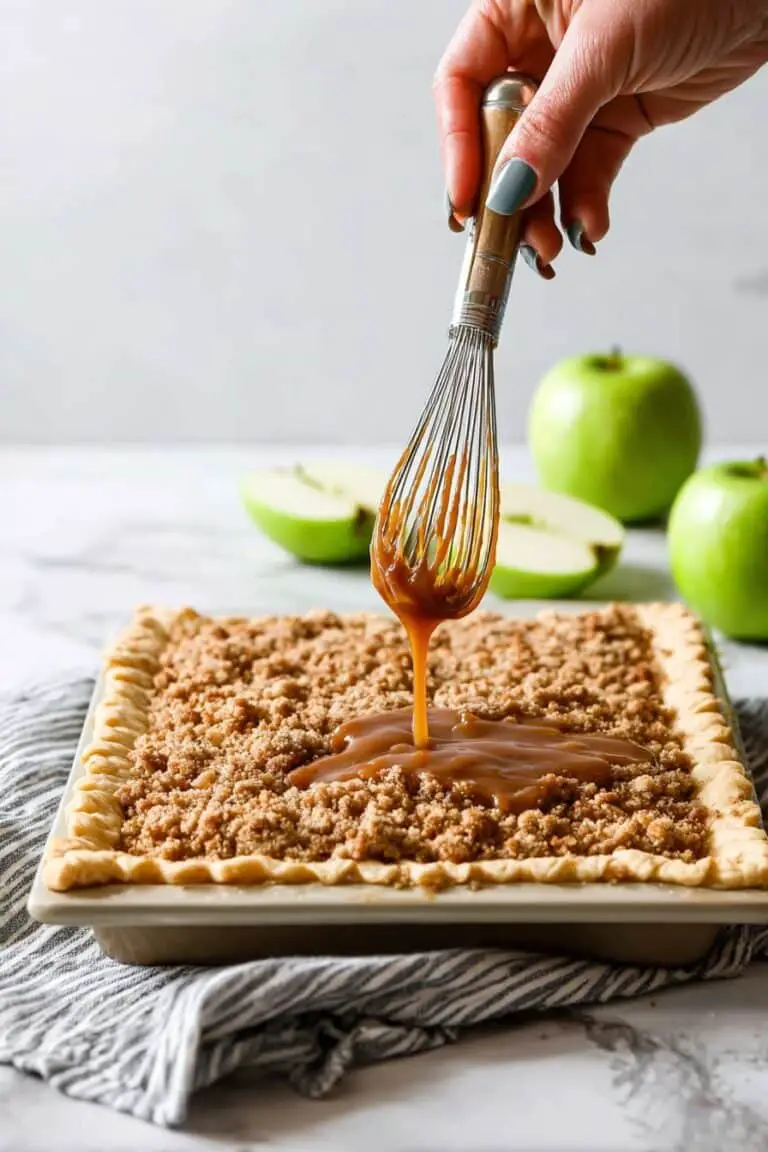
After the hour, carefully remove the cheesecake from the water bath and transfer it to a cooling rack until completely cooled. Once it’s room temperature, pop it into the fridge for at least 8 hours or overnight — this step is crucial for the best texture and flavor. Before serving, top your banana cheesecake with whipped cream, crushed Nilla Wafers, and fresh banana slices. For a show-stopping touch, drizzle some salted caramel sauce over the top. My family goes absolutely crazy over this finishing detail!
Pro Tips for Making Banana Cheesecake with Nilla Wafers Recipe
- Room Temp Ingredients: Giving eggs and cream cheese plenty of time to come to room temp makes blending easier and creates a smoother cheesecake.
- Avoid Overmixing: Once you add the flour and bananas, mix just until combined to avoid incorporating too much air, which can cause cracks.
- Water Bath Magic: I never skip the water bath step—it’s what gives the cake that custard-like, creamy texture without cracks.
- Slow Cooling: Leaving the cheesecake in the warm oven with the door slightly open prevents sudden temperature changes that can crack the cheesecake’s surface.
How to Serve Banana Cheesecake with Nilla Wafers Recipe
Garnishes
I like topping this cheesecake with a cloud of whipped cream—it softens the richness beautifully. Crushed Nilla Wafers sprinkled on top bring back that perfect crunch, and of course, freshly sliced bananas add that fresh flavor pop. When I’m feeling fancy, a drizzle of salted caramel sauce adds just the right touch of indulgence without overpowering the banana essence.
Side Dishes
This dessert pairs wonderfully with a simple cup of coffee or hot tea to cut through the richness. If you’re serving at a brunch or dinner party, fresh fruit salad with berries or a tangy citrus compote balances the sweetness nicely and adds freshness to the plate.
Creative Ways to Present
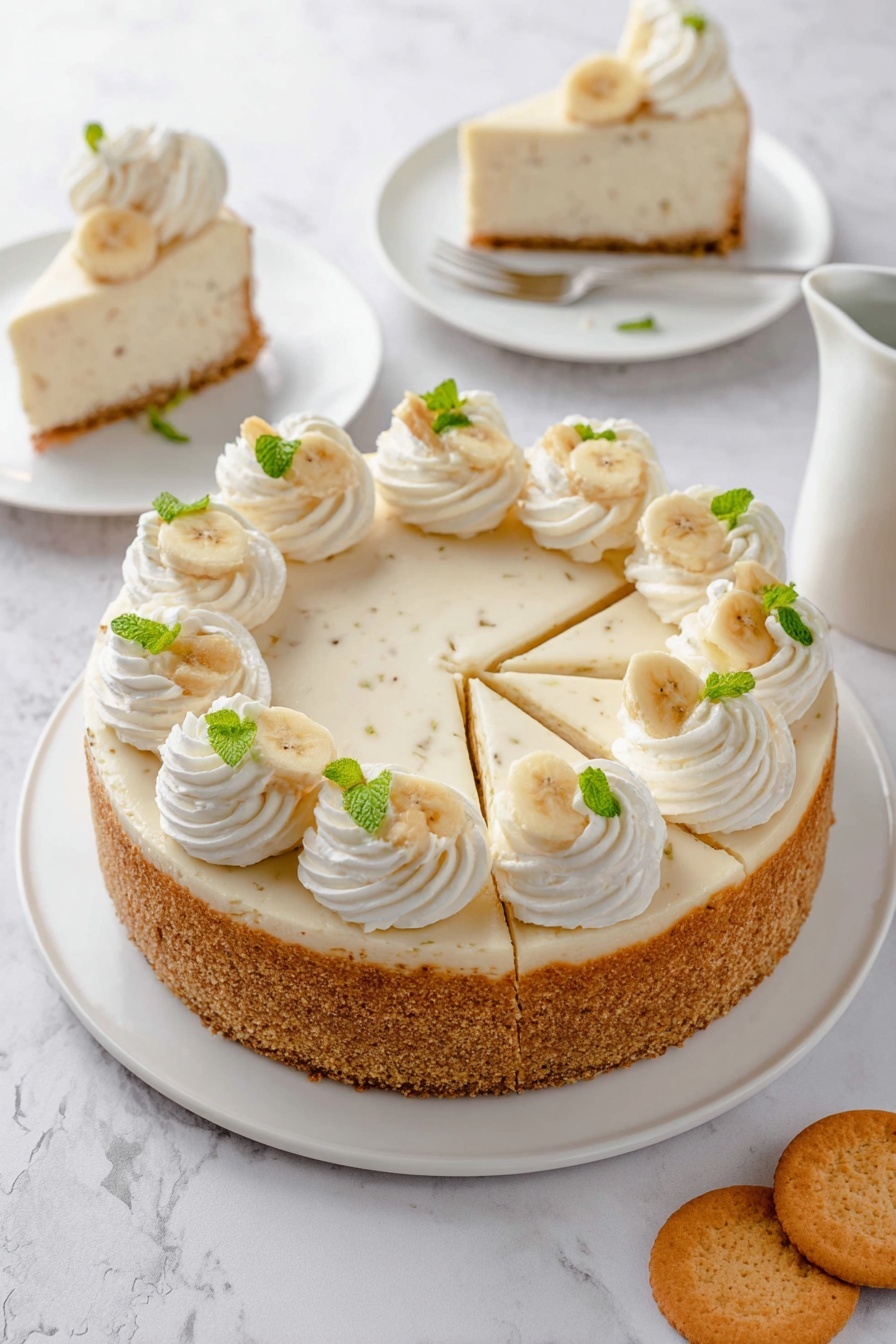
For celebrations, I like serving slices on elegant dessert plates with a banana fan on the side and a sprig of fresh mint for color and aroma. Another trick I’ve tried is layering smaller portions of this cheesecake in parfait glasses with whipped cream and crushed Nilla Wafers for a layered banana cheesecake parfait that looks stunning and portion-controlled.
Make Ahead and Storage
Storing Leftovers
I store leftover cheesecake covered tightly with plastic wrap in the fridge. It stays fresh and creamy for up to 5 days, though I’ve rarely had leftover longer than that! Keeping it sealed well also prevents it from absorbing any fridge odors.
Freezing
This Banana Cheesecake with Nilla Wafers Recipe freezes beautifully. Wrap slices individually in plastic wrap and then aluminum foil to prevent freezer burn. When you’re ready to enjoy, thaw them overnight in the fridge. The texture remains wonderfully creamy, almost like fresh-baked.
Reheating
Because cheesecake is best served chilled, I usually skip warming leftovers. But if you want a softer slice, you can let it sit at room temperature for 15-20 minutes before serving. This lets the flavors open up without melting the structure.
FAQs
-
Can I use overripe bananas in this Banana Cheesecake with Nilla Wafers Recipe?
Absolutely! Overripe bananas are actually ideal because they’re super sweet and soft, which adds more flavor and moisture to the cheesecake. Just make sure to mash or puree them well for even texture.
-
Do I really need to use a water bath when baking this cheesecake?
Yes, the water bath is crucial. It regulates the oven temperature around the cheesecake and keeps it moist, preventing cracks and dryness. I’ve found the little extra effort pays off with a silky smooth finish every time.
-
Can I make this cheesecake without a stand mixer?
You can! Use a hand mixer or even a sturdy whisk, but be sure to beat the cream cheese until smooth before adding other ingredients. Take your time scraping down the bowl to ensure everything is well incorporated.
-
How ripe should the bananas be for best flavor?
Look for bananas that have plenty of brown spots — these are sweeter and softer, making them perfect for flavor and texture. Green or just-yellow bananas won’t give you the same rich banana punch.
-
Can I prepare the crust in advance?
You sure can. Prepare and bake the crust a day ahead, then wrap and store it at room temperature. This makes day-of assembly easier and keeps the crust crisp and ready for the filling.
Final Thoughts
You know, this Banana Cheesecake with Nilla Wafers Recipe holds a special spot on my dessert rotation. It’s a nostalgic twist on two beloved treats that never fails to impress. I love how it’s approachable but feels elevated and thoughtful. If you’re craving something truly comforting and delicious, I can’t recommend making this enough – it’s a guaranteed showstopper whenever I bring it to any gathering. So go ahead, give it a whirl in your kitchen; I’m pretty sure it’ll become one of your favorites, too.
Print
Banana Cheesecake with Nilla Wafers Recipe
- Prep Time: 25 minutes
- Cook Time: 1 hour 5 minutes
- Total Time: 9 hours 30 minutes
- Yield: 12 servings
- Category: Dessert
- Method: Baking
- Cuisine: American
Description
This Banana Pudding Cheesecake combines the creamy richness of classic cheesecake with the sweet, comforting flavors of banana pudding. A buttery Nilla Wafer crust forms the perfect base for a smooth, luscious mixture of cream cheese, ripe bananas, and vanilla, baked to perfection in a water bath for a silky texture. Finished with whipped cream, crushed wafers, and fresh bananas, this dessert is a decadent treat for any occasion.
Ingredients
For the Crust:
- 8 ounces Nilla Wafer cookies, crushed into crumbs (about 2 cups)
- 6 tablespoons unsalted butter, melted
For the Cheesecake:
- 32 ounces cream cheese, room temperature (4 8-ounce packages)
- 1 ¼ cups granulated sugar
- 3 tablespoons all-purpose flour
- 4 large eggs, room temperature
- 2 teaspoons vanilla extract or vanilla bean paste
- 1 cup mashed ripe bananas (about 2 ½ medium bananas)
- ⅔ cup sour cream
- ¼ teaspoon salt
Instructions
- Preheat Oven: Preheat your oven to 350°F to prepare for baking the crust and cheesecake.
- Prepare Pan and Water Bath Setup: Tightly wrap a 9-inch springform pan in heavy-duty foil to prevent leaks during the water bath. Alternatively, place the 9-inch pan into a 10-inch round cake pan. Both pans will fit inside a large roasting pan. Boil water for the water bath.
- Grease Pan: Lightly spray the springform pan with nonstick cooking spray to prevent sticking.
- Make Crust: In a medium bowl, mix the crushed Nilla Wafer cookies with melted butter until combined. Press this mixture firmly into the bottom and about 1 inch up the sides of the prepared springform pan.
- Bake Crust: Bake the crust in the preheated oven for 8 minutes. Remove and let cool while preparing the filling.
- Beat Cream Cheese: Using a stand mixer fitted with a paddle attachment, beat the cream cheese on medium speed for about 1 minute until smooth.
- Add Sugar and Flour: Add granulated sugar and flour to the cream cheese and mix until well combined, about 1 minute.
- Add Eggs: Add eggs one at a time, fully incorporating each before adding the next. Scrape down the sides of the bowl between each addition for even mixing.
- Add Remaining Ingredients: Mix in vanilla extract, mashed bananas, sour cream, and salt until the batter is smooth and fully combined, about 1 minute.
- Pour Batter and Assemble Water Bath: Pour the cheesecake batter into the prepared crust. Place the springform pan inside the 10-inch cake pan, then place both into the large roasting pan. Carefully pour boiling water into the roasting pan until it reaches halfway up the sides of the cake pan.
- Bake Cheesecake: Bake for 65-70 minutes. The edges should be set, but the center should still have a slight jiggle. Turn off the oven, crack the door open, and let the cheesecake rest inside for 1 hour.
- Cool and Refrigerate: Remove the cheesecake from the water bath and place it on a cooling rack until completely cooled. Refrigerate for at least 8 hours to set properly.
- Serve: Before serving, top with whipped cream, crushed Nilla Wafers, and freshly sliced bananas. Optionally, drizzle with salted caramel sauce for extra decadence.
Notes
- The Nilla Wafer crust produces a slightly softer texture compared to graham cracker crust; use graham cracker crust if preferred.
- For a smoother cheesecake without visible banana flecks, puree the bananas in a food processor instead of mashing.
Nutrition
- Serving Size: 1 slice (1/12th of cheesecake)
- Calories: 480
- Sugar: 30g
- Sodium: 320mg
- Fat: 33g
- Saturated Fat: 20g
- Unsaturated Fat: 11g
- Trans Fat: 0.5g
- Carbohydrates: 38g
- Fiber: 1.5g
- Protein: 7g
- Cholesterol: 130mg


