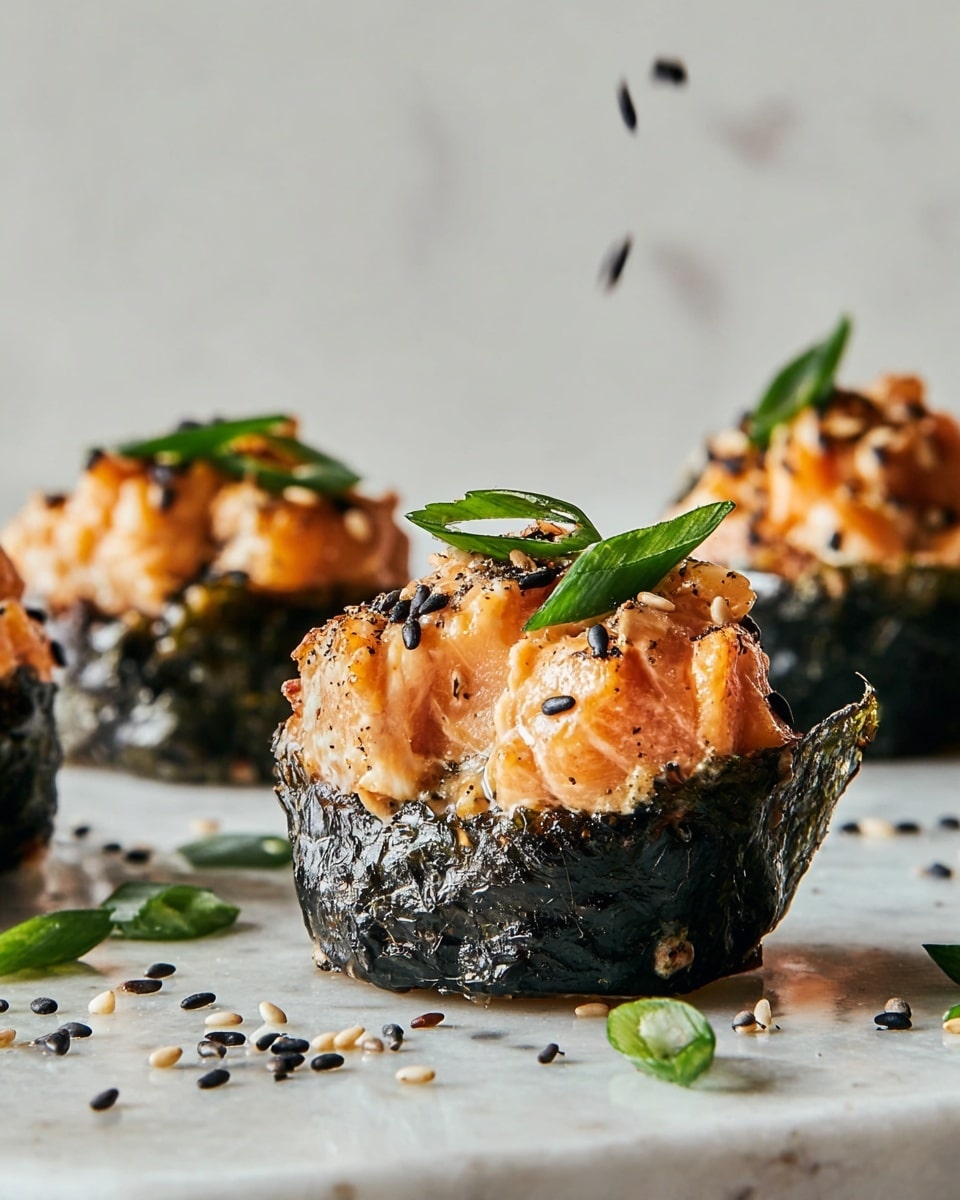
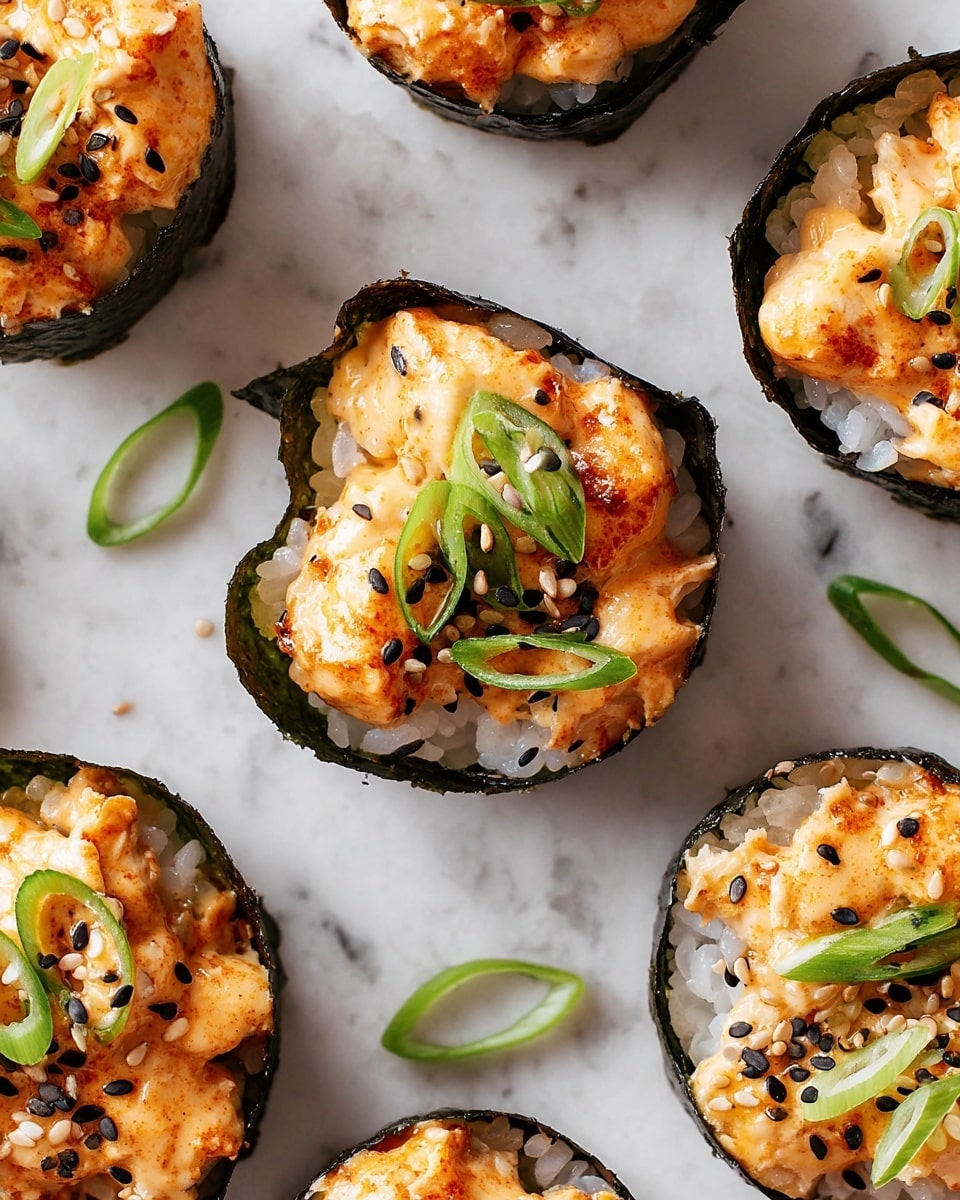
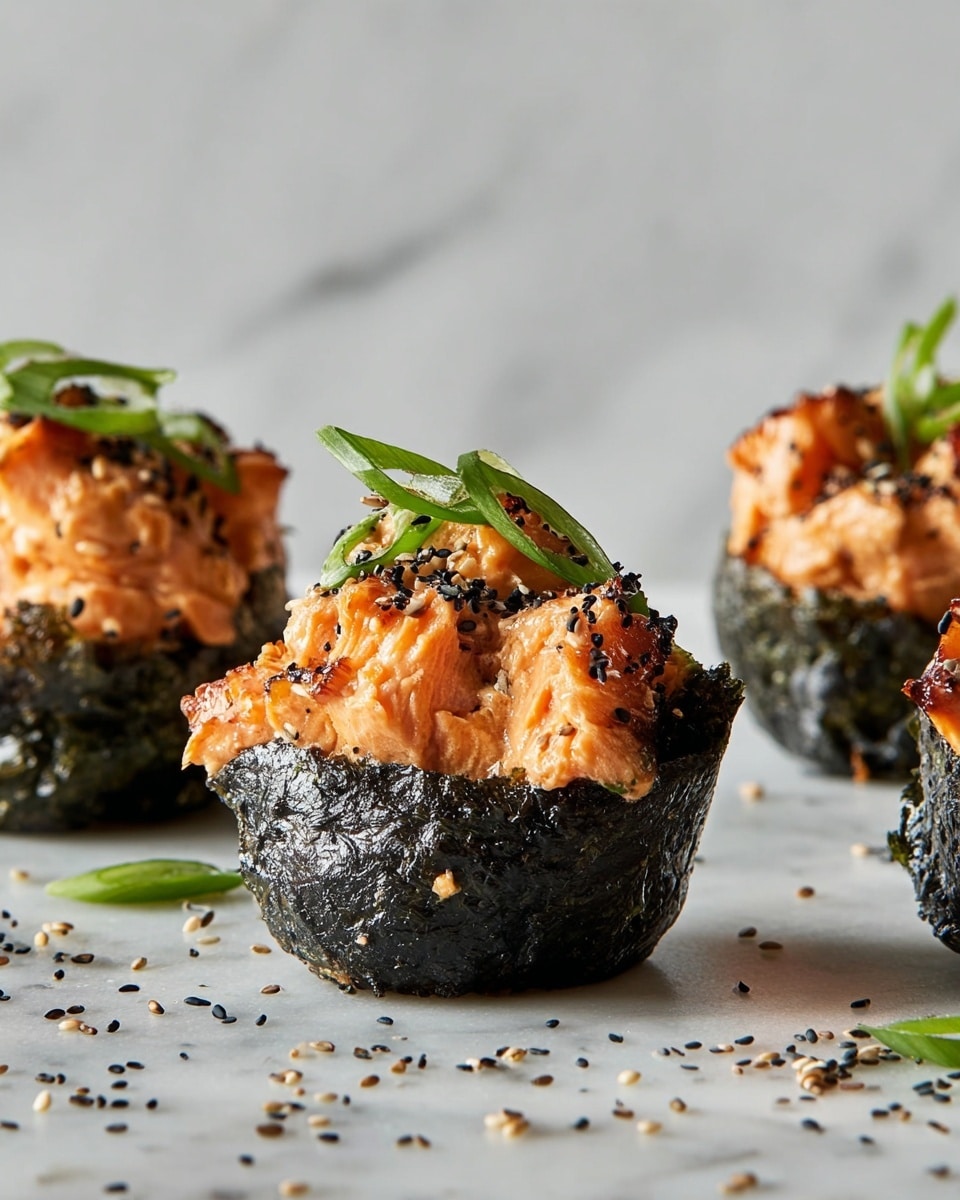
I absolutely love how these Baked Salmon Sushi Cups turn out—flavorful little bites that feel fancy but come together so easily. Honestly, this recipe hits the sweet spot when you want sushi-inspired flavors without the hassle of rolling or raw fish worries. Every time I serve these, whether it’s a casual weeknight dinner or a fun appetizer for friends, they disappear fast.
You’ll find that the Baked Salmon Sushi Cups Recipe balances the tender baked salmon with a creamy, spicy mayo drizzle, all nestled on a bed of sticky sushi rice wrapped in crispy nori. It’s a fun, hands-on treat that’s perfect if you want to impress without slaving away in the kitchen. Once you try this, it just might become your go-to sushi fix at home!
Why You’ll Love This Recipe
- Easy to Make: No rolling or fancy sushi skills needed, just build and bake!
- Customizable Flavors: You can adjust spice levels and toppings easily.
- Great for Entertaining: Bite-sized and beautiful—perfect finger food for parties.
- Healthy and Delicious: Packed with omega-3s from salmon and satisfying textures.
Ingredients You’ll Need
The ingredients for this Baked Salmon Sushi Cups Recipe are simple and complement each other perfectly. Sushi rice brings the stickiness you want, while the salmon gives you richness, and the nori keeps everything neatly together. You’ll want to find fresh salmon and high-quality Japanese mayonnaise for that authentic flavor punch.
- Cooking spray: Makes cleanup easier and helps keep the sushi cups from sticking to the muffin tin.
- Cooked sushi rice: Essential for that authentic sticky texture; leftover rice works great too.
- Nori sheets: Use full sheets and quarter them—fresh, crispy nori is best for wrapping.
- Skinless salmon fillet: Fresh and high-quality salmon will make all the difference in flavor and texture.
- Scallions: Adds a fresh, mild onion flavor and a pop of color.
- Toasted sesame oil: Brings that nutty, toasty depth which really elevates the salmon mixture.
- Japanese mayonnaise: Like Kewpie—creamy with a hint of sweetness that balances the spice.
- Sriracha: For a kick of heat—adjust to your preference!
- Kosher salt: To season and brighten the flavors.
- Black and white sesame seeds: For garnish and a tiny crunch finish.
Variations
I love playing around with this Baked Salmon Sushi Cups Recipe depending on what I have on hand or the mood I’m in. Feel free to swap out ingredients or mix up the toppings to keep it interesting—you can make it spicier, milder, or add crunch with veggies.
- Spicy Crunch: Add tempura flakes or crispy onion bits on top for extra texture; my family goes nuts over this twist!
- Avocado Boost: Mix in or top with small slices of fresh avocado for creaminess, especially if you want to tone down the spice.
- Vegetarian Version: Replace salmon with seasoned tofu or shiitake mushrooms for a meat-free option that still tastes amazing.
- Herb Variations: Swap scallions for fresh cilantro or chives to change the flavor profile slightly.
How to Make Baked Salmon Sushi Cups Recipe
Step 1: Prep Your Oven and Muffin Tin
Start by positioning a rack in the upper third of your oven and preheat it to 400°F. Lightly spray a 12-cup muffin tin with cooking spray—this keeps your sushi cups from sticking and makes cleanup a breeze. Trust me, it’s a small step that pays off!
Step 2: Build the Sushi Rice Layer
Take your nori sheets and quarter them into a dozen pieces. Scoop a heaping tablespoon of sushi rice onto each nori piece, then transfer each to a muffin cup with the rice side up. Use the back of a spoon to gently press the rice into an even layer covering the bottom—think of it as making a little sticky rice crust. Be gentle so your nori doesn’t tear.
Step 3: Mix the Salmon Filling
In a large bowl, toss together the salmon cubes, thinly sliced scallions, toasted sesame oil, 2 tablespoons of Japanese mayonnaise, sriracha, and a pinch of kosher salt. This combo makes a flavorful, creamy filling that’s balanced between heat and richness. Make sure everything is evenly coated but don’t overmix—the salmon should stay somewhat intact.
Step 4: Assemble and Bake
Divide the salmon mixture evenly among the muffin cups, placing it right on top of the rice. Bake for about 11 minutes until the salmon is nearly cooked through. Keep an eye on it—you want it tender, not dry.
Step 5: Broil for that Perfect Char
Switch your oven to the broiler and broil the sushi cups for 2 to 4 minutes. Watch closely as the tops char here and there—that’s the flavor jackpot! This step adds a delicious smoky note and finishes cooking the salmon. Let the cups rest for 5 minutes when you take them out; it helps everything settle nicely.
Step 6: Make the Spicy Mayo Drizzle
While the cups cool, whisk together the remaining 2 tablespoons of Japanese mayonnaise with a little sriracha. This sauce adds a creamy, spicy kick when drizzled on top—you’ll want to make sure every bite gets some!
Step 7: Garnish and Serve
Arrange your sushi cups on a nice platter, drizzle with the spicy mayo mixture, then sprinkle with black and white sesame seeds and extra scallions. The presentation looks incredible, and your guests won’t be able to resist diving right in.
Pro Tips for Making Baked Salmon Sushi Cups Recipe
- Use Day-Old Sushi Rice: I discovered this trick when my fresh rice was too sticky and mushy; slightly cooled, day-old rice holds up better in the cups.
- Don’t Overmix Salmon: Keep the salmon cubes intact for nicer texture—overmixing turns it pasty.
- Watch the Broiler Closely: It can go from perfectly charred to burnt in seconds, so stay nearby and keep an eye.
- Use a Nonstick Muffin Tin: Avoid sticky struggles by greasing well or using silicone molds if you have them.
How to Serve Baked Salmon Sushi Cups Recipe
Garnishes
I always stick with scallions and a sprinkle of black and white sesame seeds because they add fresh color and a nice little crunch. Sometimes I add thin strips of pickled ginger on the side for a palate cleanser, which really makes the flavors pop.
Side Dishes
These sushi cups go great alongside a simple seaweed salad or lightly dressed cucumber salad. For a heartier meal, steamed edamame or miso soup rounds out the experience nicely. I like to keep sides light to highlight the sushi cups.
Creative Ways to Present
For special occasions, I’ve arranged these in bamboo leaf-lined trays or even served them as part of a sushi party platter with wasabi, soy sauce, and extra garnishes. You can play with colors by adding small dollops of tobiko or thin avocado slices on top—like edible little cups of joy!
Make Ahead and Storage
Storing Leftovers
I usually store leftover sushi cups in an airtight container in the fridge and eat them within 2 days. They keep surprisingly well, but the nori will soften a bit overnight, so expect a more tender texture rather than crunchy.
Freezing
I don’t recommend freezing these sushi cups because the rice and nori textures change after freezing. If you want to prep ahead, just assemble the ingredients and bake fresh for best results.
Reheating
To reheat, I pop leftovers in a 350°F oven for about 8-10 minutes. This warms the salmon gently without drying it out and helps slightly re-crisp the nori edges. Avoid microwaving as it can get soggy and rubbery.
FAQs
-
Can I use raw salmon in this Baked Salmon Sushi Cups Recipe?
This recipe uses baked salmon to ensure it’s fully cooked and safe to eat, especially since it’s baked and broiled. If you want to use raw salmon (sushi-grade), you can try a no-bake version, but be sure to source very fresh, quality fish and keep it properly chilled.
-
What if I don’t have Japanese mayonnaise?
Japanese mayonnaise like Kewpie is creamier and slightly sweeter than regular mayo, but if you can’t find it, use regular mayonnaise and add a small pinch of sugar or a dash of rice vinegar to mimic the flavor.
-
Can I make these sushi cups gluten-free?
Yes! Just ensure your soy sauce (if used) and sriracha are gluten-free brands, and double-check all condiments. The basic sushi cups themselves are naturally gluten-free.
-
How do I prevent the nori from getting soggy?
Using day-old, slightly cooled sushi rice helps reduce moisture that makes nori soggy. Also, don’t overpack the rice, and bake right after assembling for the best texture.
Final Thoughts
This Baked Salmon Sushi Cups Recipe is one of those gems that makes you look like a kitchen rockstar without all the fuss. I’ve made it for casual dinners and special occasions, and every time it wins rave reviews. I hope you enjoy the process as much as the delicious bites—you’ll love how approachable sushi can be at home with this recipe. Give it a try and let me know how it turns out!
Print
Baked Salmon Sushi Cups Recipe
- Prep Time: 15 mins
- Cook Time: 25 mins
- Total Time: 40 mins
- Yield: 12 sushi cups
- Category: Appetizer
- Method: Baking
- Cuisine: Japanese
Description
Delight in these vibrant Baked Salmon Sushi Cups, a fusion of tender baked salmon, seasoned sushi rice, and crisp nori sheets, topped with a spicy mayonnaise drizzle and toasted sesame seeds. Perfect as an elegant appetizer or a light meal, these sushi cups bring Japanese flavors to your oven with ease and flair.
Ingredients
Base
- Cooking spray
- 2 cups cooked sushi rice
- 3 nori sheets, quartered
Salmon Mixture
- 1 (1 1/2-lb.) skinless salmon fillet, cut into 1/2″ cubes
- 2 scallions, thinly sliced, plus more for serving
- 1 tsp. toasted sesame oil
- 4 Tbsp. Japanese mayonnaise (such as Kewpie), divided
- 2 1/4 tsp. sriracha, divided
- Kosher salt, to taste (approximately 1/2 tsp.)
- 2 tsp. black and white sesame seeds
Instructions
- Prepare Oven and Muffin Tin: Arrange a rack in the upper third of the oven and preheat to 400°F. Lightly coat a standard 12-cup muffin tin with cooking spray to prevent sticking.
- Assemble Nori and Rice Bases: Scoop one heaping tablespoon of cooked sushi rice into the center of each quartered nori sheet. Transfer each nori piece, rice side up, into the prepared muffin tin cups. Use a spoon to gently pack the rice into an even layer at the bottom of each cup, forming the base.
- Combine Salmon Mixture: In a large bowl, toss together the cubed salmon, sliced scallions, toasted sesame oil, 2 tablespoons Japanese mayonnaise, 2 teaspoons sriracha, and 1/4 teaspoon kosher salt until all ingredients are well coated and evenly mixed.
- Fill Sushi Cups: Divide the salmon mixture evenly among the muffin tin cups, spooning about 1/4 cup of the mixture on top of the rice in each cup, creating a layered effect.
- Bake the Sushi Cups: Place the muffin tin in the oven and bake for about 11 minutes, or until the salmon is almost cooked through but not fully opaque.
- Broil for Charring: Switch the oven to broil mode. Carefully broil the sushi cups for 2 to 4 minutes, watching vigilantly to ensure the salmon doesn’t burn. The broiling will char the salmon tops in spots and finish the cooking process.
- Prepare Spicy Mayonnaise Drizzle: While the sushi cups cool for 5 minutes after baking, combine the remaining 2 tablespoons of Japanese mayonnaise with 1/4 teaspoon sriracha in a small bowl, mixing to create a spicy creamy sauce.
- Garnish and Serve: Transfer the sushi cups to a serving platter. Drizzle each with the spicy mayonnaise mixture, then sprinkle with the black and white sesame seeds and additional sliced scallions for garnish. Serve immediately.
Notes
- Use cooked sushi rice that is slightly cooled but still sticky for best shaping results.
- Watch the broiling step carefully as salmon can burn quickly under high heat.
- For a milder version, reduce sriracha according to taste.
- This recipe yields 12 sushi cups, ideal for parties or appetizers.
- Leftovers can be refrigerated and gently reheated, though best enjoyed fresh for optimal texture.
Nutrition
- Serving Size: 1 sushi cup
- Calories: 180
- Sugar: 1 g
- Sodium: 320 mg
- Fat: 9 g
- Saturated Fat: 1.5 g
- Unsaturated Fat: 6 g
- Trans Fat: 0 g
- Carbohydrates: 16 g
- Fiber: 1 g
- Protein: 10 g
- Cholesterol: 35 mg

