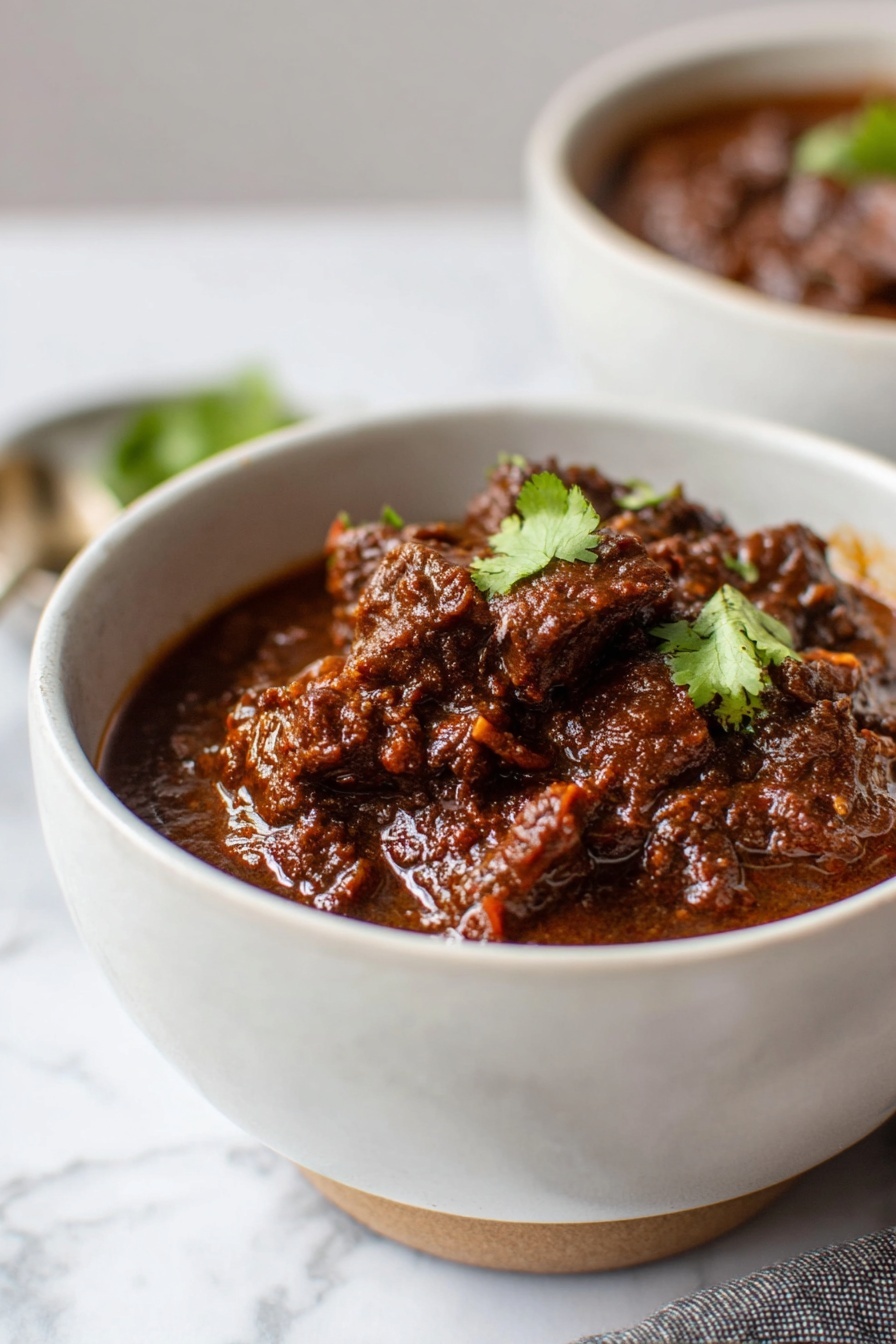
I’m so excited to share this Authentic Texas Chili Recipe with you! This isn’t your average chili—it’s rich, smoky, and packed with layers of flavor that’ll transport you straight to the heart of Texas. Whether it’s your first time making chili from scratch or you’re looking to up your chili game, this recipe will become your go-to. I absolutely love how tender the beef gets and how the blend of dried chiles creates this depth that’s just unforgettable.
Why You’ll Love This Recipe
- Deep, Authentic Flavors: The combination of ancho, pasilla, guajillo, and chipotle chiles brings a smoky, layered taste you won’t find in any canned chili.
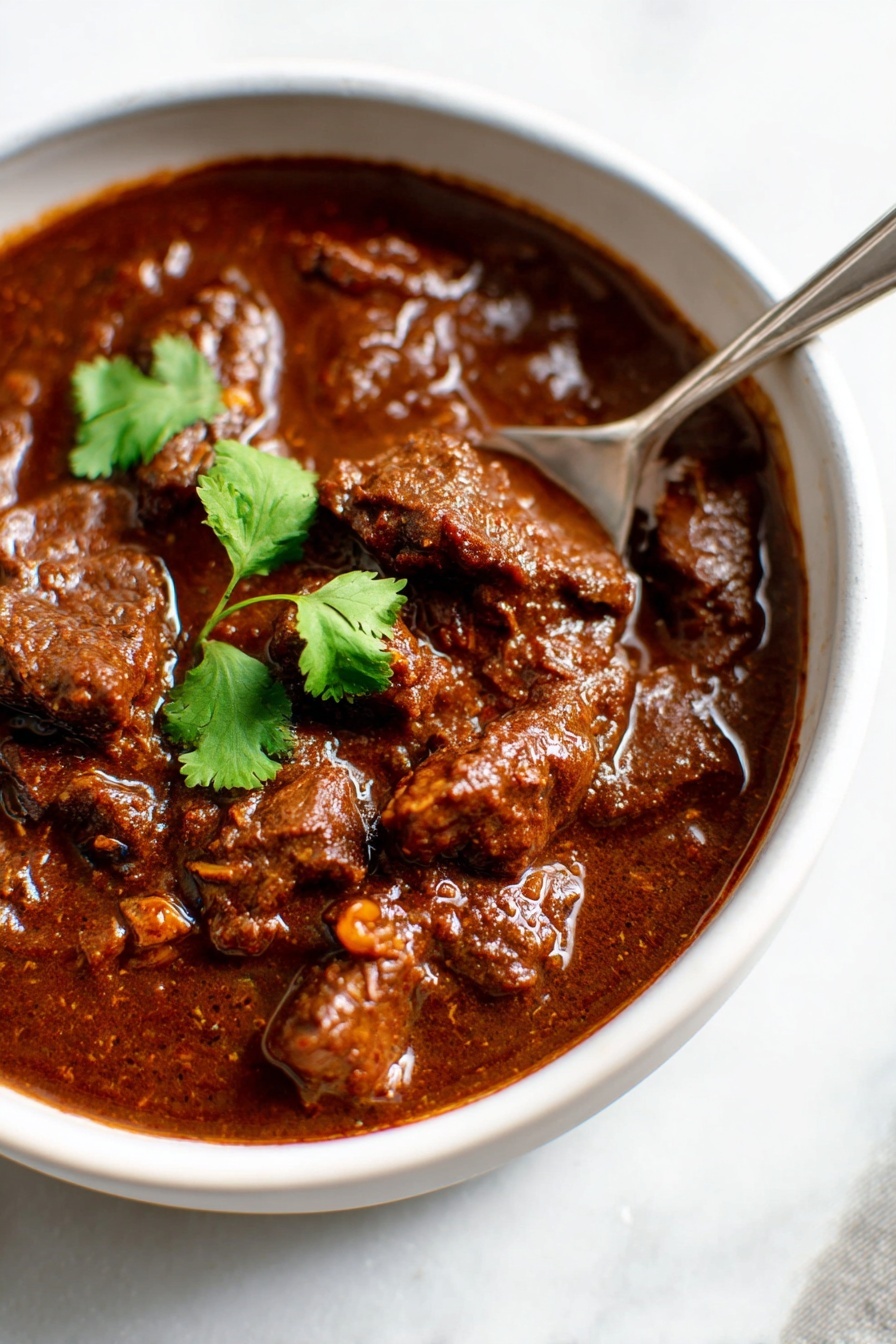
- Tender, Melt-in-Your-Mouth Beef: Slow cooking ensures the chuck roast becomes beautifully tender, perfect for cozy meals or gatherings.
- Customizable Heat Level: You can tweak the chiles and spices to match your preferred spice range, making it great for the whole family.
- Versatile Serving Options: Whether with a simple cornbread or over rice, it pairs well with all your favorite Tex-Mex sides.

Ingredients You’ll Need
To make authentic Texas chili, the right ingredients are key. Using a blend of dried chiles and quality beef really brings the dish together. I always look for fresh dried chiles without too many blemishes, and chuck roast beef for that perfect balance of flavor and tenderness.

- Dried Ancho Chili Peppers: These provide a mild sweetness with a hint of raisin flavor, setting a warm base.
- Dried Pasilla Chili Peppers: I love these for their earthy, almost chocolatey notes that add richness.
- Dried Guajillo Chili Peppers: They bring a bright, tangy heat that balances the deeper chiles.
- Dried Chipotle Peppers: Smoky and spicy, these give the chili its signature kick.
- Olive Oil: For searing the beef and sautéing the aromatics—adds subtle depth to the dish.
- Chuck Roast Beef: Cut into cubes, this beef becomes juicy and tender with slow cooking.
- Salt and Black Pepper: Essential for seasoning—don’t be shy with these!
- White Onion: Diced and sautéed, onions bring sweetness and body to the chili.
- Garlic: Minced for that aromatic punch.
- Mexican Oregano: Different from Mediterranean oregano, it adds that distinct earthy, citrusy flavor.
- Ground Cumin: A must for that warm, smoky undertone.
- Low Sodium Beef Broth: The stew’s liquid base, it helps meld all flavors without overpowering.
- Masa Harina: This is a little secret ingredient for authentic thickness and subtle corn flavor.
Variations
I love that this Authentic Texas Chili Recipe is pretty forgiving and open to your personal tweaks. Over the years, I’ve discovered a few favorite variations that make it even more enjoyable depending on the occasion or what I have on hand.
- Slow Cooker Version: I sometimes use my Crockpot—after browning the beef and sautéing the aromatics, I let it cook on low for 7-8 hours, lighting up the house with the best aromas.
- Adding Beans (If You Must): Traditional Texas chili is bean-free, but I know some folks love them. Adding black beans or pinto beans near the end works well if you want a heartier dish.
- Vegetarian Twist: Swap beef for meaty mushrooms or cauliflower and use vegetable broth. While not traditional, I’ve had friends who swear by it!
- Heat Level Adjustment: Up the chipotles for more heat, or leave them out if you prefer mild but still smoky flavors.
How to Make Authentic Texas Chili Recipe
Step 1: Toast and Soak the Chiles
The very first thing I do is toast the dried chiles in a dry skillet on medium heat for a couple of minutes each side. This step really deepens their flavor, but watch carefully—you don’t want them to burn, just get fragrant. After toasting, I place them in hot water, just off the boil, and let them soak for about 20 minutes until they’re softened and pliable. This soaking process is crucial because it makes the chiles easy to blend into a smooth paste later on.
Step 2: Brown the Beef Cubes
While the chiles soak, heat olive oil in a heavy pot or Dutch oven. I work in batches—crowding the pan will steam the meat instead of searing it—browning the chuck roast cubes on all sides. This caramelization adds layers of savory flavor that set the foundation for the chili. Don’t rush this step; take your time to get a nice golden crust. Season each batch with salt and pepper, then transfer the browned beef to a plate.
Step 3: Sauté Onions and Garlic
Next, I add diced white onion to the same pot and cook on medium heat until softened and translucent—about 5 minutes. The browned bits from the beef will lift off and infuse the onions with even more flavor. Then, stir in minced garlic and cook just until fragrant, roughly a minute. This little step wakes up the aromatics without burning anything.
Step 4: Blend the Chile Paste
Drain the softened chiles (discarding the soaking water to avoid bitterness) and pop them into a blender with half a cup of fresh water, Mexican oregano, cumin, and a pinch of salt and pepper. Blend until silky smooth—if it’s too thick, add a splash more water. This paste is the heart of your chili, so take a moment to smell it and appreciate this flavor bomb you just made!
Step 5: Combine, Simmer, and Thicken
Return the beef to the pot along with the sautéed onions and garlic. Pour in the beef broth, then stir in the blended chile paste and the masa harina. The masa harina will thicken the chili and add a subtle corn undertone that you really won’t want to skip. Bring everything to a boil, then lower the heat to a gentle simmer. Cover and let it cook low and slow for 3 to 4 hours, stirring occasionally, until the beef is fall-apart tender. This slow simmering is where all those flavors marry beautifully.
Step 6: Taste, Adjust, and Serve
Before serving, give the chili a taste and adjust salt, pepper, or spice as needed. I like to serve mine with fresh lime wedges, chopped cilantro, and diced onion to cut through the richness and add a fresh burst. Trust me, those little garnishes really elevate the experience!
Pro Tips for Making Authentic Texas Chili Recipe
- Don’t Skip Toasting the Chiles: It makes all the difference—adds a smoky nuttiness that’s hard to replicate otherwise.
- Use Chuck Roast for Best Texture: It’s affordable and breaks down slowly, giving you tender, flavorful beef every time.
- Keep the Cooking Low and Slow: Bubbling too hard can result in tougher meat, so patience pays off here.
- Avoid Using Soaking Water in the Paste: It can bring bitterness, so always use fresh water when blending.
How to Serve Authentic Texas Chili Recipe
Garnishes
I love topping my Texas chili with fresh lime wedges to give it a little citrus pop, chopped cilantro for herbal brightness, and some diced raw onion for crunch and sharpness. These simple garnishes make the whole dish feel fresh and balanced. Sometimes I even sprinkle a little shredded cheddar or Monterey Jack cheese on top—because well, cheese makes everything better!
Side Dishes
My favorite side with this Authentic Texas Chili Recipe is classic cornbread—soft, a bit sweet, and perfect for sopping up every last bit. I also enjoy serving it with simple white rice or tortilla chips for some crunch. On busy nights, a quick cabbage slaw or pickled jalapeños add a nice zing alongside the hearty chili.
Creative Ways to Present
For special occasions, I like to turn this chili into an interactive taco bar—set out a big pot of chili, tortillas, toppings like diced onions, cilantro, and cheese, and let everyone build their own. Another fun idea is serving the chili over baked potatoes topped with sour cream and green onions for a comforting, elevated meal. It’s always a hit!
Make Ahead and Storage
Storing Leftovers
I almost always make a double batch because this chili freezes and reheats wonderfully. Store leftovers in airtight containers in the fridge for up to four days. I find that the flavors actually deepen overnight, making the next day’s meal even tastier!
Freezing
Simply portion the chili into freezer-safe containers or heavy-duty freezer bags, leaving some headspace for expansion. It freezes well for up to three months. When I freeze portions, I usually label them with the date so I keep track of freshness.
Reheating
To reheat, I thaw it overnight in the fridge and warm it gently in a pot over medium-low heat, stirring occasionally. If the chili feels too thick after refrigeration, a splash of beef broth or water loosens it back up without diluting the flavor. Microwave works in a pinch, but slow reheating keeps the best texture and taste.
FAQs
-
Can I make this Authentic Texas Chili Recipe without dried chiles?
While dried chiles are key to the authentic flavor, if you can’t find them, you can experiment with chili powders or canned chipotles, but the taste won’t be quite the same. I recommend sourcing dried chiles online or at a Mexican market for the best results.
-
Is beans lacking traditional in Texas chili?
Yes! Traditional Texas chili famously excludes beans. It’s all about the meat and chile flavors. That said, some people like adding beans for texture and heartiness—totally a personal choice.
-
How thick should the chili be?
That depends on your taste and how much masa harina you add. Start with 2 tablespoons and add more if you want thicker chili. The masa adds a wonderful corn undertone and smooth texture.
-
Can I use other cuts of beef?
You can, but chuck roast is best because it becomes tender after slow cooking and has great marbling for flavor. Stew meat or brisket can also work, but adjust cooking times accordingly.
-
Can I make this recipe in a slow cooker?
Absolutely! After browning the beef and sautéing the onion and garlic, transfer everything to your slow cooker and cook on low for 7-8 hours or on high for 4-5 hours. It’s super convenient and locks in flavors beautifully.
Final Thoughts
When I first tried making this Authentic Texas Chili Recipe, I was blown away by how much better homemade chili can be. It’s a labor of love, but the slow simmer and blend of smoky chiles make it so worth the effort. I hope you give it a try and see just how satisfying and comforting real Texas chili can be. Whether it’s game day, a cozy weekend, or just a craving for bold flavors, this recipe will deliver. Trust me—once you make this chili, you’ll want to make it again and again.
Print
Authentic Texas Chili Recipe
- Prep Time: 30 minutes
- Cook Time: 3 hours 30 minutes
- Total Time: 4 hours
- Yield: 6 servings
- Category: Main Course
- Method: Stovetop
- Cuisine: Texan, Mexican
Description
This authentic Texas Chili recipe features a rich blend of dried chili peppers, tender chuck roast beef, and traditional spices simmered to perfection. The chili is thickened with masa harina for a classic texture and served with fresh garnishes, creating a flavorful, hearty dish that warms the soul.
Ingredients
Chili Peppers
- 3 dried ancho chili peppers, stems and seeds removed
- 3 dried pasilla chili peppers, stems and seeds removed
- 2 dried guajillo chili peppers, stems and seeds removed
- 2 dried chipotle peppers, stems and seeds removed
Main Ingredients
- 1 tablespoon olive oil
- 2 pounds chuck roast beef, cut into 1-inch cubes
- Salt and black pepper, to taste
- 1 small white onion, diced
- 3 cloves garlic, minced
- 1 tablespoon Mexican oregano
- 1 teaspoon ground cumin
- 4 cups low sodium beef broth
- 2-4 tablespoons masa harina, depending on desired thickness
Optional Garnishes
- Lime wedges
- Cilantro
- Diced onion
Instructions
- Toast the dried chiles: Add the dried peppers to a dry skillet over medium heat and toast for 1-2 minutes per side until aromatic. Let cool, then remove any remaining stems and seeds.
- Soften the chiles: Bring a pot of water to a boil, remove it from heat, then add the toasted chiles. Cover and soak for 20 minutes until softened.
- Sear the beef: Heat olive oil in a large Dutch oven over medium heat. In batches, brown the cubed chuck roast well on all sides. Season with salt and pepper and set aside on a plate.
- Sauté aromatics: In the same pot over medium heat, cook diced onions until softened, about 5 minutes. Add minced garlic and cook until fragrant, about 1 minute.
- Prepare chili paste: In a blender, combine the softened chiles (discard soaking liquid), ½ cup fresh water, Mexican oregano, ground cumin, and a pinch of salt and pepper. Blend until smooth.
- Combine and simmer: Return seared beef to the pot. Pour in beef broth and stir in the blended chili paste and masa harina. Bring to a boil, then reduce heat to low.
- Slow cook the chili: Cover and let simmer gently for 3 to 4 hours, stirring occasionally, until the beef is tender and falls apart easily.
- Final seasoning and serving: Taste and adjust seasoning if needed. Serve hot with optional lime wedges, fresh cilantro, and diced onion for garnish. Enjoy!
Notes
- Dried chile pepper substitutions: Ancho chiles can be substituted with mulato chiles; pasilla with New Mexico chiles; guajillo with California (dried Anaheim) chiles; chipotle with canned chipotles in adobo (use sparingly).
- Masa harina adds authentic flavor and thickens the chili. Start with 2 tablespoons and adjust to preferred thickness.
- For a slow cooker option, after browning beef and sautéing aromatics, transfer to a crockpot and cook on LOW for 7-8 hours or HIGH for 4-5 hours.
- Texas chili tastes even better the next day. Store leftovers in the fridge for up to 4 days or freeze for up to 3 months.
Nutrition
- Serving Size: 1 cup (approximately)
- Calories: 350 kcal
- Sugar: 4 g
- Sodium: 400 mg
- Fat: 18 g
- Saturated Fat: 6 g
- Unsaturated Fat: 10 g
- Trans Fat: 0 g
- Carbohydrates: 15 g
- Fiber: 5 g
- Protein: 30 g
- Cholesterol: 90 mg


