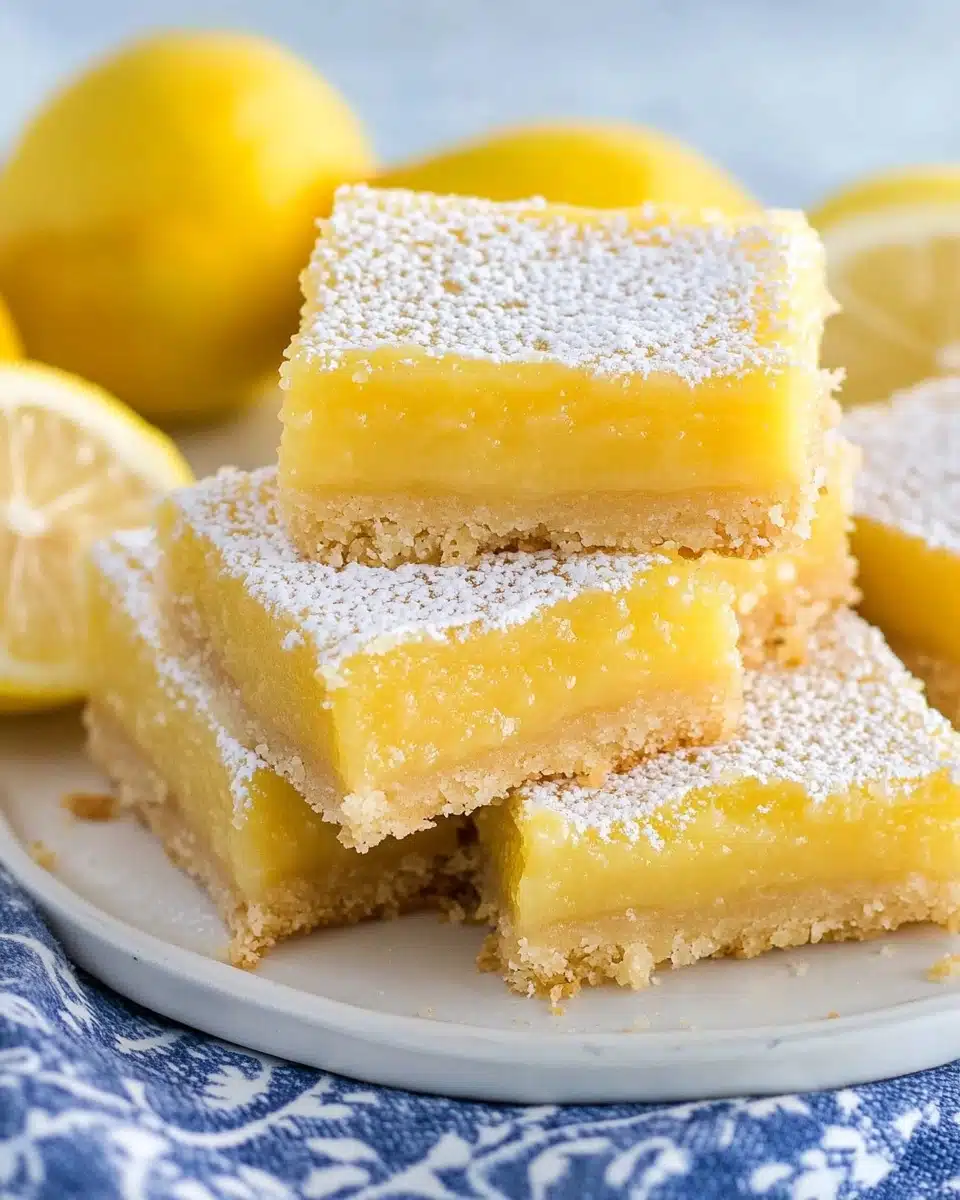
If you adore bakery-style lemon bars but need a gluten-free treat in your life, you’re about to fall in love! These Easy Gluten Free Lemon Bars deliver that tangy, sunshiny lemon filling with a dreamy buttery shortbread crust—completely wheat-free, but absolutely irresistible. They’re tart, sweet, delightfully chewy, and so simple to make, you’ll find any excuse to whip up a pan!
Why You’ll Love This Recipe
- Instant Sunshine: Each bite bursts with bright, fresh lemon flavor that’ll lift your spirits instantly—no matter the season.
- Gluten-Free Bliss: You’d never know these bars are gluten free! The crust is tender, crisp, and as satisfying as the classic version.
- Foolproof & Fast: Simple ingredients and zero tricky steps mean these Easy Gluten Free Lemon Bars are practically stress-proof, even if you’re baking at midnight.
- Perfect for Sharing: These bars cut neatly and travel well, making them a crowd-pleaser for potlucks, picnics, and bake sales alike.

Ingredients You’ll Need
Don’t be surprised—every single ingredient in these bars has its moment to shine! From the zesty lemons to the rich butter and simple gluten-free flour, everything works together to give you the lemoniest bars with a shortbread base so good, you’ll want to make it for every dessert.
- Unsalted butter: Softened butter is the foundation for the melt-in-your-mouth shortbread crust. Make sure it’s at room temperature for easier mixing.
- Granulated sugar: Provides subtle sweetness in both the crust and the filling, balancing that delicious tartness.
- Lemon zest: Freshly grated lemon zest adds intense citrus aroma and depth to both the crust and custardy filling.
- Vanilla extract: Just a splash in the crust takes the buttery flavor to the next level.
- Gluten-free all-purpose flour: This keeps everything celiac-safe, but you’ll never miss the wheat. Use your favorite blend that includes xanthan gum for best results.
- Salt: A tiny pinch sharpens every flavor and keeps the bars from tasting flat.
- Eggs: Room-temperature eggs give the filling that luscious, creamy, almost cheesecake-like texture.
- Lemon juice: Must be freshly squeezed! Bottled juice just won’t have the same sun-kissed zing.
- Powdered sugar (for garnish): Adds that picture-perfect finish after the bars are cooled—don’t skip it!
Variations
The basic recipe for Easy Gluten Free Lemon Bars is the perfect launchpad for creativity in your kitchen! Whether you want to tweak the flavors, adjust for dietary needs, or make them extra-special for a celebration, there are so many easy ways to put your own spin on these sunny treats.
- Make Them Dairy Free: Substitute plant-based butter to keep the crust rich and flaky, completely dairy-free and still delicious.
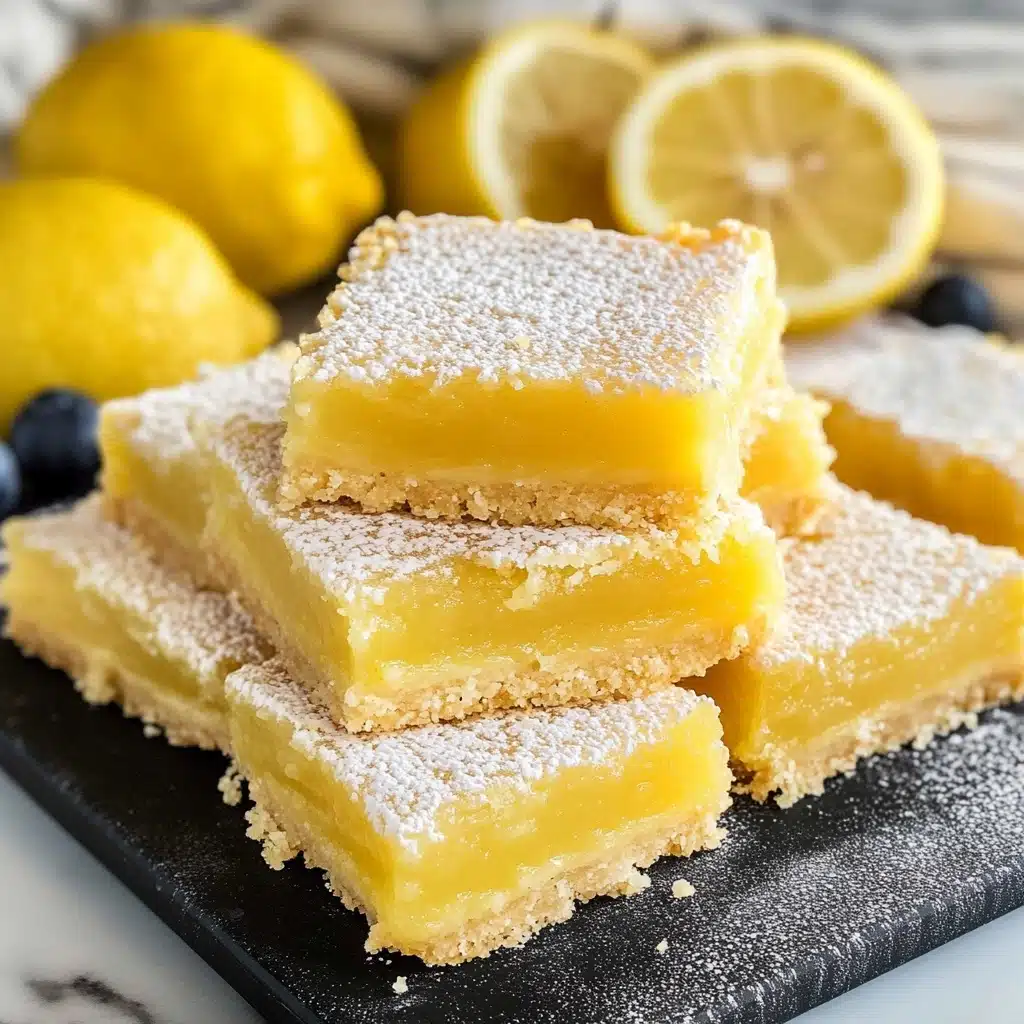
- Add a Berry Swirl: Drop small spoonfuls of raspberry or blueberry puree on top of the filling and swirl with a toothpick for a fruity pop of color and flavor.
- Coconut Crust: Swap ¼ cup of the flour in the crust for shredded unsweetened coconut for subtle tropical flair.
- Sugar-Free Version: Use your favorite 1:1 sugar substitute for baking in both the crust and filling to make these bars lower in sugar.
How to Make Easy Gluten Free Lemon Bars
Step 1: Prepare the Pan
Preheat your oven to 350°F and grab an 8×8-inch baking dish. Grease the dish, then line it with parchment paper, leaving extra hanging over the sides for easy removal later. This simple prep step will make it a breeze to lift out those bars for perfect, bakery-worthy slices every time.
Step 2: Make the Crust
In a large bowl, beat the softened butter, granulated sugar, lemon zest, and vanilla extract using an electric mixer until the mixture is pale and fluffy—this is what gives your crust that light and delicate bite. Add in the gluten-free flour and salt, mixing until fully combined and the dough holds together.
Step 3: Bake the Crust
Transfer your dough into the prepared pan and press it firmly and evenly into the bottom using your hands (wetting them lightly helps prevent sticking!). Dock the dough all over with a fork—these tiny holes keep the crust nice and flat as it bakes. Pop it in the oven for 20 minutes, until it’s golden and the center is set. Let it cool for about 10 minutes before adding the filling; this keeps the layers distinct and crisp.
Step 4: Mix the Lemon Filling
While the crust cools slightly, whisk together the eggs, granulated sugar, freshly squeezed lemon juice, lemon zest, gluten-free flour, and salt in a medium bowl until silky and uniform. The mixture will look a little foamy and should smell gloriously citrusy—that’s how you know you’re doing it right!
Step 5: Bake the Bars
Pour the lemon filling over the semi-cooled crust, making sure it’s spread evenly to every edge. Bake for another 20–30 minutes; you’ll know they’re ready when the center is set and just a little wobbly. Don’t worry—they’ll firm up perfectly as they chill on the counter.
Step 6: Cool, Dust, and Slice
Let your lemon bars cool in the pan for about 20 minutes, then gently lift them out using the parchment overhang. Allow them to cool completely on a wire rack (this is the hardest part—waiting!). Once cool, shower them generously with powdered sugar, then cut into neat 2-inch squares and serve. Voila—your Easy Gluten Free Lemon Bars are ready to dazzle!
Pro Tips for Making Easy Gluten Free Lemon Bars
- Room Temperature Ingredients Matter: Taking the time to warm your butter and eggs ensures a smooth crust and creamy, lump-free filling.
- Parchment Overhang Is Your Friend: Give yourself long parchment “handles” so you can lift the bars out easily—no more breakage or squished corners.
- Don’t Overbake: The filling should jiggle slightly in the center; it finishes setting as it cools, yielding that custardy perfection.
- Dust Garnish Right Before Serving: For the prettiest look, sprinkle powdered sugar on cooled bars just before serving—otherwise, it can disappear!
How to Serve Easy Gluten Free Lemon Bars
Garnishes
A generous dusting of powdered sugar is classic, but a few ribbons of lemon zest or even edible flowers can add a gorgeous extra pop to your Easy Gluten Free Lemon Bars. For extra zing, try topping with a few fresh raspberries or thin lemon slices—your platter will look like it came straight out of a café window!
Side Dishes
Pair these bars with a hot mug of tea, a simple fruit salad, or a dollop of freshly whipped cream. For an afternoon party, they’re lovely next to berry dishes or a refreshing minty iced green tea—nothing too sweet or overwhelming is needed, since the bars are the star of the show.
Creative Ways to Present
Stack bars on a tiered dessert tray for brunch, or use mini cupcake liners to create grab-and-go lemon bar “bites” at a shower or picnic. For a show-stopping finish, drizzle a thin ribbon of white chocolate over the bars just before serving, or nestle the bars among fresh edible petals for a touch of elegance.
Make Ahead and Storage
Storing Leftovers
If you’re lucky enough to have leftovers (and that isn’t always the case), store your Easy Gluten Free Lemon Bars in an airtight container in the refrigerator. They’ll stay fabulously fresh for up to 5 days, so you can keep treating yourself all week long!
Freezing
Yes, you can freeze these lemon bars! Wrap them tightly and layer with parchment in a freezer-safe container. They’ll keep for up to 3 months. Thaw overnight in the fridge or at room temperature—the texture stays divine, and the flavors remain bright.
Reheating
No reheating required—Easy Gluten Free Lemon Bars are best enjoyed chilled or at room temperature. If they’ve been in the fridge for a while, let them sit out for 10–15 minutes for that perfect creamy, melt-in-your-mouth bite!
FAQs
-
Can I use bottled lemon juice instead of fresh for these bars?
While you can technically use bottled lemon juice, I highly recommend sticking with fresh lemons for this recipe. Freshly squeezed juice and zest deliver much more vibrant flavor, which is what makes these Easy Gluten Free Lemon Bars sing.
-
What’s the best gluten-free flour for lemon bars?
A good-quality gluten-free all-purpose flour blend (one that includes xanthan gum or guar gum) will give you the best shortbread texture. I love using Bob’s Red Mill 1-to-1 Baking Flour or King Arthur Measure for Measure for reliably tender crusts.
-
How do I know when the lemon filling is set?
The filling should appear set around the edges with a slight jiggle in the very center when gently shaken. It will firm up as it cools, so resist the urge to overbake or you’ll lose that luscious creamy texture.
-
Can I double the recipe for a crowd?
Absolutely! Simply double all ingredients and bake in a 9×13-inch pan. The baking time may need a slight adjustment, so watch the bars closely after 25 minutes once the filling is in the oven.
Final Thoughts
I can’t wait for you to bring a little zest and sunshine to your kitchen with these Easy Gluten Free Lemon Bars! Whether you’re gluten free or just craving a slice of bright lemon joy, these bars are proof that the best treats are simple and made to share. Happy baking, my friend!
Print
Easy Gluten Free Lemon Bars Recipe
- Prep Time: 15 minutes
- Cook Time: 50 minutes
- Total Time: 1 hour 5 minutes
- Yield: 16 bars
- Category: Dessert
- Method: Baking
- Cuisine: American
- Diet: Gluten Free
Description
These Easy Gluten-Free Lemon Bars are a delightful sweet treat that perfectly balances the tangy lemon filling with a buttery, crumbly crust. With a simple list of ingredients and straightforward instructions, you can whip up these bars in no time for a refreshing dessert.
Ingredients
For the Crust
- 1/2 cup unsalted butter (1 stick), at room temperature
- 1/4 cup granulated sugar
- 1 tbsp lemon zest (grated on a Microplane)
- 1 tsp vanilla extract
- 1 cup gluten-free all-purpose flour
- 1/8 tsp kosher salt
For the Filling
- 3 eggs at room temperature
- 1 cup granulated sugar
- 1/2 cup lemon juice freshly squeezed
- 1 tbsp lemon zest (grated on a Microplane)
- 1/2 cup gluten-free all-purpose flour
- 1/8 tsp kosher salt
- Powdered sugar for garnish
Instructions
- Preheat the oven and prepare the baking dish: Preheat the oven to 350°F. Grease an 8×8-inch baking dish and line with overlapping rectangles of parchment paper.
- Make the crust: In a large bowl, beat together the softened butter, sugar, lemon zest, and vanilla until light and fluffy. Add the flour and salt, mix until uniform, then press into the baking dish and bake.
- Prepare the filling: Beat together the eggs, sugar, lemon juice, lemon zest, flour, and salt until smooth. Pour over the baked crust and bake until set.
- Cool and serve: Cool the bars in the pan, then transfer to a wire rack to cool completely. Dust with powdered sugar, slice, and enjoy!
Notes
- For added freshness, you can use Meyer lemons for a slightly sweeter flavor in the filling.
- These bars can be stored in an airtight container in the refrigerator for up to 3 days.
Nutrition
- Serving Size: 1 bar
- Calories: 180
- Sugar: 15g
- Sodium: 80mg
- Fat: 8g
- Saturated Fat: 5g
- Unsaturated Fat: 2g
- Trans Fat: 0g
- Carbohydrates: 25g
- Fiber: 1g
- Protein: 2g
- Cholesterol: 60mg


