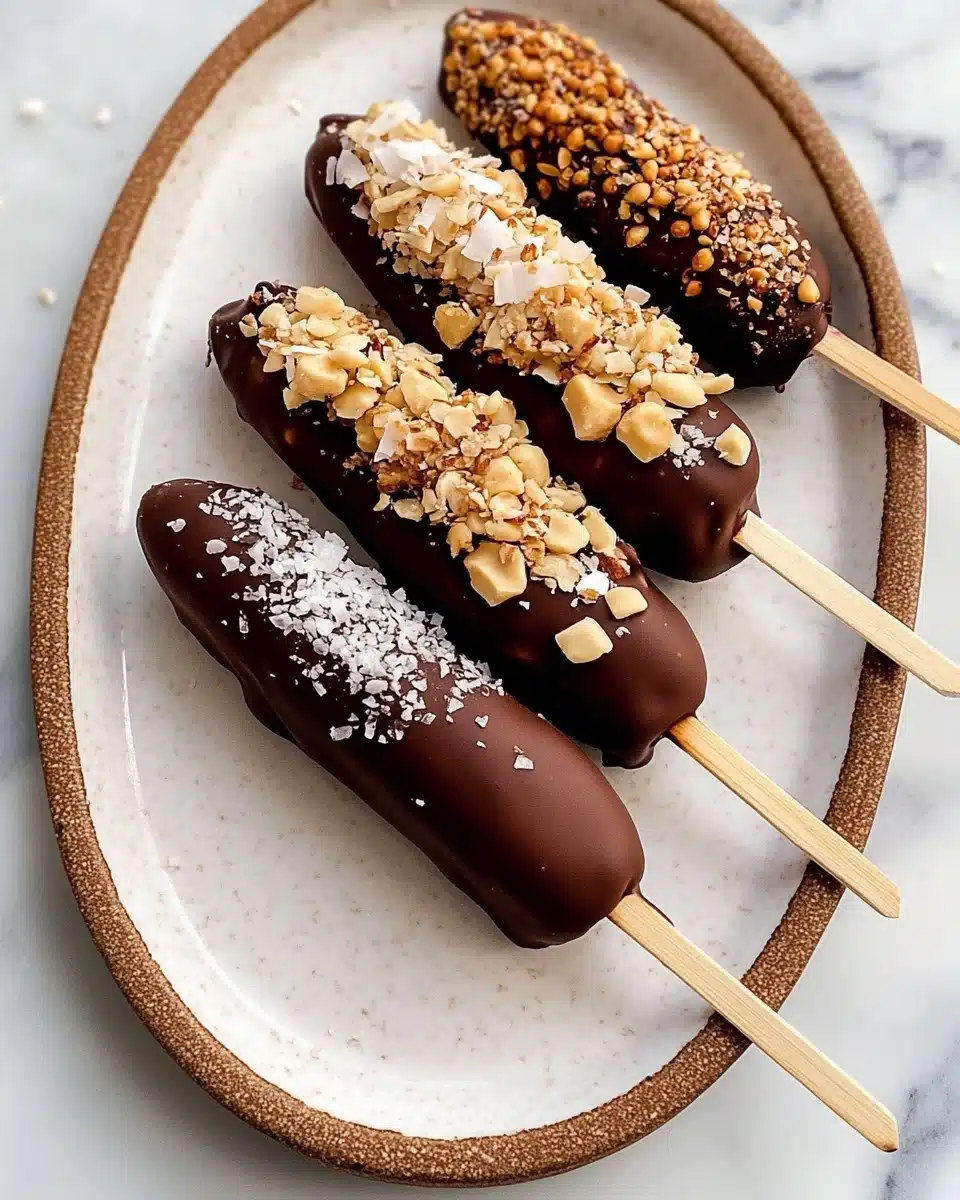
If you’re looking for a treat that’s downright nostalgic, delightfully refreshing, and impossibly easy, let me introduce you to Chocolate Covered Banana Pops! With their chilly banana centers and crisp chocolate shells, they’re a homemade snack that brings a spark of joy to kids and grown-ups alike—perfect for hot summer days, post-dinner cravings, or a fun project with little helpers.
Why You’ll Love This Recipe
- Instant Nostalgia: These Chocolate Covered Banana Pops have that classic carnival vibe, but made right in your own kitchen for a treat that’s both fun and familiar.
- Naturally Sweet & Creamy: Ripe bananas freeze into an ultra-creamy, almost ice-cream-like texture—no dairy or added sugar required!
- Quick & Customizable: Just a handful of ingredients and plenty of room for creative toppings means everyone can craft their own perfect pop.
- Kid-Friendly (and Adult-Approved!): Not only are they super fun for little hands to help make, but adults will find them totally addictive too.

Ingredients You’ll Need
The beauty of Chocolate Covered Banana Pops is in their simplicity—each ingredient plays a starring role. A creamy banana, glossy chocolate, and just a dash of coconut oil come together for the most delightful treat, and your choice of toppings can turn each pop into a mini masterpiece!
- Bananas (6 ripe, firm): Look for bananas with yellow peels and a few spots; they should be sweet but still firm enough to hold their shape when frozen.
- High-Quality Vegan Chocolate (8 oz/225 g): Choose chocolate bars or chips labeled vegan and opt for dark chocolate if you like that rich, bittersweet crunch!
- Refined Coconut Oil (1 1/2 Tbsp): This helps the melted chocolate turn silky-smooth and gives the shell a lovely, satisfying snap.
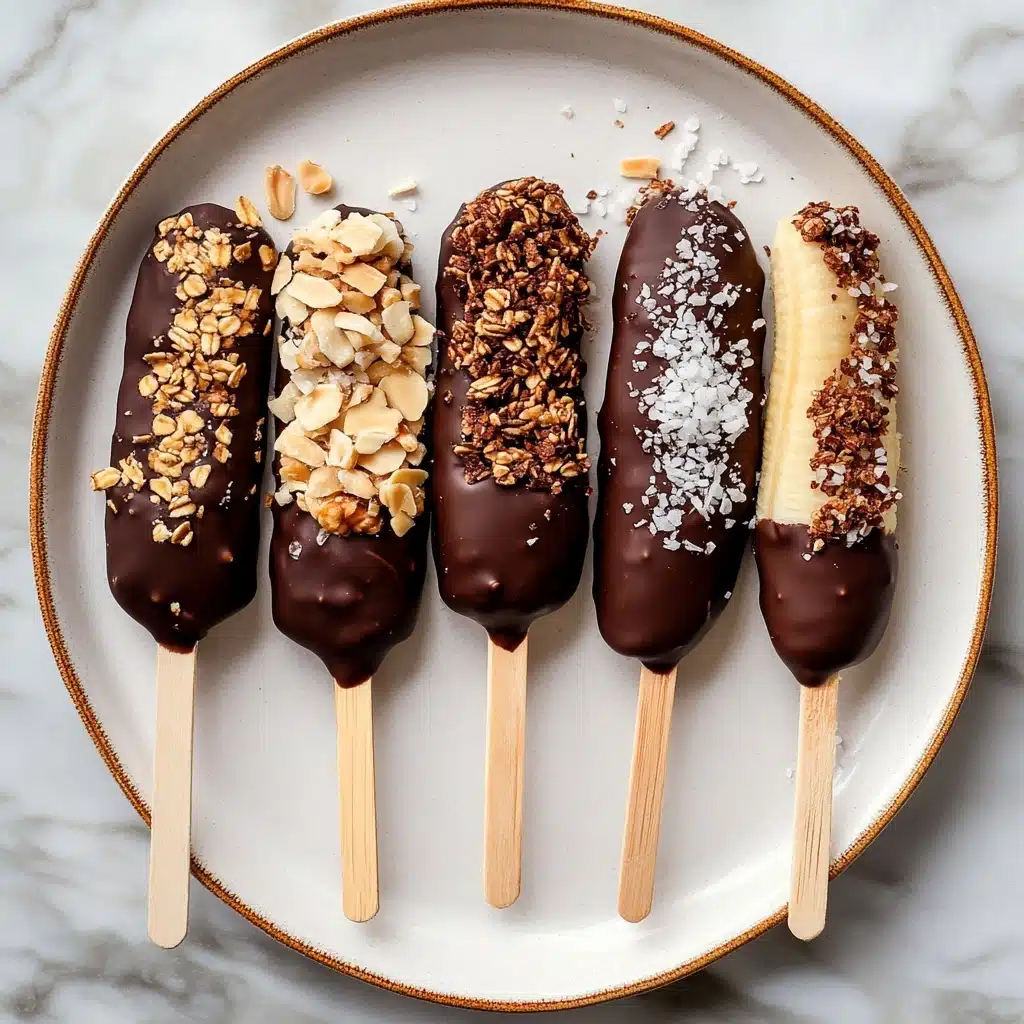
- Optional Toppings: Try chopped peanuts, shredded coconut, granola, cacao nibs, or a sprinkle of flaky salt to jazz things up and add great texture.
Variations
One of the best things about Chocolate Covered Banana Pops is how easy it is to tailor them to your favorite flavors or dietary needs. Whether you’re craving something extra-decadent, nut-free, or super snappy, there’s a fun spin just waiting for you.
- Nutty Delight: Roll the freshly dipped pops in chopped almonds, pistachios, or hazelnuts for a crunchy, protein-packed finish.
- Allergy-Friendly: Skip the nuts and opt for gluten-free granola or toasted seeds to keep it allergen-safe.
- Chocolate Lovers’ Dream: Use a mix of dark, semisweet, or even white vegan chocolate for marbled pops and a fun twist on flavor.
- Frozen Berry Blast: Add freeze-dried raspberries or strawberries on top for a tart, colorful upgrade.
How to Make Chocolate Covered Banana Pops
Step 1: Freeze the Bananas
Start by peeling your bananas, then cut them in half for the perfect pop size. Carefully insert a wooden skewer or popsicle stick into the cut end of each banana half. Lay them out on a parchment-lined baking sheet, making sure they’re not touching. Pop the tray in the freezer for at least 4 hours (or up to 2 days)—this essential chilling step ensures your bananas become ultra-creamy and that the chocolate will set in seconds later on!
Step 2: Melt the Chocolate
When you’re ready to coat, melt your chocolate and coconut oil together. You can do this in the microwave (heating in short bursts and stirring often) or in a double boiler over simmering water. Stop microwaving or heating when the chocolate is about 80% melted, and let the residual heat do the rest—this trick keeps things glossy and smooth, so your Chocolate Covered Banana Pops don’t seize up or get lumpy.
Step 3: Coat with Chocolate
Take your pops straight from the freezer. Hold a banana over the bowl and spoon or ladle the melted chocolate all over, turning as you go to coat every side. Let any extra chocolate drip off, then set the pop back on the parchment paper. (I love spooning the chocolate on rather than dunking—it keeps your chocolate perfectly pourable and prevents it from firming up too soon!)
Step 4: Add Toppings and Finish
Quickly—before the chocolate sets—sprinkle on your favorite toppings, whether it’s a rain of chopped nuts, coconut, or a pinch of flaky salt. The cold banana makes the shell set fast, so decorate each pop as soon as it’s coated. When you’re done, you can serve the pops right away or store them in the freezer to enjoy whenever you need a chilly, chocolatey treat.
Pro Tips for Making Chocolate Covered Banana Pops
- Banana Ripeness Counts: Select bananas that are sweet with some brown speckles, but not too soft—they’ll hold their shape best after freezing and give you that ice-cream-like texture inside.
- Smooth Shell Secret: Add the full amount of coconut oil to your chocolate; it helps the coating set into a thin, crisp shell that crackles with every bite.
- Chocolate Temperature Tricks: Let your melted chocolate cool slightly before coating the bananas—if it’s piping hot, it might slip right off or even crack!
- Quick Topping Timing: Sprinkle your toppings the second after dipping, or the chocolate will harden before they can stick—this is one recipe where speed pays off!
How to Serve Chocolate Covered Banana Pops
Garnishes
Nothing beats the satisfying crunch of chopped peanuts or the chewy sweetness of coconut atop your pops. For a playful touch, try a scatter of colorful sprinkles, cacao nibs, or even a drizzle of extra chocolate. Think of each Chocolate Covered Banana Pop as a blank canvas—garnish to your heart’s content!
Side Dishes
Pair these icy treats with a bowl of summer berries or tangy dairy-free yogurt—the bright freshness balances the richness of the chocolate, making each bite taste even sweeter. For kids’ parties, set out a plateful alongside mini fruit skewers or melon balls for a fun, colorful dessert spread.
Creative Ways to Present
Go all out and display your Chocolate Covered Banana Pops in a tall glass filled with ice, or set them upright in a decorated flowerpot lined with beans or rice. For a party, offer a DIY toppings bar so guests can dip and decorate their own pops just the way they like—memories and smiles guaranteed!
Make Ahead and Storage
Storing Leftovers
If you have leftover pops (lucky you!), just slip them into a freezer-safe bag or airtight container and keep them in the freezer. They’ll stay delicious for up to two weeks—just be sure to separate layers with parchment paper to prevent sticking.
Freezing
Chocolate Covered Banana Pops freeze beautifully! For the very best texture, enjoy them within a week or two—by then, the bananas are still creamy and dreamy, and the chocolate shell stays snappy. Any longer, and they may get a little icy, but they’re still totally edible.
Reheating
No reheating is needed (or recommended!) for these pops. If they’re too firm straight from the freezer, just let them sit at room temperature for a minute or two—then get ready for that irresistible chocolate crunch and chilly banana bite.
FAQs
-
Can I use milk chocolate instead of dark chocolate for these pops?
Absolutely! While dark vegan chocolate brings out that rich, bittersweet contrast to the sweet bananas, you can use any chocolate you love—as long as it melts smoothly. Just double-check the ingredients for dairy-free options if you’re making vegan Chocolate Covered Banana Pops.
-
Why do my chocolate shells sometimes crack or have streaks?
This usually happens if your chocolate is either too hot or too cold when coating, or if your bananas are very icy. Let your melted chocolate cool a bit before coating, and make sure the banana pops aren’t frosty to the touch—this yields a smoother shell for your Chocolate Covered Banana Pops.
-
How do I keep the chocolate from hardening before I’m finished dipping all the pops?
If you notice the chocolate getting thick, pause and microwave it for a few seconds, or keep your bowl set over warm water. Working in batches can help, especially if you’re making lots of Chocolate Covered Banana Pops in one go!
-
Can I make these pops ahead for a party?
Yes, and they’re party-perfect! Just prepare your Chocolate Covered Banana Pops the morning of your event and store them in a sealed container in the freezer. When it’s time to serve, let them rest at room temperature for a couple minutes before handing them out—guests always swoon!
Final Thoughts
Whether you’re making a special treat for the kids, cooling off after a hot day, or just craving a nostalgic bite, Chocolate Covered Banana Pops are simply irresistible. Give this recipe a try—you’ll be amazed at how something so simple can bring so much pure, chocolatey joy. Can’t wait for you to share these with your favorite people!
Print
Chocolate Covered Banana Pops Recipe
- Prep Time: 15 minutes
- Cook Time: 5 minutes
- Total Time: 20 minutes
- Yield: Serves 12
- Category: Dessert
- Method: Freezing, Melting
- Cuisine: American
- Diet: Vegan
Description
Delicious and easy-to-make chocolate covered banana pops that make for a refreshing treat, perfect for any occasion.
Ingredients
Banana Pops:
- 6 ripe bananas (should have some spots, but still be firm)
- 12 popsicle sticks or wooden skewers
Chocolate Coating:
- 8 ounces (225 g) chopped high-quality vegan chocolate*
- 1 1/2 tablespoons refined coconut oil*
Optional Toppings:
- Chopped peanuts
- Shredded coconut
- Granola
- Cacao nibs
- Flaky salt
Instructions
- Prep: Line a baking sheet with parchment paper. Peel the bananas, cut them in half, and insert a popsicle stick or wooden skewer into the cut side of each half. Place the bananas on the baking sheet with space in between them, and freeze for at least 4 hours, or up to 2 days in advance.
- Melt the Chocolate: Use either a double boiler or the microwave to melt the chocolate. For microwave, add the chocolate and coconut oil to a microwave-safe bowl. Microwave in 20-second intervals, stirring well until completely melted. For double-boiler, melt the chocolate and coconut oil in a glass bowl over simmering water.
- Dunk + Decorate: Remove frozen bananas from the freezer. Pour melted chocolate over each banana, allowing excess to drip off. Add optional toppings immediately.
- Serve: Enjoy immediately or store in the freezer for up to two weeks.
Notes
- For best results, use ripe but firm bananas.
- Act quickly when adding toppings as the chocolate hardens fast.
Nutrition
- Serving Size: 1 banana pop
- Calories: 180
- Sugar: 20g
- Sodium: 5mg
- Fat: 8g
- Saturated Fat: 5g
- Unsaturated Fat: 3g
- Trans Fat: 0g
- Carbohydrates: 25g
- Fiber: 3g
- Protein: 2g
- Cholesterol: 0mg


