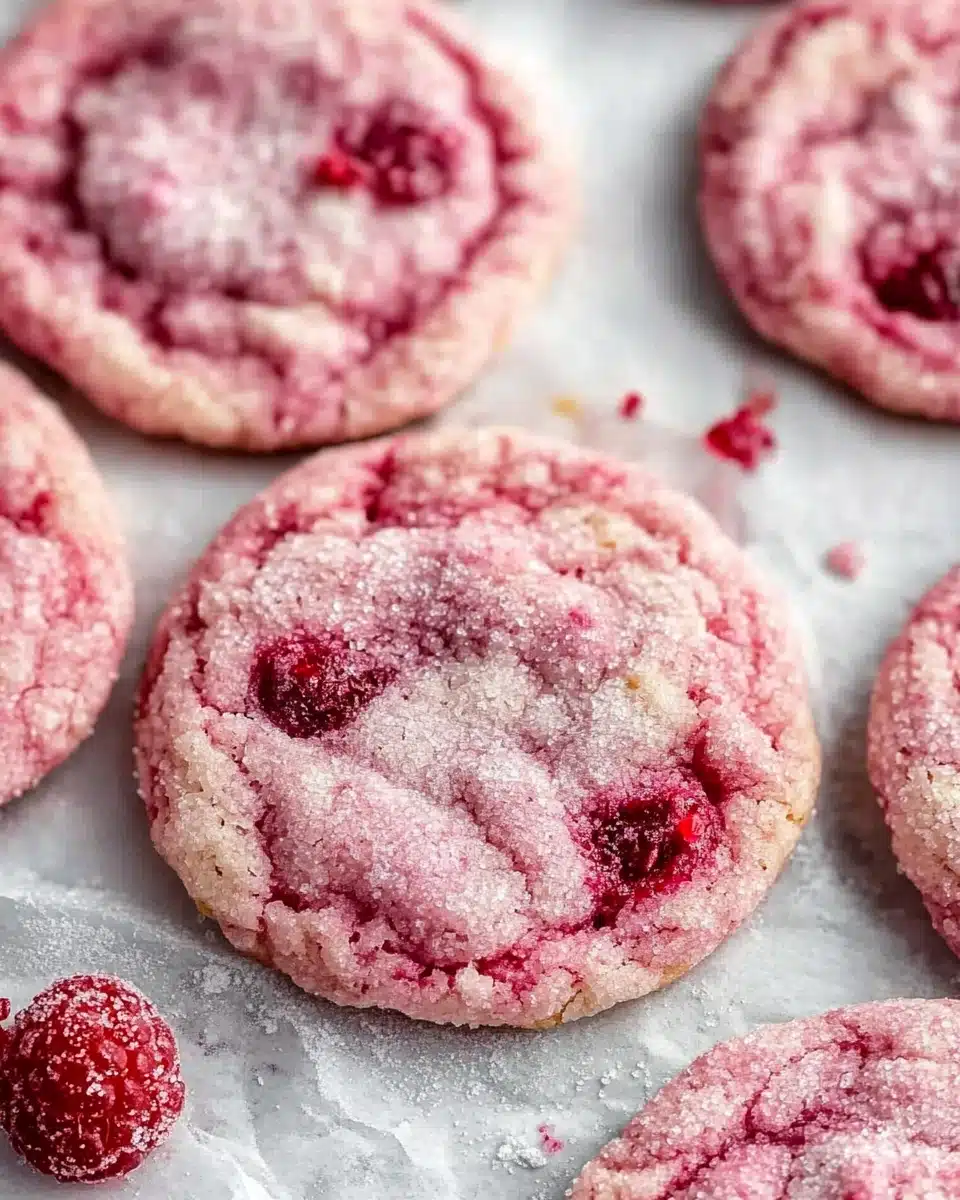
If you’re looking for cookies that truly dazzle with every bite, let me introduce you to Raspberry Marbled Cookies! These beauties swirl together tangy raspberries and soft, buttery dough, all wrapped in a gorgeous pink marble—a dreamy treat for any occasion, and absolutely irresistible fresh from the oven.
Why You’ll Love This Recipe
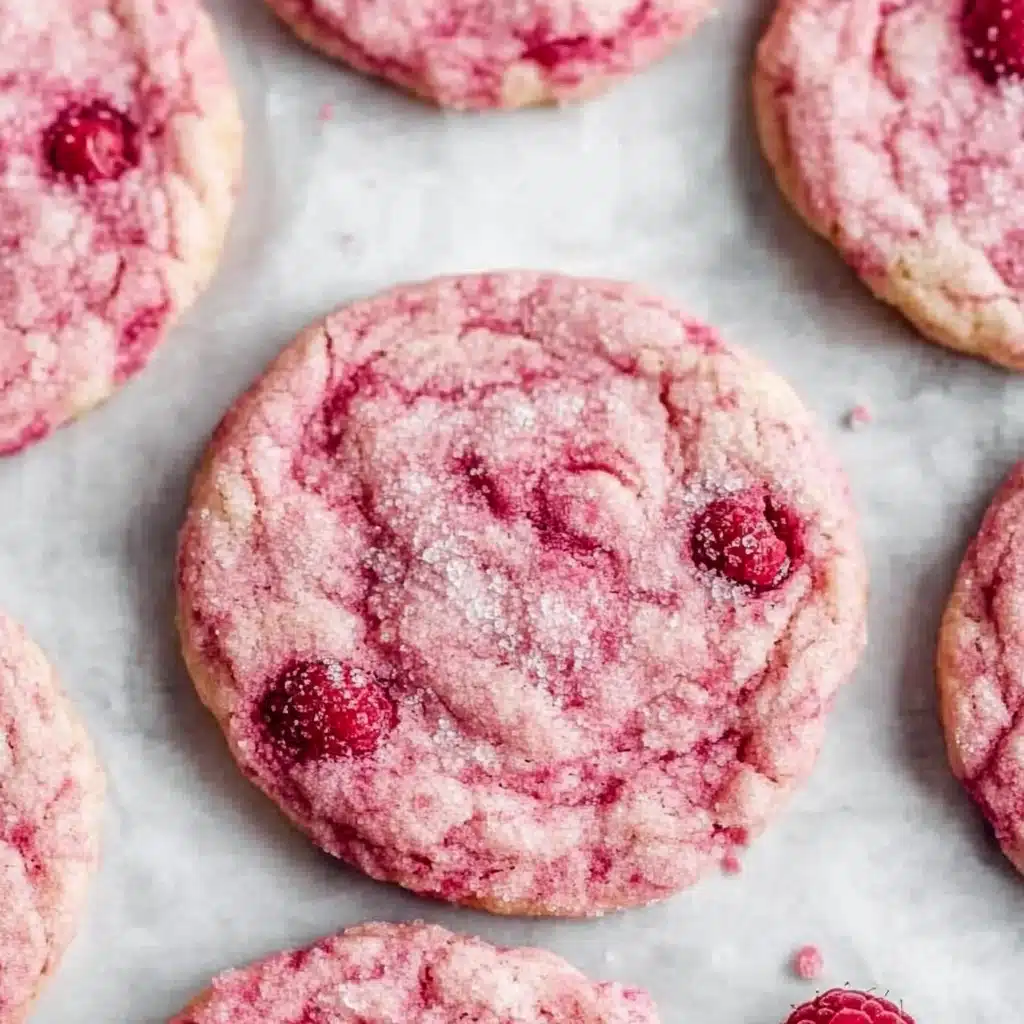
- Vibrant Marbled Swirl: Every cookie bakes up with an eye-catching pop of pink and white, making them stunning for dessert tables or gifting.
- Sweet & Tangy Raspberry Bite: Real raspberry syrup and bits bring a burst of fresh, fruity flavor in every chew—so much better than any extract or artificial flavoring!
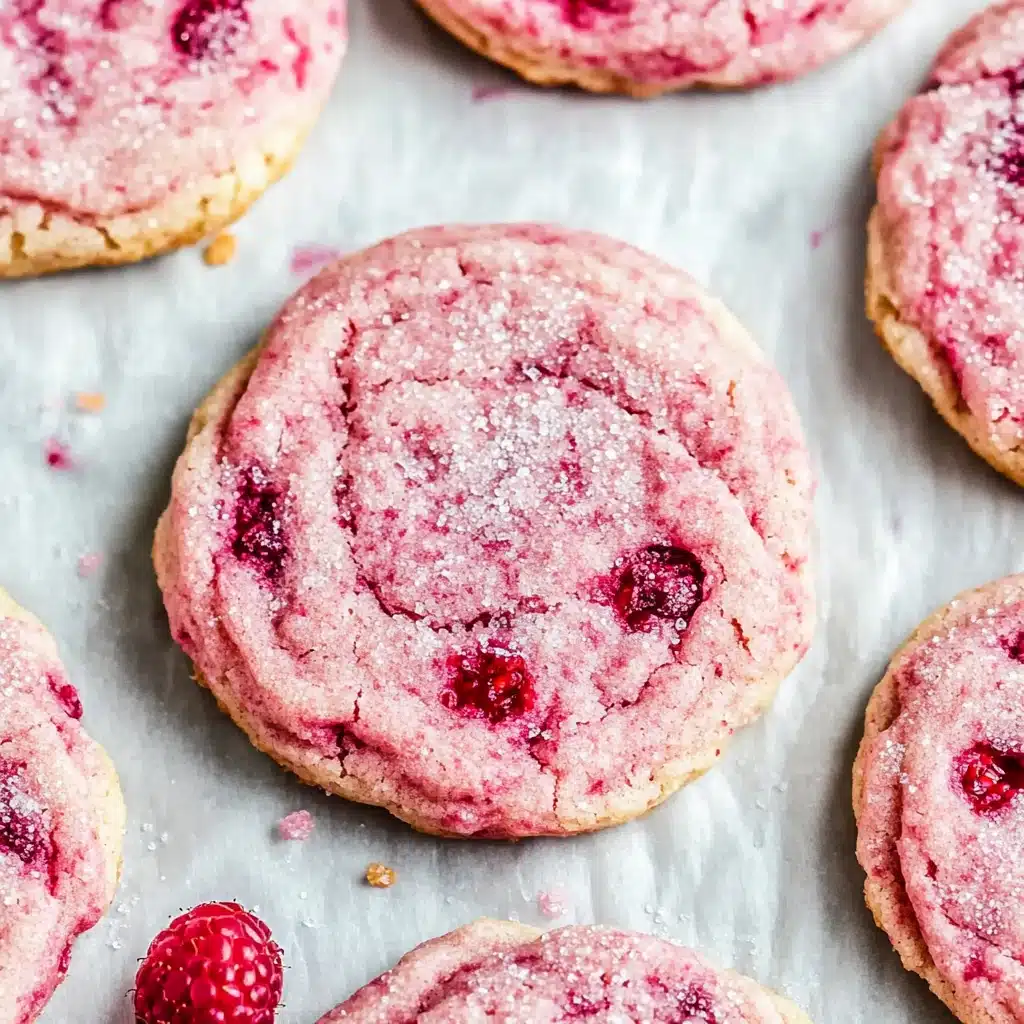
- Soft, Buttery, and Gluten-Free: Thanks to a clever combination of gluten-free flour and cornstarch, these cookies stay melt-in-your-mouth tender and are friendly for most diets.
- Easy to Make Ahead: The dough freezes beautifully, so you can bake a batch (or two) whenever a cookie craving strikes.
Ingredients You’ll Need
Every ingredient in these Raspberry Marbled Cookies is working double-duty! Not only are they pantry-friendly, but each element adds its unique flair, from the soft dough to that iconic swirl of vibrant raspberry.
- Frozen raspberries: These are the star—used both for the homemade syrup and finely chopped into the dough, lending tang, color, and flavor.
- Granulated sugar: Sweetens the dough and raspberry syrup, and adds that irresistible crunch when the cookie dough balls are rolled before baking.
- Gluten free flour blend (with xanthan gum): Delivers a soft, chewy texture even without wheat—use a 1:1 blend for the best results.
- Cornstarch: Makes the cookies extra tender and is also used as a slurry to mimic “egg” binding powers in this dairy-free recipe.
- Baking powder: Lifts the dough for a puffy, melt-in-your-mouth effect.
- Kosher salt: Balances all the sweetness and brings out the berry flavor.
- Unsalted butter or vegan baking stick: Either works well for richness—make sure yours is at room temperature for easy creaming.
- Milk: Adds just enough moisture for the dough to come together (use dairy or plant-based milk).
- Red food coloring: Optional, but takes the marbled effect totally over the top—just a few drops!
Variations
Feel free to experiment with these Raspberry Marbled Cookies! A few simple swaps can adapt this recipe to your favorite flavors, dietary preferences, or whatever you have on hand—don’t be afraid to get creative.
- Swap the berries: Try using blackberries, blueberries, or a combination for a new twist on the marbled effect and flavor.
- Vegan all the way: Stick with the vegan baking stick and your favorite non-dairy milk to keep these completely plant-based.
- Citrus zest boost: Add a little grated lemon or orange zest to the dough for a bright, sunny undertone that pairs beautifully with raspberries.
- Almond or white chocolate chips: Stir a handful into the dough just before baking for creamy pops of sweetness.
How to Make Raspberry Marbled Cookies
Step 1: Make the Homemade Raspberry Syrup
Start by simmering frozen raspberries and sugar together in a saucepan over medium heat, stirring often. As the berries break down, the mixture will thicken into a deep pink, syrupy base. Strain it to remove seeds and let it cool completely—this homemade syrup is the secret to that bold raspberry flavor in every cookie!
Step 2: Chop and Freeze Extra Raspberries
Roughly chop more frozen raspberries into tiny pieces for the marbling. Pop them back into the freezer so they stay firm and don’t bleed juice into your dough until the very last minute—this is key for pretty, distinct swirls.
Step 3: Whisk the Dry Ingredients
In a large bowl, whisk together the gluten-free flour, baking powder, cornstarch, and salt. This creates the ideal base for soft, puffy cookies with just the right amount of structure.
Step 4: Mix the Cornstarch “Egg” Slurry
Combine a couple of tablespoons of cornstarch with water in a small bowl. Stir well—at first, it’ll look a bit tacky and weird, but keep going until it’s smooth and almost gluey. This mixture acts as a binder in place of eggs.
Step 5: Cream the Butter and Sugar
Use your stand mixer (or a hand mixer) to beat the room-temperature butter and sugar together on medium speed for a couple of minutes, until light and fluffy—this creates the base for those dreamy, thick cookie centers.
Step 6: Bring the Dough Together
Slowly add the cornstarch slurry, milk, and cooled raspberry syrup to the butter mixture and beat gently. It will look a bit pink and chunky (don’t worry!). Next, gradually add the dry ingredient mixture until just combined—don’t overmix.
Step 7: Add Color & Marble with Raspberries
If you want that Instagram-ready marbled effect, beat in a few drops of food coloring now, then gently fold in the frozen chopped raspberries using a spatula. Work quickly—over-mixing will muddy the vibrant streaks and can make the dough slimy.
Step 8: Chill and Shape
Cover the dough and freeze for at least 1 hour (don’t skip this step—trust me). Once fully chilled, scoop generous balls of dough, roll in extra sugar for sparkle, and place on a lined baking sheet.
Step 9: Bake, Reshape, and Cool
Bake at 325°F for about 15 minutes. Right as they come out, use a spatula to gently nudge any wild edges back into a perfect round—this keeps Raspberry Marbled Cookies looking bakery-perfect. Cool for 5 minutes before moving to a rack. The results? Magic.
Pro Tips for Making Raspberry Marbled Cookies
- Ultimate Freezer Chill: For beautifully thick cookies that hold their shape, chill the dough in the freezer, not just the fridge—this step is absolutely non-negotiable.
- Raspberry Prep Magic: Chop the raspberries while frozen, then freeze again before folding into the dough—this keeps the cookie marbling distinct and stops the dough from becoming watery.
- Perfect Rounds Every Time: As soon as the cookies come out of the oven, quickly reshape them with a spatula—this is the secret to getting every Raspberry Marbled Cookie bakery-worthy.
- Sugar Coating for Crunch: Don’t skip rolling the scooped dough balls in sugar right before baking—it adds a delightful, sparkly crunch to every bite!
How to Serve Raspberry Marbled Cookies
Garnishes
For a simple but elegant finish, dust cooled Raspberry Marbled Cookies with a flutter of powdered sugar or drizzle with a bit of melted white chocolate. If you’re feeling playful, nestle an extra freeze-dried raspberry right in the center for extra color!
Side Dishes
These cookies shine alongside a cup of freshly brewed tea, a cold glass of lemonade, or even a scoop of lemon sorbet. They’re a gorgeous finale for brunch spreads or picnic baskets—pair them with creamy yogurts for a colorful dessert board.
Creative Ways to Present
Arrange Raspberry Marbled Cookies on a white platter for a pink pop at baby showers or bridal teas. Or, stack a few in clear cellophane bags tied with ribbon for a truly special homemade gift—especially around Valentine’s Day or Mother’s Day!
Make Ahead and Storage
Storing Leftovers
Keep cooled Raspberry Marbled Cookies in an airtight container at room temperature for up to 2 days. Thanks to the fruit and cornstarch, they stay soft and fresh—just be sure they’re completely cool before sealing to prevent moisture.
Freezing
Freeze unbaked dough balls on a tray, then transfer to a zip-top bag for up to 2 months. Bake straight from frozen, just adding an extra minute or two to the oven time—your future self will thank you for the instant treat!
Reheating
If you love a slightly warm cookie, pop one in the microwave for 7–10 seconds or gently toast in a low oven for a few minutes to revive that just-baked softness (just keep an eye on the raspberry bits—they can get hot quickly).
FAQs
-
Can I use fresh raspberries instead of frozen?
Yes, but frozen raspberries hold up better for this dough and help prevent excess juice from bleeding into the cookies. If you use fresh, freeze them first for cleaner marbling and easier chopping.
-
What’s the best way to make Raspberry Marbled Cookies vegan?
Just use a vegan butter or baking stick and your favorite non-dairy milk—the cornstarch slurry already acts as an egg alternative, so no other swaps are needed!
-
Help! My cookies spread too much. What happened?
This usually means the dough wasn’t chilled long enough, or the raspberries were too wet. Always freeze the dough for a full hour before baking and use firm, frozen berry pieces for the best results.
-
Can I make these Raspberry Marbled Cookies nut-free?
Absolutely! The recipe as written doesn’t contain any nuts, but double-check your gluten-free flour blend and baking stick labels just to be safe if you’re baking for someone with allergies.
Final Thoughts
So go ahead—treat yourself and your loved ones to a batch of Raspberry Marbled Cookies! With their blushing swirls, soft centers, and tangy-sweet flavor, they’re pure joy in every bite. I can’t wait for you to discover just how special homemade cookies can be—happy baking!
Print
Raspberry Cookies Recipe
- Prep Time: 30 minutes
- Cook Time: 15 minutes
- Total Time: 1 hour 45 minutes
- Yield: 12 large cookies
- Category: Dessert
- Method: Baking
- Cuisine: American
- Diet: Gluten Free
Description
These delightful Raspberry Cookies are a perfect blend of sweet and tart, with a burst of raspberry flavor in every bite. Gluten-free and beautifully marbled with raspberries, these cookies are a treat for any occasion.
Ingredients
For the Raspberry Syrup
- 1 cup frozen raspberries
- 1/4 cup granulated sugar
For the Cookies
- 2 cups gluten-free flour (1:1 gluten-free multipurpose flour with xanthan gum)
- 1.5 tablespoons cornstarch
- 1.5 teaspoons baking powder
- 1/2 teaspoon kosher salt
- 1/2 cup unsalted butter or vegan baking stick, room temperature
- 1 1/4 cups granulated sugar
- 2 tablespoons granulated sugar for rolling
- 2 heaping tablespoons cornstarch mixed with 3 tablespoons water
- 3 tablespoons milk
- 3 tablespoons raspberry syrup
- 3 drops red food coloring
- 1/2 cup frozen raspberries, chopped
Instructions
- Raspberry Syrup: Cook raspberries and sugar in a saucepan until syrupy. Strain and set aside.
- Cookies: Mix dry ingredients. Cream butter and sugar. Add cornstarch mixture, milk, raspberry syrup. Fold in dry ingredients, add food coloring, and chopped raspberries. Freeze dough. Preheat oven. Roll dough in sugar, bake, reshape, and cool.
Notes
- Do not skip freezing the dough.
- Reshape cookies immediately after baking.
- Bake cookies in batches if needed.
Nutrition
- Serving Size: 1 cookie
- Calories: 220
- Sugar: 15g
- Sodium: 150mg
- Fat: 9g
- Saturated Fat: 5g
- Unsaturated Fat: 3g
- Trans Fat: 0g
- Carbohydrates: 32g
- Fiber: 2g
- Protein: 2g
- Cholesterol: 20mg


