
If you’re on the lookout for a bright and zesty treat that won’t derail your healthy eating habits, I absolutely love sharing this Healthy Lemon Bars Recipe with friends who appreciate a guilt-free indulgence. It’s packed with fresh lemon flavor, naturally sweetened, and has a tender coconut flour crust that comes together like a dream. Whether you’re new to baking lemon bars or have tried a hundred recipes that felt too heavy or too sweet, this one truly hits the spot — trust me, your taste buds will thank you.
Why You’ll Love This Recipe
- Bright & Natural Flavor: Fresh lemon juice and zest create a tangy punch without artificial extras.
- Paleo-Friendly & Gluten-Free: Made with coconut flour and ghee, perfect if you’re avoiding gluten or grains.
- Balanced Sweetness: Maple syrup adds just the right touch of natural sweetness without overpowering the lemon.
- Simple & Quick to Make: No complicated techniques here, just straightforward steps that anyone can follow confidently.

Ingredients You’ll Need
The magic of this Healthy Lemon Bars Recipe lies in combining simple, wholesome ingredients that bring out the best in each other. Using coconut flour ensures you get the perfect texture in the crust, while plenty of fresh lemons brighten every bite. You’ll want to pick ripe, juicy lemons for the best results.
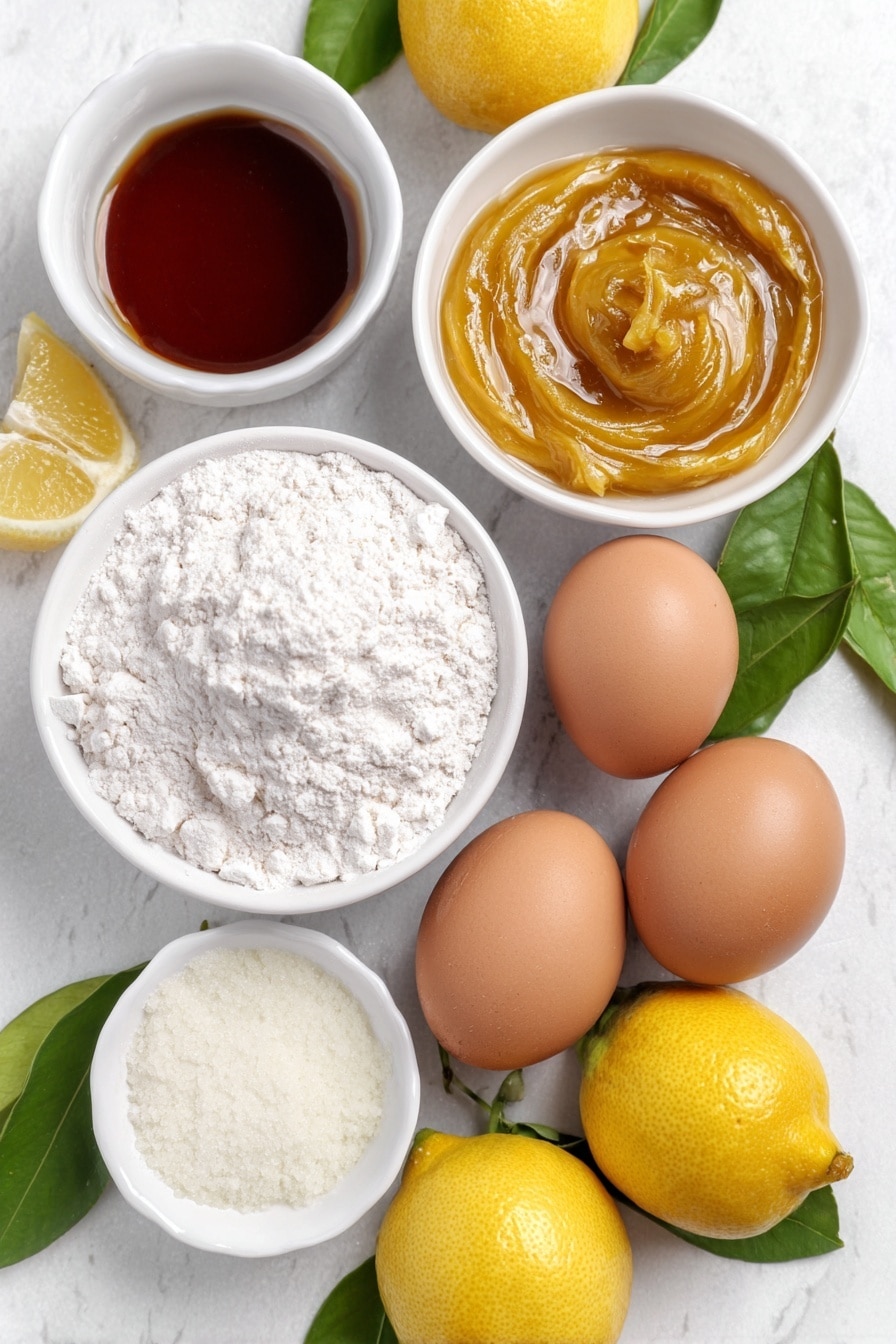
- Maple syrup: I love using real maple syrup because it melts smoothly and adds a gentle sweetness.
- Ghee (melted and cooled): This gives the crust a rich, buttery flavor without greasiness.
- Large eggs: They bind everything together and give the bars their perfect texture.
- Coconut flour: This is the star of the gluten-free crust – don’t swap it for almond flour here!
- Tapioca flour: Acts as a binder and keeps things light and chewy.
- Lemon zest: Provides a fragrant, citrusy kick in both crust and filling.
- Vanilla extract: Just a touch for warmth and depth.
- Lemon juice: Freshly squeezed is a must for that bright tartness you want in every bite.
Variations
I love encouraging folks to make this recipe their own. While I stick to the original for perfect results, I’ve tried a couple of fun twists that spice things up without losing that classic lemon bar charm.
- Lime Bars: Swapping lemon juice and zest for fresh lime makes a tangy, tropical treat — I did this once for a summer party and everyone loved the citrusy twist!
- Berry Lemon Bars: Adding a few fresh raspberries or blueberries on top right before baking can add a pop of color and a sweet burst.
- Non-Paleo Version: If you aren’t avoiding gluten, feel free to try this with regular all-purpose flour and butter — just adjust baking times slightly.
- Less Sweet: You can reduce the maple syrup by a tablespoon or two if you prefer a more tart flavor.
How to Make Healthy Lemon Bars Recipe
Step 1: Mix the Crust Wet Ingredients
Start by preheating your oven to 350°F. In a large mixing bowl, combine maple syrup, vanilla extract, melted (but cooled) ghee, and one large egg. Be sure the ghee isn’t too hot to avoid scrambling the egg — I learned this the hard way, and it can really throw off your crust texture!
Step 2: Combine Dry Ingredients and Form Dough
In another bowl, whisk together the coconut flour, tapioca flour, and lemon zest. Gradually add the wet mixture into the dry while stirring with a fork — at first, it might seem like the dough is too wet, but coconut flour needs a moment to absorb the moisture. Keep mixing until it comes together into a dough-like consistency.
Step 3: Press Crust and Bake
Press the dough evenly into an 8×8 baking pan lined with parchment or sprayed with cooking spray. Give it a few gentle pricks with a fork on the surface (but don’t pierce all the way through—just a couple pokes to avoid puffing). Bake for 8-10 minutes until it just sets with slightly golden edges. If you see puffing, a quick prick with the fork will deflate it perfectly.
Step 4: Prepare the Lemon Filling
While the crust bakes, whisk together 4 large eggs, lemon zest, fresh lemon juice, maple syrup, and tapioca flour until silky smooth. This filling is where the lemon magic happens, so don’t skip the fresh juice—it makes all the difference!
Step 5: Bake the Filled Bars
As soon as the crust is out of the oven, pour the filling evenly over it — don’t let the crust cool, as filling sticks better this way. Lower the oven temp to 325°F and bake for 14-16 minutes, watching closely. You want the filling just set, still a little jiggly in the center but not wet. Overbaking will cause cracking, which is fine but less dreamy aesthetically.
Step 6: Cool and Chill
Once baked, let the lemon bars cool completely at room temperature, then refrigerate for at least 90 minutes to let the filling firm up beautifully for slicing. I learned that the bars slice much cleaner when cold—patience here is definitely rewarded!
Pro Tips for Making Healthy Lemon Bars Recipe
- Use Fresh Lemons: I can’t stress this enough — fresh juice and zest bring unbeatable brightness compared to bottled juice.
- Don’t Overbake: I check my bars frequently in the last few minutes to catch the perfect set; overbaking leads to cracks.
- Cool Ghee Before Mixing: Pouring warm ghee into eggs? It curdles the mixture. Let it cool for silky smooth batter.
- Chill Before Slicing: Going straight for the knife while warm results in messier slices — chilling makes clean, easy cuts.
How to Serve Healthy Lemon Bars Recipe
Garnishes
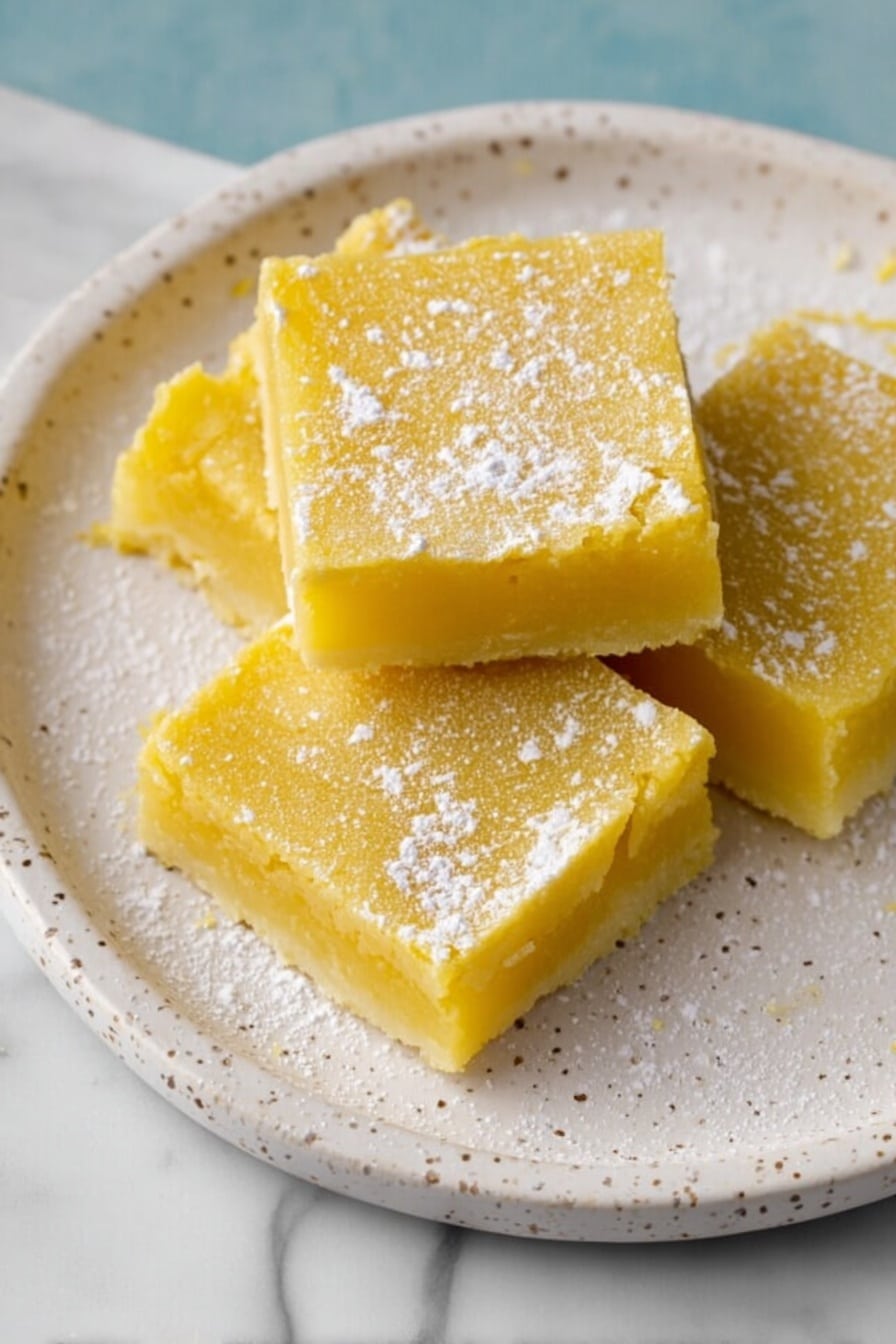
I genuinely love sprinkling just a light dusting of powdered sugar on top (even if it’s not paleo) or adding a tiny spoonful of whipped coconut cream for a luscious finish. Sometimes I toss a bit of finely chopped fresh mint or a few thin lemon slices on plates when serving guests – it always looks so fresh!
Side Dishes
These lemon bars pair beautifully with a cup of hot herbal tea or an iced green tea for a refreshing afternoon snack. I’ve also served them alongside fresh berries and a small bowl of Greek yogurt for a light dessert spread that feels special without heaviness.
Creative Ways to Present
For special occasions, I like cutting the bars into mini squares and serving them on a tiered dessert tray with edible flowers or placing them in pretty cupcake liners for easy grab-and-go treats. They also make a wonderful homemade gift when wrapped in parchment with a rustic twine bow.
Make Ahead and Storage
Storing Leftovers
I store leftover bars covered tightly in the fridge — they keep beautifully for up to 5 days without drying out. I like to use an airtight container and layer parchment between them to prevent sticking.
Freezing
You can freeze these lemon bars wrapped individually in plastic wrap and then placed in a freezer-safe bag. From my experience, thawing in the fridge overnight keeps their texture intact, and they taste practically fresh.
Reheating
If you want them slightly warm, I gently reheat single portions in the microwave for about 10-15 seconds — just enough to soften without melting the filling or making the crust soggy. Otherwise, I enjoy them cold straight from the fridge.
FAQs
-
Can I substitute almond flour for coconut flour in this Healthy Lemon Bars Recipe?
I don’t recommend swapping almond flour for coconut flour in this recipe. The crust relies on coconut flour’s unique texture and absorbency to hold together properly. Almond flour will make the crust too greasy and won’t firm up as needed.
-
Is it possible to make these lemon bars vegan or egg-free?
Eggs are essential here for structure and texture, so if you need a vegan or egg-free version, you might want to try a specialized vegan lemon bar recipe instead. This recipe specifically depends on eggs for the perfect set and flavor.
-
Can I use bottled lemon juice?
Fresh lemon juice is strongly recommended. Bottled lemon juice just doesn’t have the same bright, fresh flavor, and it can make the bars taste flat or artificial. Using fresh lemons really makes the filling shine!
-
How long do these lemon bars stay fresh?
Stored in an airtight container in the fridge, these bars stay fresh and delicious for up to 5 days. I wouldn’t recommend keeping them out at room temperature for too long because of the eggs and fresh lemon juice.
-
Can I double this Healthy Lemon Bars Recipe?
I haven’t tried doubling the recipe myself, but it should work well using a 9×13-inch pan. Just keep an eye on the baking times and check for doneness with the usual cues—set edges and slightly jiggly center.
Final Thoughts
I have to say, this Healthy Lemon Bars Recipe quickly became a favorite in my kitchen because it balances indulgence with wholesome ingredients so well. It’s one of those desserts I’m happy to make for myself or guests without any guilt, and honestly, my family goes crazy for it too. If you love lemon bars but want a recipe that’s lighter, paleo-friendly, and full of real flavor, this one’s definitely worth trying. Give it a go and let me know how your bars turn out—I’m cheering for you every lemony step of the way!
Print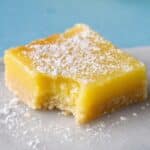
Healthy Lemon Bars Recipe
- Prep Time: 5 minutes
- Cook Time: 25 minutes
- Total Time: 2 hours (includes chilling time)
- Yield: 9 bars
- Category: Dessert
- Method: Baking
- Cuisine: American
- Diet: Gluten Free
Description
These Healthy Lemon Bars are a delicious gluten-free, paleo-friendly treat with a perfectly tangy lemon filling and a soft, tender coconut flour crust. Made with wholesome ingredients like maple syrup, ghee, and fresh lemon juice, these bars offer a healthier alternative to traditional lemon bars while maintaining classic flavors and texture.
Ingredients
Crust:
- 1/4 cup maple syrup
- 1/3 cup ghee, melted and cooled
- 1 large egg
- 2/3 cup Bob’s Red Mill Coconut Flour
- 1/4 cup Bob’s Red Mill Tapioca Flour
- 1/2 teaspoon lemon zest (zest of about 1/2 lemon)
- 2 teaspoons vanilla extract
Filling:
- 1/2 cup fresh lemon juice (about 4-5 lemons depending on size)
- 1 1/2 tablespoons lemon zest (zest of about 2 lemons)
- 1/3 cup maple syrup
- 4 large eggs
- 2 tablespoons tapioca flour
Instructions
- Preheat Oven: Preheat your oven to 350°F (175°C) to prepare for baking the crust.
- Mix Wet Ingredients for Crust: In a large mixing bowl, combine the maple syrup, vanilla extract, melted and cooled ghee, and one large egg. Make sure the ghee is cooled so it doesn’t cook the egg.
- Combine Dry Ingredients for Crust: In another bowl, whisk together the coconut flour, tapioca flour, and lemon zest. Slowly stream in the wet ingredients while mixing with a fork. Though the mixture seems wet at first, keep mixing as the coconut flour absorbs the liquid and forms a dough.
- Form the Dough: Mix until the dough comes together fully and resembles a soft, pliable dough.
- Press Dough into Pan: Press the dough evenly into an 8×8 inch baking pan, either sprayed with cooking spray or lined with parchment paper for easy removal.
- Prick the Dough: Use a fork to gently prick the dough a few times, but do not pierce all the way through. This helps any steam escape while baking.
- Bake the Crust: Bake the crust at 350°F for 8-10 minutes. It should look just set with a slight golden edge. If the dough puffs, gently prick it again to deflate.
- Prepare the Filling: While the crust bakes, whisk together the 4 eggs, lemon zest, maple syrup, fresh lemon juice, and tapioca flour until perfectly smooth and fully combined.
- Add Filling to Crust: As soon as the crust comes out of the oven, pour the lemon filling evenly over the hot crust without letting the crust cool.
- Bake the Bars: Reduce oven temperature to 325°F and bake the lemon bars for 14-16 minutes, watching closely to remove them as soon as the filling is just set and not wobbly.
- Cool and Chill: Remove the bars from the oven and allow them to cool completely at room temperature, then transfer to the refrigerator to chill for at least 90 minutes.
- Serve: Once chilled and firm, cut the bars into squares and serve alone or topped with whipped topping or powdered sugar for a traditional touch (not paleo).
Notes
- This recipe does not lend itself well to substitutions. For best results, use the specified ingredients to maintain the gluten-free, paleo-friendly qualities.
- You can use either glass or metal baking dishes. Metal pans conduct heat better and will bake the bars faster but may cause slight cracking if baked beyond the set stage. This cracking does not affect flavor.
- Fresh lemon juice is essential for the best flavor. Avoid using bottled lemon juice.
- Swapping the lemon for lime works nicely if you prefer key lime pie bars.
- Do not substitute flours other than the specified coconut and tapioca flours; almond flour or others will not yield the same texture or structure.
- Eggs are a crucial binding and flavor element; no good substitutes exist for this recipe unless using a specific vegan lemon bar recipe.
- Ghee adds a buttery cookie flavor missing from coconut oil; avoid substituting coconut oil due to flavor and texture issues. Grass-fed or regular butter can be used if not following paleo.
- Coconut sugar is not recommended as it does not melt like liquid sweeteners and results in poor texture and flavor.
- Maple syrup may potentially be substituted with honey, though this has not been tested.
- Doubling the recipe should work in a 9×13 inch pan, though this is untested.
Nutrition
- Serving Size: 1 bar (1/9th of recipe)
- Calories: 150
- Sugar: 12g
- Sodium: 30mg
- Fat: 8g
- Saturated Fat: 4.5g
- Unsaturated Fat: 2.5g
- Trans Fat: 0g
- Carbohydrates: 18g
- Fiber: 3g
- Protein: 3g
- Cholesterol: 70mg

