
If you’ve ever wanted to bake delicious crusty bread right at home without wrestling with kneading or complicated steps, this Easy No-Knead Artisan Bread Recipe is just what you need. Trust me, I was skeptical at first too, but once I tried it, I was hooked. The best part? You get bakery-quality bread with minimal effort and nothing fancy required. Keep reading—I’m going to share every little trick so you nail it on your first go!
Why You’ll Love This Recipe
- Zero Kneading Required: Seriously, no muscle power needed and no special equipment.
- Minimal Ingredients: Just a handful of pantry staples come together for artisan-quality bread.
- Perfect Crust and Crumb: Thanks to the dutch oven method, you get that professional crispy crust every time.
- Flexible Timing: Whether you want to bake right away or refrigerate for flavor, this recipe works around your schedule.

Ingredients You’ll Need
The magic of this Easy No-Knead Artisan Bread Recipe comes down to a few simple ingredients that work beautifully together. Using quality flour and the right water temperature can make all the difference, so I’ll walk you through what to look for when shopping too.

- Bread or Plain/All-Purpose Flour: Bread flour gives a chewier, fluffier crumb and keeps bread fresh longer, but all-purpose works just fine too—just expect a slightly different texture.
- Instant or Rapid Rise Yeast: This makes rising faster and more reliable; if you only have active dry yeast, I’ll share how to adjust it below.
- Cooking or Kosher Salt: Avoid table salt here; its finer grains can make your bread too salty for this recipe.
- Warm Water: Around 130°F (55°C) is perfect—not too hot to kill yeast and not cold enough to slow things down.
- Flour for Dusting: Needed for shaping the dough, just a little goes a long way.
Variations
I love that this Easy No-Knead Artisan Bread Recipe is a fantastic base to play with, so I often tweak it depending on my mood or what I have on hand. Don’t be shy—playing around is part of the fun and can introduce you to new favorite versions.
- Whole Wheat Addition: I sometimes swap out a quarter cup of white flour for whole wheat for a nuttier flavour and denser crumb. Just reduce total flour slightly to balance absorbency.
- Herbs and Seeds: Toss in rosemary, thyme, or seeds like sesame or sunflower right at the start for extra aroma and crunch. My family goes crazy for rosemary and sea salt on top!
- Gluten-Friendly: While this recipe relies on gluten for structure, you can experiment with gluten-free flours but expect very different results and longer rising times.
- Cold Fermentation: Letting the dough rise in the fridge up to three days develops deeper flavor—perfect if you want to prep ahead for the weekend.
How to Make Easy No-Knead Artisan Bread Recipe
Step 1: Mix Your Dough Without Kneading
Start by combining the flour, yeast, and salt in a large bowl. Then add your warm water and mix everything using the handle of a wooden spoon until the flour is fully incorporated. Don’t expect this dough to feel like typical bread dough—it’s quite wet and sticky, almost like a thick batter. That’s totally normal! If it feels too dry or wet, add a little more water or flour to get it right. I discovered this trick watching a quick video—seeing the texture really helped me understand what ‘wet but not runny’ looks like.
Step 2: Let It Rise Until Puffy and Bubbling
Cover the bowl with cling wrap or a plate and leave it on your counter for two to three hours. You’re looking for the dough to double in size, become wobbly and jelly-like, and develop bubbles on the surface. If after an hour it’s not rising, try moving it somewhere warmer—yeast loves heat, but not hot! Sometimes I put it near a warm sink or inside the closed dryer briefly for a boost. This part amazed me the most: no kneading, just waiting, and the dough transforms completely.
Step 3: (Optional) Refrigerate to Build Flavor
If you’re not ready to bake right away, just pop that covered bowl in the fridge—up to three days! This slow chill rise develops flavor much like a sourdough, and I love doing this when I want fresh bread at the weekend but don’t have time to start early. When you’re ready, just bring the dough out and let it sit on the counter for 45–60 minutes to take the chill off before baking.
Step 4: Preheat Your Oven and Dutch Oven
This is key for the signature crust. Heat your oven to 230°C (450°F) with your dutch oven inside, lid on, for about 30 minutes. The hot pot traps steam created by the dough’s moisture, giving the crust that gorgeous crispy blistered texture. If you don’t have a dutch oven, don’t worry—I’ll share an alternate method below.
Step 5: Shape the Dough Gently
Dust your work surface with flour. Scrape the dough out onto it, then sprinkle the top lightly with flour (about ½ tablespoon). Using a dough scraper, cake server, or spatula, gently fold the edges over toward the center about six times. The goal here is to give the dough a roughly round shape and gently push out some of the big air bubbles—but don’t overwork it or try to make it perfect. I love that this recipe allows you to be a little messy—the rustic, uneven loaf makes for the best crunch and character!
Step 6: Transfer Dough to Parchment and Prepare for Baking
Slide a large sheet of parchment paper nearby. Flip the dough seam-side down onto the paper and nudge it towards the center, reshaping it gently if needed. The lopsided shape is actually a win here—more twists and ridges mean more crunchy edges in your final loaf.
Step 7: Bake in the Dutch Oven
Carefully remove your piping-hot dutch oven from the oven. Using the paper, lift and place the dough right inside. Cover it with the lid and bake for 30 minutes—this steamy environment forms a beautiful crust. Then remove the lid and bake for another 12 minutes or until your bread turns a deep golden brown. The smell at this point will be unreal, trust me.
Step 8: Cool Before Slicing
Once out of the oven, transfer your bread to a wire rack and let it cool for about 10 minutes before slicing. This wait is hard, I know! But it helps the crumb set properly, so your slices don’t get gummy. The result? Crackling crust with a soft, airy inside—a perfect companion for everything from butter to hearty stews.
Pro Tips for Making Easy No-Knead Artisan Bread Recipe
- Water Temperature is Crucial: When I first tried boiling water, the yeast died instantly! Stick to warm tap water around 130°F (55°C) to keep yeast happy and rising.
- Don’t Skip the Preheat: The super-hot dutch oven creates steam that makes the crust crispy—baking in a cold pot won’t give the same effect.
- Patience Pays Off: Your dough rising time can vary. I’ve had days where it took three hours or more, and it still came out perfect.
- Shaping is Gentle, Not Precise: Don’t stress over your dough’s shape; rustic and lumpy means more crunchy edges to enjoy!
How to Serve Easy No-Knead Artisan Bread Recipe

Garnishes
When my bread’s fresh and warm, I love brushing the crust with a little olive oil and sprinkling flaky sea salt or herbs like rosemary. It wakes up the flavors and gives you a hint of gourmet flair. For a quick snack, spreading good salted butter or your favorite jam is irresistible.
Side Dishes
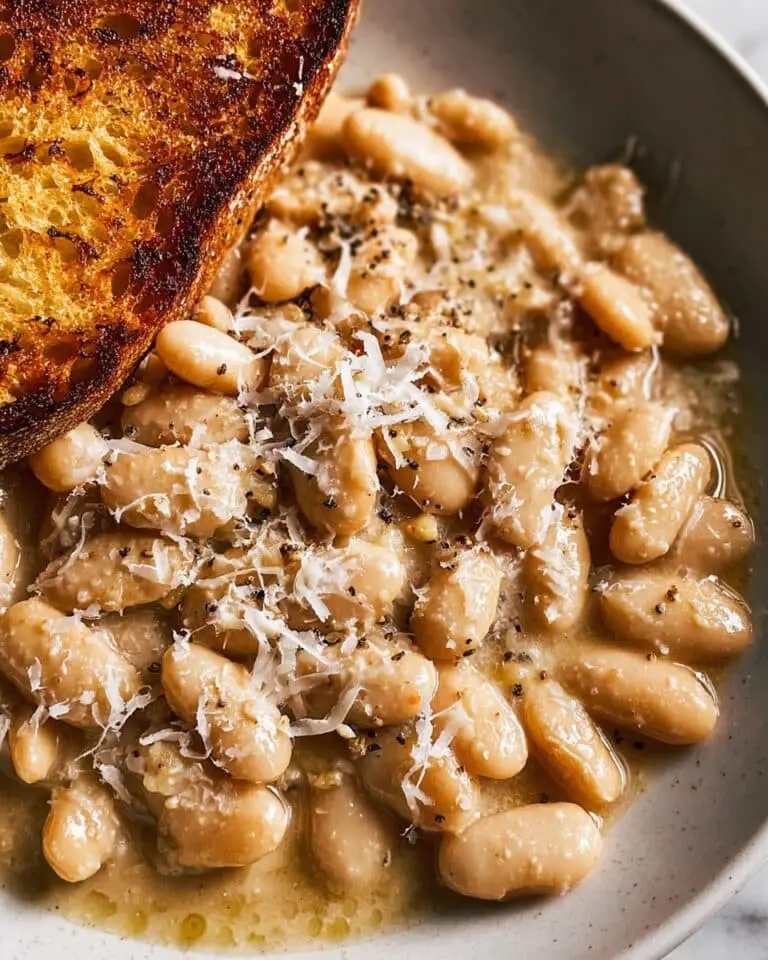
This bread pairs beautifully with just about anything—from creamy soups and hearty stews to fresh salads and cheese plates. My go-to lunch is sliced bread with avocado, ripe tomatoes, and a sprinkle of chili flakes. My family especially loves dipping the bread into homemade vegetable soups; it soaks up every bit of flavor!
Creative Ways to Present
For a cozy brunch or special occasion, I arrange slices on a wooden board with fresh fruit, assorted cheeses, and charcuterie. You can also hollow out the loaf after baking to create a bread bowl filled with warm chili or spinach dip—a fun way to impress guests! I used this trick for our last holiday dinner and everyone asked for the recipe.
Make Ahead and Storage
Storing Leftovers
If you don’t finish your bread in one sitting (though that’s rare in my house), wrap it loosely in a clean tea towel and store it at room temperature in a bread box or paper bag. This keeps the crust crisp and the inside soft for a day or two. Plastic wrap or airtight containers tend to soften the crust quickly, so avoid those if you want to keep the crunchy exterior.
Freezing
I often slice leftover bread and freeze it in sandwich bags. It defrosts nicely at room temperature or straight in the toaster. Freezing works great with this recipe because the bread has a sturdy crust and nice crumb—just make sure it’s fully cooled first to avoid sogginess.
Reheating
To bring day-old bread back to life, I like to heat it in a 350°F (175°C) oven for about 5–7 minutes. This refreshes the crust and softens the crumb perfectly. You can also pop slices straight into the toaster for a quick, warm bite.
FAQs
-
Can I use active dry yeast instead of instant yeast in this Easy No-Knead Artisan Bread Recipe?
Yes! If you only have active dry yeast, simply dissolve it in the warm water for about 5 to 10 minutes before mixing it with the flour and salt. This “proofing” step wakes up the yeast and makes sure it’s alive, helping your bread rise nicely. Just keep an eye on the dough’s rise time, as it may take a bit longer.
-
What if I don’t have a dutch oven for baking?
No worries! You can create a steam effect using a regular roasting pan or metal baking dish. Preheat a pan filled with boiling water on the oven’s bottom rack and place your bread on the middle rack. The steam will help form the crust. Just be careful working quickly so you don’t lose heat or the steam escapes before baking.
-
How long will this bread keep fresh?
Because of the moisture in the bread, it’s best enjoyed within 2 days when stored at room temperature in a bread box or wrapped in a tea towel. For longer storage, freezing sliced bread works wonderfully and retains most of its fresh-baked charm.
-
Can I add flavors like garlic or herbs directly into the dough?
Absolutely! Adding minced garlic, fresh herbs, or even olives into your dough before the first rise adds great flavor. I usually keep additions simple to preserve the airy crumb but don’t be afraid to experiment. If using wet add-ins like olives, adjust the flour slightly to maintain dough consistency.
-
Why does the dough feel so sticky and wet?
This dough is meant to be wetter than traditional bread dough; this high hydration is what gives the bread its open crumb and chewy texture. Don’t try to make it stiffer—just trust the process and handle it with floured tools and surfaces during shaping.
Final Thoughts
I absolutely love how this Easy No-Knead Artisan Bread Recipe makes baking approachable for everyone—even if you’ve never made bread before. The aroma of fresh bread filling your home after a few hours of hands-off rising is unbeatable. Plus, it’s flexible, forgiving, and reliably delicious—a true kitchen win. I encourage you to give this a try; once you taste that crispy crust and tender crumb, you’ll wonder why you ever thought bread baking was hard. Happy baking, friend!
Print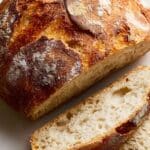
Easy No-Knead Artisan Bread Recipe
- Prep Time: 5 minutes
- Cook Time: 40 minutes
- Total Time: 2 hours 45 minutes
- Yield: 10 servings (slices)
- Category: Bread
- Method: Baking
- Cuisine: American
Description
This World’s Easiest Yeast Bread recipe delivers a rustic, artisan-style loaf with no kneading required. Using simple ingredients and a hands-off method, this bread yields a chewy, fluffy crumb with a crispy crust, perfect for everyday baking. The dough requires only mixing, rising, and baking in a preheated Dutch oven to create a steamy environment that produces bakery-quality bread at home.
Ingredients
Main Dough Ingredients
- 3 cups (450g) bread or plain/all-purpose flour
- 2 tsp instant or rapid rise yeast
- 2 tsp cooking/kosher salt (not table salt)
- 1½ cups (375 ml) very warm tap water (up to 55°C/130°F)
Dough Shaping
- 1½ tbsp flour, for dusting
Instructions
- Mix Dough: In a large bowl, combine the flour, yeast, and salt. Add the warm water and mix using the handle of a wooden spoon until all the flour is incorporated. The dough will be wet and sloppy but not runny like cake batter. Adjust with more water or flour if necessary to achieve the right consistency.
- Rise: Cover the bowl with cling wrap or a plate and leave it on the counter for 2 to 3 hours until it doubles in volume and becomes bubbly and wobbly like jelly. If it hasn’t risen after 1 hour, place it in a warmer spot to encourage rising.
- Optional Refrigeration: At this stage, you can either proceed to baking or refrigerate the dough for up to 3 days to develop more flavor.
- Take Chill Out: If refrigerated, remove the dough from the fridge and let it rest on the counter for 45 to 60 minutes while the oven preheats to take the chill out, as cold dough does not rise well.
- Preheat Oven and Dutch Oven: Place a Dutch oven with its lid in the oven and preheat the oven to 230°C/450°F (220°C fan) for 30 minutes before baking.
- Shape Dough: Dust your work surface with 1 tbsp flour, scrape the dough out of the bowl, and dust the top of the dough with ½ tbsp flour.
- Fold Dough: Using a dough scraper or similar tool, fold the sides of the dough inwards about six times to roughly form a round shape, deflating the bubbles but not overly shaping it.
- Transfer to Parchment Paper: Slide a large piece of parchment paper next to the dough and flip the dough onto it seam side down so the smooth side is up. Slide it towards the middle and reshape it into a roundish form without worrying about perfect shape.
- Place Dough in Dutch Oven: Carefully remove the hot Dutch oven from the oven. Use the parchment paper to lift and place the dough inside the pot, then cover with the lid.
- Bake Covered: Bake the bread covered for 30 minutes.
- Bake Uncovered: Remove the lid and continue baking for another 12 minutes or until the crust is deep golden and crispy.
- Cool: Transfer the bread to a wire rack and let it cool for 10 minutes before slicing.
Notes
- Flour: Bread flour produces a chewier, fluffier crumb and longer freshness due to higher protein content, but plain/all-purpose flour also works.
- Wholemeal Flour: For wholemeal, reduce initial flour by ¼ cup (30g) and adjust as needed since it absorbs more water.
- Salt: Use 1¼ tsp if using fine table salt due to its finer grains to avoid over-salting.
- Water Temperature: The water should be warm but not hot; too hot will kill the yeast.
- Dough Consistency: Adjust flour or water to get a sticky but not runny dough, as shown in the linked video.
- Dough Rising: Rising time varies by temperature and humidity; ensure dough doubles in volume with bubbly surface. Use warm spots if slow to rise.
- Oven Preheating: Preheat oven and Dutch oven well in advance for best steam baking effect.
- Dutch Oven Size: Use a 26cm (10”) or larger Dutch oven for sufficient steam space; it creates a steamer effect similar to professional ovens.
- No Dutch Oven Method: Use a metal pan filled with boiling water on a lower shelf to create steam, bake bread on parchment on middle rack for 40 minutes until golden brown.
- Make Ahead/Storage: Dough can be refrigerated up to 3 days; bread is best eaten same day but stores well for 2 days at room temperature in a paper bag.
- Source: Adapted from the New York Times no-knead bread recipe with modifications for home cook ease.
Nutrition
- Serving Size: 1 slice (about 1/10 loaf)
- Calories: 150
- Sugar: 0.3g
- Sodium: 350mg
- Fat: 0.5g
- Saturated Fat: 0.1g
- Unsaturated Fat: 0.3g
- Trans Fat: 0g
- Carbohydrates: 31g
- Fiber: 1g
- Protein: 5g
- Cholesterol: 0mg


