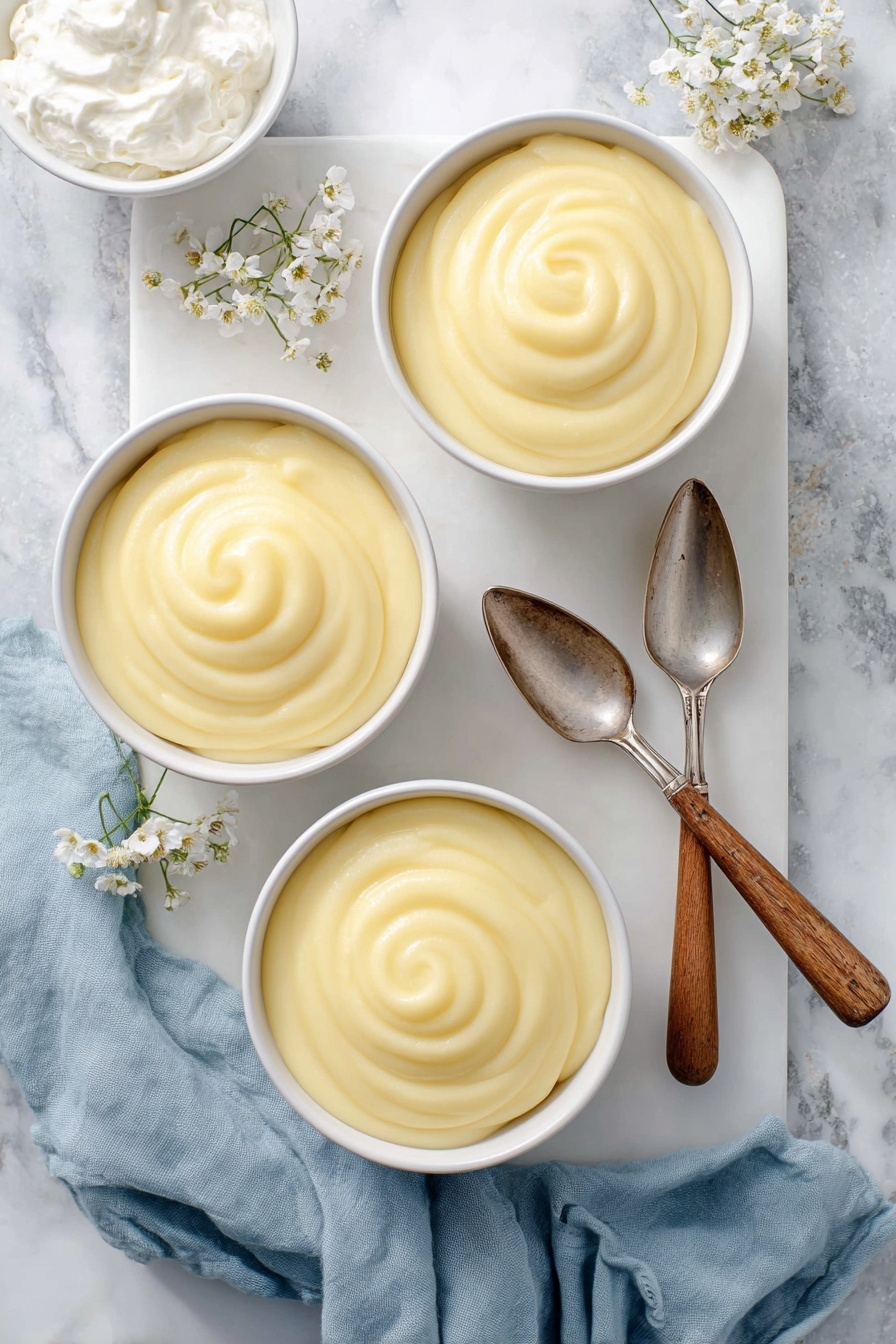
If you’re craving a classic dessert that’s both comforting and delightfully smooth, this Homemade Vanilla Pudding Recipe is going to become your new best friend. It’s rich, creamy, and so simple to whip up in just about 20 minutes. Whether you want it warm and cozy or chilled and refreshing, this pudding hits all the right notes. I absolutely love how this turns out every single time, and I’m excited to share all my tips so you can nail it in your own kitchen.
Why You’ll Love This Recipe
- Super Simple Ingredients: You probably already have everything for this in your pantry and fridge, making it an easy go-to dessert.
- Creamy, Silky Texture: When you get the technique right, it’s so silky you’ll swear you’re eating from a high-end bakery.
- Customizable Flavors: Vanilla is classic, but this base is great for adding twists like cinnamon or a splash of bourbon.
- Kid and Adult Friendly: My family goes crazy for this, and it’s totally a crowd-pleaser for all ages.

Ingredients You’ll Need
The beauty of this Homemade Vanilla Pudding Recipe is in its simplicity—each ingredient plays a crucial role in creating that luscious texture and balanced sweetness. Using whole milk really helps make the pudding rich without being too heavy, and fresh egg yolks give an unbeatable creaminess.
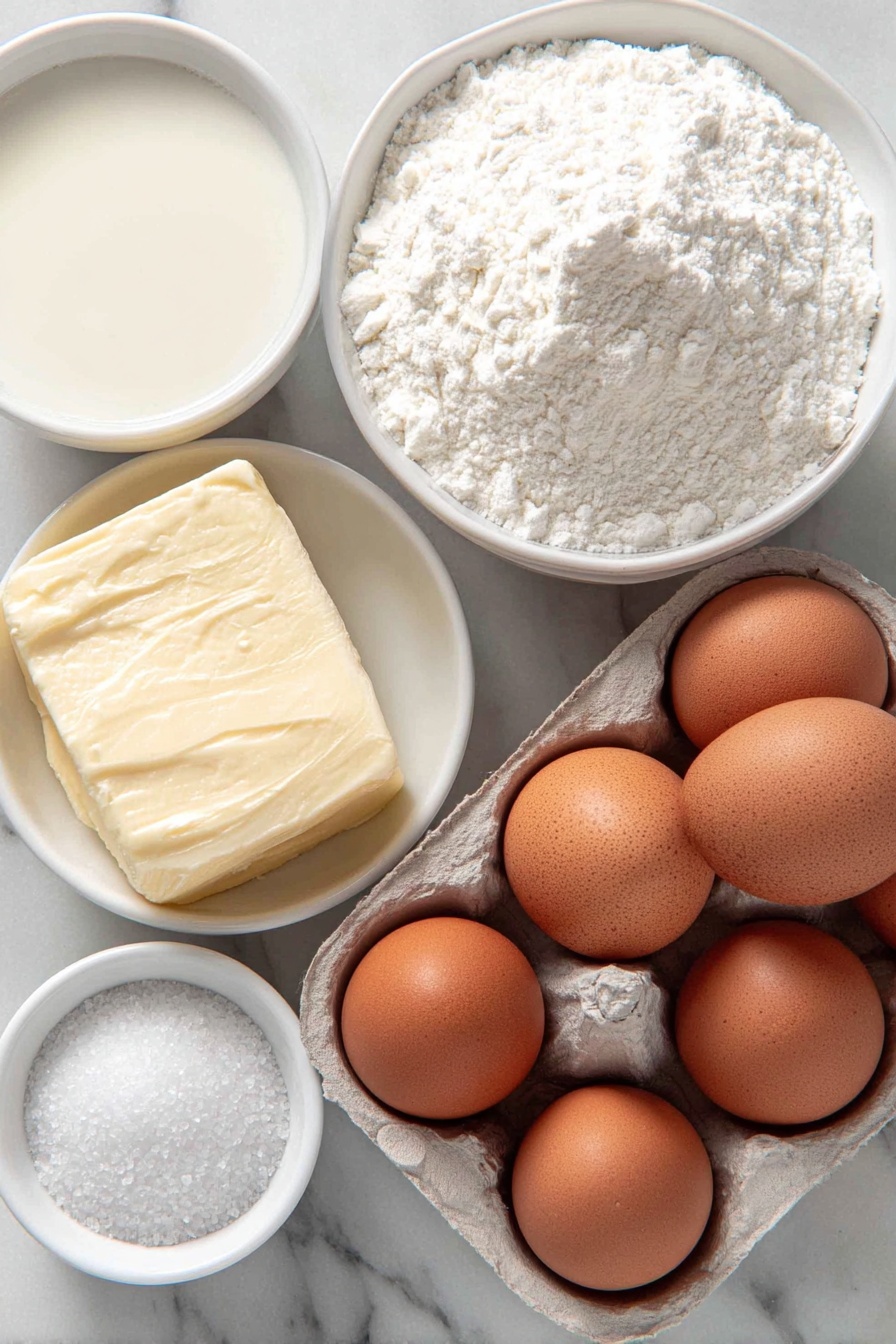
- Whole Milk: I recommend whole milk for its creamy texture; you can’t really replicate that with skim.
- Cornstarch: This is your thickening agent—make sure to whisk it well with cold milk to avoid lumps.
- Salt: Just a pinch works wonders to enhance the sweetness and deepen flavor.
- Sugar: Adjust to your taste, but I find ¾ cup balances perfectly without being overpowering.
- Egg Yolks: They add richness and help thicken while giving that silky mouthfeel everyone loves.
- Butter: A tablespoon stirred in at the end adds a subtle richness and shine.
- Pure Vanilla Extract: This is the star flavor—use good quality vanilla for the best aroma and taste.
Variations
I love playing around with this Homemade Vanilla Pudding Recipe depending on the season or what I have on hand. You should never feel locked into just vanilla—there’s so much room for fun customization that makes it feel brand new each time.
- Chocolate Vanilla Swirl: I once folded in melted dark chocolate at the end and swirled it in—my family went nuts over the marbled look and flavor.
- Spiced Pudding: A pinch of cinnamon or nutmeg adds warmth, especially cozy for fall.
- Dairy-Free Version: Swap whole milk for coconut milk and use a dairy-free butter to keep it creamy for sensitive diets.
- Extra Boozy: A splash of bourbon or rum stirred in after cooking adds grown-up sophistication.
How to Make Homemade Vanilla Pudding Recipe
Step 1: Mix Cornstarch with Cold Milk
Start by whisking together ¼ cup of cold whole milk with the cornstarch in a small bowl until smooth. This simple step ensures your pudding will thicken evenly without any gritty lumps later on. I discovered this trick after a few batches with lumps, and it makes all the difference—don’t skip it!
Step 2: Heat the Remaining Milk with Sugar and Salt
Pour the remaining milk into a medium saucepan, add the pinch of salt and sugar, then heat over medium heat. Stir gently until the mixture is steaming hot but not boiling—that’s key. Boiling can cause the milk to scorch or create a skin that’s hard to fix. You’ll want to watch closely here and swirl the pot so the heat distributes evenly.
Step 3: Temper the Egg Yolks
While the milk is heating, whisk the egg yolks in a bowl until smooth. Then, slowly pour about ½ cup of the hot milk into the yolks in a thin stream, whisking constantly. This “tempering” warms the yolks gently so they don’t scramble. When I first tried skipping this step, I ended up with scrambled eggs (not ideal), so trust me—it’s worth the extra second!
Step 4: Combine and Thicken the Pudding
Pour the egg yolk mixture back into the saucepan, then add the cornstarch-milk mixture. Whisk everything together constantly over medium heat as the pudding thickens and just starts to simmer—keep your eyes peeled! It usually takes about 3-5 minutes. If you stop whisking, you risk clumps or burning on the bottom. This part feels a bit like cooking risotto—constant attention pays off!
Step 5: Finish with Butter and Vanilla
Remove the pot from heat and whisk in the butter and vanilla extract immediately. The butter gives the pudding a lovely shine and richness, while the vanilla adds its unmistakable floral sweetness. This step is like the final magic touch that makes this pudding truly special.
Step 6: Chill or Serve Warm
Pour the pudding into serving dishes, and press plastic wrap directly onto the surface to prevent a skin from forming. Now, you can either serve it warm right away (perfect on chilly days) or chill it in the fridge for several hours for a firmer texture. Personally, I adore it both ways—warm for immediate comfort, chilled for a refreshing dessert on hot days.
Pro Tips for Making Homemade Vanilla Pudding Recipe
- Lump-Free Guarantee: Always mix cornstarch with cold milk before adding it to the hot mixture to avoid lumps.
- Constant Whisking: Keep whisking during cooking to prevent the pudding from sticking or burning on the bottom.
- Temper Egg Yolks Slowly: Pour hot milk slowly into yolks to avoid curdling—this step saved me from a disappointing scramble many times!
- Prevent Skin Formation: Pressing plastic wrap directly on the pudding’s surface as it cools stops that annoying film from forming.
How to Serve Homemade Vanilla Pudding Recipe
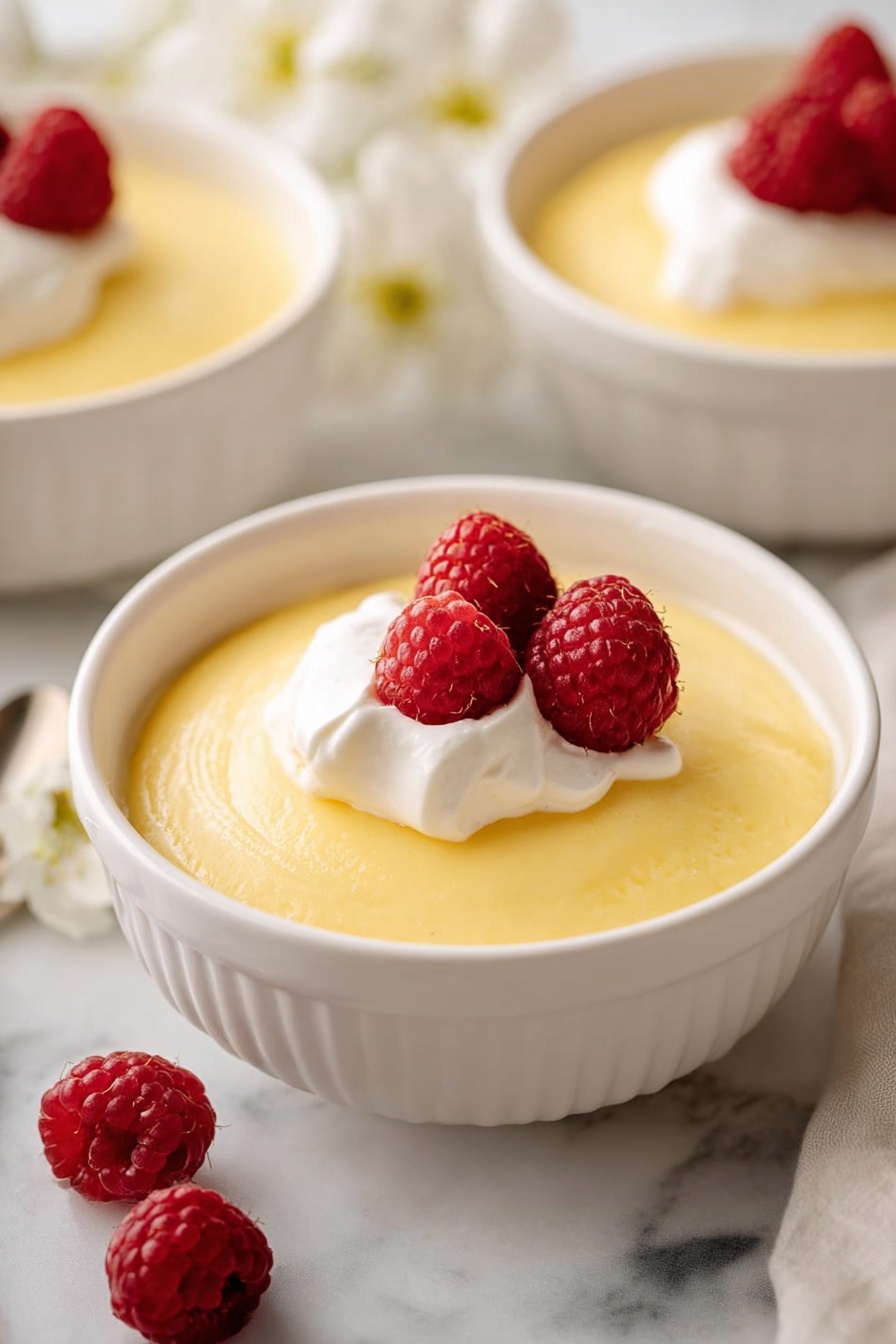
Garnishes
One of my favorite things about this pudding is how easy it is to dress up. I often top it with a sprinkle of freshly grated nutmeg, or sometimes a handful of fresh berries for a pop of tartness and color. Toasted coconut flakes or a dollop of whipped cream also add a fun texture contrast. You’ll find that these simple touches make it feel like a special treat every time.
Side Dishes
This pudding pairs wonderfully with light, crisp cookies like ladyfingers or shortbread. I’ve also served it alongside poached pears or sliced fruits for an elegant dessert plate. For kids, I love pairing it with vanilla wafers or graham crackers for a nostalgic combo that never fails.
Creative Ways to Present
For parties or holidays, I’ve spooned this pudding into pretty glasses layered with crushed cookies and fresh fruit for a trifle-style dessert. Another fun way is to fill mini mason jars, tie a ribbon around them, and hand them out as sweet favors. Those little personal touches always get compliments and make your Homemade Vanilla Pudding Recipe feel extra special.
Make Ahead and Storage
Storing Leftovers
I store leftover pudding right in the serving dishes, covered tightly with plastic wrap pressed to the surface to keep it fresh. It keeps beautifully in the fridge for up to 3 days. This way, you can enjoy creamy goodness for a few days without worrying about it drying out or forming lumps.
Freezing
Freezing pudding can be a bit tricky because the texture sometimes changes, becoming grainy or watery after thawing. From my experience, if you really want to freeze it, do so in an airtight container and thaw it slowly overnight in the fridge. Then, re-whisk or stir gently before serving to help restore some smoothness.
Reheating
If you prefer your pudding warm, I reheat it gently in a double boiler or on very low heat on the stove, whisking constantly. Microwave works too but be careful to heat in short bursts and whisk in between so it heats evenly without curdling.
FAQs
-
Can I make this pudding without eggs?
Yes! You can omit the egg yolks and increase the cornstarch slightly, but the texture will be different—less rich and silky. If you want a richer egg-free pudding, consider using a store-bought egg replacer or experiment with adding some cream for extra body.
-
Why did my pudding get lumpy?
Lumps usually form if cornstarch isn’t properly mixed with cold liquid before heating, or if the mixture isn’t whisked constantly while cooking. To avoid lumps, always whisk the cornstarch with cold milk first and keep stirring as it thickens over the heat.
-
How long can I store homemade vanilla pudding in the fridge?
Stored properly in an airtight container or covered with plastic wrap pressed to the surface, the pudding will last up to 3 days in the refrigerator. Beyond that, the texture and flavor may deteriorate.
-
Can I use milk alternatives?
You can try using almond milk, oat milk, or coconut milk, but they will affect the flavor and texture. Coconut milk is the closest in creaminess and works best for dairy-free versions. Keep in mind the pudding might not set quite as firmly depending on the milk chosen.
-
Can I make this pudding ahead of time?
Absolutely! You can make the pudding a day ahead. Just cover it with plastic wrap directly on the surface and keep it refrigerated until ready to serve. It tastes even better once chilled, as the flavors meld beautifully.
Final Thoughts
This Homemade Vanilla Pudding Recipe truly holds a special place in my heart. It’s one of those recipes that’s simple enough for beginners but delicious enough to impress anyone. Whenever I make it, I’m reminded of cozy family dinners and those little sweet moments that bring people together. I encourage you to try it out—once you do, this silky, smooth pudding will become your go-to comfort dessert just like it is mine.
Print
Homemade Vanilla Pudding Recipe
- Prep Time: 5 minutes
- Cook Time: 15 minutes
- Total Time: 20 minutes
- Yield: 6 servings
- Category: Dessert
- Method: Stovetop
- Cuisine: American
Description
This smooth and creamy homemade vanilla pudding is a classic dessert made with simple ingredients like whole milk, egg yolks, and vanilla extract. Perfect for a comforting treat, it can be served warm right away or chilled for a refreshing finish. The pudding is thickened gently on the stovetop using cornstarch and richened with butter for a luscious texture.
Ingredients
Milk Mixture
- 3 cups whole milk, divided
- Pinch of salt
- ¾ cup sugar
Thickening Agent
- 3 tablespoons cornstarch
Egg Mixture
- 3 egg yolks
Flavoring and Finish
- 1 tablespoon butter
- 1 teaspoon pure vanilla extract
Instructions
- Prepare Cornstarch Mixture: In a small bowl, whisk together ¼ cup of the milk with the cornstarch until smooth. Set this mixture aside for later use.
- Heat Milk, Salt, and Sugar: In a medium saucepan, combine the remaining milk, pinch of salt, and sugar. Heat the mixture over medium heat, stirring occasionally, until it becomes steaming but not boiling.
- Temper Egg Yolks: While the milk heats, whisk the egg yolks in a separate small bowl. Once the milk is steaming, gradually pour about ½ cup of the hot milk mixture into the egg yolks while whisking constantly to prevent curdling.
- Combine and Thicken: Slowly add the egg yolk mixture back into the saucepan with the remaining milk mixture, followed by the cornstarch mixture. Continue cooking over medium heat, whisking constantly, until the pudding begins to simmer and thickens to the desired consistency.
- Finish with Butter and Vanilla: Remove the saucepan from the heat and whisk in the butter and vanilla extract until fully incorporated, giving the pudding a rich and creamy flavor.
- Serve and Chill: Pour the pudding into individual serving dishes. Press a layer of plastic wrap directly onto the surface of the pudding to prevent a skin from forming. The pudding can be served warm immediately or chilled in the refrigerator for several hours for a firmer texture.
Notes
- Whisk constantly during cooking to avoid lumps and ensure a smooth pudding.
- Tempering the egg yolks with hot milk prevents them from scrambling when added to the saucepan.
- Pressing plastic wrap directly on the pudding’s surface is key to preventing a skin from forming.
- For a lighter pudding, you can substitute some of the whole milk with lower-fat milk, but whole milk provides the creamiest texture.
- The pudding keeps well covered in the refrigerator for up to 3 days.
Nutrition
- Serving Size: 1/6 of recipe (about 150g)
- Calories: 210
- Sugar: 30g
- Sodium: 90mg
- Fat: 7g
- Saturated Fat: 4.5g
- Unsaturated Fat: 2g
- Trans Fat: 0g
- Carbohydrates: 35g
- Fiber: 0g
- Protein: 5g
- Cholesterol: 125mg

