
If you’re looking to impress at your holiday gathering with something festive, fun, and downright delicious, this Christmas Red Velvet Poke Cake Recipe is your new go-to. I absolutely love how this cake blends the classic rich red velvet flavor with a tangy cheesecake pudding that seeps into every bite, topped with a festive whipped cream and colorful candies that scream Christmas cheer. Trust me, once you try this, it’ll be a permanent feature on your holiday dessert table!
Why You’ll Love This Recipe
- Festive and Flavorful: The red velvet cake paired with cheesecake pudding creates a decadent, creamy texture you won’t get from a regular cake.
- Easy to Make: Using a cake mix and instant pudding, you can whip this up without hours of prep, perfect for busy holiday seasons.
- Poke Cake Magic: Those perfectly spaced holes soak up the pudding for moistness with every forkful.
- Beautiful Presentation: The green-tinted whipped topping and colorful candy garnishes make it a centerpiece worthy dessert.

Ingredients You’ll Need
I love that the ingredients for this Christmas Red Velvet Poke Cake Recipe are simple and mostly pantry staples, yet the results are anything but ordinary. Choosing good quality cake mix and fresh milk really helps the flavors shine through.
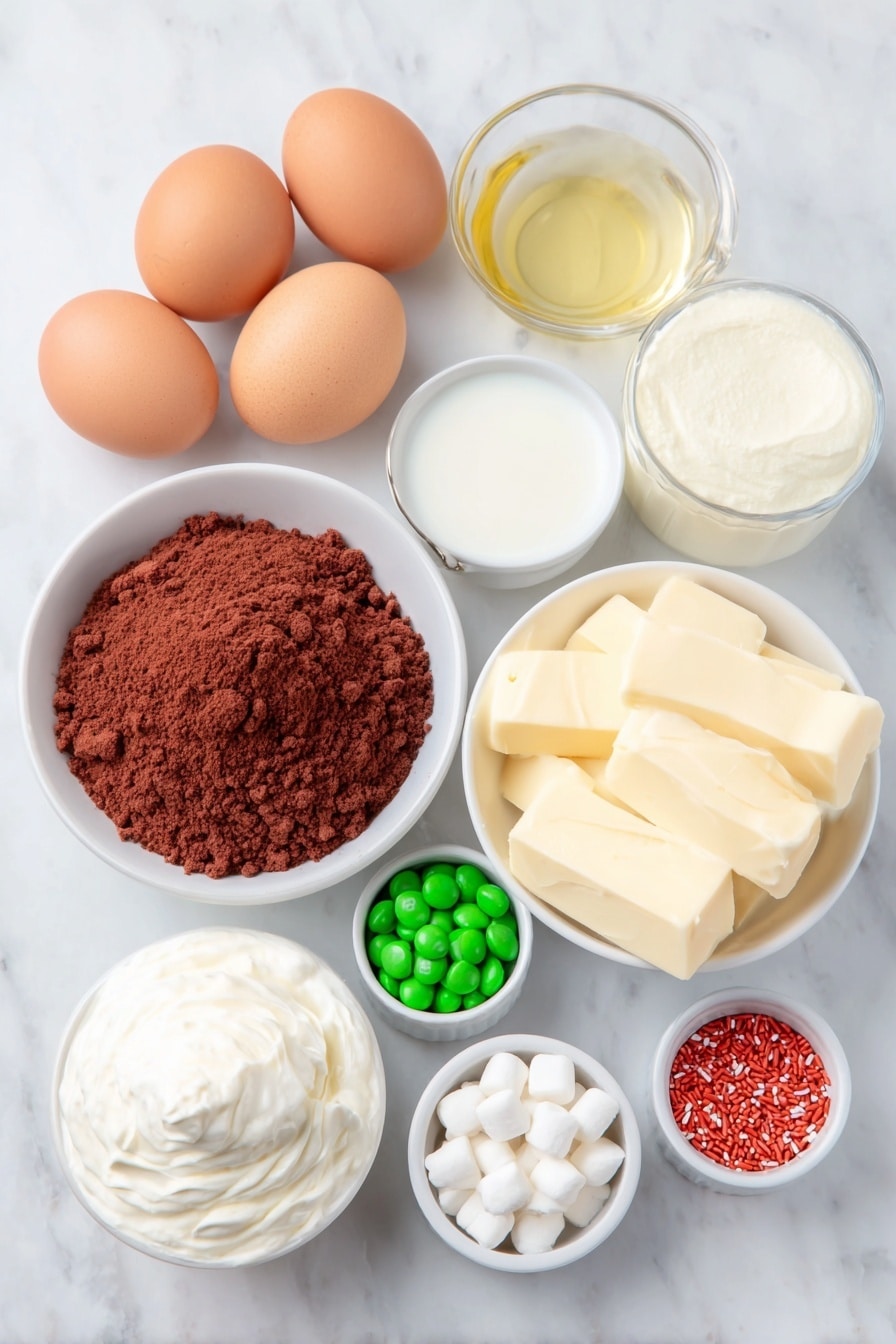
- Red velvet cake mix: Using a trusted brand ensures that perfect rich cocoa flavor and that signature red hue.
- Water: Just as called for on the cake mix box; key for the right cake texture.
- Vegetable oil: Keeps the cake moist and tender.
- Eggs: Bind everything together and add richness.
- Whole milk: Opt for whole milk for creaminess, especially for the pudding mix.
- Cheesecake flavored instant pudding mix: This is the secret star—adds a creamy, tangy layer that soaks into the cake beautifully.
- Whipped topping (thawed): Provides a light, fluffy finish that contrasts the dense cake and pudding.
- Green food coloring: Just a few drops transform the whipped topping into a festive green, perfect for Christmas.
- Mini marshmallows: Adds texture and fun to the topping.
- Red and green M&M’s: For that classic colorful holiday sprinkle.
- Red sprinkles: To give it an extra festive sparkle.
Variations
I love customizing this Christmas Red Velvet Poke Cake Recipe depending on who I’m sharing it with, and honestly, you’ll find it’s super adaptable to your own preferences or dietary needs.
- Non-Dairy Variation: I once swapped whipped topping for coconut whipped cream and used almond milk-based pudding to make it dairy-free—still super tasty and festive!
- Extra Chocolate: For serious chocolate lovers, adding mini chocolate chips to the pudding layer gives an indulgent twist.
- Different Candy Toppings: Some years, I switch out M&M’s for cranberries or pistachios for a fresh twist.
- Snowy Twist: Sprinkle shredded coconut over the topping to mimic snow—my kids adored that version.
How to Make Christmas Red Velvet Poke Cake Recipe
Step 1: Bake the Perfect Red Velvet Cake Base
Start by preheating your oven to 350°F and greasing a 9×13 pan with baker’s spray (I like Baker’s Joy because it has flour included). Preparing the cake mix by hand or with a handheld mixer, follow the box instructions carefully: combine the mix, water, vegetable oil, and eggs until smooth. Pour it into your pan and bake for 25 minutes. The cake should spring back lightly when touched. Don’t skip greasing the pan well—this cake is delicate and you want it to release easily.
Step 2: Poke the Cake and Pour on the Cheesecake Pudding
While the cake is still warm but not hot, grab a wooden spoon with a rounded handle and poke holes about ½ inch apart all over the cake. This part is fun—the holes let the cheesecake pudding seep in so each bite is moist and creamy. Whisk together the cheesecake pudding mix and cold whole milk until it thickens (about 1 to 1½ minutes), then pour it evenly over the cake. I like to use a spatula to gently smooth the pudding for full coverage. Cover it tightly and pop it in the fridge for at least 4 hours. This patience pays off beautifully!
Step 3: Add the Festive Whipped Topping and Garnishes
When you’re ready to serve, stir green food coloring into the thawed whipped topping until evenly tinted. This little pop of color brings the holiday spirit to life! Spread the green whipped topping evenly over the chilled pudding layer, then sprinkle on mini marshmallows, red and green M&M’s, and a dusting of red sprinkles. The contrast of the white marshmallows with the green and red candies makes this cake visually stunning and super inviting.
Pro Tips for Making Christmas Red Velvet Poke Cake Recipe
- Don’t Overbake the Cake: I learned the hard way that if you leave it too long, the cake won’t absorb the pudding well—aim for just a light spring back.
- Use Cold Milk for Pudding: Mixing the instant pudding with cold milk helps it thicken properly and soak into the cake.
- Chill Thoroughly: Give the pudding time to set in the fridge—at least 4 hours—to get that perfect melded texture.
- Color Your Whipped Topping Last: Stir in food coloring gently to avoid overmixing and losing volume in your whipped topping.
How to Serve Christmas Red Velvet Poke Cake Recipe
Garnishes
I usually stick with mini marshmallows and red and green M&M’s—they add just the right pop of color and texture. Sometimes I toss on colorful sprinkles or even edible glitter for extra sparkle when serving at a party. It makes the whole dessert feel so special and festive!
Side Dishes
This poke cake pairs wonderfully with a light cup of hot cocoa or a clear cranberry spritzer. I’ve also served it alongside simple holiday cookies to round out a dessert plate at Christmas gatherings—everyone loved the contrast!
Creative Ways to Present
Once, I made individual poke cakes in small glass bowls for a fun presentation that let guests see those luscious pudding layers. You can also make the top layer sugar cookie cutouts pressed lightly into the whipped topping for a personalized festive touch. Little details like a dusting of powdered sugar “snow” can really amp up the holiday vibes.
Make Ahead and Storage
Storing Leftovers
I keep leftovers covered tightly in the fridge with plastic wrap or in an airtight container. The flavors meld beautifully overnight, but the marshmallow topping might get a bit soft after a day or two. I recommend enjoying it within 3 days for the best texture.
Freezing
I’ve tried freezing slices wrapped in foil and stored in airtight containers. It works okay, but the marshmallow topping can get a little rubbery after thawing. If you want to freeze, I suggest freezing only the cake and pudding layers, then adding fresh whipped topping and decorations after thawing.
Reheating
Because this is a chilled dessert, reheating isn’t usually necessary. If you prefer it at room temperature, just let slices sit out for 15-20 minutes before serving. This loosens the texture and brings out the flavors nicely.
FAQs
-
Can I use homemade red velvet cake instead of cake mix?
Absolutely! If you have a favorite homemade red velvet cake recipe, feel free to use that. Just make sure the cake is sturdy enough to hold the pudding without falling apart when poked. Baking at a standard 9×13 pan size also helps with soaking.
-
How long should I poke holes in my cake?
You’ll want to poke holes about every ½ inch across the entire surface. I usually go row by row, covering every inch so the pudding seeps through evenly. Too few holes means less pudding absorption; too many can cause the cake to break.
-
Can I make this recipe ahead for a party?
Yes! This poke cake actually tastes better after a few hours chilling, making it great for party prep. Just assemble it a day before serving and keep covered in the refrigerator.
-
What is the best way to color the whipped topping?
Use gel or liquid food coloring and stir gently until the color is uniform. Be careful not to overmix or you might deflate the whipped topping. Add color little by little to reach your perfect shade of green.
Final Thoughts
This Christmas Red Velvet Poke Cake Recipe is a holiday game-changer in my book. It’s surprisingly easy to make but feels like a show-stopper with all its layers, colors, and textures. Every year when I bring it out, my family goes crazy for that rich cake soaked in creamy cheesecake pudding and topped with that snowy green whipped topping—it truly feels like a celebration in every bite. I’m confident once you try it, you’ll be making it your holiday tradition too. So go ahead, give it a try and share this joyful cake with your loved ones this Christmas season!
Print
Christmas Red Velvet Poke Cake Recipe
- Prep Time: 10 minutes
- Cook Time: 25 minutes
- Total Time: 4 hours 35 minutes
- Yield: 12 servings
- Category: Dessert
- Method: Baking
- Cuisine: American
Description
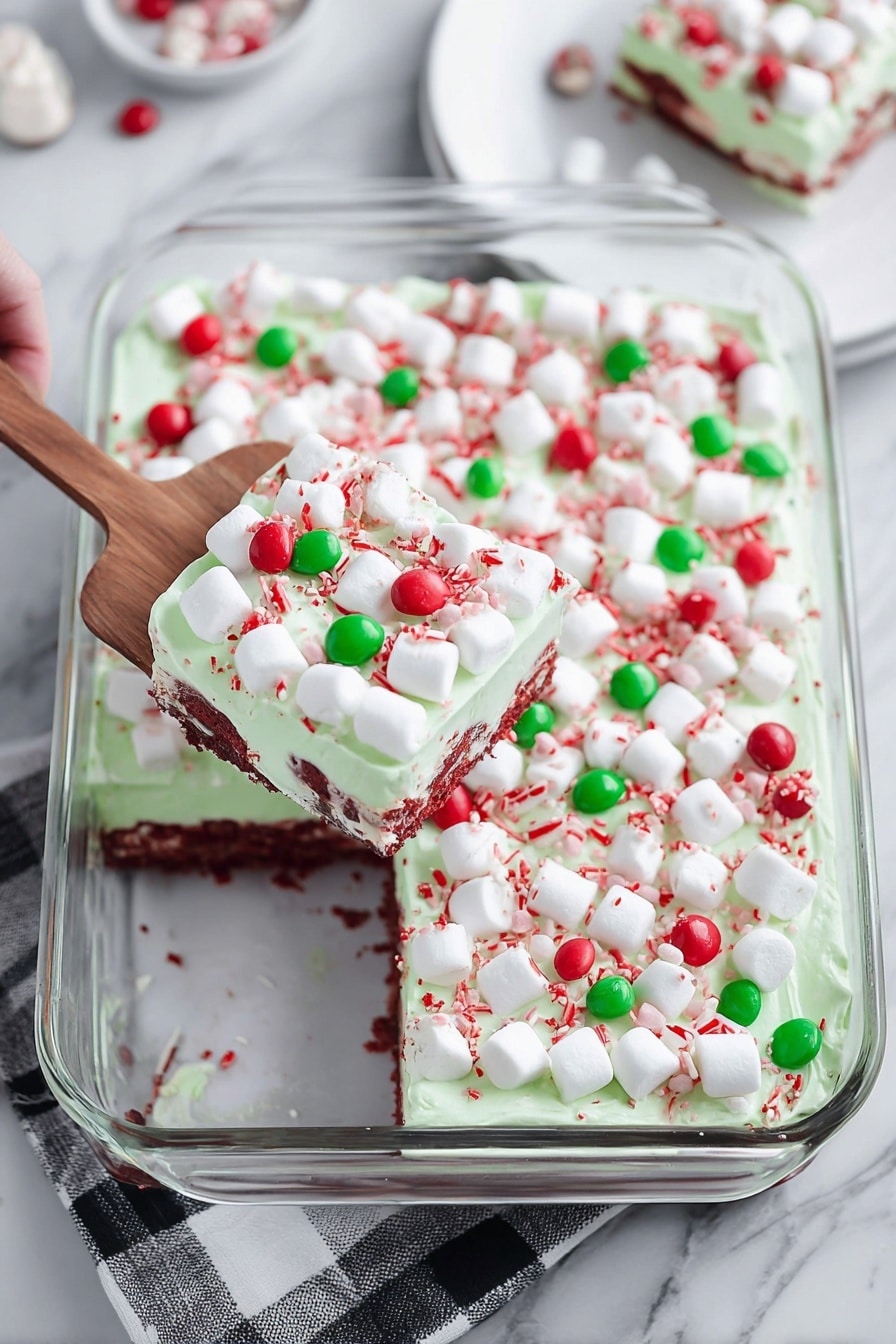
This festive Christmas Red Velvet Poke Cake is a delightful layered dessert featuring a moist red velvet cake base, infused with cheesecake-flavored instant pudding, and topped with vibrant green-tinted whipped topping, mini marshmallows, and colorful red and green candies. Perfect for holiday celebrations, this easy-to-make poke cake combines rich flavors and playful decorations to impress your family and guests.
Ingredients
Red Velvet Cake:
- 15.25 ounce red velvet cake mix
- 1¼ cup water
- ½ cup vegetable oil
- 3 large eggs
Cheesecake Flavored Instant Pudding Mix:
- 3¾ cups cold whole milk
- 6.8 ounce cheesecake flavored instant pudding mix
Whipped Topping and Decoration:
- 16 ounce (2 tubs) whipped topping, thawed
- 10-12 drops green food color
- 3 cups mini marshmallows
- ¼ cup red M&M’s
- ¼ cup green M&M’s
- red sprinkles
Instructions
- Prepare Red Velvet Cake: Preheat the oven to 350°F (175°C). Spray a 9×13 inch baking pan with bakers spray such as Baker’s Joy, then set it aside.
- Mix Cake Batter: In a medium mixing bowl, use a handheld mixer on medium speed to prepare the red velvet cake mix according to the box directions, combining the cake mix, water, vegetable oil, and eggs until smooth.
- Bake Cake: Pour the batter into the prepared pan and bake for 25 minutes or until a toothpick inserted in the center comes out clean.
- Poke Holes in Cake: When the cake is out of the oven but still warm, use the rounded handle of a wooden spoon to poke holes about ½ inch apart all over the surface of the cake. Allow the cake to cool completely.
- Prepare Cheesecake Pudding: In a medium bowl, whisk together the cheesecake flavored instant pudding mix and cold whole milk for 1 to 1 ½ minutes until the pudding starts to thicken.
- Pour Pudding Over Cake: Evenly pour the thickened pudding over the cooled cake, using a spatula to smooth it into the holes and cover the cake surface thoroughly.
- Chill Cake: Cover the cake tightly with plastic wrap and refrigerate for at least 4 hours to set the pudding layer.
- Tint Whipped Topping: Stir green food coloring into the thawed whipped topping until the color is uniform and well mixed.
- Spread Whipped Topping: Remove the cake from the refrigerator and evenly spread the tinted whipped topping over the pudding layer.
- Add Decorations: Sprinkle the mini marshmallows evenly over the whipped topping layer.
- Finish Decorating: Add the red and green M&M’s evenly over the marshmallows, then top with red sprinkles to complete the festive look.
- Serve: Cut the cake into 12 squares approximately 3 inches by 3 inches each and serve chilled.
Notes
- Storage: Keep leftovers covered in the refrigerator for up to 3 days for optimal freshness.
- You can substitute low-fat milk if desired, but whole milk yields the creamiest pudding texture.
- For a stronger color contrast, adjust the amount of green food coloring to your preference.
- Make sure to poke the holes evenly and closely spaced to allow pudding to seep nicely into the cake for best flavor.
- Allow the cake to cool completely before adding the pudding layer to prevent melting or sogginess.
Nutrition
- Serving Size: 1 slice (approx. 3×3 inches)
- Calories: 350 kcal
- Sugar: 28g
- Sodium: 300mg
- Fat: 18g
- Saturated Fat: 8g
- Unsaturated Fat: 7g
- Trans Fat: 0g
- Carbohydrates: 42g
- Fiber: 1g
- Protein: 4g
- Cholesterol: 50mg


