
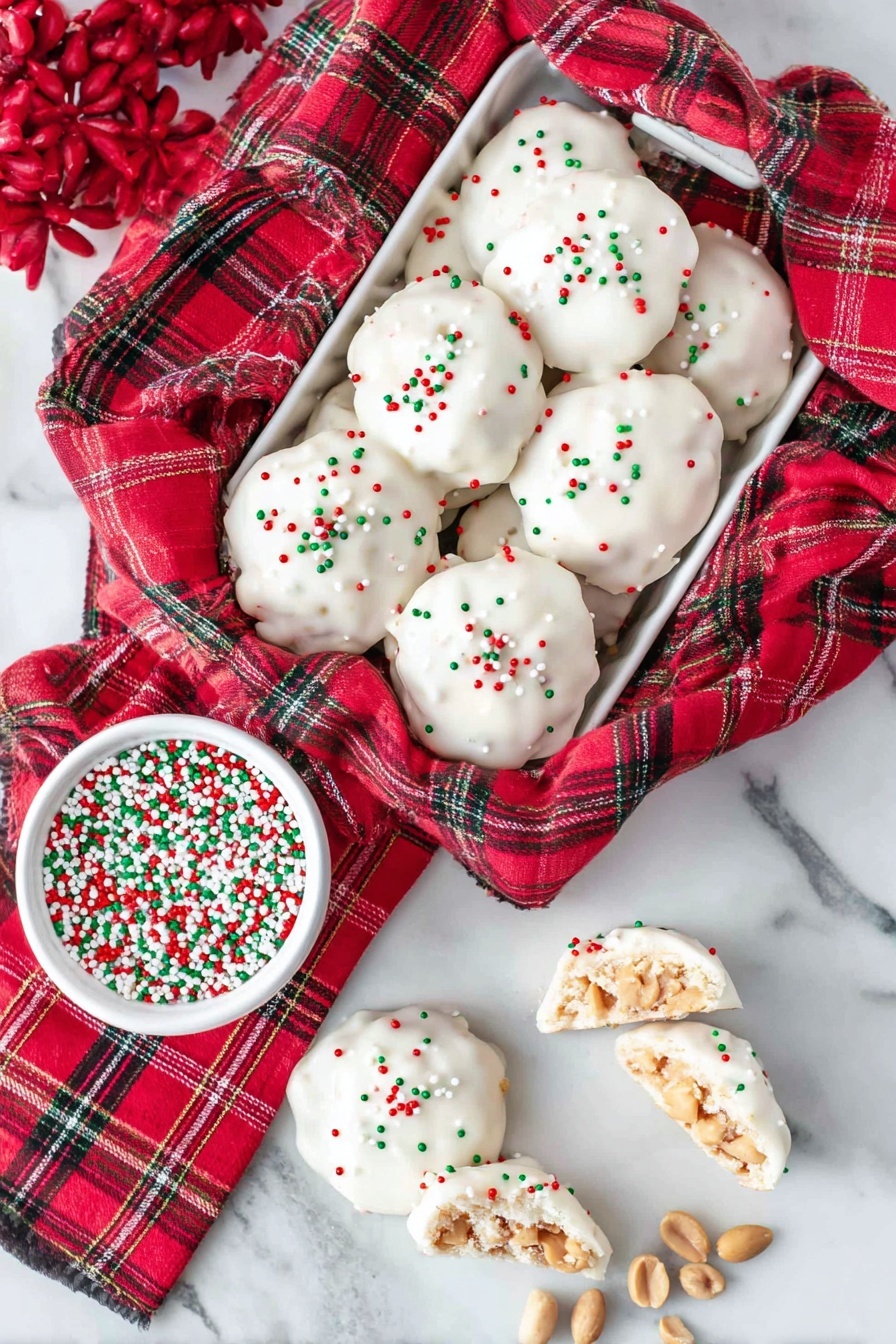
If you’re looking for a sweet treat that’s as nostalgic as it is delicious, you’ve got to try my Polar Bear Paws Candy Recipe. This candy is a delightful blend of creamy caramel, crunchy peanuts, and smooth white chocolate that’ll have your taste buds dancing. I love this because it’s easy to make but feels like a special homemade gift every time. Stick with me and I’ll walk you through every step to make sure your Polar Bear Paws turn out perfect!
Why You’ll Love This Recipe
- Simple Ingredients: You probably already have most of these pantry staples on hand, making it easy to whip up without a special trip.
- Perfect Texture Combination: The soft caramel mixed with crunchy peanuts and cool white chocolate coating creates an irresistible bite every time.
- Great for Gifting: These candies look beautiful when coated and sprinkled, making them perfect for sharing with friends and family.
- Fun to Make: You’ll enjoy the process, especially when you see how easy it is to dip and decorate these little treats.

Ingredients You’ll Need
Each ingredient in this Polar Bear Paws Candy Recipe plays a star role, from creamy caramel squares to roasted salted peanuts that add the perfect crunch and saltiness to balance the sweetness.
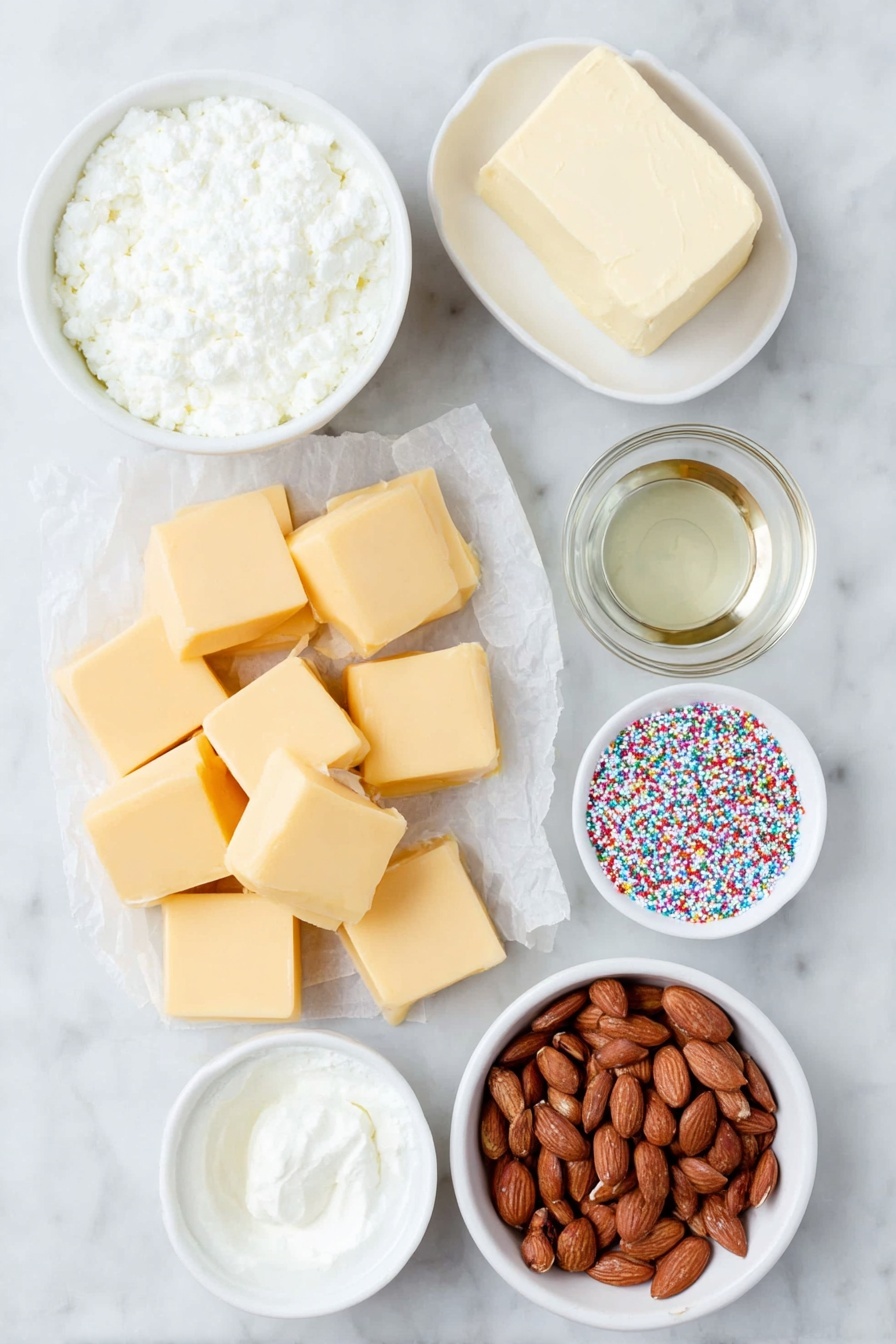
- Caramel squares: Using unwrapped caramel squares ensures you get that melty, buttery flavor; no need to fuss with caramel sauce here.
- Heavy whipping cream: A little cream makes the caramel extra creamy and smooth, giving your candy that perfect soft chew.
- Butter: Adds richness and helps with that dreamy caramel texture.
- Vanilla extract: Just a splash elevates the flavor, warming it up and making it taste homemade.
- Roasted salted peanuts: I love these for the crunch and salty kick—they balance out the sweetness perfectly.
- White almond bark: This melts beautifully and hardens with a nice sheen, perfect for coating your clusters.
- Sprinkles (optional): For a touch of fun and color, great if you’re making these for holidays or parties.
Variations
Don’t be shy about making this Polar Bear Paws Candy Recipe your own! I’ve played around with a few tweaks over the years, and each brings a new twist that’s just as tasty.
- Nut substitutions: I once tried chopped pecans instead of peanuts, and honestly, the cozy, buttery flavor was fantastic.
- Dairy-free option: Use coconut cream and dairy-free butter alternatives to make a vegan-friendly version that still tastes rich.
- Chocolate coating: Swap out white almond bark for semi-sweet chocolate if you prefer a darker, less sweet coating.
- Extra texture: Toss in mini chocolate chips or crushed pretzels into the caramel-peanut mix for a fun crunch.
How to Make Polar Bear Paws Candy Recipe
Step 1: Melt the Caramel Mixture
Start by lining a baking sheet with parchment paper—trust me, cleanup is way easier this way. Then, in a medium pot over medium heat, add your unwrapped caramel squares along with heavy whipping cream, butter, and vanilla extract. Stir constantly and patiently until everything melts together into a smooth, creamy caramel sauce. Be careful not to rush this part or increase the heat too much; a low-and-slow melt prevents burning and keeps the flavor pure.
Step 2: Stir in the Peanuts
Once your caramel base is silky smooth, stir in the roasted salted peanuts. This is where the magic happens—the peanuts soak up some caramel, giving you pockets of crunch surrounded by luscious caramel.
Step 3: Create Your Candy Clusters
Using a tablespoon, scoop out mounds of the caramel-peanut mixture onto your prepared parchment. Try to space them evenly so they don’t spread together. Now, pop this tray into the fridge for about an hour. Chilling is key here—it firms up the clusters, making them easier to handle for the next delicious step.
Step 4: Dip in Melted White Almond Bark
In a microwave-safe bowl, melt the white almond bark in 30-second increments, stirring between each interval until it’s smooth. This white chocolatey coating is what makes these candies stand out. Now comes the fun (and a bit fast!) part: dip each chilled caramel cluster fully into the melted almond bark, allowing excess to drip back into the bowl. Place them back on parchment and quickly add sprinkles if you’re using them—this adds a festive touch and a little texture.
Step 5: Chill Again to Set
Return your dipped candy clusters to the refrigerator for 30 to 60 minutes so that the almond bark sets firm. Once dry, your Polar Bear Paws candies are ready to enjoy or wrap up as gifts!
Pro Tips for Making Polar Bear Paws Candy Recipe
- Work in Batches: I always remove a few clusters at a time from the fridge to dip, so they don’t get too soft sitting out on the counter.
- Use Parchment Paper: It prevents sticking and makes cleanup so much easier—you’ll thank me later.
- Stir the Almond Bark Well: After melting, stirring well removes any lumps and ensures a glossy coating on your candies.
- Don’t Rush Cooling Times: Let the candies set fully in the fridge so your coating doesn’t get sticky or blemished.
How to Serve Polar Bear Paws Candy Recipe
Garnishes
I like to keep it simple with classic rainbow sprinkles or crushed peppermint during the holidays. It adds just the right pop of color and extra crunch. If you prefer something more sophisticated, finely chopped toasted coconut or a dash of edible glitter can turn these treats into party-ready delights.
Side Dishes
These candies shine on their own, but if you want to build a dessert platter, try pairing them with warm spiced cider or a cozy cup of hot cocoa. They also pair wonderfully alongside a simple cheese board with mild cheeses to balance the sweetness.
Creative Ways to Present
For holiday gifting, I like to place a few Polar Bear Paws candies in small clear boxes layered with tissue paper. You can also arrange them on a festive platter with edible flowers for a charming dessert table display. Wrapping individual candies in decorative parchment and tying with twine makes an adorable party favor, too.
Make Ahead and Storage
Storing Leftovers
I keep my leftover Polar Bear Paws candies in an airtight container at room temperature. To keep them from sticking together, I layer parchment paper between each row. They hold up beautifully for about a week, still tasting fresh and perfect.
Freezing
Freezing these candies works well if you want to make them ahead of time. I wrap each piece individually in wax paper, then place them in a sealed freezer bag. When thawed at room temperature, they keep their texture nicely without sweating or sogginess.
Reheating
Since Polar Bear Paws are best enjoyed cool, I don’t recommend reheating. If you want to soften them slightly, just let them sit at room temperature for 10-15 minutes. That way, you get the caramel chewiness without melting the coating.
FAQs
-
Can I use different nuts in the Polar Bear Paws Candy Recipe?
Absolutely! While roasted salted peanuts give the classic flavor and crunch, feel free to use almonds, pecans, or even cashews. Just make sure they’re roasted to bring out that nutty flavor and lightly salted to balance the sweetness.
-
What’s the best way to melt white almond bark without burning it?
Microwaving in short 30-second increments and stirring in between is key. Using medium power can help avoid scorching. If you prefer, melting gently over a double boiler works wonderfully too and gives you more control.
-
Can I make this recipe vegan or dairy-free?
Yes! Swap the butter for a plant-based alternative and use coconut cream instead of heavy whipping cream. Make sure to choose dairy-free white chocolate or almond bark substitutes. The texture might vary slightly but it’s still delicious.
-
How long will Polar Bear Paws candy stay fresh?
Stored properly at room temperature in an airtight container with parchment layers, these candies will stay fresh for up to 7-10 days. Avoid humid environments to keep the almond bark coating crisp.
Final Thoughts
Whenever I make Polar Bear Paws Candy Recipe, it brings back so many warm memories—whether it’s holiday baking with my family or treating friends to something special. It’s one of those recipes that feels fancy but is surprisingly simple, which makes it a go-to whenever I want to impress without stress. I really hope you give this a try and love it as much as I do. Trust me, your sweet tooth will thank you!
Print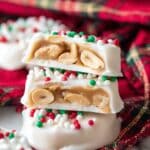
Polar Bear Paws Candy Recipe
- Prep Time: 15 minutes
- Cook Time: 15 minutes
- Total Time: 30 minutes
- Yield: 20 candies
- Category: Dessert
- Method: Stovetop
- Cuisine: American
Description
Polar Bear Paws Candy is a delightful no-bake treat featuring a rich caramel and peanut cluster coated in creamy white almond bark and optionally decorated with festive sprinkles. These candies offer a perfect combination of chewy caramel, crunchy peanuts, and smooth white chocolate, making them an irresistible sweet snack or holiday treat.
Ingredients
Caramel Peanut Clusters
- 11 ounce bag caramel squares, unwrapped
- 3 Tablespoons heavy whipping cream
- 1 Tablespoon butter
- 1 teaspoon vanilla extract
- 1 cup roasted salted peanuts
Coating
- 1 pound white almond bark
- Sprinkles, optional
Instructions
- Prepare Baking Sheet: Line a baking sheet with parchment paper and set it aside to keep candies from sticking.
- Melt Caramel Mixture: In a medium pot over medium heat, combine caramel squares, heavy whipping cream, butter, and vanilla extract. Stir continuously until the mixture is fully melted and smooth.
- Add Peanuts: Stir in the roasted salted peanuts until they are evenly coated with the caramel mixture.
- Form Clusters: Using a spoon, drop tablespoon-sized mounds of the caramel peanut mixture onto the prepared parchment paper.
- Chill Clusters: Place the baking sheet in the refrigerator and chill the clusters for about 1 hour or until they are set and firm.
- Melt Almond Bark: In a microwave-safe bowl, melt the white almond bark by heating in 30-second intervals, stirring between each until smooth and fully melted.
- Dip Candies: Quickly dip each caramel peanut cluster into the melted white almond bark, allowing excess coating to drip off, then return them to the parchment paper. If desired, immediately sprinkle the candies with sprinkles to decorate.
- Final Chill: Return the dipped candies to the refrigerator for 30-60 minutes or until the coating is fully hardened and set.
Notes
- Work quickly when dipping candies in melted almond bark to prevent hardening and softening of the clusters.
- Removing the candies from the refrigerator in small batches helps keep them firm during the dipping process.
- Store candies at room temperature for 7-10 days.
- To prevent sticking, separate layers of candies with parchment paper.
Nutrition
- Serving Size: 1 candy
- Calories: 150
- Sugar: 17g
- Sodium: 90mg
- Fat: 8g
- Saturated Fat: 4g
- Unsaturated Fat: 3g
- Trans Fat: 0g
- Carbohydrates: 20g
- Fiber: 1g
- Protein: 2g
- Cholesterol: 10mg


