
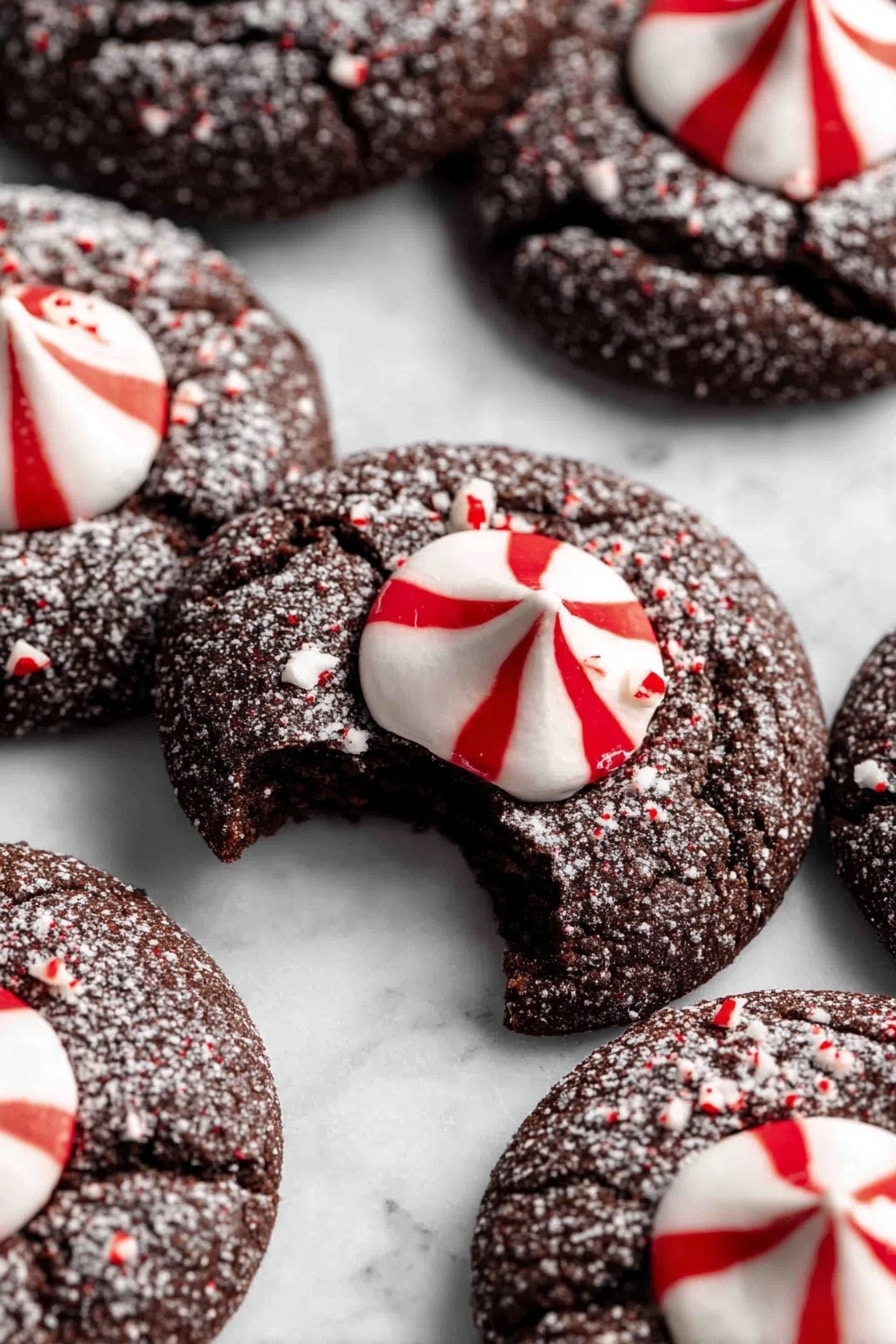
If you’re on the hunt for a festive, melt-in-your-mouth treat that’s as fun to make as it is to eat, you’ve hit the jackpot with this Chocolate Peppermint Kiss Cookies Recipe. I absolutely love how these cookies combine rich chocolate, a hint of peppermint, and that signature Hershey’s Kiss on top—it’s like a cozy holiday hug in cookie form. Stick around, because I’m going to share my favorite tips and tricks to help you nail these every single time!
Why You’ll Love This Recipe
- Perfect Holiday Flavor Blend: The chocolate and peppermint combo is classic and totally addictive.
- Simple Ingredients: You probably already have everything in your pantry, making this quick to whip up.
- Beautiful Presentation: The frozen Kisses keep their shape, making each cookie look like a little work of art.
- Great for Gifting or Parties: These cookies always fly off the plate, whether at holiday parties or as sweet homemade gifts.

Ingredients You’ll Need
Choosing quality ingredients really elevates these cookies, especially the cocoa powder and the famous Candy Cane Hershey Kisses—those frozen candies are key! I like to use Dutch-processed cocoa for a deeper chocolate flavor that complements the mint perfectly.
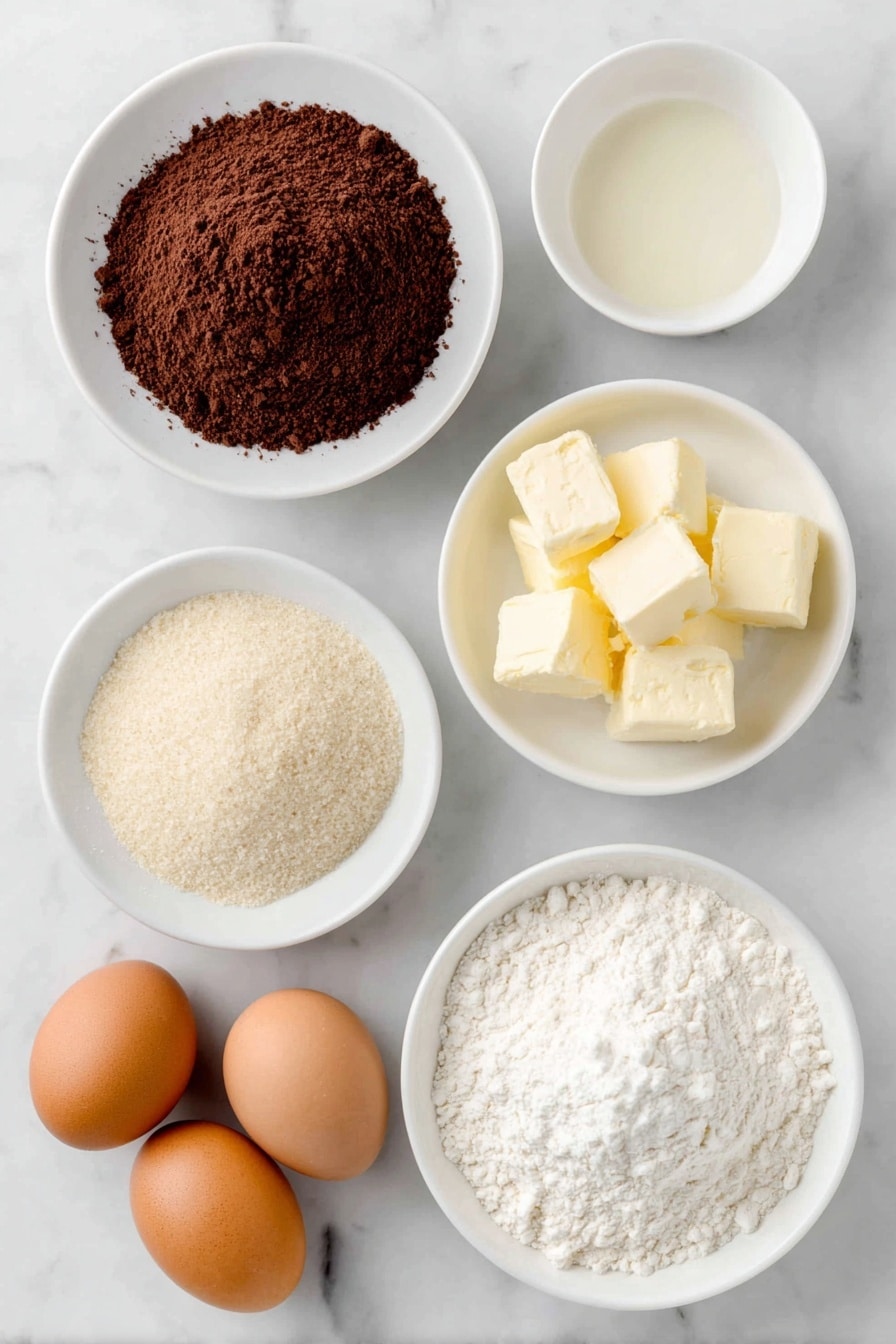
- All-purpose flour: Make sure to measure properly to keep your cookies tender.
- Dutch-process cocoa powder: Gives a rich chocolate flavor that’s less acidic and smoother.
- Baking powder and baking soda: These leavening agents work together to give the cookies just the right lift.
- Salt: Balances the sweetness and enhances the chocolate flavor.
- Unsalted butter: Softened for creamy mixing and best flavor control.
- Light brown sugar: Adds moisture and a subtle caramel note.
- Granulated sugar: Used both in the dough and for rolling to add a bit of sparkle and crunch.
- Egg yolks: Make the cookies tender and impart richness.
- Vanilla extract: Enhances the overall flavor depth.
- Candy Cane Hershey Kisses: Frozen before baking to keep their shape and coat your cookies with peppermint magic.
Variations
I love playing with this Chocolate Peppermint Kiss Cookies Recipe—feel free to tweak it to suit your family’s tastes or dietary needs. You can turn these cookies into your own signature treat by adding your favorite nuts or spices.
- Nutty Upgrade: Adding chopped pecans or walnuts adds a lovely crunch that my family can’t get enough of.
- Gluten-Free Option: Swap the all-purpose flour for a good-quality gluten-free blend; just make sure it has xanthan gum to keep the cookie structure intact.
- Extra Minty: Mix in a dash of peppermint extract to the dough if you want your cookies to pack an extra mint punch.
- Dark Chocolate Kisses: Try substituting with dark chocolate Hershey Kisses for a richer, slightly bittersweet element.
How to Make Chocolate Peppermint Kiss Cookies Recipe
Step 1: Freeze Those Kisses First
Start by unwrapping 34 Candy Cane Hershey Kisses and freezing them for about 30 minutes. This little step makes a huge difference because it keeps the chocolate from melting too fast once they go in the hot cookies—and helps them hold their classic shape. Trust me, skipping this step is a rookie mistake I’ve learned to avoid!
Step 2: Preheat and Prep Your Baking Sheets
While your Kisses chill, preheat your oven to 350°F (175°C). Line three baking sheets with parchment paper—I like to do three because this recipe makes a lot of cookies and gives them room to spread without sticking together.
Step 3: Mix Dry Ingredients
In a medium bowl, whisk together flour, cocoa powder, baking powder, baking soda, and salt. This ensures everything’s evenly distributed so your cookies bake consistently. I always sift my cocoa powder to avoid lumps, which makes for a smoother dough.
Step 4: Cream Butter and Sugars
Using an electric mixer, beat softened butter with both light brown sugar and granulated sugar until creamy and fluffy—this usually takes 1-2 minutes. The texture here is crucial because incorporating air will keep your cookies light, not dense.
Step 5: Add Yolks and Vanilla
Next, add in the egg yolks and vanilla extract. Beat until the mixture pale in color and looks fluffy, about 1-2 minutes. The yolks enrich the dough, so don’t be tempted to substitute with whole eggs for this recipe.
Step 6: Combine Wet and Dry Mixtures
Gradually mix the dry ingredients into the wet until just combined. Avoid overmixing here—you want the dough homogenous but still tender. I’ve found that stopping when you see no more dry streaks makes for the best texture.
Step 7: Shape and Sugar-Coat Your Cookies
Scoop the dough into 34 one-tablespoon portions and roll each into a ball. Then, roll each ball in granulated sugar—it adds a beautiful sparkle and little crunch that contrasts perfectly with the soft cookie. Place them about two inches apart on your prepared baking sheets; I usually do 12 cookies on the first two sheets and 10 on the last.
Step 8: Bake and Press
Bake for 7-8 minutes—7 if you prefer chewier cookies. As soon as they come out of the oven, carefully press a frozen Candy Cane Kiss into the center of each cookie. Press down gently so your Kiss sinks in just enough but doesn’t melt or lose shape. Leaving them on the hot tray lets the cookie gently soften around the chocolate, creating that signature “blossom” effect.
Step 9: Cool Completely and Enjoy
Let your cookies cool completely on the baking sheets so the Kisses set properly. This is absolutely the best way to keep that gorgeous shape without the chocolate spreading or melting. Once cooled, serve them up and watch your friends and family go crazy for these festive treats!
Pro Tips for Making Chocolate Peppermint Kiss Cookies Recipe
- Freeze the Kisses Properly: I always unwrap and freeze them first to keep their iconic shape and prevent melting while baking.
- Measure Flour with Care: I learned the hard way that spooning flour into your cup can make cookies dry; weighing flour or spoon-and-level method works best.
- Don’t Overbake: Pull the cookies at 7 minutes for soft, chewy bites—overbaking toughens the texture.
- Cool on the Sheet: Letting the cookies cool undisturbed keeps the Kisses set perfectly—moving them too soon risks smudging.
How to Serve Chocolate Peppermint Kiss Cookies Recipe
Garnishes
I usually keep it simple with these cookies because they’re already a showstopper. Sometimes I sprinkle just a touch of edible glitter or crushed candy canes on top after pressing in the Kiss for a festive sparkle, but honestly, these look stunning as they are.
Side Dishes
These cookies pair wonderfully with a warm cup of cocoa or minty hot chocolate. I also love serving them alongside a classic eggnog or a simple glass of cold milk to balance that peppermint-chocolate combo.
Creative Ways to Present
For holiday parties, I’ve arranged these cookies on a tiered dessert stand with holiday greenery for a festive centerpiece. Wrapping a few in clear cellophane with a red ribbon makes perfect DIY gifts that feel both thoughtful and elegant.
Make Ahead and Storage
Storing Leftovers
I recommend storing leftover cookies in an airtight container at room temperature. This keeps them fresh and chewy for up to three days, though honestly, they rarely last that long in my house!
Freezing
If you want to prep ahead, you can freeze fully baked cookies (without the Kisses, then add fresh ones after thawing) or freeze the dough balls rolled in sugar. Wrap tightly and freeze up to 3 months. Just thaw overnight before baking or pressing in the frozen Kisses.
Reheating
To revive the fresh-baked feel, pop a leftover cookie in the microwave for 10-15 seconds—watch them closely so the chocolate doesn’t melt too much. This little warm-up brings back that soft, indulgent texture I adore.
FAQs
-
Can I use whole eggs instead of just egg yolks in this Chocolate Peppermint Kiss Cookies Recipe?
While you technically can use whole eggs, I recommend sticking with just the yolks as the recipe states. Egg yolks add richness and tenderness to the cookies, while the whites might make them dryer and less chewy. The texture really benefits from this choice, and I’ve found my cookies turn out perfectly soft and flavorful this way.
-
Why do I need to freeze the Hershey Kisses before baking?
Freezing the Candy Cane Hershey Kisses prevents them from melting too much and losing their shape during baking. It also helps the Kiss to press into the cookie neatly without creating a chocolate puddle. This little trick ensures your cookies look and taste just like the classic peppermint blossoms we all love.
-
Can I make these cookies gluten-free?
Absolutely. Swap the all-purpose flour for a high-quality gluten-free flour blend that includes xanthan gum or another binder. Just note that texture might vary slightly, but they still come out delicious and festive. I recommend testing a small batch to see how your chosen flour behaves.
-
How long do these cookies stay fresh?
Stored in an airtight container at room temperature, these cookies stay soft and fresh for about three days. Beyond that, they can dry out or lose their fresh-baked charm, so enjoy them quickly or freeze extras for later.
Final Thoughts
This Chocolate Peppermint Kiss Cookies Recipe has become a staple in my holiday baking lineup for good reason. It’s easy, festive, and a guaranteed crowd-pleaser that brings a little magic to the kitchen every time. I promise, once you try these, you’ll keep coming back to make them again and again—whether for family, friends, or just that well-deserved cookie-loving moment. So go ahead, preheat that oven, and let these sweet, peppermint-kissed delights fill your home with warmth and joy!
Print
Chocolate Peppermint Kiss Cookies Recipe
- Prep Time: 15 minutes
- Cook Time: 7-8 minutes
- Total Time: 22-23 minutes
- Yield: 34 cookies
- Category: Dessert
- Method: Baking
- Cuisine: American
- Diet: Vegetarian
Description
Delightfully festive and chewy Chocolate Peppermint Blossoms combine rich cocoa-flavored soft cookies with a refreshing peppermint Candy Cane Hershey Kiss center. These holiday treats are perfect for gifting or sharing at celebrations.
Ingredients
Dry Ingredients
- 1 1/2 cups (188 g) all-purpose flour, spooned and leveled
- 1/2 cup (40 g) cocoa powder, Dutch process
- 1/2 tsp baking powder
- 1/2 tsp baking soda
- 1/2 tsp salt
Wet Ingredients
- 3/4 cup (168 g) unsalted butter, softened
- 3/4 cup (165 g) light brown sugar, packed
- 1/4 cup (50 g) granulated sugar
- 2 egg yolks, at room temperature
- 1 tsp vanilla extract
Toppings
- 34 Candy Cane Hershey Kisses, frozen
- 1/4 cup (50 g) granulated sugar for rolling dough
Instructions
- Freeze Kisses: Unwrap 34 Candy Cane Hershey Kisses and place them in the freezer for 30 minutes to firm up their shape for pressing into cookies later.
- Preheat Oven: Heat oven to 350°F (175°C) and line three baking sheets with parchment paper to prepare for baking the cookies.
- Mix Dry Ingredients: In a medium bowl, whisk together the flour, cocoa powder, baking powder, baking soda, and salt until evenly combined to ensure a balanced chocolate base.
- Cream Butter and Sugars: In a large bowl, use an electric mixer to cream the softened butter with brown sugar and granulated sugar for 1-2 minutes until the mixture is light and fluffy.
- Add Egg Yolks and Vanilla: Mix in the egg yolks and vanilla extract until the batter turns pale and fluffy, about 1-2 minutes, which adds richness and flavor.
- Combine Dry and Wet: Gradually add the dry ingredient mixture into the wet ingredients and mix until fully combined to form a soft cookie dough.
- Portion Dough: Using a 1 tablespoon scoop, portion the dough into 34 equal balls and roll each ball between your hands into a smooth sphere.
- Roll in Sugar: Roll each dough ball in granulated sugar to create a sparkly and crisp outer coating, then place them on prepared baking sheets spaced about 2 inches apart to allow for spreading.
- Bake Cookies: Bake the cookies for 7-8 minutes at 350°F; 7 minutes will yield chewier cookies while 8 minutes produces slightly firmer but still soft cookies.
- Add Kisses: Immediately after removing the cookies from the oven, press a frozen Candy Cane Kiss into the center of each cookie while still warm, allowing them to gently soften but retain shape.
- Cool and Set: Let the cookies cool completely on the baking sheets until the Hershey Kisses have hardened and set, preventing deformation and keeping presentation intact.
- Serve: Once cooled, transfer the cookies to a serving plate and enjoy this festive treat perfect for holiday gatherings.
- Store Leftovers: Store any remaining cookies in an airtight container at room temperature for up to three days to maintain freshness and texture.
Notes
- Measure your flour properly: Always spoon flour into your measuring cup and level it off with a knife or weigh it to avoid packing too much flour, which can result in dry cookies. One cup of flour weighs approximately 125 grams.
Nutrition
- Serving Size: 1 cookie
- Calories: 110 kcal
- Sugar: 10 g
- Sodium: 70 mg
- Fat: 6 g
- Saturated Fat: 3.5 g
- Unsaturated Fat: 2 g
- Trans Fat: 0 g
- Carbohydrates: 14 g
- Fiber: 1 g
- Protein: 1.5 g
- Cholesterol: 30 mg


