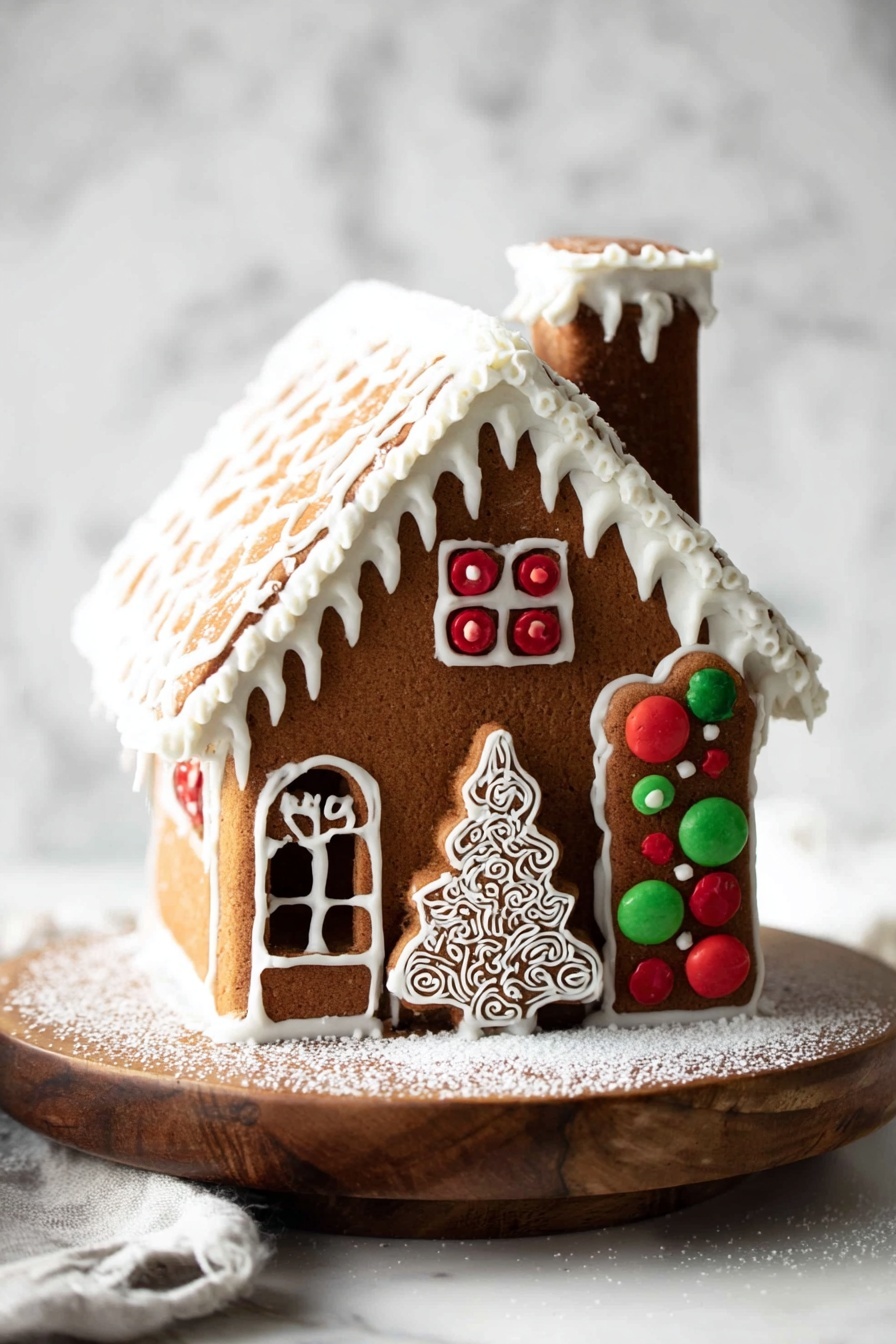
If you’re looking for a holiday project that’s equal parts fun and delicious, you’re going to adore this Festive Gingerbread House Recipe. Trust me, once you’ve tried making your own gingerbread house from scratch, you’ll see why this recipe quickly becomes a treasured tradition. It’s not just about baking—it’s about creating memories, and bonus, you get to eat the results! Whether you’re a first-timer or a gingerbread house pro, this recipe offers a perfect balance of rich, spicy gingerbread and sweet royal icing that makes decorating a joy. So, let’s get into it—because the holiday magic starts here.
Why You’ll Love This Recipe
- Made from Scratch Magic: You get that authentic gingerbread flavor and sturdiness perfect for building and decorating.
- Stained Glass Windows: Using melted jolly ranchers as windows adds a stunning colorful effect that’s super fun to see.
- Royal Icing that Really Works: This icing sets up beautifully without cracking, making assembly easier and decoration a breeze.
- Family Fun Project: The whole family can get involved decorating, creating joyful holiday memories.

Ingredients You’ll Need
This recipe calls for pantry staples along with a few festive touches that come together into a fragrant, flavorful dough. I always find it helpful to have your decorating candies picked out ahead of time—you’ll see how much fun it is to get creative once you start assembling!
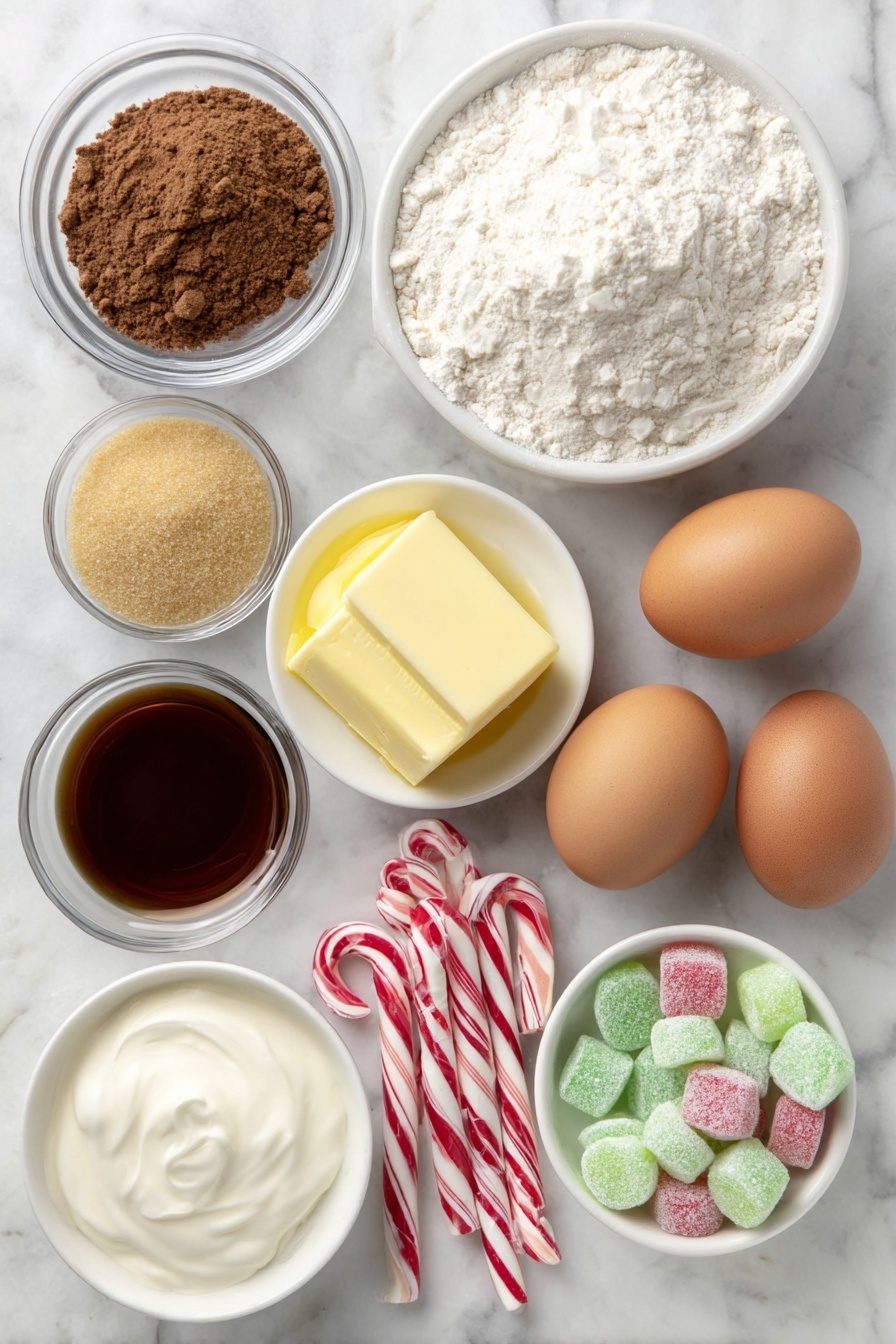
- All-purpose flour: Provides the perfect structure for a sturdy gingerbread house that’s not too crumbly.
- Ground ginger: The star spice for that classic gingerbread warmth and bite.
- Ground cinnamon: Adds depth and cozy aroma to balance the ginger.
- Ground allspice: A subtle background spice that enhances the overall flavor.
- Salt: Balances sweetness and spices, bringing out flavor complexity.
- Baking soda: Helps the dough set firmly without puffing up too much.
- Egg: Binds the dough and adds richness.
- Butter (melted): Gives a tender texture and buttery flavor to the gingerbread.
- Brown sugar: Adds moistness and that deep molasses sweetness.
- Molasses: Essential for that iconic gingerbread flavor and color.
- Water: Just enough to bring everything together without making the dough sticky.
- Jolly Ranchers: For colorful stained glass-style windows—fun and tasty!
- Egg whites: Key for the royal icing to pipe details and glue the house together.
- Confectioners’ sugar: Sweetens and thickens the icing perfectly.
- Cream of tartar (optional): Stabilizes the royal icing so it holds its shape long-term.
- Assorted candies: For decorating—let your imagination run wild!
- Confectioners’ sugar and shredded coconut: To create snow effects around your gingerbread house.
Variations
While this Festive Gingerbread House Recipe is perfect as is, I love tweaking it for different occasions or dietary needs. You can make it your own with simple swaps or add a twist that suits your festive mood.
- Gluten-Free Variation: I once replaced the all-purpose flour with a gluten-free blend that worked surprisingly well—just be sure to chill the dough a bit longer for easier handling.
- Vegan Adaptation: Swapping the egg with a flaxseed egg and using vegan butter creates a house that everyone can enjoy; just add a little extra molasses for moisture.
- Candy-Free Decoration: For a less sweet option, try decorating with nuts, dried fruit, or natural edible flowers—my kids still go crazy for the designs!
- Mini Houses: When I wanted to gift neighbors quick treats, I scaled this recipe down for individual smaller houses—it cut down on baking time and made for adorable packages.
How to Make Festive Gingerbread House Recipe
Step 1: Mix Your Spices and Flour
Start by whisking together all your dry ingredients—flour, ground ginger, cinnamon, allspice, salt, and baking soda—in a large bowl. This ensures your spices are evenly distributed so every bite bursts with flavor. Trust me, the aroma at this stage always gets me excited to continue.
Step 2: Combine Wet Ingredients
In another bowl, beat together the egg, melted (and cooled!) butter, brown sugar, molasses, and water. Use a hand mixer on medium speed for about a minute until everything comes together smoothly. This part always feels like magic, watching how the molasses deepens the color and adds that rich aroma.
Step 3: Make the Dough and Chill
Slowly add the wet ingredients into the dry mixture. Mix on medium speed until just combined—no dry spots, but also don’t overmix or the dough can get tough. Then, use your hands to form the dough into a ball and divide it into two discs. Wrap tightly in plastic wrap and chill it for at least two hours or overnight. This chilling step makes rolling out MUCH easier, and the flavors deepen overnight—totally worth the wait!
Step 4: Roll and Cut Out Your Gingerbread Pieces
Preheat your oven to 375°F and line your baking pans with silicone mats. Roll out the chilled dough discs one at a time on parchment paper to about ¼-inch thickness. I like to put the parchment paper on a Silpat mat to keep everything from slipping around. Use our printed gingerbread house template to trace and cut your shapes carefully with a pizza cutter for clean lines—don’t forget the circular window on the front piece! Place your shapes on the baking sheets and add a whole jolly rancher (or half for the circular window) inside each window cutout. Watching the candies melt into colorful “glass” is such a cool part of this recipe.
Step 5: Bake until Perfect
Bake for 8-10 minutes, keeping an eye on the edges—they should be set but not too dark. Early in the bake, carefully cut out the door with a knife and set it aside on the baking sheet to bake fully shaped. Let the pieces cool on the sheets for 5-10 minutes before transferring to a cooling rack to avoid breakage. This cooling period also helps the gingerbread firm up just right for assembly.
Step 6: Whip Up the Royal Icing
The royal icing is your building glue and decoration dream. Start beating egg whites for 10 seconds, add cream of tartar (if using), then gradually beat in confectioners’ sugar until you get stiff, glossy peaks—about 5 minutes. I always keep a damp towel over the bowl to stop the icing from drying out while piping. If it feels too runny, add a bit more sugar; if it’s too thick, add water teaspoon by teaspoon. This is where you gain control over how easy it is to pipe your designs later!
Step 7: Assemble Your Gingerbread Masterpiece
I like to build on a sturdy base—cover a piece of cardboard with aluminum foil and place it on a wooden board. Pipe a thick line of royal icing along the edge of the front piece, then attach a side panel and hold it in place for a couple of minutes while it sets. Don’t forget to run a thick icing line inside along the base to secure the walls. Repeat for the other sides, holding everything steady or propping with cans or glasses until it’s firm enough. Let the house set for an hour before adding the roof—it’s tempting to rush but patience pays off.
Step 8: Add Roof, Chimney, and Door
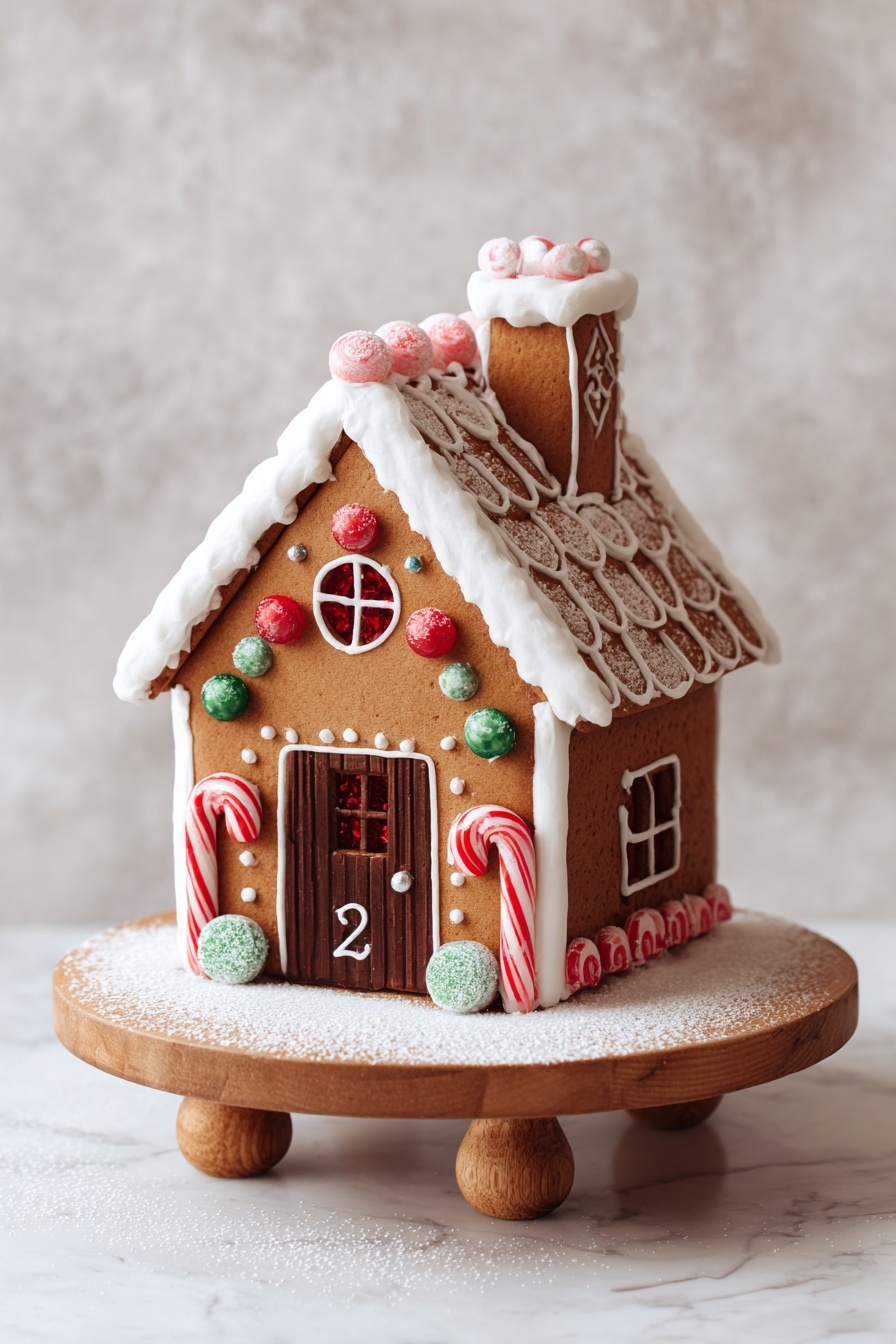
Attach the roof panels with thick royal icing just like the walls, and hold them in place until set. Assemble the chimney separately and affix it at the top with icing—it’s one of my favorite finishing touches. Attach the door slightly ajar for a charming welcoming look, using more royal icing as glue. Once your structure is sturdy, pipe extra icing along roof edges in a dripping “snow” pattern and let it set for about an hour before decorating.
Step 9: Decorate with Patterns, Snow, and Candies
If you’ve got a piping bag and small round tip, you can add lovely scalloped shingles on the roof, outline windows, and create dots and squiggles that really bring the house to life. Sprinkle confectioners’ sugar and shredded coconut for a fresh snowfall effect. Use thick royal icing to “glue” on assorted candies wherever your heart desires. I love adding little peppermint swirls and gumdrops—my family goes crazy for these colorful accents! Optional: place a battery-operated tea light inside to watch it glow warmly.
Pro Tips for Making Festive Gingerbread House Recipe
- Chill Dough Thoroughly: I discovered this trick after many sticky messes—chilled dough is easier to roll and cuts cleaner edges.
- Use a Silpat for Stability: Placing parchment on a Silpat mat prevents slipping while rolling out dough, saving a lot of frustration.
- Cut Door After Partial Baking: Cutting the door out a few minutes into baking helps it keep its shape without spreading or cracking.
- Let Icing Set Before Adding Roof: Give the walls time to harden so the roof pieces don’t collapse or slide off during assembly.
How to Serve Festive Gingerbread House Recipe
Garnishes
I love dusting the finished gingerbread house with extra confectioners’ sugar for a snowy effect, plus a sprinkle of shredded coconut around the base to mimic fluffy frost. Adding small mint leaves or edible glitter on the “snow” makes it feel extra festive and magical.
Side Dishes
This gingerbread house is usually a centerpiece rather than something you slice and serve, but it pairs beautifully with warm holiday drinks like mulled cider, hot cocoa, or spiced tea to sip while you admire your creation—or share slices of extra gingerbread cookies made from any leftover dough.
Creative Ways to Present
I once set the gingerbread house on a mirror platter with battery-operated string lights underneath for a glowing effect. Another fun idea is to build a whole gingerbread village with smaller houses and faux snow using cotton batting. Wrapping the finished house in cellophane with a bow also makes an incredible homemade gift that friends and neighbors adore.
Make Ahead and Storage
Storing Leftovers
If you don’t consume your gingerbread house all at once (though honestly, I understand if you do!), store any leftover pieces in an airtight container at room temperature away from humidity. Royal icing decorations will keep firm and the gingerbread will stay crisp for several days. I usually cover the unused gingerbread pieces with a clean kitchen towel to keep them fresh.
Freezing
Freezing assembled gingerbread houses isn’t ideal because the icing can soften, but you can freeze dough discs before rolling. I wrap the dough tightly in plastic and freeze for up to a month—thaw in the fridge overnight before rolling to preserve texture.
Reheating
Since this is more of a display and treat, reheating isn’t common, but if you want to enjoy leftover gingerbread cookies or scraps, warming briefly in a low oven (around 300°F for 5-7 minutes) refreshes that cozy spice aroma without drying them out.
FAQs
-
Can I use store-bought gingerbread for this Festive Gingerbread House Recipe?
While store-bought gingerbread can save time, it often lacks the perfect thickness and sturdiness needed for building a house. Making this recipe from scratch gives you a dough that’s easier to shape and sturdier to hold decorations, plus that fresher, richer flavor.
-
How long does it take to assemble the gingerbread house?
Assembly generally takes about 30 minutes to an hour, depending on how intricate your decorations are. Remember to allow setting time for the walls (about an hour) before adding the roof, to avoid collapsing.
-
What if I don’t have a piping bag?
No worries! You can use a small resealable plastic bag and snip a tiny corner off to pipe the royal icing. It works just as well for decorating and assembling your gingerbread house.
-
How do I prevent my gingerbread house from falling apart?
Make sure to chill the dough well before cutting shapes and let the royal icing set firmly at each stage. Using thick lines of icing for seams and supporting walls during drying helps keep everything solid.
-
Can children help with this recipe?
Absolutely! Kids love rolling dough, cutting shapes, and especially decorating. Just supervise during baking and piping the royal icing. It’s a wonderful family activity that creates lasting memories.
Final Thoughts
This Festive Gingerbread House Recipe has truly become one of my favorite holiday rituals. I love how it combines baking, creativity, and a bit of engineering all rolled into one sweet, joyful experience. Plus, the smell of fresh gingerbread wafting through the kitchen? Pure holiday magic. Give it a go with your loved ones—you’ll find it’s as rewarding as it is delicious, and the memories you make decorating together will warm you for seasons to come.
Print
Festive Gingerbread House Recipe
- Prep Time: 30 minutes (plus at least 2 hours chilling dough and setting)
- Cook Time: 8-10 minutes baking gingerbread
- Total Time: Approximately 3 hours including chilling and assembly time
- Yield: 1 gingerbread house
- Category: Dessert, Holiday Treat
- Method: Baking
- Cuisine: American
- Diet: Vegetarian
Description
This Gingerbread House recipe provides a delightful and festive way to create an edible holiday decoration. Using a blend of warm spices in the gingerbread dough and a sturdy royal icing for assembly, this recipe guides you through making detailed gingerbread shapes, melting candy windows, and decorating with various candies to bring your gingerbread house to life. Perfect for holiday celebrations, this activity combines baking and decorating into a fun seasonal tradition.
Ingredients
For the Gingerbread House:
- 2 + ⅓ cups all-purpose flour
- 1 tablespoon ground ginger
- 2 teaspoons ground cinnamon
- ½ teaspoon ground allspice
- ¼ teaspoon salt
- ½ teaspoon baking soda
- 1 large egg
- ½ cup butter, melted and cooled
- ½ cup brown sugar, packed
- ½ cup molasses
- 1 tablespoon water
- 7 jolly ranchers (hard candies)
For the Royal Icing:
- 2 large egg whites
- 2 + ¾ cups confectioners’ sugar
- ¼ teaspoon cream of tartar (optional)
For Decorating:
- Assorted candies
- Confectioners’ sugar (for dusting)
- Shredded coconut (for snow effect)
Instructions
- Prepare the template: Print out the Gingerbread House Template and cut out the shapes you will be using. Set aside to guide cutting the dough.
- Mix dry ingredients: In a large bowl, whisk together the flour, ground ginger, cinnamon, allspice, salt, and baking soda. Set aside.
- Mix wet ingredients: In a medium bowl, beat the egg, cooled melted butter, brown sugar, molasses, and water on medium speed with a hand mixer until combined, about 1 minute.
- Combine wet and dry ingredients: Gradually add wet ingredients to the dry and mix on medium speed until just combined with no dry flour visible.
- Form and chill dough: Use your hands to form the dough into a ball, divide into two balls, flatten into discs, wrap tightly in plastic wrap, and chill at least 2 hours or overnight.
- Preheat oven and prepare pans: Preheat oven to 375°F. Line two large half-sheet pans with silicone baking mats.
- Roll out dough: Roll one dough disc at a time on parchment paper to ¼-inch thickness. For stability, place parchment on Silpat mat while rolling.
- Cut out shapes: Use the gingerbread template to trace and cut out house components with pizza cutter and knife for details. Cut out windows and doors as instructed, cutting door after baking.
- Transfer and add candy windows: Place shapes on baking sheets, adding whole jolly ranchers to windows; use half of one for circular windows for stained glass effect.
- Bake gingerbread: Bake for 8-10 minutes until edges are set. After first few minutes, cut out door and leave it on baking sheet.
- Cool gingerbread: Let cool 5-10 minutes on sheets, then transfer to wire rack to cool completely.
- Prepare royal icing: Beat egg whites on low speed 10 seconds, add cream of tartar, then gradually add confectioners’ sugar ½ cup at a time. Beat on high speed 5 minutes until very stiff icing forms.
- Adjust icing consistency: If too wet, add sugar; if too thick, add water teaspoon by teaspoon until it ropes and holds shape but not runny.
- Keep icing moist: Cover baking bowl with a damp towel when not in use to prevent icing from drying too fast.
- Prepare base: Create a base by wrapping cardboard with aluminum foil and placing on a wooden serving platter.
- Assemble house corners: Pipe thick lines of royal icing on edges; attach front and side pieces, holding until partially set, then secure to base with icing underneath for stability.
- Add remaining walls and seal corners: Attach back and remaining side pieces with thick royal icing lines at edges and bottoms; hold or prop until partial set. Let set 1 hour before roofing.
- Attach roof: Pipe icing on top edges and place roof pieces one at a time, securing seams with extra icing; hold in place as they set.
- Build chimney: Attach chimney pieces with icing, then fix to roof with icing, holding until set.
- Attach door: Secure door on house slightly ajar with royal icing, holding until set.
- Seal and add snow effect: Pipe extra royal icing along roof edges and corners in dripping pattern for snow look; allow at least 1 hour to fully set.
- Decorate shingles and windows: Using a piping bag with no. 1 round tip, pipe scalloped roof shingles pattern, outline windows, and add decorative dots and squiggles.
- Add snow dusting: Use a fine mesh strainer to dust confectioners’ sugar as snow on roof; sprinkle shredded coconut on base to mimic ground snow.
- Apply candies: Pipe thick royal icing along edges or desired spots and press assorted candies onto the house.
- Add optional lights: Place battery-operated lights inside the gingerbread house to illuminate it beautifully.
Notes
- Chilling the dough is important for easier rolling and shape retention during baking.
- Use silicone baking mats or parchment paper to prevent sticking and assist with easy transfer.
- Cutting the door after starting the bake helps preserve its shape.
- Royal icing dries quickly; keep covered with a damp cloth when not in use.
- Allow assembled pieces to set partially between steps for structural stability.
- Decorate with your favorite candies to personalize the house.
- Battery-operated LED lights are safer than candles or open flames inside edible houses.
- If concerned about raw egg in royal icing, consider using pasteurized egg whites or meringue powder.
Nutrition
- Serving Size: 1 gingerbread house (serves about 8-10 slices)
- Calories: Approximately 3500 kcal total (about 350-440 kcal per slice depending on decoration and serving size)
- Sugar: High (due to brown sugar, molasses, confectioners’ sugar, and candies)
- Sodium: Moderate (around 300-400 mg per serving estimated)
- Fat: Moderate (from butter and egg, about 12-15g per serving)
- Saturated Fat: About 7-9g per serving
- Unsaturated Fat: Approximately 4-6g per serving
- Trans Fat: Negligible
- Carbohydrates: High (about 50-60g per serving mainly from flour and sugars)
- Fiber: Low to moderate (2-3g per serving from flour and spices)
- Protein: Moderate (5-7g per serving from egg and flour)
- Cholesterol: About 40-50mg per serving from eggs and butter


