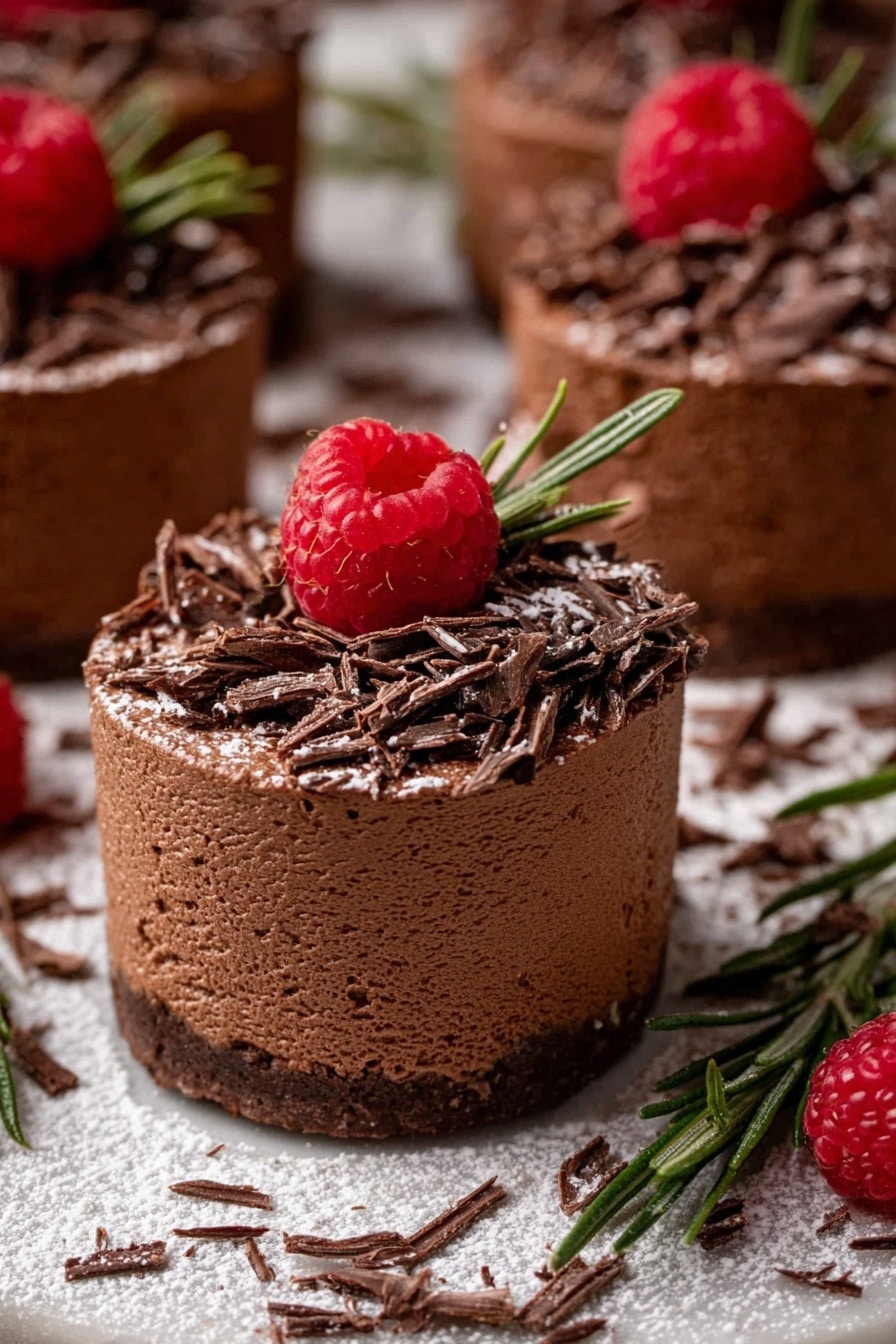
If you’re looking for a show-stopping dessert that’s both charming and delicious, you’ve got to try this Delicious Mini Chocolate Cakes with Creamy Frosting Recipe. I absolutely love how these little cakes turn out — moist, chocolatey, and topped with the most dreamy buttercream you can imagine. When I first tried this recipe, I couldn’t believe how simple it was to make something that looked so fancy and tasted like it came from a bakery. Stick around, and I’ll walk you through every step so you can wow your friends and family too!
Why You’ll Love This Recipe
- Perfectly Moist Texture: The cake comes out incredibly tender thanks to a simple mix of oil and boiling water that keeps it super soft.
- Decadent Creamy Frosting: The chocolate buttercream is silky smooth and fluffy, making every bite a pure indulgence.
- Impress with Minimal Effort: You don’t need fancy equipment or complicated steps—just some basic ingredients and a little patience.
- Versatile & Fun to Decorate: Customize these mini cakes with your favorite toppings or turn them into different shapes for any occasion.

Ingredients You’ll Need
This recipe uses simple pantry staples that work together beautifully to create a rich and tender chocolate cake base paired with luscious chocolate buttercream. I always recommend using fresh, room-temperature eggs and milk because they help the batter blend better, giving you that smooth cake texture every time.
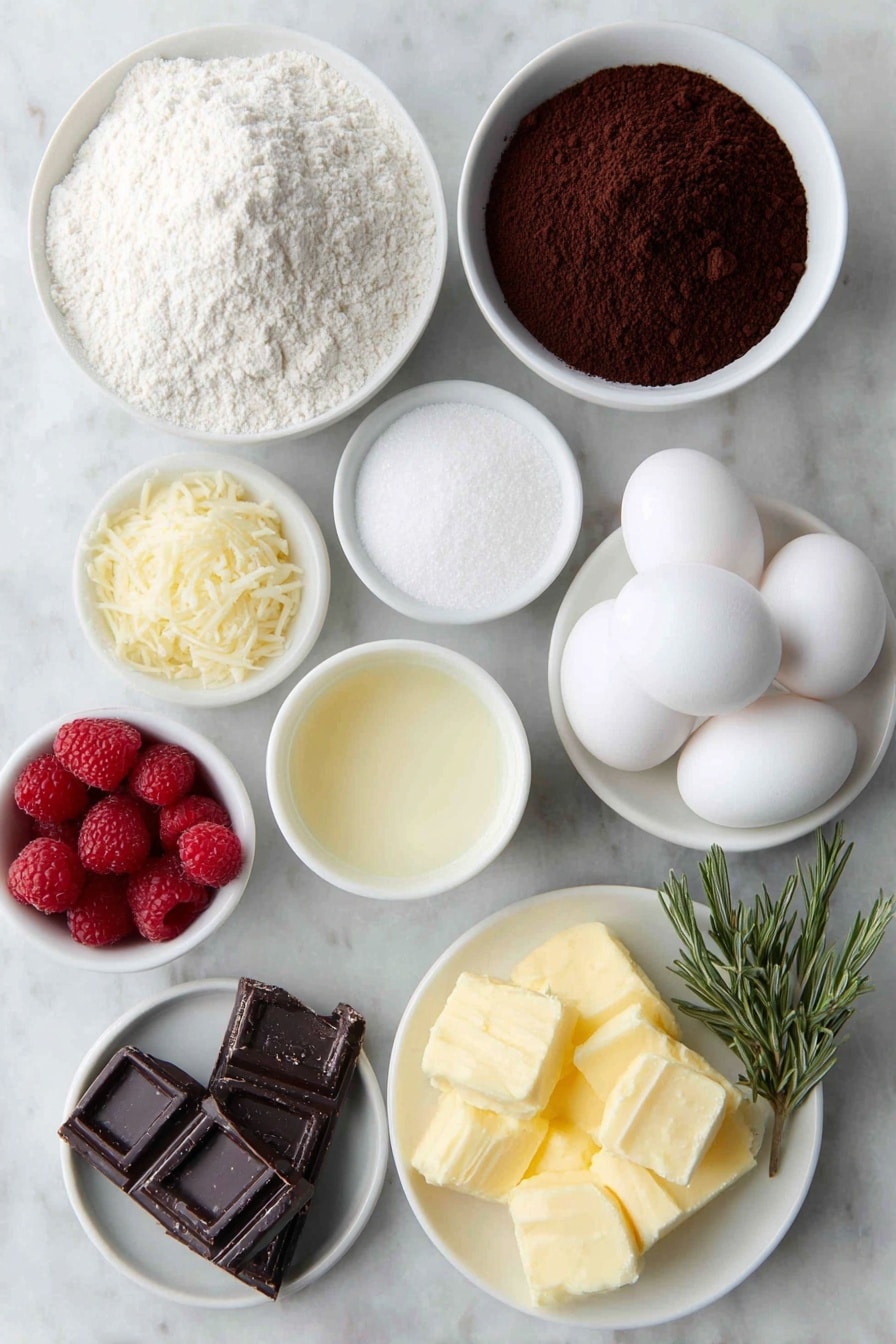
- Plain flour / all-purpose flour: The structural base for your cake—sifted to keep it light and airy.
- Cocoa powder (unsweetened): This adds deep chocolate flavor; I use natural cocoa powder for brightness, but Dutch-processed works too if you want extra color and depth.
- Baking powder: Helps the cakes rise evenly without leaving any bitter aftertaste.
- Baking soda / bi-carb: Works as a rising agent and reacts with the cocoa and coffee to keep the crumb tender.
- White sugar: Sweetens and balances the cocoa bitterness.
- Cooking salt / kosher salt: Just a pinch enhances chocolate flavor wonderfully.
- Large egg (room temperature): This binds ingredients and adds richness; I find letting it sit on the counter for 30 minutes really helps.
- Milk (full fat, room temperature): Fat really helps moisture and flavor, so full-fat is key here.
- Plain oil (vegetable, canola, or peanut): Keeps the cake moist without any flavor interference.
- Vanilla extract: A splash adds warmth and rounds out the chocolate notes.
- Boiling water: This might surprise you, but it intensifies the cocoa flavor and creates a softer crumb.
- Instant coffee powder (optional): I love adding this to boost the chocolate depth without tasting coffee at all.
- Unsalted butter (softened) for frosting: The base of your buttercream—soft butter whips up beautifully.
- Soft icing sugar / powdered sugar: For sweetness and smooth texture in the buttercream.
- Cocoa powder (unsweetened) for frosting: Adds rich chocolate flavor to the buttercream.
- Milk for frosting: Helps achieve the perfect creamy consistency.
- Decorations (dark chocolate shards, raspberries, rosemary sprigs): These make the final cakes not just delicious, but stunning too—trust me, it’s worth the effort!
Variations
This recipe is super adaptable, which is one of the things I love about it. I often tweak it depending on the occasion or what I have on hand. Feel free to get creative and make it your own!
- Gluten-Free Version: I’ve tried substituting plain flour with a 1-to-1 gluten-free baking flour blend with great success. Just be sure your blend includes xanthan gum for structure.
- Vegan Alternative: Replace the egg with a flax egg, use plant-based milk, and vegan butter in the frosting—this works well though a bit denser.
- Flavored Frosting: Mixing in a teaspoon of orange zest or a tablespoon of espresso for an extra flavor twist really elevates these mini cakes.
- Fruit Filling: Spread a thin layer of raspberry jam or salted caramel between layers before frosting for wonderful surprises inside.
How to Make Delicious Mini Chocolate Cakes with Creamy Frosting Recipe
Step 1: Prepare Your Pan and Oven
First things first, preheat your oven to 180°C (350°F). If you have a fan-forced oven, setting it to 160°C helps ensure even baking. Grab a jelly roll pan (about 40 x 28.5 cm) and give it a good buttering. Then line it with parchment paper — the edges should hang over a bit, which will make lifting the cake out later a breeze. This lining trick saves so much frustration!
Step 2: Whisk Together Your Dry Ingredients
Sift your plain flour, cocoa powder, baking powder, and baking soda into a large bowl. Add the sugar and salt, then whisk everything together until fully combined. This ensures your cocoa and leavening are evenly distributed — no clumps allowed!
Step 3: Add the Wet Ingredients and Coffee
In goes your egg, milk, oil, and vanilla extract directly into the dry mix. Whisk everything until just combined. Here’s where a little magic happens: dissolve the instant coffee powder in boiling water, then slowly whisk it into your batter. You’ll notice the batter looks super thin — that’s exactly right! It’s what keeps the cake tender and moist. Resist the temptation to add more flour.
Step 4: Bake and Cool
Pour your batter evenly into the prepared pan and bake at 180°C (350°F) for just 13 minutes. Keep a close eye near the end — the cake should spring back gently when pressed and a toothpick inserted comes out with just a few moist crumbs. After baking, let it cool in the pan for 10 minutes, then use the parchment paper edges to lift it onto a cooling rack to cool completely for about 30 minutes. Pop it in the fridge uncovered for at least an hour before cutting — this step firms the cake and makes cutting neat rounds so much easier!
Step 5: Cut and Assemble Your Mini Cakes
Here’s a tip I discovered when I first made mini cakes: to get perfect circles, cover the sticky surface of the cake with parchment paper, then flip it upside down on a cutting board (so the sticky side is down). Peel off the base paper, then press out your rounds using a 6cm cookie cutter (or any shape you like!). You’ll get about 21 perfect mini cake rounds.
Step 6: Pipe on the Creamy Frosting
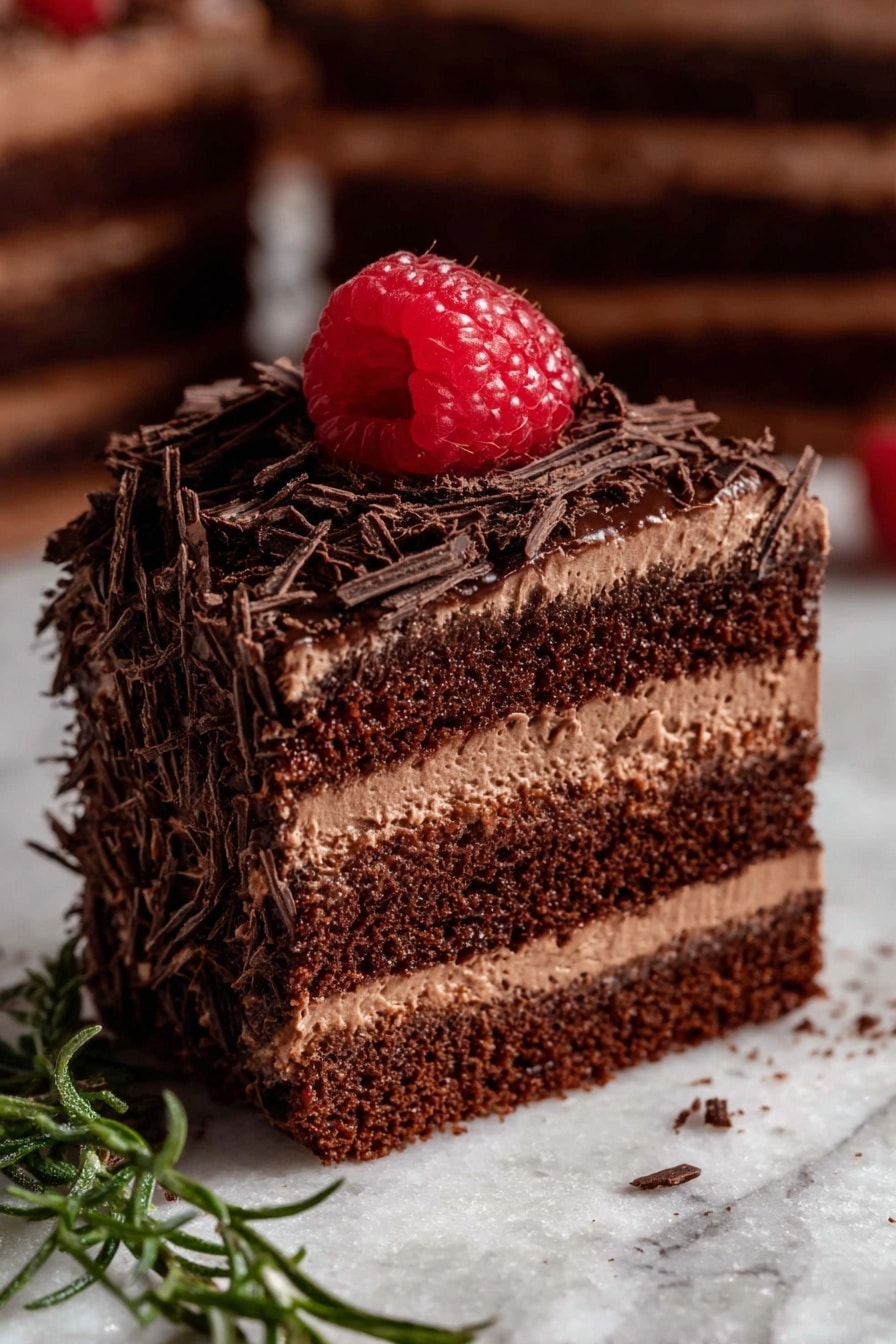
Set a cake round on a small piece of parchment paper (to keep it from sliding around). Use a piping bag to swirl generous coils of your luscious chocolate buttercream on each layer. Stack three rounds per mini cake and pipe frosting around the sides and top. If you have a cake turntable, it makes smoothing the frosting a breeze, but a small offset spatula or knife works great too. Just be gentle to avoid dragging crumbs into the frosting—wipe your spatula clean frequently!
Step 7: Decorate Your Mini Masterpieces
Top your cakes with piles of finely shaved dark chocolate—I like to use a sharp knife to create delicate curls that melt in your mouth. For a pop of color and freshness, I add raspberries and rosemary sprigs. Not only does it look gorgeous, but the tartness and herbal aroma balance the sweetness perfectly.
Step 8: Make the Chocolate Buttercream
Beat 250g of softened unsalted butter on high for 3 minutes until it’s soft and fluffy. Gradually add 4 cups of sifted powdered sugar in three parts—start on low speed to avoid a cloud of sugar dust, then increase the speed once combined. After all sugar is mixed in, add 1/2 cup of cocoa powder, 5 tablespoons of milk, and 1 teaspoon of vanilla extract. Beat it all together, starting on low speed and moving to high for a final 3-minute whip. This method makes a silky-smooth, spreadable frosting that pipes beautifully.
Pro Tips for Making Delicious Mini Chocolate Cakes with Creamy Frosting Recipe
- Use Boiling Water Wisely: Adding boiling water to the batter seems unusual, but it unlocks deep chocolate flavors and keeps the crumb light—don’t skip this step!
- Chill Before Cutting: Refrigerating the cake before cutting makes those sticky mini rounds tidy and less crumbly—trust me, it’s a game changer.
- Sifting Is Key: Sift both your dry ingredients and icing sugar for smooth batters and frosting without lumps.
- Piping Bag Hack: If you don’t have a piping bag, a reinforced ziplock with the corner snipped off works in a pinch—makes the frosting step quick and easy!
How to Serve Delicious Mini Chocolate Cakes with Creamy Frosting Recipe
Garnishes
I love finishing these cakes with dark chocolate shards because they add a wonderful crunch and intense chocolate hit. Adding fresh raspberries gives a tart burst that contrasts beautifully with the rich frosting. Rosemary sprigs might sound fancy, but they add a fantastic herbal aroma that lifts the dessert, especially for special occasions.
Side Dishes
My go-to pairing is a light raspberry coulis or a dollop of lightly whipped cream to balance the cake’s richness. A simple bowl of fresh berries also complements the chocolate without overpowering it—a perfect finish to any dinner party.
Creative Ways to Present
For a crowd, I’ve served these mini cakes stacked on a tiered cake stand, which looks stunning and lets everyone grab their own. Another fun idea is to arrange them in festive shapes—think hearts for Valentine’s or stars for holiday parties. Wrapping each cake in clear cellophane and tying with a ribbon makes an adorable edible gift!
Make Ahead and Storage
Storing Leftovers
I keep leftover mini cakes in an airtight container in the fridge. Because of the oil and the buttercream, they stay moist and fresh for up to 5 days, which is perfect if you’re prepping for a week of indulgence (or just want to savor the leftovers slowly!).
Freezing
These mini cakes freeze wonderfully. I freeze them unassembled (just the cake layers) wrapped tightly in plastic wrap and foil, then thaw overnight in the fridge before frosting and decorating. You can also freeze assembled cakes carefully wrapped, but I recommend fresh frosting for the best texture once thawed.
Reheating
If you want to enjoy your cakes slightly warm, let them sit out at room temperature for about 15-20 minutes before serving. Avoid microwaving once frosted, as it can melt the buttercream and change the texture.
FAQs
-
Can I make these mini chocolate cakes without coffee?
Absolutely! The instant coffee powder is optional. It just enhances the chocolate flavor subtly without leaving a coffee taste. If you don’t have it on hand or prefer to skip it, your cakes will still be moist and delicious.
-
Why is the batter so thin?
The thin consistency comes from the boiling water added to the batter, which helps bloom the cocoa powder and creates a tender crumb. Don’t worry—it bakes into a perfectly moist cake despite looking runny.
-
How do I prevent frosting crumbs from ruining my buttercream?
Flip your cake so the sticky side is down when cutting, and only spread or pipe frosting onto smooth surfaces. Use a small offset spatula and smooth the frosting gently with minimal contact to the cake. Wiping your spatula after smoothing helps keep it crumb-free.
-
Can I make these cakes bigger or different shapes?
Definitely! You can cut the cake into squares, rectangles, or larger rounds. For squares or rectangles, assemble a three-layer cake, chill it to set, then slice into pieces. This shapes easier and avoids scraps. Customize as you like!
Final Thoughts
I honestly recommend this Delicious Mini Chocolate Cakes with Creamy Frosting Recipe to anyone—whether you’re a baking newbie or a seasoned pro looking for a quick, impressive treat. These cakes bring such joy to my family, and I know you’ll love serving them up as much as I do. Plus, they’re perfect for sharing or indulging in a little solo moment of chocolate bliss. Go ahead and give it a try—I promise you’ll be amazed at how easy and rewarding it is!
Print
Delicious Mini Chocolate Cakes with Creamy Frosting Recipe
- Prep Time: 45 minutes
- Cook Time: 13 minutes
- Total Time: 1 hour 58 minutes
- Yield: 21 mini chocolate cakes
- Category: Dessert
- Method: Baking
- Cuisine: Western
Description
This recipe for Mini Chocolate Cakes delivers moist, tender layers of rich chocolate sponge enhanced by a hint of coffee, all crowned with a fluffy chocolate buttercream frosting and decorated with chocolate shards, fresh raspberries, and rosemary sprigs. Perfect for elegant mini desserts or party treats, these cakes are baked in a jelly roll pan, cut into rounds, and assembled with layers of luscious buttercream for a delightful bite-sized indulgence.
Ingredients
Cake Layers
- 1 cup plain flour / all-purpose flour
- 1/3 cup cocoa powder (unsweetened, not Dutch processed), sifted
- 3/4 tsp baking powder
- 3/4 tsp baking soda / bi-carb
- 1 cup white sugar
- 1/2 tsp cooking salt / kosher salt
- 1 large egg, at room temperature
- 1/2 cup milk, preferably full fat, at room temperature
- 1/4 cup plain oil (vegetable, canola, or peanut oil)
- 1 tsp vanilla extract
- 1/2 cup boiling water
- 1 tsp instant coffee powder (optional)
Chocolate Buttercream
- 250g / 1 cup unsalted butter, softened
- 4 cups soft icing sugar / powdered sugar, sifted
- 1/2 cup cocoa powder (unsweetened)
- 5 tbsp milk, preferably full fat
- 1 tsp vanilla extract
Decorations
- Dark chocolate, finely shaved using a knife (white chocolate is also an option)
- Fresh raspberries
- Rosemary sprigs
Instructions
- Preheat Oven: Set the oven temperature to 180°C / 350°F (160°C fan-forced) to ensure it is ready for baking.
- Prepare Baking Pan: Butter a 40 x 28.5 x 2.5cm (15.8 x 11.3 x 1 inch) jelly roll pan and line it with baking/parchment paper for easy removal of the cake.
- Whisk Dry Ingredients: Sift together the plain flour, cocoa powder, baking powder, and baking soda into a bowl. Add sugar and salt, then whisk to combine evenly.
- Add Wet Ingredients: Add the egg, milk, oil, and vanilla extract to the dry mixture and whisk well until combined. Dissolve the instant coffee powder in the boiling water, then whisk this into the batter. The batter will be very thin and runny.
- Bake the Cake Layers: Pour the batter evenly into the prepared pan and bake in the preheated oven for 13 minutes until just set.
- Cool the Cake: Let the cake cool in the pan for 10 minutes. Then, lift the cake out using the paper overhang and place it on a wire rack (leave the paper on the cake base). Cool fully for 30 minutes, then refrigerate uncovered for at least 1 hour to firm up the cake before cutting.
- Cut Cake Rounds: Place a piece of parchment paper over the sticky cake surface and flip the cake upside down onto a cutting board (sticky side down). Peel the base paper off, then cut out 21 rounds measuring 6cm (2.4 inches) in diameter or use any preferred shape or size.
- Prepare Chocolate Buttercream: Beat the softened butter on high for 3 minutes until soft and fluffy. Gradually add the sifted icing sugar in three portions, starting on low speed then increasing to avoid powder clouds. After all sugar is incorporated, add the cocoa powder, milk, and vanilla extract, and beat starting on low speed before increasing to high. Beat for an additional 3 minutes to create a light and fluffy frosting.
- Assemble and Frost Cakes: Place a small dab of frosting on a small piece of paper and position a cake round on top to prevent sliding. Pipe coils of buttercream between three cake rounds to create each mini cake. Frost the sides and tops with the remaining buttercream using an offset spatula or knife, smoothing carefully to avoid crumbs.
- Decorate: Garnish each mini chocolate cake with piles of finely shaved dark chocolate, fresh raspberries, and rosemary sprigs as an elegant finishing touch.
Notes
- Cocoa: Use ordinary unsweetened cocoa powder. Dutch-processed cocoa powder can be substituted for a richer chocolate color and flavor.
- Baking Soda: If unavailable, substitute with 2 1/4 teaspoons extra baking powder. Baking soda helps ensure an even rise.
- Coffee: Adding instant coffee powder enhances the chocolate flavor subtly without making the cake taste like coffee. This is optional.
- Cutting Technique: Flipping the cake upside down before cutting helps prevent the sticky surface from sticking to the cutter, resulting in neat, clean rounds.
- Alternate Shapes: For easier assembly and less waste, cut the cake into three equal rectangles and frost layers to create a large cake. Refrigerate to set, then cut into squares or rectangles and refrost sides as desired.
- Storage: If storing baked cake overnight, ensure it is completely cooled, cover the top with paper to prevent sticking, then wrap with cling film. Refrigerate and use within 5 days. Cakes can be frozen for up to 3 months. Assembled mini cakes keep fresh in the fridge for 5 days.
Nutrition
- Serving Size: 1 mini cake
- Calories: 220 kcal
- Sugar: 19 g
- Sodium: 120 mg
- Fat: 12 g
- Saturated Fat: 6 g
- Unsaturated Fat: 5 g
- Trans Fat: 0 g
- Carbohydrates: 25 g
- Fiber: 2 g
- Protein: 3 g
- Cholesterol: 35 mg


