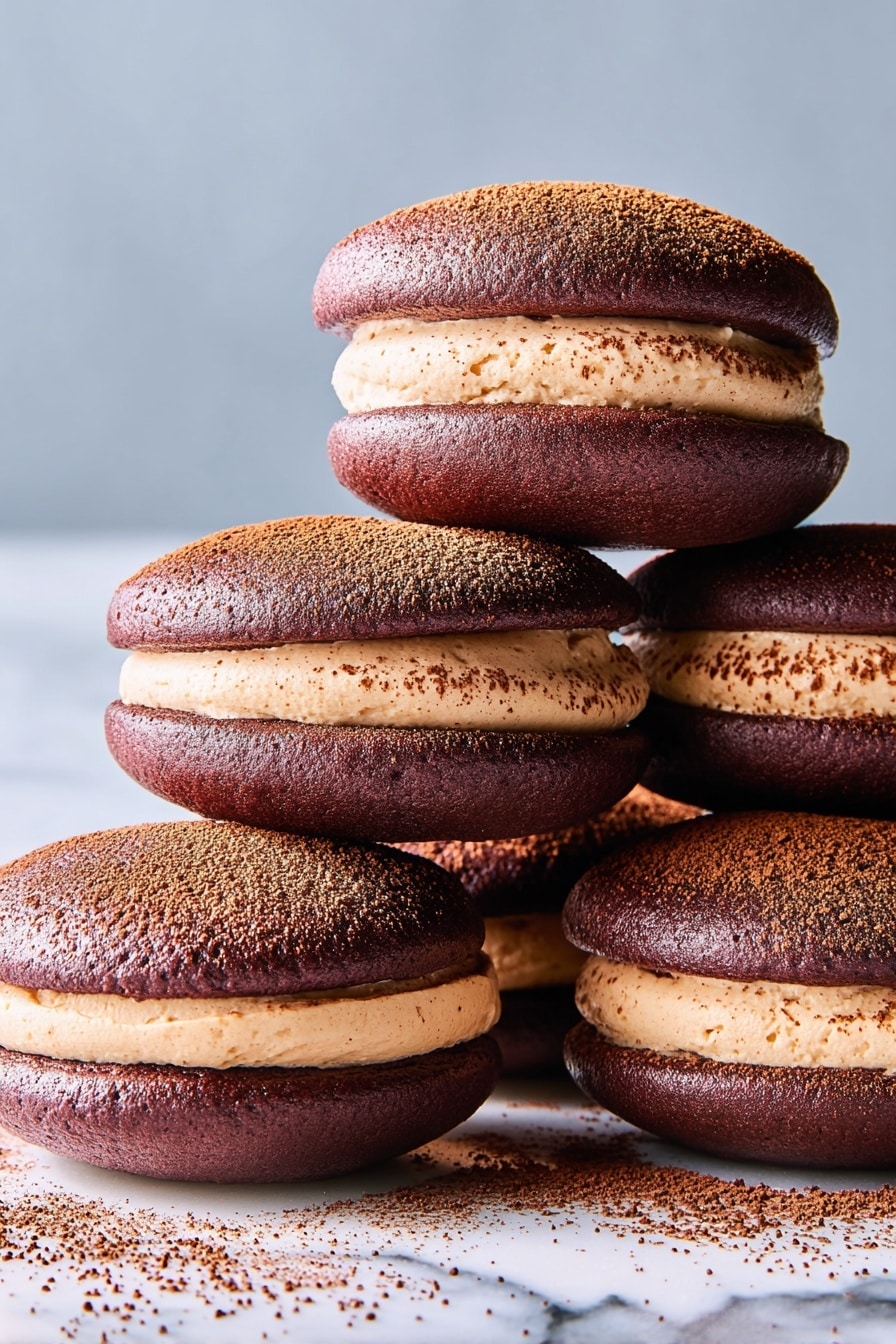
If you’re looking for a delightful twist on classic tiramisu that feels both fancy and fun, you’ve got to try this Tiramisu Whoopie Pies with Coffee Mascarpone Recipe. Imagine soft, chocolatey little cakes sandwiched together with a luscious coffee-infused mascarpone filling — it’s like eating a portable tiramisu that’s perfect for sharing (or sneaking a few!). I promise, once you make these, they’ll quickly become a family favorite, and I can’t wait to walk you through all my tips for baking them just right.
Why You’ll Love This Recipe
- Portable Tiramisu Magic: You get all the coffee-mascarpone goodness in bite-sized whoopie pies.
- Moist, Chocolatey Cakes: The cocoa and coffee combo makes these cakes rich but amazingly soft.
- Impress Without Stress: This recipe is straightforward for any level but yields impressive results.
- Customizable Filling: You can easily adjust coffee strength or sweetness to suit your taste buds.

Ingredients You’ll Need
Choosing quality ingredients here makes all the difference. I always use Dutch-processed cocoa for its smooth chocolate flavor and freshly brewed coffee to give these whoopie pies that authentic tiramisu kick. Let’s look at the key players.
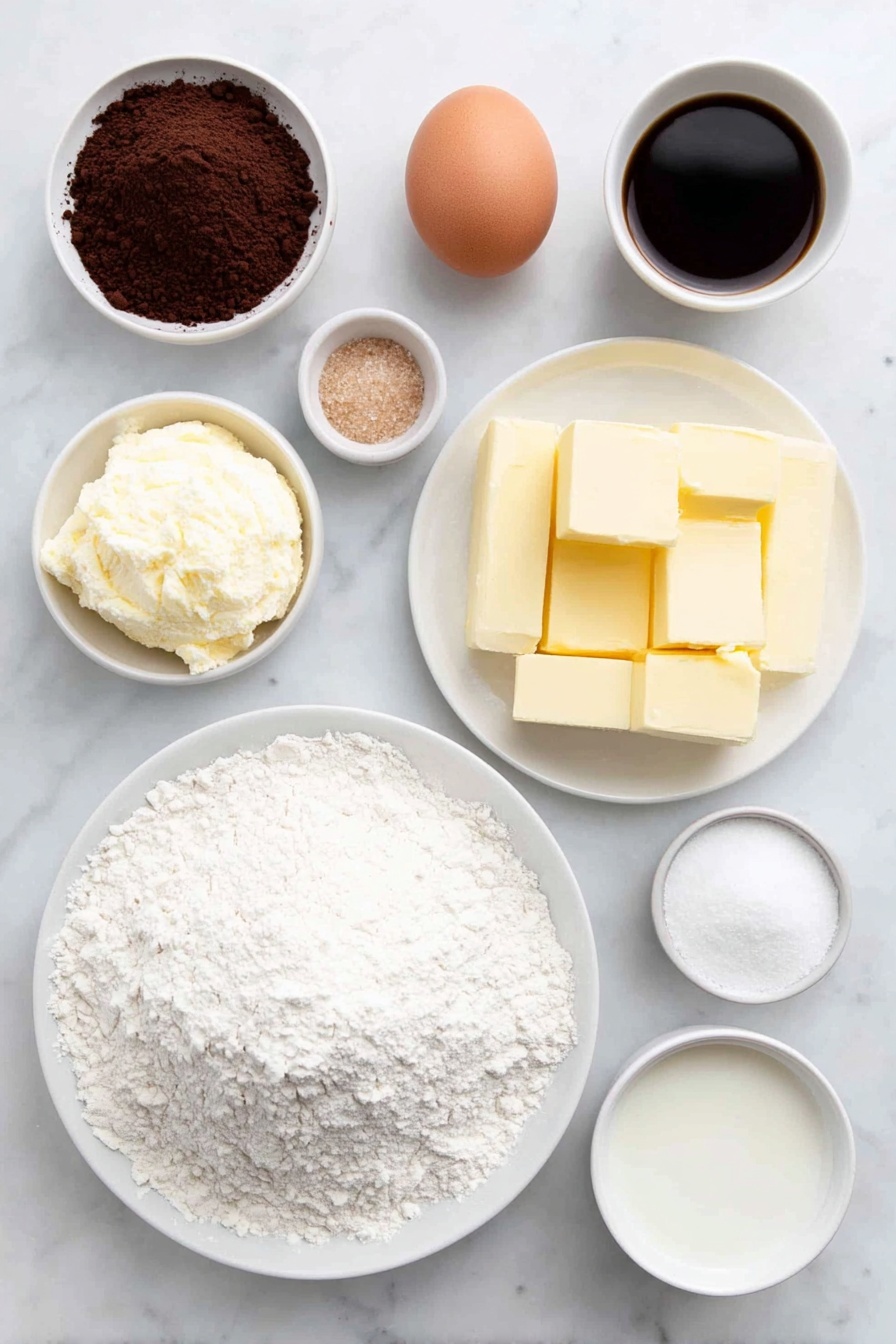
- All-purpose flour: The classic base for soft, sturdy cakes that hold their shape well.
- Unsweetened cocoa powder: Dutch-processed works best if you can find it for a mellow chocolate taste.
- Light brown sugar: Adds moisture and a subtle caramel hint that rounds out flavor.
- Vegetable oil: Keeps cakes tender and moist without overpowering flavors.
- Unsalted butter: Use softened butter for richness and fluffiness in the batter.
- Egg: Helps bind everything while adding structure and richness.
- Vanilla extract: A must-have for enhancing the deep chocolate and coffee notes.
- Milk: Balances the dry ingredients for just the right cake texture.
- Freshly brewed coffee: Adds the signature tiramisu flavor—definitely don’t skip this.
- Heavy cream: For the filling, whipped to soft peaks to lighten the mascarpone.
- Confectioners’ sugar: Sweetens the filling without graininess.
- Instant coffee: Boosts that intense coffee flavor in the filling, no brewing needed.
- Mascarpone cheese: The star of the filling, creamy and slightly tangy—keep it cold until ready to use!
Variations
One of the best things about this Tiramisu Whoopie Pies with Coffee Mascarpone Recipe is how adaptable it is. Over time, I’ve tried a few tweaks to make it my own and to match different occasions—and you should feel free to do the same!
- Chocolate Lovers’ Boost: I once doubled the cocoa powder for extra richness—my chocoholic friends went nuts over it.
- Decaf Version: If you’re sensitive to caffeine, swap the coffee with decaf; it still keeps the right depth and warmth.
- Sweetness Level: Play with confectioners’ sugar in the filling to dial sweetness up or down depending on your preference.
- Layered Presentation: For a special dinner, try stacking three layers with chilled filling in between for a mini tiramisu tower.
How to Make Tiramisu Whoopie Pies with Coffee Mascarpone Recipe
Step 1: Prep your baking sheets and dry ingredients
Start by preheating your oven to 350°F (175°C). Line two baking sheets with parchment paper and lightly grease them with cooking spray—that way, your whoopie pies won’t stick or lose their perfect shape. In a medium bowl, whisk together all your dry ingredients: flour, cocoa powder, baking powder, kosher salt, and baking soda. Mixing these well now ensures your cakes rise evenly and taste perfectly balanced.
Step 2: Beat sugar, fats, then add eggs and vanilla
Using a handheld mixer, beat the brown sugar, vegetable oil, and softened butter on medium-high speed until the mixture becomes light and fluffy—this usually takes about 2 to 3 minutes. This step is key for getting tender cakes, so don’t rush it. Then add your egg and vanilla extract and mix until combined. Make sure your egg is at room temperature to avoid curdling the batter.
Step 3: Combine dry and wet ingredients gently
Next, add the dry ingredients to the wet mixture and beat on medium-low speed just until there are still a few dry streaks left. This keeps the batter light and prevents overmixing, which can make cakes tough. Then pour in the milk and warm coffee, beating just until combined. The coffee adds a subtle depth that’s essential to nail that tiramisu taste—don’t skip it!
Step 4: Scoop and bake your whoopie pies
Using a medium scoop (about 3 tablespoons), dollop rounds of batter onto your prepared baking sheets, spacing them about 3 inches apart because they’ll spread a bit. Bake for 12 to 14 minutes until the edges feel firm but the centers still have a slight softness. They’ll firm up as they cool—don’t overbake! Once done, let them cool completely on the sheets before moving on.
Step 5: Whip up the coffee mascarpone filling
In a large bowl, beat the heavy cream, confectioners’ sugar, and instant coffee on medium-high speed until soft peaks form. This takes a couple minutes, but stopping at soft peaks keeps your filling light and creamy. Slowly add half the mascarpone cheese and beat just until combined, then add the rest and beat until stiff peaks form. Overwhipping can make mascarpone curdle, so keep a close eye here.
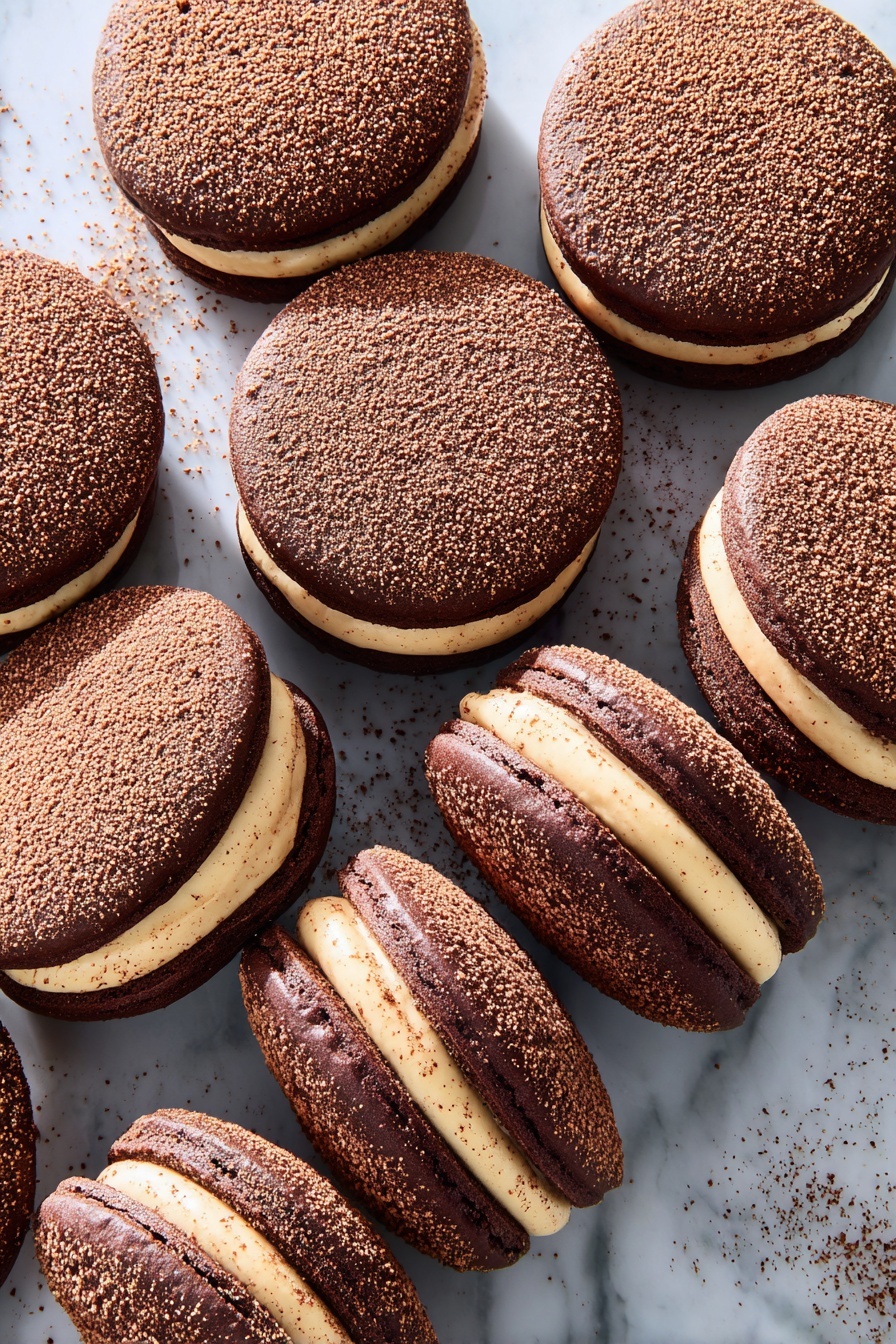
Step 6: Assemble your tiramisu whoopie pies
Flip half of the cooled cake discs so their flat sides face up. Use your scoop to dollop a generous amount of the coffee mascarpone filling onto each. Then, sandwich with another cake piece (flat side down) and gently press until filling nearly reaches the edges. For the final touch, sprinkle a little cocoa powder on top for that signature tiramisu look and flavor.
Pro Tips for Making Tiramisu Whoopie Pies with Coffee Mascarpone Recipe
- Warm Coffee Makes All the Difference: I learned that adding warm but not hot coffee speeds up blending without cooking the batter.
- Don’t Overmix Dry and Wet Ingredients: Leaving a few flour streaks keeps your cakes tender, so stop mixing as soon as combined.
- Chill Your Mascarpone: Keeping mascarpone cold before beating helps avoid a runny filling.
- Watch Your Bake Times: Baking just until edges are firm and centers slightly soft prevents dryness in these small cakes.
How to Serve Tiramisu Whoopie Pies with Coffee Mascarpone Recipe
Garnishes
I love finishing these with a light dusting of cocoa powder for that classic look, but you can also sprinkle some finely grated dark chocolate or even a pinch of espresso powder on top if you want to up the drama. A few chocolate shavings or a tiny sprig of fresh mint can make them extra special for guests.
Side Dishes
Since these are dessert treats, I usually pair them with a simple espresso or a creamy cappuccino to echo the coffee notes, or even a scoop of vanilla gelato for an indulgent combo. They’re perfect after a rustic Italian meal or just with some good conversation over coffee.
Creative Ways to Present
Once, I arranged these whoopie pies on a tiered stand for a birthday party, alternating with mini tiramisu glasses. It was festive and elegant, and everyone loved grabbing a bite-sized indulgence. You could also wrap them individually in parchment and tie with twine for a gorgeous gift or party favor!
Make Ahead and Storage
Storing Leftovers
These whoopie pies keep beautifully in the fridge for up to 3 days. I recommend storing them in an airtight container to keep the cakes from drying out and to keep the filling fresh and creamy. Just remember that the coffee flavor intensifies slightly after sitting, which I actually enjoy!
Freezing
Freezing assembled whoopie pies is possible but I prefer freezing the cake discs alone. Freeze them flat on a tray, then stack with parchment paper between. When ready to eat, thaw the cakes and whip up fresh mascarpone filling—they taste just as amazing and feel freshly made!
Reheating
I usually don’t recommend reheating these pies since the mascarpone filling is best chilled. If you want warmed cakes, try removing filling and gently warming the cake discs alone for a few seconds in the microwave, then reassemble just before serving.
FAQs
-
Can I use regular brewed coffee instead of instant coffee in the filling?
Yes, you can substitute brewed coffee for the instant coffee in the filling, but since brewed coffee is liquid, reduce the heavy cream slightly to maintain the thick consistency. Instant coffee is handy here because it blends in without adding extra moisture.
-
How do I prevent the mascarpone filling from becoming runny?
Chilling your mascarpone before mixing helps a lot, and be sure to beat it gently with the whipped cream until just combined. Overwhipping can cause the filling to break down. Also, don’t skip the instant coffee and sugar as they add structure and flavor.
-
Can I make the whoopie pies ahead of time?
Absolutely! You can bake the cake discs a day or two ahead and store them in an airtight container. The filling is best made fresh, but you can prepare it a few hours ahead and refrigerate, then assemble right before serving for best texture.
-
What can I do if I don’t have Dutch-processed cocoa?
If you only have natural cocoa powder, it’ll still work fine—your whoopie pies will have a slightly tangier chocolate flavor and a bit lighter color, but they’ll still be delicious. Just keep the baking soda as the recipe calls for to help balance acidity.
Final Thoughts
I absolutely love how these Tiramisu Whoopie Pies with Coffee Mascarpone Recipe bring together the best parts of tiramisu into a fun, handheld treat. When I first tried making them, I was amazed at how approachable this classic Italian dessert became without compromising on flavor. Whether you’re baking for a crowd, a special occasion, or just your own coffee break, these pies will make you smile with every bite. Give them a go — you might just find a new favorite!
Print
Tiramisu Whoopie Pies with Coffee Mascarpone Recipe
- Prep Time: 15 mins
- Cook Time: 14 mins
- Total Time: 1 hr
- Yield: 10 servings
- Category: Dessert
- Method: Baking
- Cuisine: Italian-American
Description
Delight in these indulgent Tiramisu Whoopie Pies, combining soft cocoa-spiced cakes with a creamy mascarpone coffee filling for a perfect handheld dessert inspired by the classic Italian tiramisu.
Ingredients
Cakes
- Cooking spray, for greasing
- 2 1/4 cups (270 g) all-purpose flour
- 1/2 cup (40 g) unsweetened cocoa powder (preferably Dutch-processed), plus more for dusting
- 1 tsp baking powder
- 1 tsp kosher salt
- 1/2 tsp baking soda
- 1 cup (215 g) packed light brown sugar
- 1/4 cup vegetable oil
- 4 Tbsp unsalted butter, softened
- 1 large egg
- 1 tsp pure vanilla extract
- 3/4 cup milk
- 1/4 cup freshly brewed coffee, warm
Mascarpone Coffee Filling
- 3/4 cup heavy cream
- 1/2 cup (55 g) confectioners’ sugar
- 1 Tbsp instant coffee
- 6 oz mascarpone, cold
Instructions
- Prepare the Oven and Baking Sheets: Preheat your oven to 350°F (175°C). Line two baking sheets with parchment paper and grease them lightly with cooking spray to prevent sticking.
- Mix Dry Ingredients: In a medium bowl, whisk together flour, cocoa powder, baking powder, kosher salt, and baking soda until evenly combined.
- Cream Sugar and Fats: In a large bowl, using a handheld mixer on medium-high speed, beat the light brown sugar, vegetable oil, and softened butter until the mixture is light and fluffy, about 2 to 3 minutes.
- Add Egg and Vanilla: Add the egg and vanilla extract to the creamed mixture and continue beating until fully incorporated.
- Combine Dry and Wet Ingredients: Gradually add the dry ingredients to the wet mixture, beating on medium-low speed until just a few dry streaks remain. Next, add the milk and warm coffee, mixing until just combined to form the batter.
- Portion the Batter: Using a medium scoop (about 3 tablespoons), drop dollops of batter spaced about 3 inches apart onto the prepared baking sheets.
- Bake Cakes: Bake the whoopie pies in the preheated oven until the edges are firm and the centers are slightly soft, approximately 12 to 14 minutes. Remove from the oven and allow to cool completely on the baking sheets.
- Make Mascarpone Coffee Filling: In a large bowl, beat the heavy cream, confectioners’ sugar, and instant coffee with a handheld mixer on medium-high speed until soft peaks form.
- Incorporate Mascarpone: Add half of the cold mascarpone to the whipped cream mixture and beat until just combined. Add the remaining mascarpone and continue beating until stiff peaks form, creating a smooth, fluffy filling.
- Assemble Whoopie Pies: Flip half of the cooled cake discs over. Using a medium scoop, place a generous dollop of the mascarpone coffee filling onto the center of each flipped disc. Top each with another disc, flat side down, gently pressing together until the filling almost reaches the edges.
- Finish and Serve: Lightly dust the assembled whoopie pies with additional cocoa powder for a classic tiramisu touch. Serve immediately or chill until ready to enjoy.
Notes
- Use Dutch-processed cocoa powder for a smoother, richer chocolate flavor and deeper color.
- Coffee in the batter and filling enhances the signature tiramisu taste; freshly brewed and warm coffee works best for the batter.
- Ensure mascarpone is cold before whipping to achieve the best texture in the filling.
- Allow the cakes to cool completely before assembling to prevent the filling from melting.
- Store assembled whoopie pies in an airtight container in the refrigerator for up to 3 days.
Nutrition
- Serving Size: 1 whoopie pie
- Calories: 320
- Sugar: 25 g
- Sodium: 180 mg
- Fat: 17 g
- Saturated Fat: 9 g
- Unsaturated Fat: 7 g
- Trans Fat: 0.2 g
- Carbohydrates: 34 g
- Fiber: 3 g
- Protein: 4 g
- Cholesterol: 55 mg


