
If you’re anything like me and you love soft, buttery, melt-in-your-mouth bread, then you absolutely have to try this Parker House Rolls Recipe. They bake up beautifully golden with that classic slight crunch on the outside and the airiness inside that makes every bite feel like a warm hug. I first stumbled on this recipe years ago at a family gathering, and ever since then, these rolls have made their way onto every holiday table—and honestly, any dinner where I want to impress without too much fuss!
Why You’ll Love This Recipe
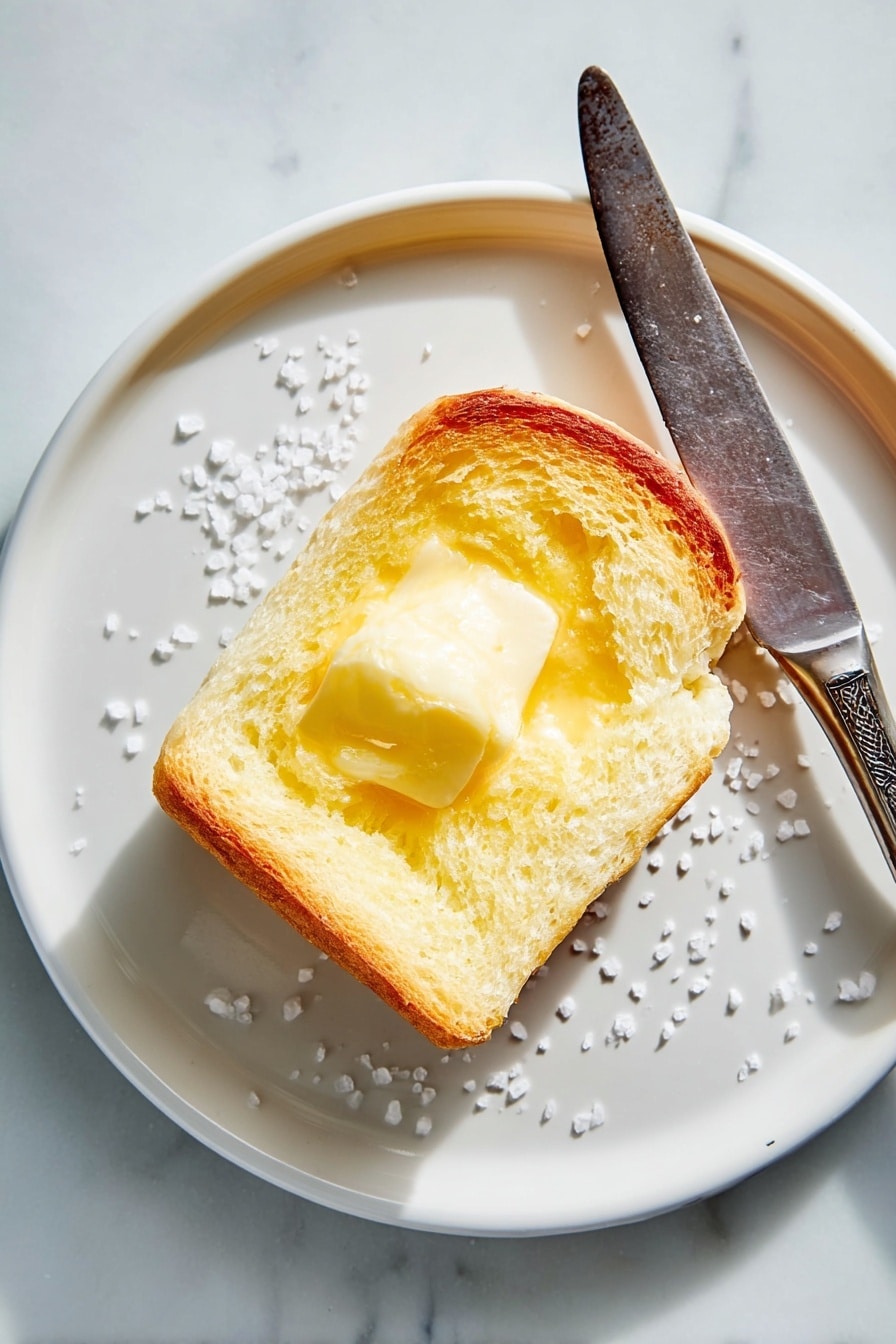
- Soft, Buttery Texture: Thanks to the generous use of butter and milk, these rolls stay soft and tender for days.
- Classic New England Charm: Parker House rolls have that signature folded shape and flaky salt finish that will impress any guest.
- Versatile and Crowd-Pleasing: Perfect for everything from Sunday dinners to special holiday feasts.
- Make-Ahead Flexibility: The dough can be refrigerated overnight, making your kitchen prep more manageable.

Ingredients You’ll Need
These ingredients work beautifully together to create that fluffy, buttery roll everyone raves about. I always reach for real butter and whole milk because they enrich the dough and give it such a rich flavor. A good quality active dry yeast is key for a reliable rise, especially if you’re doing the slow refrigerator proofing.
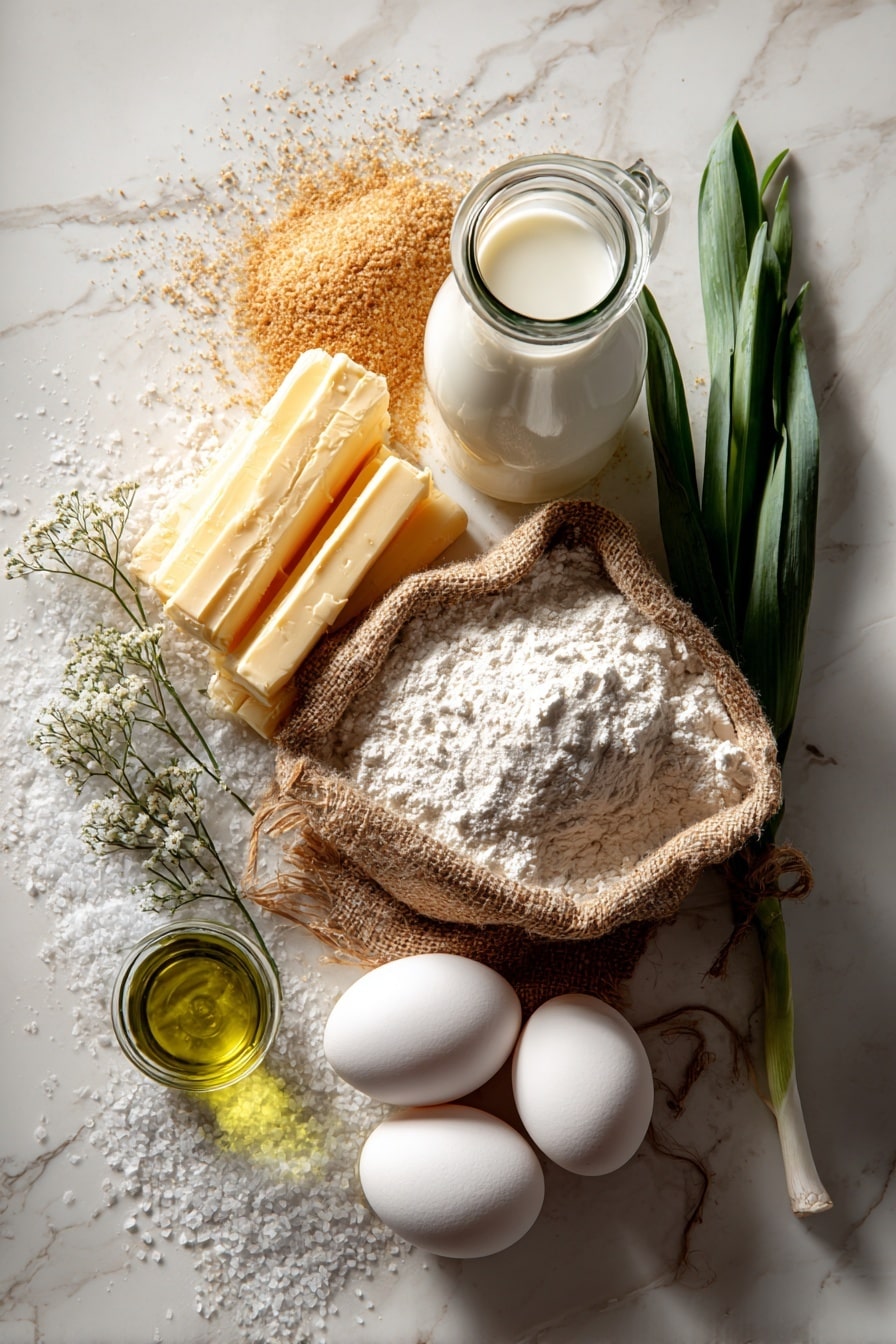
- Whole milk: Adds moisture and richness; warm it gently to activate the yeast properly.
- Salted butter: Provides flavor and tenderness—plus you’ll use a bit more for greasing and brushing for that glorious crust.
- Sugar: Feeds the yeast and lends a subtle sweetness to balance the butteriness.
- Active dry yeast: Makes the dough rise nicely—always check your expiration date so your rolls don’t fall flat.
- Eggs: Give the rolls a lovely golden color and more structure.
- All-purpose flour: The main structure builder; spoon it into your measuring cup for accurate amounts to keep the dough soft but manageable.
- Vegetable oil: For greasing the bowl, helping the dough rise without sticking.
- Flaky salt: I sprinkle this on top right after baking—it adds the perfect little crunch and finish.
Variations
While I love the classic version as is, sometimes I like to switch things up to keep the rolls fresh and exciting. Feel free to tweak the fats or flavorings—you’ll find this dough is pretty forgiving and welcoming to new ideas!
- Herb-Infused Rolls: Adding fresh rosemary or thyme to the dough is one of my favorite twists—it perfumes the rolls just enough without overpowering that buttery base.
- Whole Wheat Blend: I’ve mixed half whole wheat flour into the dough before; it gives a nice nuttiness but still keeps the rolls tender if you don’t go overboard.
- Dairy-Free Adaptation: Swap milk for a plant-based alternative and use vegan butter; it’s worked great when friends with allergies come over.
- Garlic Butter Finish: Brushing the tops with melted garlic butter before baking kicks things up for garlic lovers in your life.
How to Make Parker House Rolls Recipe
Step 1: Warm Milk and Butter Mixture
The first step is to gently heat your milk with half of the butter until the butter melts. I use a small saucepan over low heat and watch carefully—not too hot, just warm enough to activate the yeast later. Once melted, stir in the sugar and let this cool to room temperature. This cooling step is crucial so you don’t kill your yeast in the next step!
Step 2: Proof the Yeast
In a small bowl, combine your yeast with half a cup of warm water (around 110°F is perfect). It’s always rewarding to watch the yeast start to bubble up and foam after a couple of minutes—that’s your signal the yeast is alive and ready to work its magic.
Step 3: Mix and Knead the Dough
Next, you’ll add your milk mixture, eggs, yeast mixture, and half the flour to your stand mixer bowl. I like using the dough hook attachment for this—they make kneading so much easier. Mix on low speed until smooth. Then, add the remaining flour and increase to medium speed, kneading for about 5 to 7 minutes. You want a smooth, elastic dough that springs back when you poke it. If your dough feels sticky, sprinkle in a tiny bit more flour, but don’t go overboard or your rolls won’t be as soft!
Step 4: First Rise
Grease a large bowl with vegetable oil, then place your dough inside, turning once to coat. Cover loosely with plastic wrap and let it rest at room temperature until doubled in size, usually 1½ to 2 hours. Here’s a trick I learned: if you’re prepping ahead, you can refrigerate the dough for 12 to 24 hours instead, which develops a deeper flavor and lets you bake fresh rolls the next day.
Step 5: Shape Your Rolls
Once your dough has risen, melt the remaining butter and generously grease your 9×13-inch baking pan. Punch down the dough to gently deflate it, then transfer it to a floured surface. Divide into four equal pieces. Roll each piece into a 12×8-inch rectangle, then cut lengthwise into two 12×4-inch strips. Cut each strip into six pieces. Brush each piece with melted butter and fold it in half with a slight ¼-inch overhang to create that iconic folded shape. When you place the rolls in the pan, arrange them with a little overlap at the fold—they’ll puff up and “kiss” as they bake, creating soft sides perfect for pulling apart.
Step 6: Second Rise and Bake
Brush the tops of your shaped rolls with the leftover melted butter, cover the pan with plastic wrap, and let them rise again. At room temperature, this takes about 30-40 minutes; if you want to slow it down, refrigerate for up to overnight—this slow rise enhances flavor and makes baking day easier. When they’ve doubled, preheat your oven to 375°F. Bake the rolls for 20-25 minutes, until golden brown and irresistible. While still warm, melt some extra butter and brush the tops to keep them super soft, then sprinkle with flaky salt for that perfect final touch.
Pro Tips for Making Parker House Rolls Recipe
- Check Your Yeast Temperature: The milk and water used for proofing yeast should be warm, but never hot—anything above 120°F risks killing your yeast.
- Don’t Over-Flour Your Dough: Adding too much flour can make the rolls dense; it’s better to have a slightly sticky dough that’s well kneaded.
- Use Melted Butter for Brushing: Melted butter helps rolls brown evenly and keeps them soft long after cooling.
- Avoid Drafts During Rising: I once had my dough stall because of a chilly kitchen breeze—cover your dough well to keep it warm and have a successful rise.
How to Serve Parker House Rolls Recipe
Garnishes
I love sprinkling flaky sea salt on top right after brushing the rolls with butter—it adds a light crunch and bursts of flavor that make each bite exciting. Sometimes, I’ll add a light dusting of fresh chopped parsley or chives for color and a fresh note, especially when serving with savory meals.
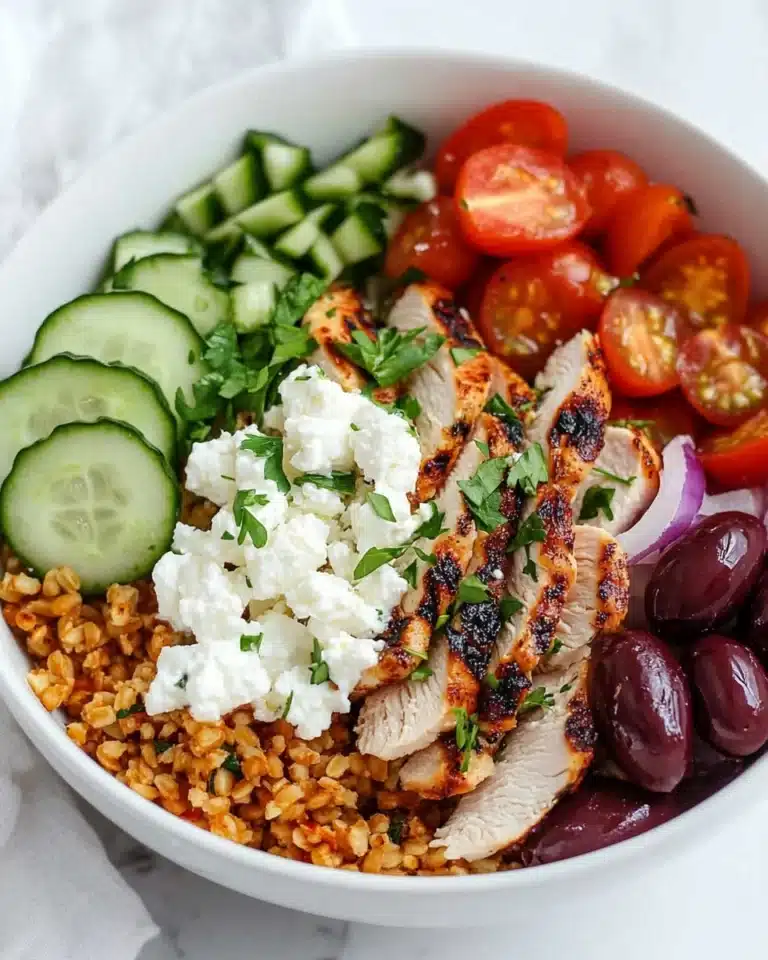
Side Dishes
These Parker House rolls are a dream alongside hearty stews, creamy mashed potatoes, or glazed ham. We’ve enjoyed them with Thanksgiving turkey and a rich beef pot roast. Honestly, they’re like a mini blank canvas—you can pair them with nearly any main dish that calls for comforting bread.
Creative Ways to Present
For a special occasion, I’ve arranged these rolls in a pretty circular pattern on a round platter, brushing extra garlic herb butter on top and finishing with a sprinkle of parmesan cheese. It makes the presentation so inviting, and everyone digs in right away. You can also use cute mini chalkboard labels for each flavor variation if you try herbs or spices—a fun way to impress guests.
Make Ahead and Storage
Storing Leftovers
Leftover Parker House rolls store beautifully at room temperature for 2-3 days if you keep them sealed tight in a bread box or airtight container. I usually wrap mine in foil and put them in a plastic bag to keep moisture locked in so they don’t get dry.
Freezing
I’ve had great success freezing these rolls individually wrapped or in freezer bags for up to 3 months. Just thaw overnight in the fridge or on the counter for a few hours before reheating. This way, you can always have fresh-tasting bread ready for any meal.
Reheating
To bring leftovers back to life, I pop them in a 350°F oven wrapped in foil for 10-15 minutes or until warmed through. If you want that fresh-baked crust again, remove the foil for the last few minutes of baking. I find microwaving makes them soft but removes that lovely crust, so the oven is my go-to.
FAQs
-
Can I make Parker House rolls without a stand mixer?
Absolutely! While a stand mixer with a dough hook makes kneading easier and faster, you can knead the dough by hand on a floured surface. It will take a bit more elbow grease—about 10-12 minutes—but you’ll still end up with soft, delicious rolls.
-
Can I use instant yeast instead of active dry yeast?
Yes, you can substitute instant yeast, but since it doesn’t need proofing, add it directly to the flour and reduce the warm water slightly since instant yeast tends to absorb more liquid. You may also see a faster rise, so keep an eye on the dough.
-
Why do Parker House rolls have that folded shape?
The fold creates the classic fluffy interior and soft sides that make these rolls easy to pull apart. It also gives the top surface a slightly crispy edge when baked, providing a nice texture contrast.
-
Can I make these rolls gluten-free?
Gluten-free Parker House rolls are a bit tricky because you need the gluten for that perfect rise and texture. However, you can experiment with a high-quality gluten-free flour blend and xanthan gum to help the dough rise, but results may vary. I recommend starting with your favorite gluten-free bread recipe before trying this one.
-
How do I know when the rolls are fully baked?
The rolls should be a rich golden brown on top and sound hollow when tapped on the bottom. Using an instant-read thermometer, the internal temperature should be around 190°F for perfectly baked rolls.
Final Thoughts
I can’t tell you how many times this Parker House Rolls Recipe has saved me when I needed a showstopper that’s easy to make, tastes incredible, and pleases every palate at the table. There’s something so satisfying about pulling apart those buttery, fluffy rolls fresh from the oven, and honestly, it feels like a little celebration every single time. So go ahead—grab your ingredients, and make these rolls your own kitchen tradition. I promise you’ll be reaching for this recipe again and again!
Print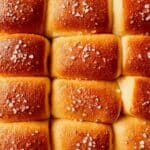
Parker House Rolls Recipe
- Prep Time: 3 hrs 30 min
- Cook Time: 30 min
- Total Time: 4 hrs
- Yield: 48 rolls
- Category: Bread
- Method: Baking
- Cuisine: American
Description
Classic Parker House Rolls that are soft, buttery, and slightly sweet, perfect for serving alongside any meal. These homemade rolls feature a tender crumb and flaky salt topping, made using a traditional yeast dough that’s kneaded, allowed to rise twice, then baked to golden perfection.
Ingredients
Wet Ingredients
- 1½ cups whole milk
- 1 cup (2 sticks) salted butter, plus more for greasing and serving
- ¼ cup sugar
- 1 package active dry yeast
- 3 large eggs
- ½ cup warm water (110°F)
Dry Ingredients
- 6 cups all-purpose flour, plus more for dusting
Other Ingredients
- 2 teaspoons vegetable oil
- Flaky salt, for serving
Instructions
- Heat Milk and Butter: In a small saucepan over low heat, combine whole milk and ½ cup of the butter. Heat until the butter melts, then remove from heat and stir in the sugar. Allow the mixture to cool to room temperature.
- Activate Yeast: In a small bowl, combine active dry yeast and ½ cup of warm water (110°F). Let it sit for about 2 minutes until the yeast dissolves and the mixture becomes foamy, indicating the yeast is active.
- Make the Dough: In the bowl of a stand mixer fitted with a dough hook, add the cooled milk-butter mixture, eggs, yeast mixture, and 3 cups of flour. Mix on low speed until smooth. Gradually add the remaining 3 cups of flour and increase the mixer speed to medium. Knead the dough for 5 to 7 minutes until it is smooth and elastic.
- First Rise: Grease a large bowl with vegetable oil. Transfer the dough into the greased bowl and cover loosely with plastic wrap. Let it rise at room temperature for about 1½ to 2 hours until doubled in size. Alternatively, refrigerate the dough for 12 to 24 hours to rise slowly.
- Shape Rolls: Melt the remaining ½ cup of butter and grease a 9×13-inch baking dish with some of it. Punch down the risen dough and transfer it to a lightly floured surface. Divide the dough into 4 equal portions. Working one portion at a time, roll it out into a 12×8-inch rectangle. Cut each rectangle lengthwise into two 12×4-inch strips, then cut each strip into 6 pieces. Brush each piece with melted butter, fold it in half with a ¼-inch overhang, and place them in the prepared baking dish with the folded edges overlapping slightly. Arrange six rows of eight rolls each.
- Second Rise: Brush the tops of the rolls with the remaining melted butter. Cover with plastic wrap and let the rolls rise at room temperature for 30-40 minutes until doubled in size. Alternatively, refrigerate for 6 hours or up to overnight.
- Bake Rolls: Preheat the oven to 375°F with the rack in the center. Bake the rolls for 20 to 25 minutes until golden brown on top.
- Finish and Serve: While the rolls are still warm, brush them with melted butter and sprinkle flaky salt on top before serving.
Notes
- For best flavor and texture, allow the dough to rise slowly overnight in the refrigerator.
- You can substitute unsalted butter but add a pinch of salt to the dough.
- Ensure the water for activating yeast is not too hot to avoid killing the yeast.
- Brush the rolls generously with butter after baking for a soft crust with extra flavor.
- Flaky salt adds a nice finishing touch, but can be omitted if preferred.
Nutrition
- Serving Size: 1 roll
- Calories: 150
- Sugar: 3g
- Sodium: 210mg
- Fat: 6g
- Saturated Fat: 3.5g
- Unsaturated Fat: 2g
- Trans Fat: 0g
- Carbohydrates: 22g
- Fiber: 1g
- Protein: 4g
- Cholesterol: 35mg


