
If you’re on the hunt for the ultimate soft, fluffy, and melt-in-your-mouth rolls, then look no further—I’ve got a secret weapon for you. My Buttery Cloverleaf Rolls Recipe is a true crowd-pleaser, perfect for family dinners, holiday feasts, or any time you want to impress with little effort. These rolls come out tender and buttery with a subtle honey sweetness, and that iconic cloverleaf shape is just too charming to resist. Trust me, once you try this recipe, your bread game will never be the same!
Why You’ll Love This Recipe
- Incredibly Soft and Buttery: Each roll is tender, with layers of buttery goodness that practically melt on your tongue.
- Fun & Fluffy Cloverleaf Shape: The classic shape isn’t just adorable—it lets you tear off just the right amount every time.
- Sweetened Just Right: A touch of honey balances the flavors without being overpowering.
- Perfect for Any Occasion: Whether it’s weeknight dinner or holiday brunch, these rolls fit the bill perfectly.

Ingredients You’ll Need
The ingredients in this Buttery Cloverleaf Rolls Recipe work harmoniously to create that soft, golden-brown roll with a silky crumb. Keep an eye on your yeast freshness and try to use room-temperature butter for best results.
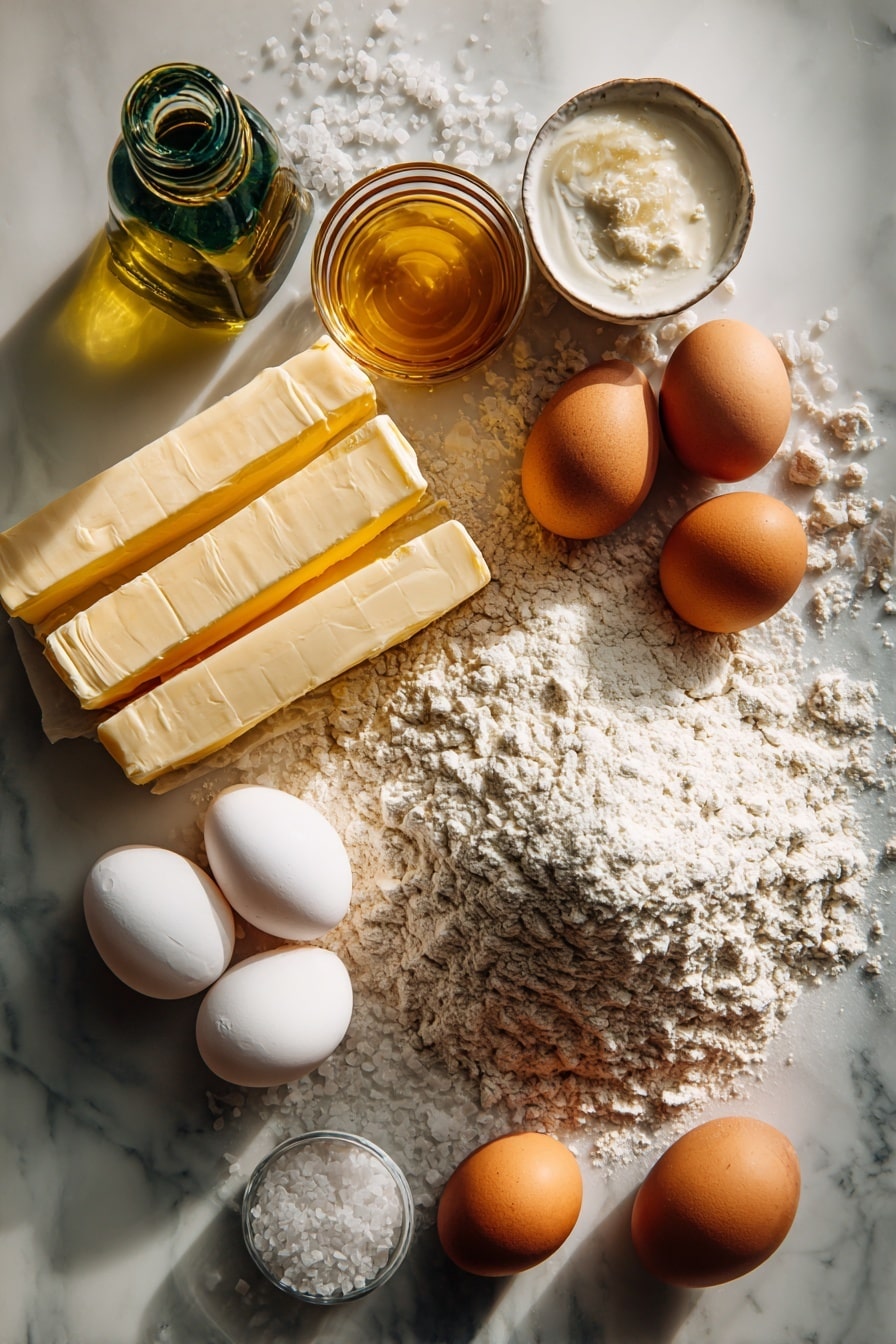
- Active dry yeast: Make sure it’s fresh and proof it in warm water to activate those magical bubbles.
- Warm water: Keeps the yeast happy and helps the dough rise beautifully. Aim for about 110°F—not too hot or you’ll kill the yeast.
- Warm milk: Adds richness and flavor; whole milk works best but 2% is fine too.
- Honey: A natural sweetener that boosts yeast activity and adds a lovely subtle sweetness.
- Olive oil: Balances the butter’s richness and keeps the dough pliable.
- Large egg: Binds the dough and contributes to that perfect golden color.
- Unsalted butter (softened): The star player that makes these rolls irresistibly buttery.
- Salt: Enhances all the flavors—don’t skip it!
- All-purpose flour: Use fresh flour; this forms the structure but don’t overdo it or your rolls will be tough.
- Melted butter for brushing: This little extra butter brushing after baking is my favorite finishing touch for that glossy, melt-in-your-mouth top.
Variations
I love tinkering with this Buttery Cloverleaf Rolls Recipe to fit different seasons and tastes. Don’t be shy about making it your own—you can easily sneak in some herbs or swap honey for maple syrup for a twist.
- Herb-Infused Rolls: Adding a teaspoon of dried rosemary or thyme into the dough gives these rolls a fragrant, savory note that my family adores.
- Garlic Butter Variation: Brush garlic-infused melted butter on top right after baking—I discovered this trick at a family reunion and it was an instant hit.
- Whole Wheat Blend: Swap half the all-purpose flour with whole wheat for a nuttier flavor and added fiber without compromising fluffiness.
- Honey Substitute: If you prefer, replace honey with pure maple syrup for a slightly different sweetness that pairs great with fall dishes.
How to Make Buttery Cloverleaf Rolls Recipe
Step 1: Activate Your Yeast Like a Pro
Start by combining your warm water, yeast, olive oil, and a tablespoon of honey in the bowl of your electric mixer. I like to stir this gently with a spoon and then set it aside for about 10-15 minutes, just until it gets that lovely foamy head. This foam is your signal that the yeast is alive and ready to make magic happen. No foam? Double-check your water temp or freshness of the yeast.
Step 2: Mix and Knead the Dough
Once your yeast is bubbly, add in the warm milk, the rest of the honey, the egg, and softened butter. Mix on low to combine, then add 2 cups of flour and salt. Keep mixing and gradually increase your mixer speed to medium. Slowly incorporate the remaining flour, one cup at a time, stopping around 5 cups—you want the dough to be soft and slightly sticky, not dry. Knead on medium speed for about 4-5 minutes. If your dough feels too sticky, sprinkle a little more flour and knead a bit more, but keep it tender.
Step 3: First Rise — Let It Puff Up!
Shape the dough into a ball on a lightly floured surface. Brush a large bowl with melted butter and place your dough inside, turning to coat it evenly in butter. Cover with a towel and put it somewhere warm and cozy for 1 ½ to 2 hours, or until the dough has doubled in size. This slow rise is what gives you that soft crumb inside and a subtle tangy flavor.
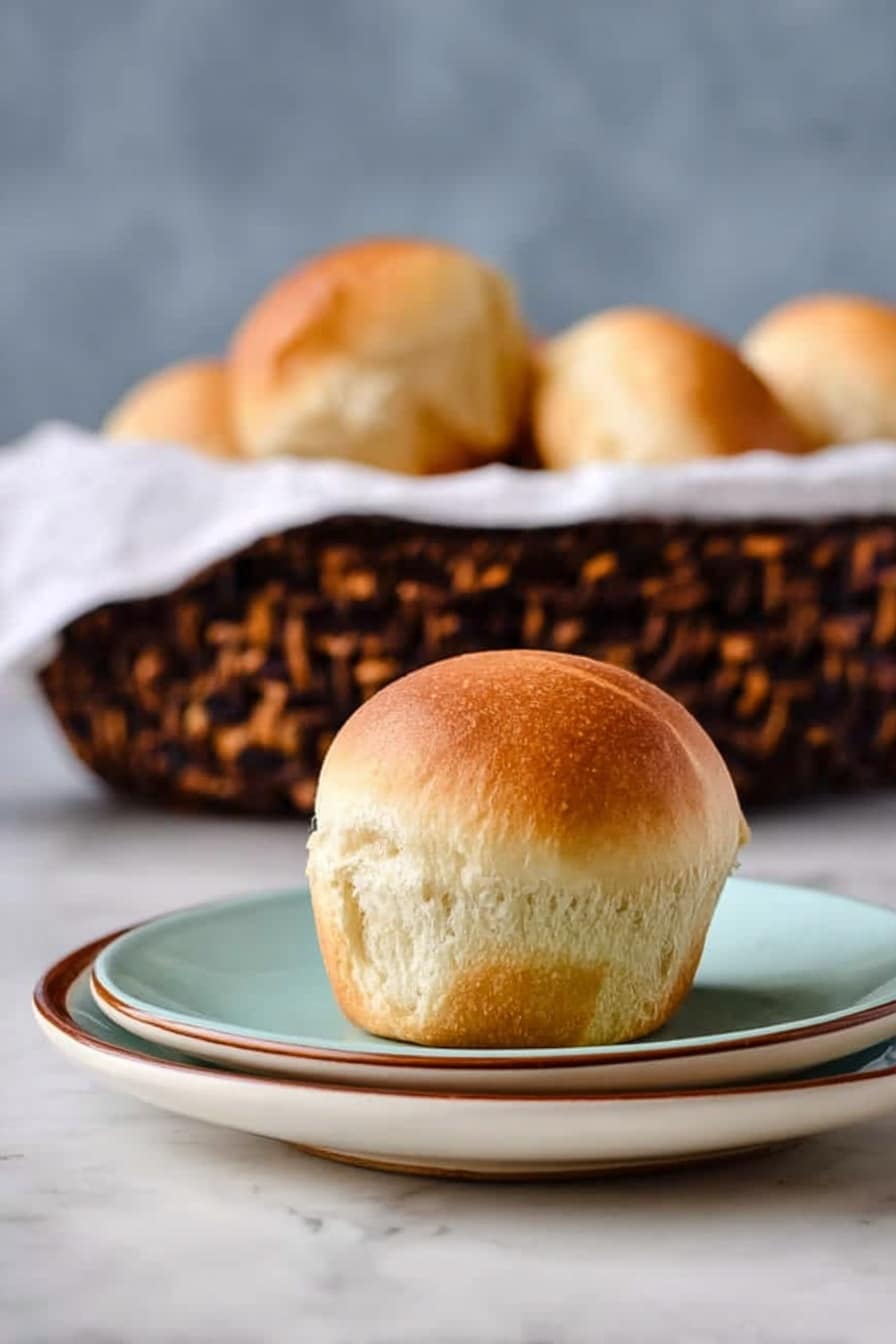
Step 4: Shape Your Cloverleaf Rolls
This is where the fun part begins! Punch down your dough gently and transfer it to a floured surface. Tear off small pieces slightly larger than an inch, then roll each into smooth little balls—you’ll get around 90 dough balls total. Butter your muffin tins generously (that extra butter makes all the difference!) and place 3 dough balls in each cup. Cover again and let them rise for about an hour until puffy and touching.
Step 5: Bake and Butter, Butter, Butter!
Preheat your oven to 375°F. Just before baking, give the tops of your rolls a generous brush of melted butter. Bake for 11-12 minutes or until the tops are a gorgeous golden brown. Take them out, and while they’re still warm, brush on melted butter several times as they cool—this extra step makes them insanely shiny and tender. It’s a ritual I never skip!
Pro Tips for Making Buttery Cloverleaf Rolls Recipe
- Perfect Yeast Activation: Use water that’s warm, not hot—about 110°F—to wake your yeast without killing it.
- Flour Gradually: Adding flour slowly helps you avoid a dry, tough dough and keeps those rolls soft.
- Butter-Brush Ritual: Don’t skip brushing the rolls multiple times as they cool—it adds flavor and keeps the crust tender.
- Warm Rising Spot: I use my oven’s proof setting or a sunny windowsill to ensure my dough rises perfectly every time.
How to Serve Buttery Cloverleaf Rolls Recipe
Garnishes
For garnish, I love sprinkling a little flaky sea salt over the top right after that final butter brush, especially if I’m serving them as dinner rolls. A light dusting of fresh herbs like parsley or chives can also add a pop of color and a burst of flavor.
Side Dishes
These rolls are incredible with soups and stews—think creamy tomato basil soup or classic beef stew. They also shine alongside roasted chicken or turkey. Honestly, the first time I served them with a big holiday meal, my family devoured them before the main course!
Creative Ways to Present
For special occasions, I arrange the rolls tightly in a beautiful circular pattern on a platter to showcase their cloverleaf shape, then add fresh rosemary sprigs in the center for that rustic touch. Turning the muffin tins upside-down right after baking (once cool enough) reveals the perfect rolls shape and makes serving a breeze.
Make Ahead and Storage
Storing Leftovers
If you have any rolls leftover (and I hope you do!), let them cool completely, then store them in an airtight container at room temperature. I usually place a paper towel in the container to absorb excess moisture—it works wonders to keep them from getting soggy or stale.
Freezing
I’ve frozen these rolls successfully after the first rise and after baking. For best results, freeze them unbaked shaped in muffin tins or baked in an airtight container. Just thaw overnight in the refrigerator, then warm gently in the oven.
Reheating
To reheat, pop the rolls in a 300°F oven for about 10 minutes, loosely covered with foil to keep moisture inside. This refreshes their soft texture without drying them out. You can also microwave them for 15 seconds, but the oven method really keeps that buttery crust intact.
FAQs
-
Can I make Buttery Cloverleaf Rolls Recipe without a mixer?
Absolutely! You can mix and knead the dough by hand. It’ll take a bit more elbow grease—around 8-10 minutes of kneading—but it’s completely doable. Just be patient and watch for that smooth, slightly sticky texture.
-
How do I know when the rolls are done baking?
Look for golden brown tops and a slight firmness when you gently tap them. They should sound hollow when tapped underneath. Baking time is typically 11-12 minutes, but ovens vary, so keep an eye on them after the 10-minute mark.
-
Can I make these rolls in advance?
Yes! You can prepare up to shaping the rolls the day before, then refrigerate them overnight covered tightly with plastic wrap. Let them come to room temperature and rise before baking the next day for fresh rolls.
-
What’s the best way to keep the rolls soft?
Brushing with melted butter multiple times right after baking is key. Also, storing in an airtight container with a little moisture absorber (like a paper towel) helps maintain softness even the next day.
Final Thoughts
Honestly, this Buttery Cloverleaf Rolls Recipe holds a special place in my heart. It’s the recipe I come back to when I want to wow guests without stressing in the kitchen. The combination of buttery richness, tender crumb, and that cute cloverleaf design makes every bite feel like a little celebration. So go ahead, try these rolls out—you’ll soon find yourself making them for every meal because they’re just that good.
Print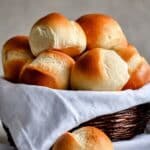
Buttery Cloverleaf Rolls Recipe
- Prep Time: 20 minutes
- Cook Time: 12 minutes
- Total Time: 3 hours 20 minutes
- Yield: 30 rolls
- Category: Bread
- Method: Baking
- Cuisine: American
Description
These Buttery Cloverleaf Rolls are soft, fluffy, and perfectly golden rolls with a rich buttery flavor. Made with active dry yeast, honey, and a combination of milk and olive oil, they are ideal for dinner parties, family meals, or holiday gatherings. The rolls rise twice to develop a light, airy texture and are brushed generously with melted butter before, during, and after baking for an irresistible finish.
Ingredients
Yeast Mixture
- 4 1/2 teaspoons (2 packets) active dry yeast
- 1/2 cup warm water
- 1 tablespoon olive oil
- 1 tablespoon honey
Dough
- 1 1/2 cups warm milk
- 1/4 cup honey
- 1 large egg
- 1/4 cup unsalted butter, softened
- 2 teaspoons salt
- 5 1/2 – 6 cups all-purpose flour, or more if needed
Finishing
- Melted butter for brushing
Instructions
- Activate Yeast: In the bowl of an electric mixer fitted with a dough hook, combine warm water, yeast, olive oil, and 1 tablespoon of honey. Stir with a spoon and let the mixture sit until it becomes foamy, about 10-15 minutes, indicating the yeast is active.
- Prepare Dough: Add warm milk, the remaining honey, egg, and softened butter to the yeast mixture. Mix on low speed until just combined, then incorporate 2 cups of flour and salt. Gradually add remaining flour 1 cup at a time while mixing, stopping at about 5 cups. Increase speed to medium to knead the dough for 4-5 minutes, adding a bit more flour if sticky, until dough is smooth but slightly tacky.
- First Rise: Remove dough from mixer and shape into a ball, dusting hands with flour to prevent sticking. Butter a large bowl and place the dough inside, turning it to coat with butter. Cover the bowl with a towel and let the dough rise in a warm place for 1 1/2 to 2 hours until doubled in size.
- Shape Rolls: Punch down the dough to release air. Transfer to a floured surface, tear off small pieces slightly larger than one inch, and roll into balls. You should have about 90 dough balls in total. Butter a muffin tin and place 3 dough balls into each cup, forming the characteristic cloverleaf shape.
- Second Rise: Cover the muffin tin and let the rolls rise again in a warm spot for about 1 hour until puffed.
- Preheat Oven and Butter Rolls: Preheat your oven to 375°F (190°C). Generously brush melted butter over the tops of the rolls to create a golden crust during baking.
- Bake: Bake the cloverleaf rolls for 11-12 minutes or until the tops are just golden brown and the rolls are cooked through.
- Butter and Cool: Remove the rolls from the oven and brush them again with melted butter. Repeat the butter brushing every few minutes as the rolls cool to keep them soft and flavorful.
- Serve: Remove the rolls from the muffin tins and serve warm. These rolls are best eaten the same day they are made, but if storing, ensure they are cooled completely and kept in an airtight container for freshness.
Notes
- Ensure your water and milk are warm, not hot, to avoid killing the yeast.
- The dough should be slightly sticky but manageable; avoid adding too much flour to keep rolls soft.
- Double rising helps develop the fluffy texture unique to cloverleaf rolls.
- Brush with melted butter multiple times after baking to keep rolls moist and flavorful.
- Store cooled rolls in an airtight container if making ahead, best consumed within 1-2 days.
- You can freeze baked rolls; thaw and warm before serving for best results.
Nutrition
- Serving Size: 1 roll
- Calories: 150
- Sugar: 3g
- Sodium: 250mg
- Fat: 5g
- Saturated Fat: 3g
- Unsaturated Fat: 2g
- Trans Fat: 0g
- Carbohydrates: 22g
- Fiber: 1g
- Protein: 4g
- Cholesterol: 30mg


