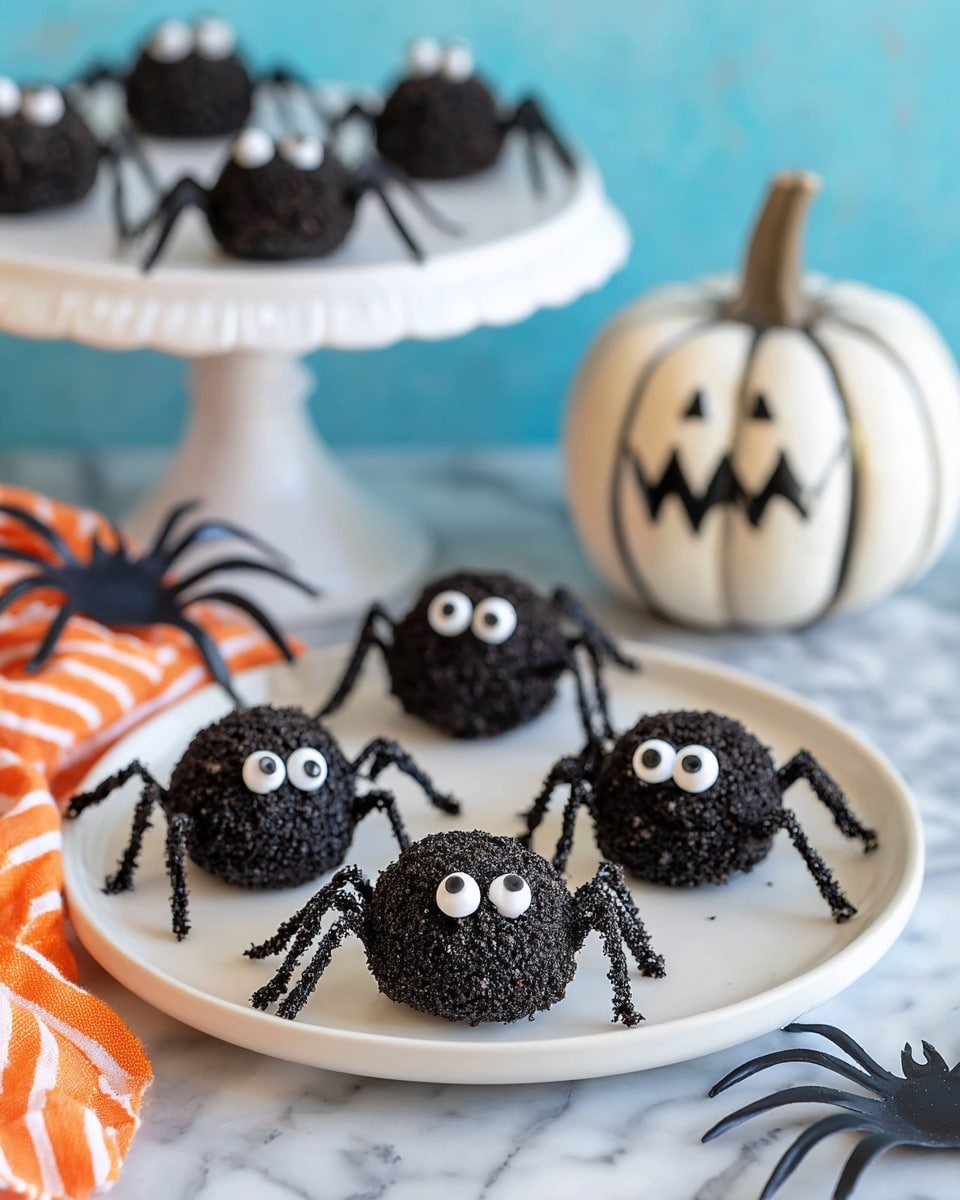
If you’re looking for a fun, festive, and downright adorable treat to wow your friends or family this season, you’ve got to try my Spider Oreo Treats Recipe. These little creepy crawlers are not just cute—they’re super tasty and surprisingly easy to make. I remember the first time I whipped these up; my kids went absolutely wild for them, and honestly, so did I! Stick around because I’m going to walk you through every step to help you nail these fantastic spider bites every time.
Why You’ll Love This Recipe
- Simple Ingredients: You probably already have most of the stuff in your pantry or fridge, making this a last-minute hit.
- Perfect Halloween Treat: These spider-themed Oreo balls are playful, spooky, and totally kid-approved.
- No Bake, No Oven: Ideal if you want something quick and mess-free to make with the kids or guests.
- Customizable Fun: You can easily swap candy eyes or chocolate colors to fit any theme or party vibe.

Ingredients You’ll Need
These ingredients come together like magic—Oreo cookies add crunch and flavor, cream cheese lends a creamy texture, and chocolate brings it all together with a perfect finish. I always recommend getting candy eyeballs that are just the right size for a playful look and melting wafers that are smooth and easy to work with.
- Oreo cookies: Classic and accessible, giving your spiders that iconic chocolaty crunch and flavor.
- Cream cheese: Make sure it’s softened to room temperature for the easiest mixing and smoothest texture.
- Chocolate melting wafers: I use these because they melt evenly and set up quickly, perfect for piping spider legs.
- Candy eyeballs: These fun little details bring your spiders to life—grab a size that’s proportional to your Oreo balls for the best effect.
Variations
I love how flexible this Spider Oreo Treats Recipe is! I’ve played around with different toppings and flavors that really suit my mood or the party theme. Feel free to get creative—you’ll find changing a few ingredients can make these treats just as fun but new each time.
- Use different cookie flavors: I once tried golden Oreos instead of regular, and it gave a fun twist with a lighter color for the spiders, which looked super cute.
- Try white chocolate: For a snowy spider vibe or simply if you want a sweeter finish, swapping in white chocolate wafers works perfectly.
- Add sprinkles or edible glitter: Great for parties or to give your spiders extra sparkle—my niece absolutely loved that when I added edible glitter legs one year.
- Dairy-free or vegan adaptation: Use dairy-free cream cheese and vegan-friendly chocolate wafers. Just make sure your candy eyes meet your dietary needs.
How to Make Spider Oreo Treats Recipe
Step 1: Crush Those Oreos
Pop the entire package of Oreos into your food processor and blitz them until they turn into fine crumbs. When I first tried this, I was surprised how quickly the cookies pulverized—just a few pulses will do! Scoop out about two-thirds of the crumbs to set aside; you’ll coat the spider bodies with these later. Using the processor gives you that perfect crumb texture that helps form the balls seamlessly.
Step 2: Mix in the Cream Cheese
Cut your softened cream cheese into chunks and toss it into the food processor with the remaining Oreo crumbs. Blend together until the mixture is well combined and can be shaped easily. This step is crucial because the cream cheese acts like glue—if it’s too cold or hard, your mixture won’t ball up nicely.
Step 3: Shape Your Spiders
Using a small spoon or melon baller, scoop out 25 small portions and roll each into a tight ball. Then roll each ball in the Oreo crumbs you set aside to coat the outside and create that crunchy, dusted spider body. This coating adds a nice texture contrast and mess-proofs your spiders just a bit.
Step 4: Create the Legs with Chocolate
Melt your chocolate wafers in the microwave, stirring every 20 seconds so you don’t overheat or burn the chocolate. Pour the melted chocolate into a squeeze bottle or a ziploc bag with a tiny corner cut off. Squeeze out spider legs in L shapes onto parchment paper laid on a baking sheet. Freeze this for about 10 minutes so the legs harden completely. This little chilling trick helps the legs pop off the paper clean and keeps their shape.
Step 5: Assemble Your Spider Oreo Treats
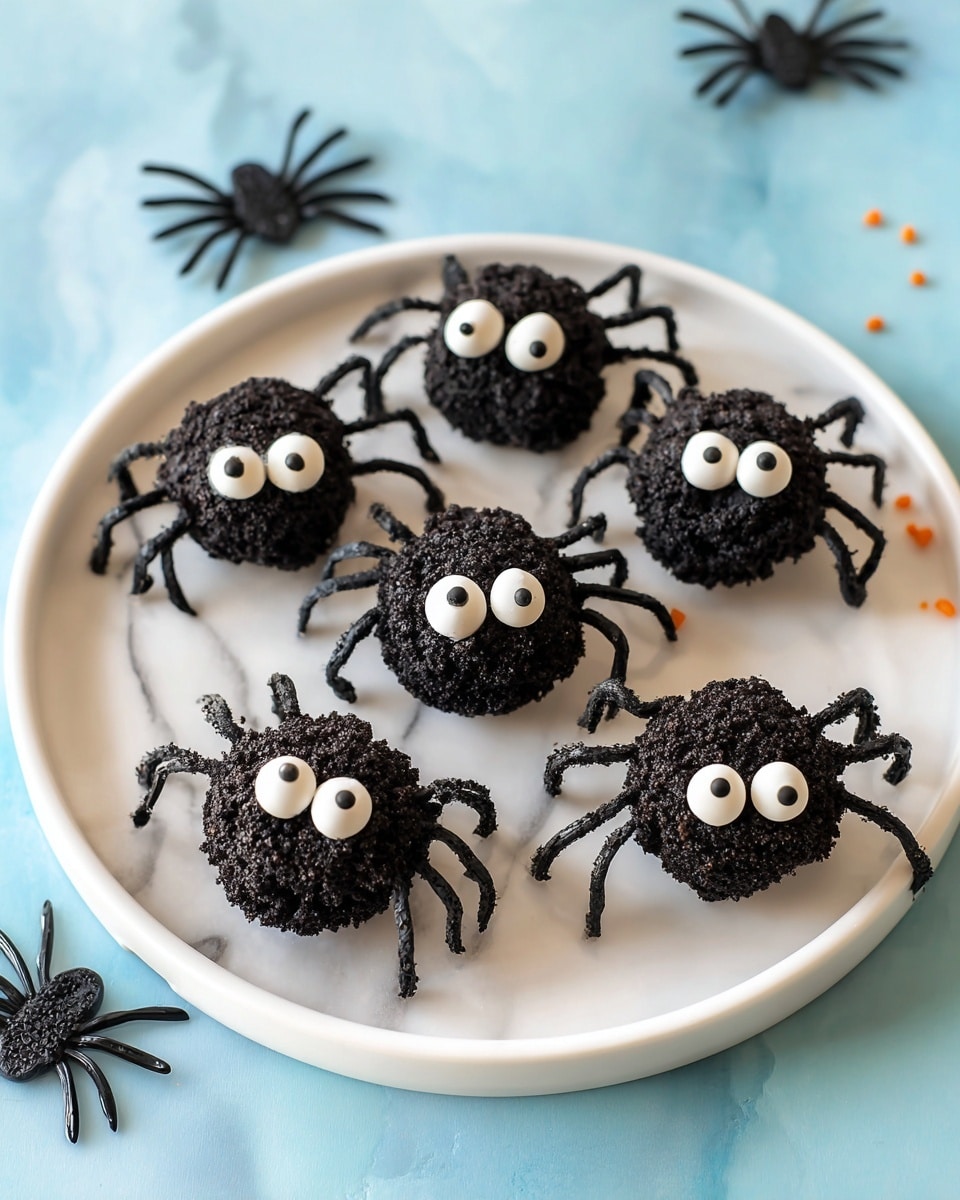
Using a dab of melted chocolate as glue, attach candy eyeballs to each spider body. Then gently press six hardened chocolate legs onto each ball, positioning them so they look like a real spider’s legs. I found this part super satisfying—plus, it’s where these treats start to really come alive!
Pro Tips for Making Spider Oreo Treats Recipe
- Softened Cream Cheese: Make sure your cream cheese is fully softened; cold cream cheese won’t blend well and makes rolling difficult.
- Chocolate Melting: Keep the microwave intervals short and stir often to avoid burning the chocolate—burned chocolate gets grainy and won’t set properly.
- Leg Assembly: Try chilling your spider bodies briefly before attaching legs; this helps the chocolate legs adhere better and prevents melting.
- Avoid Overhandling: Handle your spider treats with dry clean hands to keep the crumbs intact and avoid melting the chocolate legs prematurely.
How to Serve Spider Oreo Treats Recipe
Garnishes
I love adding extra candy eyes or even small licorice strands to jazz up these Spider Oreo Treats. Sometimes I sprinkle edible glitter or colored sugar on top just before the chocolate legs set for a dazzling creepy-crawly effect. It adds just the right bit of whimsy when serving to kids or at parties.
Side Dishes
These spiders pair perfectly with a tall glass of cold milk or a warm cup of hot chocolate. For parties, I like serving them alongside pumpkin-shaped sugar cookies or simple fruit platters to balance the rich sweetness.
Creative Ways to Present
One of my favorite presentations is plating these Spider Oreo Treats on a bed of spun sugar or “cobweb” crafted from thin strands of melted marshmallow. For Halloween, I’ve even arranged them inside clear treat bags tied with spider web ribbons. It’s a fun way to wow guests and give your party that extra spooky charm.
Make Ahead and Storage
Storing Leftovers
I store leftover Spider Oreo Treats in an airtight container in the fridge. They keep their shape and texture perfectly for up to a week. It’s amazing how they almost taste better the next day once the flavors have melded a bit.
Freezing
If you want to make these ahead, they freeze beautifully. Just arrange the spiders in a single layer on a tray to freeze individually, then transfer to a freezer-safe container. When you’re ready, thaw them in the fridge overnight and assemble the legs and eyes fresh—this keeps everything looking crisp.
Reheating
Since these are no-bake treats, reheating isn’t really necessary. If the chocolate legs soften, just pop the spiders in the fridge for a bit to firm back up. Avoid heating them directly, or you risk melting your charming legs and messing with the texture.
FAQs
-
Can I use a hand mixer instead of a food processor for the Oreo crumbs?
Absolutely! While a food processor is quickest, you can place Oreos in a sealed plastic bag and crush them with a rolling pin, or pulse with a hand mixer until you get fine crumbs. Just be patient to achieve a consistent texture so your Spider Oreo Treats hold together well.
-
What if I can’t find candy eyeballs?
No worries—you can substitute with mini chocolate chips, jelly beans, or even pipe tiny dots of white and dark chocolate to create eyes. When I was out of candy eyeballs once, I made small white chocolate dots with a toothpick and added a dark chocolate center, and they turned out awesome!
-
How long do Spider Oreo Treats last?
Stored properly in an airtight container in the fridge, these treats stay fresh for up to a week. The chocolate legs hold up nicely, and the cream cheese in the mixture keeps the spider bodies soft and creamy.
-
Can I make these ahead for a party?
Yes! You can prepare the spider bodies a day ahead and refrigerate them. The chocolate legs are best piped and assembled just a few hours before serving to keep them from melting or breaking.
Final Thoughts
Honestly, the Spider Oreo Treats Recipe is one of those joyful kitchen moments where fun meets flavor perfectly. It’s easy enough for the kids to get involved, but impressive enough to bring a smile to any guest’s face. Whether you’re making these for Halloween or just because you want a treat that’s a bit unexpected, you’re going to love how they turn out—and so will everyone else. So grab those Oreos, melt that chocolate, and let’s make some spiders crawl their way into your snack rotation!
Print
Spider Oreo Treats Recipe
- Prep Time: 10 minutes
- Cook Time: 0 minutes
- Total Time: 20 minutes (including 10 minutes freezing)
- Yield: 25 spiders
- Category: No-Bake Desserts
- Method: No-Cook
- Cuisine: American
Description
Delightfully spooky and irresistibly delicious, these Spider Oreo Treats are a fun Halloween-themed dessert. Made with Oreo cookie crumbs, creamy cream cheese, and decorated with chocolate spider legs and candy eyeballs, these bite-sized treats are perfect for parties and festive gatherings. With simple no-bake assembly and minimal freezing time, they’re both quick and fun to make with kids or friends.
Ingredients
Cookies and Base
- 18 oz. package of Oreo cookies
- 8 oz. cream cheese, softened
Decoration
- 6 oz. chocolate melting wafers
- 50 candy eyeballs
Instructions
- Process Oreo Cookies: Put the Oreos into a food processor and pulse until you have very fine crumbs. Remove 2/3 cup of these crumbs and set them aside for coating later.
- Mix Cream Cheese: Cut the softened cream cheese into chunks and add it to the remaining Oreo crumbs in the food processor. Blend until the mixture is thoroughly combined and forms a consistent dough.
- Form Spider Bodies: Scoop out 25 small portions of the Oreo-cream cheese mixture using a small spoon or melon baller. Roll each portion into a round ball. Roll each ball in the set-aside Oreo crumbs to coat thoroughly, creating the spider bodies.
- Melt Chocolate: Place the chocolate melting wafers into a small microwavable bowl. Microwave in 20-second intervals, stirring between each, until fully melted and smooth.
- Create Spider Legs: Transfer the melted chocolate into a small squeeze bottle or a ziplock bag with a tiny cut in one corner. Pipe spider leg shapes (simple lines or L shapes) onto a piece of parchment paper on a baking sheet.
- Harden Legs: Freeze the chocolate spider legs on the baking sheet for about 10 minutes or until they have completely hardened.
- Assemble Spiders: Put a small dot of melted chocolate on the back of each candy eyeball and attach one to each spider body to form the eyes.
- Add Legs: Once the chocolate legs are hardened, carefully insert six legs into each spider body to complete the spooky look.
Notes
- Be sure the cream cheese is softened to blend easily with the Oreo crumbs.
- Use a small melon baller or teaspoon for even-sized spider bodies.
- Chocolate legs can be piped in various shapes for creative spider designs.
- Keep the chocolate warm enough to pipe but not too hot to affect the candy eyeballs.
- Store the finished spiders in the refrigerator until serving to keep them firm.
Nutrition
- Serving Size: 1 spider (approx.)
- Calories: 120
- Sugar: 10g
- Sodium: 95mg
- Fat: 7g
- Saturated Fat: 4g
- Unsaturated Fat: 3g
- Trans Fat: 0g
- Carbohydrates: 14g
- Fiber: 1g
- Protein: 1g
- Cholesterol: 10mg


