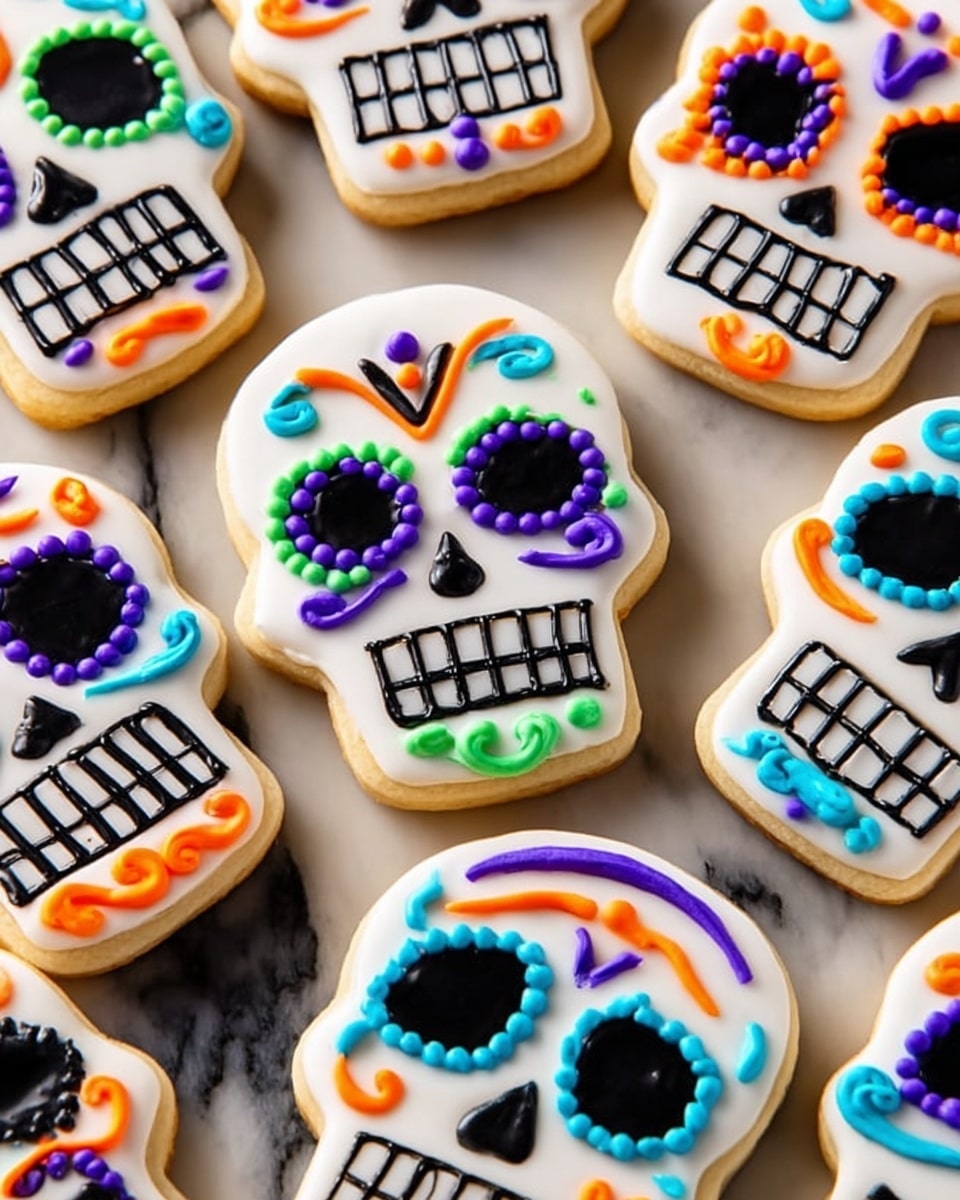
If you’re looking to make a stunning treat that’s as fun to decorate as it is delicious to eat, you’re going to love this Day of the Dead Skull Cookies Recipe. Perfect for celebrating this vibrant tradition, these cookies combine a tender, buttery base with colorful, festive icing that lets your creativity run wild. I absolutely love how these turn out—my family always goes crazy for how festive and tasty they are. Stick with me here; I’ll share all the tips and tricks you need to nail these delectable delights in your own kitchen!
Why You’ll Love This Recipe
- Vibrant Decoration: The colored icing lets you get creative and really capture the spirit of the Day of the Dead.
- Buttery, Tender Cookies: The dough holds its shape beautifully but stays soft and delicious—no dry, crumbly disasters here.
- Fun for All Skill Levels: Whether you’re a seasoned baker or just starting out, these cookies are approachable and rewarding.
- Make-Ahead Friendly: The dough chills well, and the cookies keep their flavor and texture for days.

Ingredients You’ll Need
The magic behind this Day of the Dead Skull Cookies Recipe starts with simple pantry staples that come together effortlessly. I recommend using good-quality butter and pure vanilla extract—you’ll notice the difference in flavor right away!
- All-purpose flour: Provides the perfect texture; rolling out on a lightly floured surface helps the dough from sticking.
- Baking powder: A pinch to keep your cookies light, not too dense.
- Kosher salt: Balances the sweetness and enhances flavor.
- Butter: Use softened, unsalted butter for the best flavor and texture.
- Granulated sugar: Sweetens while helping the dough hold together.
- Egg: Adds moisture and helps bind everything.
- Milk: Just a tablespoon to keep the dough tender.
- Vanilla extract: For that warm, comforting aroma and flavor.
- Powdered sugar: Essential for smooth, silky icing.
- Corn syrup: Keeps the icing shiny and workable for decorating.
- Food coloring (black, teal, orange, green, purple, yellow): Pick vibrant gels for the best color payoff!
Variations
I love making this Day of the Dead Skull Cookies Recipe my own by switching up colors or adding flavors! Don’t be afraid to experiment and personalize these cookies to suit your style or dietary needs—you’ll have a blast with it.
- Flavor Boost: Once, I added a bit of orange zest to the dough and it gave the cookies a subtle citrusy lift that paired beautifully with the icing.
- Gluten-Free Version: Try swapping the all-purpose flour for a 1:1 gluten-free baking blend—just watch the dough consistency and add a touch more milk if it feels dry.
- Vegan Adaptation: Use vegan butter and a flax egg (1 tbsp ground flax + 3 tbsp water) to make these deliciously dairy and egg-free.
- Seasonal Twists: Play with fall-themed colors like deep reds and golds if you’re celebrating around Halloween or Thanksgiving.
How to Make Day of the Dead Skull Cookies Recipe
Step 1: Mix Dry Ingredients
Start by whisking together the flour, baking powder, and salt in a large bowl. This ensures your leavening and seasoning are evenly dispersed—so your cookies rise just right with balanced flavor.
Step 2: Cream Butter and Sugar, Then Combine
In a separate large bowl, beat the softened butter and sugar together until fluffy and pale in color. This step is key for light texture. Next, add the egg, milk, and vanilla, mixing until combined. Then gradually add the flour mixture to the wet ingredients until your dough comes together smoothly, but don’t overmix—it’ll make your cookies tough.
Step 3: Chill the Dough
Shape the dough into a disk and wrap it tightly in plastic wrap. Refrigerate for at least one hour. This chilling step is important—it gives the dough time to firm up, making it much easier to roll and cut without sticking or warping.
Step 4: Roll Out and Cut Skulls
Preheat your oven to 350ºF. Line two baking sheets with parchment paper. On a lightly floured surface, roll the dough out to about an eighth of an inch thick. Use a skull-shaped cookie cutter to cut out your shapes, then transfer them to the baking sheets. Pop the trays in the freezer for about 10 minutes—this little trick helps the cookies keep their sharp skull shapes while baking.
Step 5: Bake and Cool
Bake your cookies for 10 to 12 minutes, until the edges are just starting to turn a light golden color. Removing them before they brown too much keeps them tender. Let the cookies cool completely before moving on to icing—if you ice them warm, the icing will melt and run.
Step 6: Make the Icing
In a medium bowl, combine powdered sugar, milk, corn syrup, and vanilla for your icing base. This combo makes a thick, shiny finish that’s easy to work with. Fill a piping bag with a small round tip with about a quarter of the icing for outlining cookies later.
Step 7: Outline and Flood Cookies
Use the reserved icing to outline your skulls. Then thin half of the remaining icing by adding milk, a teaspoon at a time, until it reaches a flood consistency—smooth and pourable but not too runny. Pipe this thinner icing into the centers of the skulls, completely filling them. This technique gives your cookies those classic decorated “sugar skull” looks.
Step 8: Color Your Icing
Divide the remaining icing evenly into six small bowls. Tint each with your chosen food coloring: black, teal, orange, green, purple, and yellow. I find gel food colors work best—they give vibrant shades without watering down the icing too much.
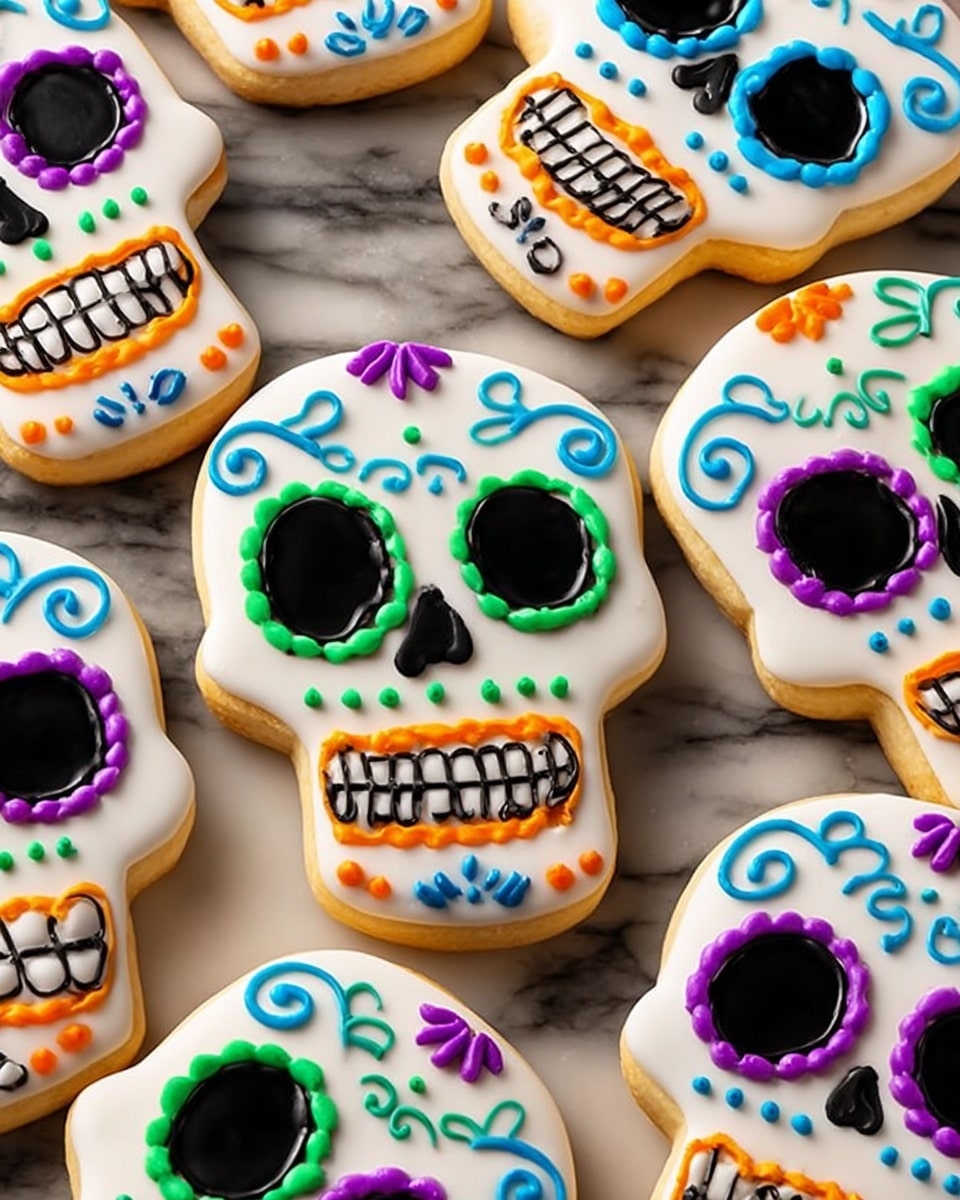
Step 9: Decorate Your Skulls
Fit piping bags with small round tips for each color and have fun decorating! You can recreate traditional faces with flowers, dots, and swirls or invent your own gorgeous designs. This is the part I look forward to most—watching each cookie come to life.
Pro Tips for Making Day of the Dead Skull Cookies Recipe
- Chill Dough Twice: After rolling and cutting, freezing the cookie shapes before baking helps your skulls keep crisp edges.
- Use Gel Food Colors: They give vibrant colors without thinning your icing, which is perfect for intricate piping work.
- Thin Icing Slowly: Add milk in small increments to avoid over-thinning and ensure flooding icing isn’t too runny or dripping.
- Cool Completely Before Icing: Warm cookies will melt icing fast, so patience here really pays off.
How to Serve Day of the Dead Skull Cookies Recipe
Garnishes
I usually sprinkle a few edible glitter accents on top of the icing for a little sparkle that catches the light beautifully. You can also add tiny sugar pearls, or even edible gold dust for a luxe touch—your skulls will look like festive jewels!
Side Dishes
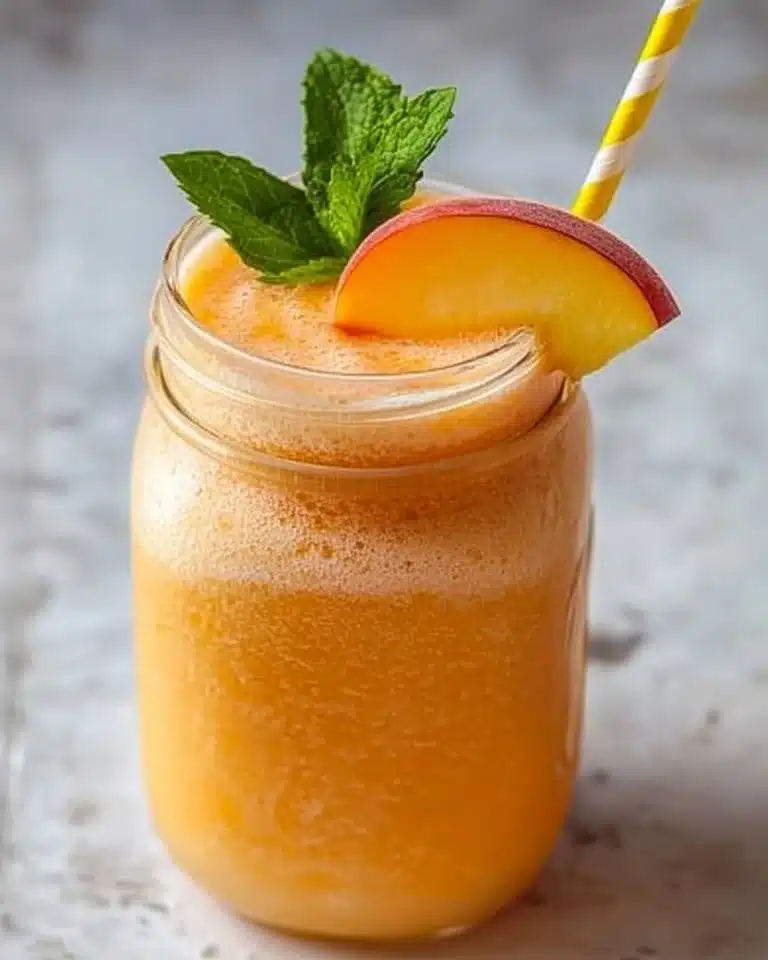
Pair these with a warm cup of Mexican hot chocolate or a spiced cinnamon latte to complement the sweetness and really elevate your Day of the Dead celebration. A bowl of fresh, seasonal fruit also offers a nice fresh balance alongside.
Creative Ways to Present
I like setting my decorated cookies on colorful papel picado, surrounded by marigold flowers for an authentic festive vibe. Arranging cookies on tiered platters makes a striking centerpiece, and gift-wrapping them in clear boxes tied with ribbon is a fantastic gift idea.
Make Ahead and Storage
Storing Leftovers
Once decorated and fully dried, I store these cookies in an airtight container layered with parchment paper to keep them from sticking together. They keep well at room temperature for up to 3 days without losing their crisp edges or vibrant icing.
Freezing
I’ve found that freezing undecorated baked cookies works best: flash freeze them on a tray, then transfer to a freezer-safe bag. When you want to decorate, thaw completely then ice as usual. This way, you can prepare in advance and still get fresh-looking cookies.
Reheating
I don’t recommend reheating decorated cookies because the icing can soften or melt, but if you prefer your cookie a bit softer, just let it sit at room temp for a bit before serving. This preserves the decoration while giving you the preferred texture.
FAQs
-
Can I make this Day of the Dead Skull Cookies Recipe without a skull cookie cutter?
Absolutely! If you don’t have a skull cutter, you can use any other cookie cutter shape or even hand-cut your own skull shapes with a sharp knife or stencil. The decorating icing is what really brings out the Day of the Dead spirit.
-
How do I get my icing to harden but stay shiny?
The combination of powdered sugar, corn syrup, and the right balance of milk creates a glossy finish that hardens nicely without losing that beautiful shine. Make sure to let the iced cookies dry at room temperature completely—this will set the icing properly.
-
Can I prepare the dough ahead of time?
Yes! The dough can be wrapped tightly and refrigerated for up to 2 days before rolling and cutting. This helps with convenience if you want to spread out your baking process.
-
What if I don’t have corn syrup for the icing?
You can substitute corn syrup with honey or golden syrup in equal amounts, but note that it may slightly affect the flavor and texture. Corn syrup keeps the icing smooth and glossy, so if possible, I recommend sticking to it for this recipe.
-
How long do decorated cookies last?
When stored properly in an airtight container at room temperature, these cookies stay fresh for about 3 to 5 days. The icing may harden further, making them great for gifting as well.
Final Thoughts
This Day of the Dead Skull Cookies Recipe has become one of my go-to festive projects because it brings so much joy in both making and sharing. From that first buttery bite to the joyful decorating moments, it really makes the celebration special. I hope you have just as much fun with this recipe as I do—go ahead, roll up your sleeves and create some colorful memories with these beautiful cookies!
Print
Day of the Dead Skull Cookies Recipe
- Prep Time: 20 mins
- Cook Time: 12 mins
- Total Time: 3 hrs
- Yield: 30 cookies
- Category: Dessert
- Method: Baking
- Cuisine: Mexican
Description
Celebrate the vibrant and spirited Day of the Dead festival with these colorful and festive Day Of The Dead Cookies. This recipe features tender, buttery sugar cookies shaped like skulls and beautifully decorated with bright, glossy royal icing in traditional Day of the Dead colors. Perfect for sharing during the holiday or as a fun baking activity, these cookies bring both flavor and festive charm to your celebration.
Ingredients
For the Cookies:
- 3 cups all-purpose flour, plus more for surface
- 1 tsp baking powder
- 1/2 tsp kosher salt
- 1 cup (2 sticks) butter, softened
- 1 cup granulated sugar
- 1 large egg
- 1 Tbsp milk
- 1 tsp pure vanilla extract
For the Icing:
- 5 cups powdered sugar
- 6 Tbsp milk, plus more for thinning
- 1/4 cup light corn syrup
- 1/4 tsp pure vanilla extract
- Black food coloring
- Teal food coloring
- Orange food coloring
- Green food coloring
- Purple food coloring
- Yellow food coloring
Instructions
- Mix dry ingredients: In a large bowl, whisk together the all-purpose flour, baking powder, and kosher salt until well combined and set aside.
- Cream butter and sugar: In another large bowl, beat the softened butter and granulated sugar together until fluffy and pale in color using a mixer. Add the egg, milk, and vanilla extract, and beat until fully combined.
- Combine and chill dough: Gradually incorporate the flour mixture into the wet ingredients until the dough is fully combined. Shape the dough into a disk, wrap it in plastic wrap, and refrigerate for 1 hour to firm up.
- Preheat and roll dough: When ready to bake, preheat the oven to 350ºF (175ºC) and line two baking sheets with parchment paper. Lightly flour a clean work surface and roll out the chilled dough to about 1/8 inch thickness. Use a skull-shaped cookie cutter to cut out shapes and transfer them to the baking sheets. Freeze the cut cookies for 10 minutes to help them hold their shape during baking.
- Bake cookies: Bake the cookies in the preheated oven for 10 to 12 minutes, or until the edges turn lightly golden. Remove from the oven and allow them to cool completely on a wire rack.
- Prepare icing base: While the cookies cool, make the icing by combining powdered sugar, milk, light corn syrup, and vanilla extract in a medium bowl until smooth. Place about one-quarter of the icing into a piping bag with a small round tip; this will be used to outline the cookies.
- Flood cookies: Thin about half of the remaining icing with milk, one teaspoon at a time, to reach a consistency suitable for flooding. Transfer this to another piping bag with a small round tip and carefully fill the centers of the cookies.
- Color the icing: Divide the remaining icing into six small bowls and tint each with a different food coloring: black, teal, orange, green, purple, and yellow.
- Decorate cookies: Place each colored icing into separate piping bags fitted with small round tips. Use these to pipe decorative faces and intricate designs onto the flooded cookies to resemble traditional Day of the Dead skull decorations.
Notes
- Chilling the dough and freezing cut cookies before baking helps maintain sharp cookie shapes and prevents spreading.
- If the iced cookies stick to your hands when decorating, let the icing dry slightly before continuing to add additional layers.
- Store cookies in an airtight container at room temperature for up to 5 days to keep them fresh.
- Use gel food colorings for brighter, more vibrant icing colors without thinning the icing too much.
- Adjust milk quantity gradually when thinning icing to prevent overly runny consistency.
Nutrition
- Serving Size: 1 cookie
- Calories: 180
- Sugar: 15g
- Sodium: 85mg
- Fat: 9g
- Saturated Fat: 5g
- Unsaturated Fat: 3g
- Trans Fat: 0g
- Carbohydrates: 23g
- Fiber: 0.5g
- Protein: 2g
- Cholesterol: 35mg


