
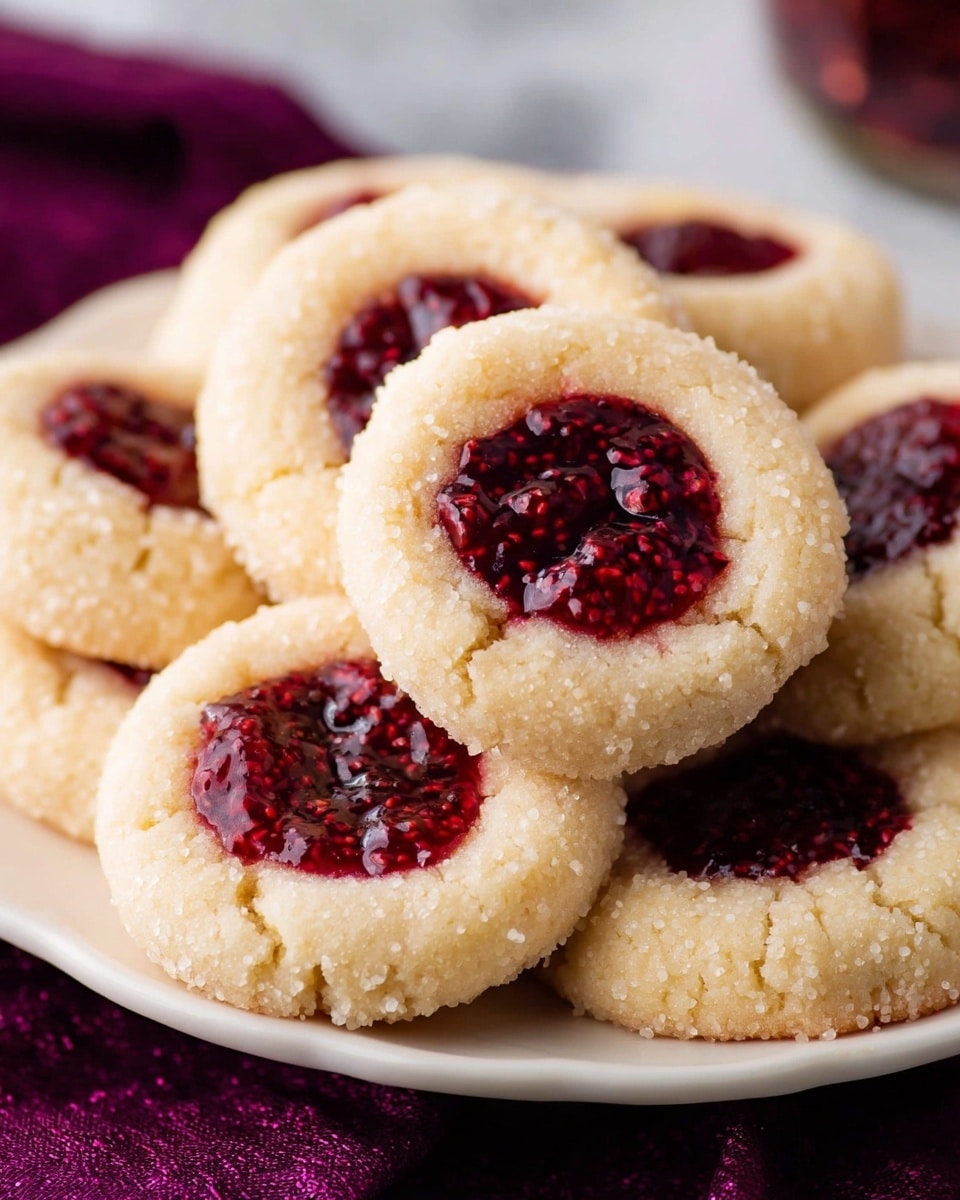
I absolutely love this Thumbprint Cookies Recipe because it combines that perfect buttery, melt-in-your-mouth texture with a burst of fruity jam right in the center. When I first tried making these, I was amazed at how simple the ingredients were, yet the results were so impressive — everyone in my family goes crazy for them whenever I bake a batch. These little treats are just the kind of comfort cookie that works beautifully for holiday gatherings, afternoon tea, or even just a sweet snack to brighten your day.
You’ll find that this Thumbprint Cookies Recipe gives you a reliable dough that’s easy to work with, making it great even if you’re new to baking cookies. The secret lies in a few small tricks — like rolling the dough balls tight to avoid cracks and chilling the dough before baking — which I’ve learned from lots of trial and error. Trust me, once you get the hang of it, these cookies become your go-to for sharing with friends or surprising yourself with something delightful straight from the oven.
Why You’ll Love This Recipe
- Buttery & Tender Texture: The dough uses cornstarch which gives these cookies an unbeatable melt-in-your-mouth softness.
- Customizable Fillings: You can add your favorite jam flavors, making every batch a new experience.
- Easy to Handle Dough: The recipe is forgiving, perfect for home bakers wanting consistent results.
- Perfect for All Occasions: These cookies feel special enough for holidays but simple enough for everyday treats.

Ingredients You’ll Need
The ingredients in this Thumbprint Cookies Recipe are straightforward but chosen carefully to work together perfectly: rich butter for flavor and tenderness, a mix of sugars for balance and slight caramel notes, and cornstarch which is my secret weapon for a soft bite. When shopping, I always opt for good quality jams since that final flavor really shines in the cookies.
- Butter: Use unsalted and softened to room temperature so it creams smoothly with the sugars.
- Sugar: Granulated sugar adds sweetness and a light crispness, while light brown sugar adds moisture and depth.
- Egg Yolk: Adds richness and helps bind the dough without making it too cakey.
- Vanilla Extract: The key to enhancing all the flavors with a warm aroma.
- All-Purpose Flour: Forms the base structure for these cookies and balances tenderness with sturdiness.
- Cornstarch: This little addition is a game-changer — it softens the texture, making the cookies buttery and tender.
- Salt: Enhances sweetness and balances flavors.
- Sugar for Rolling (optional): I love rolling my cookies in granulated sugar before making the thumbprint; it adds a subtle added crunch and sparkle.
- Jam or Preserves: Choose your favorite flavor! Raspberry is my go-to, but apricot or strawberry work beautifully too.
Variations
I love tweaking this Thumbprint Cookies Recipe depending on the occasion — maybe swapping the jam for a dollop of Nutella or mixing in a little lemon zest for brightness. Don’t hesitate to experiment with fillings or even try rolling the dough in crushed nuts for an extra crunch; it’s all about making the recipe your own.
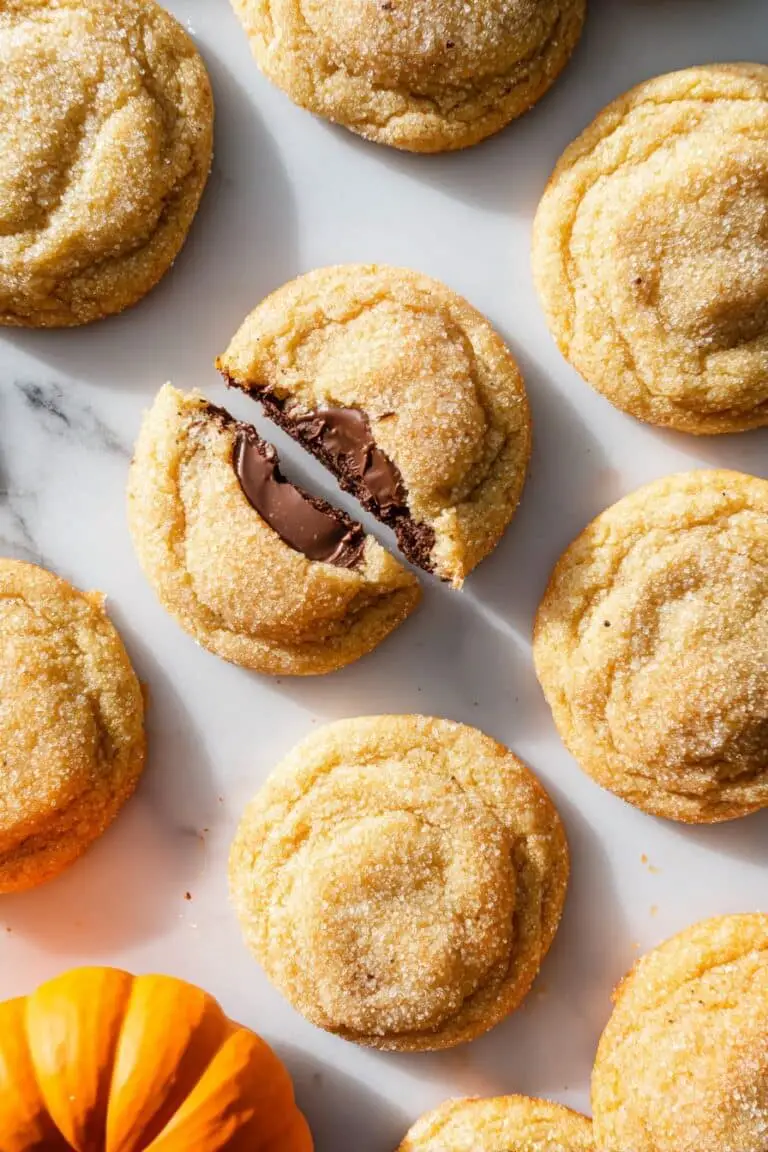
- Nutella Filling: My kids went wild when I replaced the jam with hazelnut spread, making these even more indulgent and rich.
- Gluten-Free: I tried using a gluten-free flour blend instead of all-purpose flour and still got great results, just watch the texture to make sure the dough isn’t too crumbly.
- Seasonal Jams: Switching to pumpkin butter or cranberry preserves during the holidays adds festive flavors I adore.
How to Make Thumbprint Cookies Recipe
Step 1: Cream Butter and Sugars
Start by beating your softened butter in a stand mixer or with a hand mixer until it’s creamy and smooth — this usually takes about 30 seconds to a minute. Scrape down the bowl and gradually add both the granulated and brown sugars, then beat on medium-high. This step is crucial because it aerates the butter, helping the cookies stay light. Don’t skip scraping the sides so everything blends evenly.
Step 2: Add Egg Yolk and Vanilla
Mix in the egg yolk and vanilla extract until everything comes together nicely. The egg yolk enriches the dough, giving it that tender texture you want without making it cakey or dense.
Step 3: Combine Dry Ingredients and Mix
In a separate bowl, whisk the flour, cornstarch, and salt together. Then, with your mixer on low, slowly add this dry mixture to the wet ingredients. The dough will look very dry and crumbly at first — this is normal! Pause occasionally to scrape the bowl and, if your mixer struggles, don’t be shy about finishing the kneading by hand.
Step 4: Shape and Chill the Dough
Scoop out tablespoon-sized dough balls and roll them tightly between your palms until smooth, with no cracks visible. This tight rolling helps keep your thumbprints neat and prevents cracking during baking. If you want, roll each ball in granulated sugar for an extra sparkle and slight crunch before setting them on a wax paper–lined plate or small baking sheet. Press a gentle thumb or spoon indentation into the center of each ball, then pop the whole batch into the freezer to chill for 30 minutes. This chill step helps maintain the cookie shape and prevents spreading.
Step 5: Fill and Bake
While the dough chills, warm your jam slightly to make it easier to spoon into the cookie indents — just 5 to 10 seconds in the microwave is enough. When you’re ready, fill each cookie’s thumbprint to the brim with jam. Bake at 375°F (190°C) for about 11 minutes or until the edges just begin to turn golden—it’s that subtle hint of color that tells you they’re done. Let the cookies cool completely on the baking sheet; this helps them set properly and avoids jam spillover.
Pro Tips for Making Thumbprint Cookies Recipe
- Roll Dough Smoothly: Rolling the dough balls tight with no cracks lets your thumbprints stay intact—this keeps the jam nestled without leaking.
- Don’t Skip Chilling: I learned the hard way that chilling prevents spreading and keeps the cookies perfectly shaped.
- Warm Your Jam Slightly: Warming the jam makes it easier to spoon and helps it fill the thumbprint in a nice even layer.
- Watch Baking Time Closely: Cookies go from golden to overdone quickly, so stay close around the 10-12 minute mark.
How to Serve Thumbprint Cookies Recipe
Garnishes
I keep garnishes simple—sometimes just a light dusting of powdered sugar for an elegant touch. If I’m feeling festive, a tiny sprinkle of finely chopped nuts like pistachios or almonds on top of the jam before baking adds a lovely texture and color contrast. These small details really make the cookies pop on any dessert platter.
Side Dishes
Serve these cookies alongside a hot cup of coffee or your favorite tea for a cozy pairing. For holiday brunches, I like placing them next to fresh fruit or a creamy cheesecake—your guests will appreciate the mix of flavors and textures.
Creative Ways to Present
One fun trick that impresses guests is arranging the cookies in a pretty circular pattern on a decorative plate, with little sprigs of fresh mint or edible flowers as a natural garnish. For kids’ parties, I’ve made a “cookie bar” where friends fill their own thumbprints with different jams and spreads—it’s interactive and delicious!
Make Ahead and Storage
Storing Leftovers
I store leftover thumbprint cookies in an airtight container at room temperature and they usually stay fresh for up to 4 days. If the jam feels sticky, you can place parchment paper between layers to prevent sticking without losing their delicate texture.
Freezing
One of my favorite things about this Thumbprint Cookies Recipe is that the dough freezes beautifully. I roll the dough balls, indent them with my thumb, and freeze them on a tray before transferring to a freezer bag. When ready to bake, just add a couple of extra minutes to the baking time—baking from frozen keeps the cookies fresh and flavorful.
Reheating
To reheat, I pop a couple of cookies in a 300°F oven for 5-7 minutes to revive that fresh-baked warmth without drying them out. Microwave reheating is quick but can soften the cookie too much, so if you want that perfect texture, oven warming is my preferred method.
FAQs
-
Can I use store-bought cookie dough instead of making dough from scratch?
While store-bought dough is convenient, I find the texture isn’t quite right for thumbprint cookies—they tend to spread too much, and the jam doesn’t hold as well. For best results and that classic soft, crumbly texture, making your own dough following this Thumbprint Cookies Recipe is worth the extra few minutes.
-
What can I substitute for cornstarch in this recipe?
If you don’t have cornstarch handy, arrowroot powder or tapioca starch are good alternatives that will keep the cookies tender. However, if you skip it entirely, expect the cookies to be a bit less delicate and slightly more crumbly.
-
How do I prevent the jam from bubbling over during baking?
Press your thumb to make a nice deep indentation in the dough and warm the jam slightly so it’s spreadable but not runny. Don’t overfill the thumbprints, as this can cause jam to spill out when baking. Chilling the dough also helps maintain shape and keeps jam from bubbling over.
-
Can I make these cookies vegan?
Yes! You can substitute the butter with vegan butter and use a flax egg (1 tablespoon ground flaxseed + 3 tablespoons water) instead of the egg yolk. The texture will be slightly different but still delicious—perfect for accommodating dietary preferences.
-
How long do thumbprint cookies last?
Stored in an airtight container at room temperature, these cookies stay fresh for about 4 days. You can also freeze them, which extends their life up to 3 months if properly wrapped and stored.
Final Thoughts
Making this Thumbprint Cookies Recipe has become one of my favorite kitchen rituals—it’s simple, satisfying, and always delivers a batch of cookies that feel homemade but impress everyone who tries them. I hope you’ll enjoy the process and the tasty results as much as I do. Whether you stick with classic raspberry jam or venture into fun variations, these cookies are sure to become a cherished favorite in your baking repertoire. Happy baking!
Print
Thumbprint Cookies Recipe
- Prep Time: 20 minutes
- Cook Time: 11 minutes
- Total Time: 1 hour 1 minute
- Yield: 24 cookies
- Category: Dessert
- Method: Baking
- Cuisine: American
Description
Delight in these classic Thumbprint Cookies featuring a tender, buttery dough with a sweet and fruity jam center. Perfectly crisp on the edges and soft in the middle, these cookies are a delightful treat for any occasion and easy to prepare with simple ingredients.
Ingredients
Cookie Dough
- 1 cup (226 g) unsalted butter, softened to room temperature
- 1/3 cup (70 g) sugar
- 1/3 cup (70 g) light brown sugar, tightly packed
- 1 large egg yolk
- 3/4 teaspoon vanilla extract
- 2 1/4 cup (280 g) all purpose flour
- 2 teaspoons cornstarch
- 1/2 teaspoon salt
Coating and Filling
- 1/2 cup sugar for rolling (optional)
- 1/3 cup (105 g) jam or preserves, flavor of your choice (raspberry recommended)
Instructions
- Cream the Butter: Place the softened unsalted butter in the bowl of a stand mixer or a large bowl if using a hand mixer. Beat the butter until creamy, ensuring a smooth texture to start your dough base.
- Add Sugars: Scrape down the sides of the bowl. Add both white and light brown sugars and beat the mixture on medium-high speed until well combined, about 30 to 60 seconds. This step ensures a light and fluffy dough.
- Incorporate Egg Yolk and Vanilla: Add the egg yolk and vanilla extract to the creamed butter mixture. Continue beating well to fully integrate these ingredients, adding richness and flavor to your dough.
- Combine Dry Ingredients: In a separate bowl, whisk together all purpose flour, cornstarch, and salt. This mixture provides structure and tenderness to the cookies.
- Mix Dry Ingredients into Wet: With the mixer on low speed, gradually add the flour mixture into the wet ingredients until fully combined. The dough will appear dry and crumbly—pause occasionally to scrape the bowl. If the mixer struggles, finish mixing by hand to bring the dough together.
- Shape the Dough: Scoop tablespoon-sized portions of dough and roll them into smooth, crack-free balls to prevent your thumbprints from cracking during baking.
- Roll in Sugar (Optional) and Make Indents: Roll each ball in granulated sugar if desired, then place on a wax-paper lined plate or small cookie sheet. Using your thumb or the back of a teaspoon, gently press an indent into the center of each ball to hold the jam.
- Chill Dough: Freeze the arranged cookie dough balls for 30 minutes. Chilling solidifies the dough, helping the cookies retain their shape while baking.
- Prepare Jam: Preheat the oven to 375°F (190°C). While the oven heats, warm the jam in a microwave-safe bowl for 5-10 seconds just until it’s easy to stir but not hot.
- Fill Thumbprints: Spoon the warmed jam into each indent, filling them generously but without overflow.
- Bake: Place the filled cookies on a parchment paper-lined baking sheet, spaced at least 2 inches apart. Bake at 375°F (190°C) for 11 minutes or until the edges begin to turn golden brown.
- Cool and Serve: Allow the cookies to cool completely on the baking sheet before removing. This ensures the jam sets properly and the cookies finish firming up.
Notes
- Rolling the dough balls tightly and evenly prevents cracks and ensures a neat thumbprint.
- Chilling the dough is essential for cookie shape retention and easier handling.
- Use your favorite flavor of jam or preserves; raspberry works wonderfully for a classic taste.
- Optional rolling in sugar adds a sweet crunch and sparkle to the cookie surface.
- Cookies can be stored in an airtight container at room temperature for up to one week.
Nutrition
- Serving Size: 1 cookie
- Calories: 115
- Sugar: 8g
- Sodium: 65mg
- Fat: 7g
- Saturated Fat: 4.5g
- Unsaturated Fat: 2g
- Trans Fat: 0g
- Carbohydrates: 12g
- Fiber: 0.3g
- Protein: 1.2g
- Cholesterol: 25mg


